2016 Peugeot Expert VU remove seats
[x] Cancel search: remove seatsPage 15 of 520
13
Limit the causes of excess
consumption
Spread loads throughout the vehicle; place the
heaviest items in the bottom of the boot, as
close as possible to the rear seats.
Limit the loads carried in the vehicle and reduce
wind resistance (roof bars, roof rack, bicycle
carrier, trailer...). u
s
e a roof box in preference.
Remove roof bars and roof racks after use.
At the end of winter, remove snow tyres and refit
your summer tyres.
Observe the recommendations
on maintenance
Check the tyre pressures regularly, when cold,
referring to the label in the door aperture,
driver's side.
Carry out this check in particular:
-
b
efore a long journey,
-
a
t each change of season,
-
a
fter a long period out of use.
Don't forget the spare wheel and the tyres on
any trailer or caravan.
Have your vehicle serviced regularly (engine
oil, oil filter, air filter, passenger compartment
filter...) and observe the schedule of operations
recommended in the manufacturer's service
schedule.
With a BlueHDi Diesel engine, if the SCR
system is faulty your vehicle becomes polluting;
go to a P
e
ugeot dealer or a qualified
workshop without delay to have the emissions
of nitrogen oxides brought back to the legal
level. When refuelling, do not continue after the third
cut-off of the nozzle to avoid any over flow.
At the wheel of your new vehicle, it is only after
the first 1 800 miles (3 000 kilometres) that you
will see the fuel consumption settle down to a
consistent average.
.
Eco-driving
Page 105 of 520
103
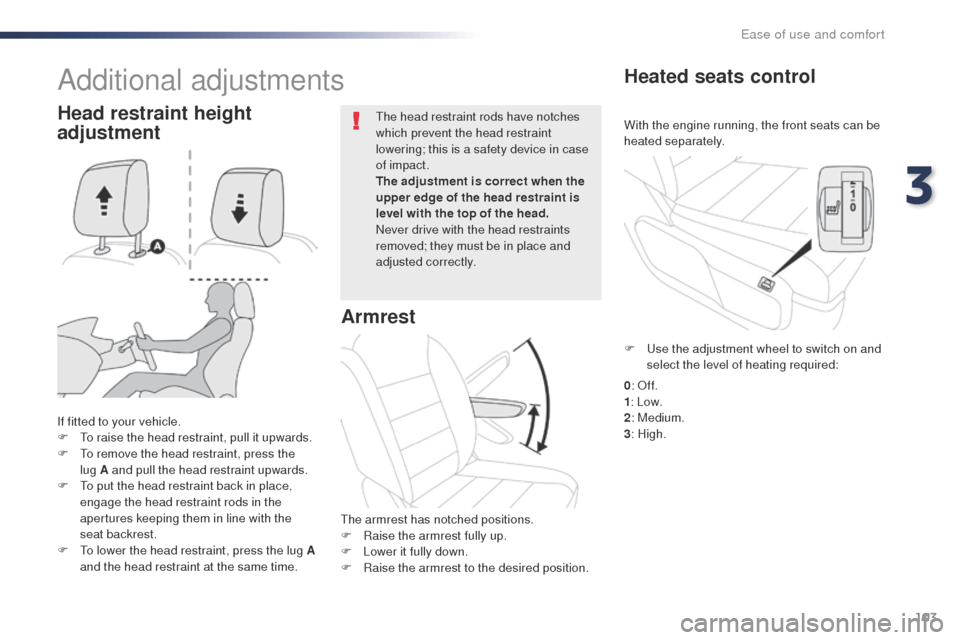
With the engine running, the front seats can be
heated separately.
Heated seats control
If fitted to your vehicle.
F to r aise the head restraint, pull it upwards.
F
t
o r
emove the head restraint, press the
lug
A and pull the head restraint upwards.
F
t
o p
ut the head restraint back in place,
engage the head restraint rods in the
apertures keeping them in line with the
seat backrest.
F
t
o l
ower the head restraint, press the lug A
and the head restraint at the same time.
th
e head restraint rods have notches
which prevent the head restraint
lowering; this is a safety device in case
of impact.
The adjustment is correct when the
upper edge of the head restraint is
level with the top of the head.
Never drive with the head restraints
removed; they must be in place and
adjusted correctly.
Head restraint height
adjustment
Additional adjustments
Armrest
the armrest has notched positions.
F Ra ise the armrest fully up.
F
L
ower it fully down.
F
R
aise the armrest to the desired position. F
u
s
e the adjustment wheel to switch on and
select the level of heating required:
0 : o
f
f.
1 : Low.
2 : Medium.
3 : High.
3
ease of use and comfort
Page 118 of 520
116
Precautions for the
seats and bench
seats
Following the various handling operations:
- d o not remove a head restraint without
storing it and fixing it to a support,
-
c
heck that the seat belts are always
accessible to the passenger and easy to
fasten,
-
a p
assenger must not take their seat
without adjusting the seat's head restraint
correctly and adjusting and fastening the
seat belt.
Loading luggage or objects
behind the row 3 seat and
bench seat
If you want to load luggage onto the backrests
in row 3 while in the table position, the
backrests in row 2 must also be in the table
position.
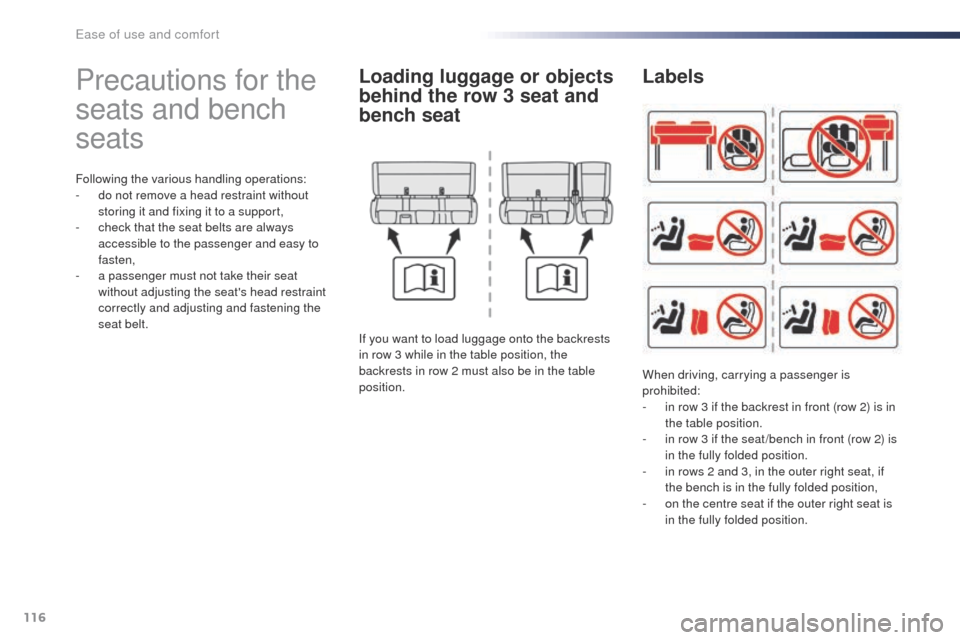
Labels
When driving, carrying a passenger is
prohibited:
-
i
n row 3 if the backrest in front (row 2) is in
the table position.
-
i
n row 3 if the seat /bench in front (row 2) is
in the fully folded position.
-
i
n rows 2 and 3, in the outer right seat, if
the bench is in the fully folded position,
-
o
n the centre seat if the outer right seat is
in the fully folded position.
ease of use and comfort
Page 125 of 520
123
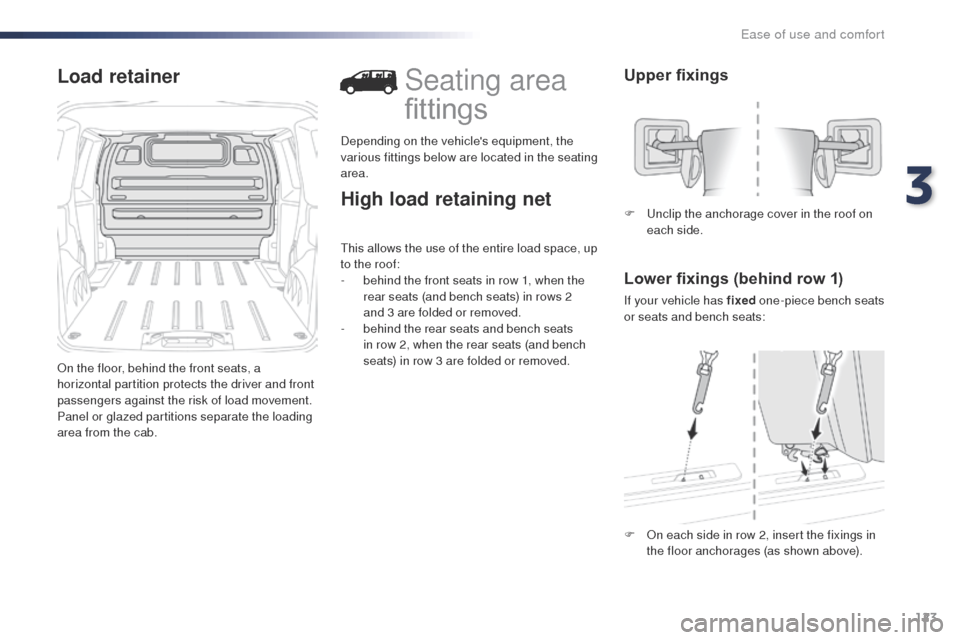
Load retainer
on the floor, behind the front seats, a
horizontal partition protects the driver and front
passengers against the risk of load movement.
Panel or glazed partitions separate the loading
area from the cab.
High load retaining net
Seating area
fittings
Depending on the vehicle's equipment, the
various fittings below are located in the seating
area.
th
is allows the use of the entire load space, up
to the roof:
-
b
ehind the front seats in row 1, when the
rear seats (and bench seats) in rows 2
and
3 are folded or removed.
-
b
ehind the rear seats and bench seats
in row 2, when the rear seats (and bench
seats) in row 3 are folded or removed.
Upper fixings
Lower fixings (behind row 1)
If your vehicle has fixed one-piece bench seats
or seats and bench seats: F u
n
clip the anchorage cover in the roof on
each side.
F o
n e
ach side in row 2, insert the fixings in
the floor anchorages (as shown above).
3
Ease of use and comfort
Page 175 of 520
173
Sit in a normal upright position.
Wear a correctly adjusted seat belt.
Do not leave anything between the
occupants and the airbags (a child, pet,
object...), nor fix or attach anything close to
the inflation trajectory of the airbags; this
could cause injuries during their deployment.
Never modify the original definition of your
vehicle, particularly in the area directly
around the airbags.
After an accident or if the vehicle has been
stolen or broken into, have the airbag
systems checked.
All work on the airbag system must be
carried out by a P
e
ugeot dealer or a
qualified workshop.
ev
en if all of the precautions mentioned are
observed, a risk of injury or of minor burns
to the head, chest or arms when an airbag is
deployed cannot be ruled out.
Lateral airbags
use only approved covers on the seats,
compatible with the deployment the lateral
airbags. For information on the range of seat
covers suitable for your vehicle, you can
contact a P
e
ugeot dealer.
For more information on Accessories , refer
to the corresponding section.
Do not fix or attach anything to the seat
backrests (clothing...).
t
h
is could cause
injury to the chest or arms if the lateral
airbag is deployed.
Do not sit with the upper part of the body any
nearer to the door than necessary.
th
e bag inflates almost instantly (within
a few milliseconds) then deflates within
the same time discharging the hot gas via
openings provided for this purpose.
Front airbags
Do not drive holding the steering wheel by its
spokes or resting your hands on the centre
part of the wheel.
Passengers must not place their feet on the
dashboard.
Do not smoke as deployment of the airbags
can cause burns or the risk of injury from a
cigarette or pipe.
Never remove or pierce the steering wheel or
hit it violently.
Do not fit or attach anything to the steering
wheel or dashboard, this could cause
injuries with deployment of the airbags.
Advice
For the airbags to be fully effective, observe the safety
recommendations below:
the vehicle's front door panels include side
impact sensors.
A damaged door or any unauthorised or
incorrectly executed work (modification or
repair) on the front doors or their interior trim
could compromise the operation of these
sensors - Risk of malfunction of the lateral
airbags!
Such work must only be done by a
P
e
ugeot dealer or a qualified workshop.
5
Safety
Page 185 of 520
183
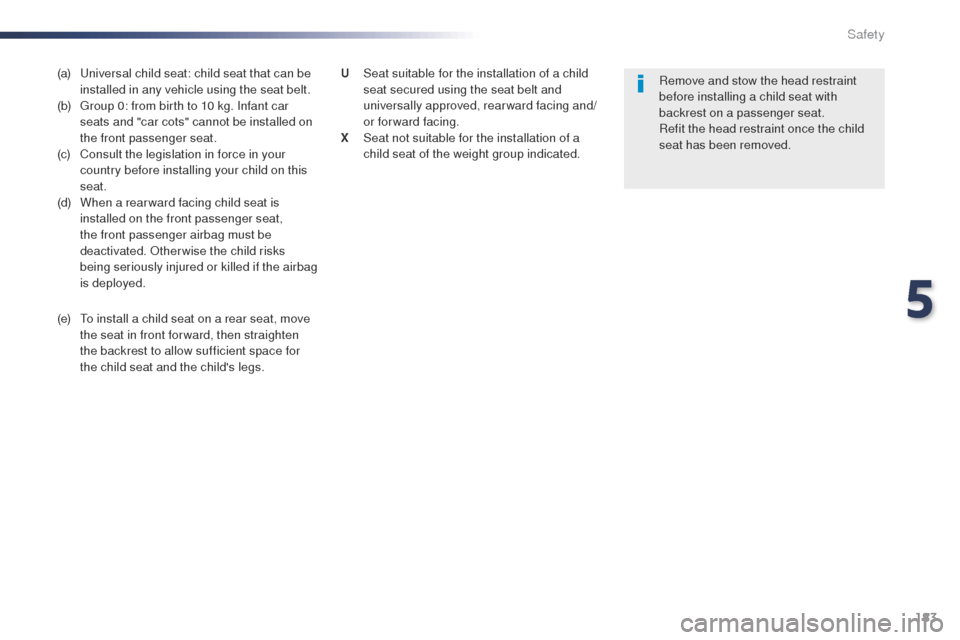
(a) universal child seat: child seat that can be installed in any vehicle using the seat belt.
(b)
g
r
oup 0: from birth to 10 kg. Infant car
seats and "car cots" cannot be installed on
the front passenger seat.
(c)
C
onsult the legislation in force in your
country before installing your child on this
seat.
(d)
W
hen a rear ward facing child seat is
installed on the front passenger seat,
the front passenger airbag must be
deactivated.
o
t
herwise the child risks
being seriously injured or killed if the airbag
is deployed.
(e)
t
o i
nstall a child seat on a rear seat, move
the seat in front for ward, then straighten
the backrest to allow sufficient space for
the child seat and the child's legs. Remove and stow the head restraint
before installing a child seat with
backrest on a passenger seat.
Refit the head restraint once the child
seat has been removed.
U
S eat suitable for the installation of a child
seat secured using the seat belt and
universally approved, rearward facing and/
or forward facing.
X
S
eat not suitable for the installation of a
child seat of the weight group indicated.
5
Safety
Page 187 of 520
185
(a) universal child seat: child seat that can be installed in any vehicle using the seat belt.
(b)
g
r
oup 0: from birth to 10 kg. Infant car
seats and "car cots" cannot be installed
on the front passenger seat(s) or the seats
in row 3.
(c)
C
onsult the legislation in force in your
country before installing your child
on this seat.
U
S
eat suitable for the installation of a child
seat secured using the seat belt and
universally approved, rearward facing and/
or forward facing.
UF
S
eat suitable for the installation of a child
seat secured using the seat belt and
universally approved forward facing.
X
S
eat not suitable for the installation of a
child seat of the weight group indicated. Refit the head restraint once the child
seat has been removed.
5
Safety
Page 188 of 520
186
"ISoFIX" mountings
the incorrect installation of a child seat
in a vehicle compromises the child's
protection in the event of an accident.
For information on the possibilities for
installing IS
oF
IX child seats in your
vehicle, refer to the locations table.
ob
serve strictly the fitting instructions
provided with the child seat.
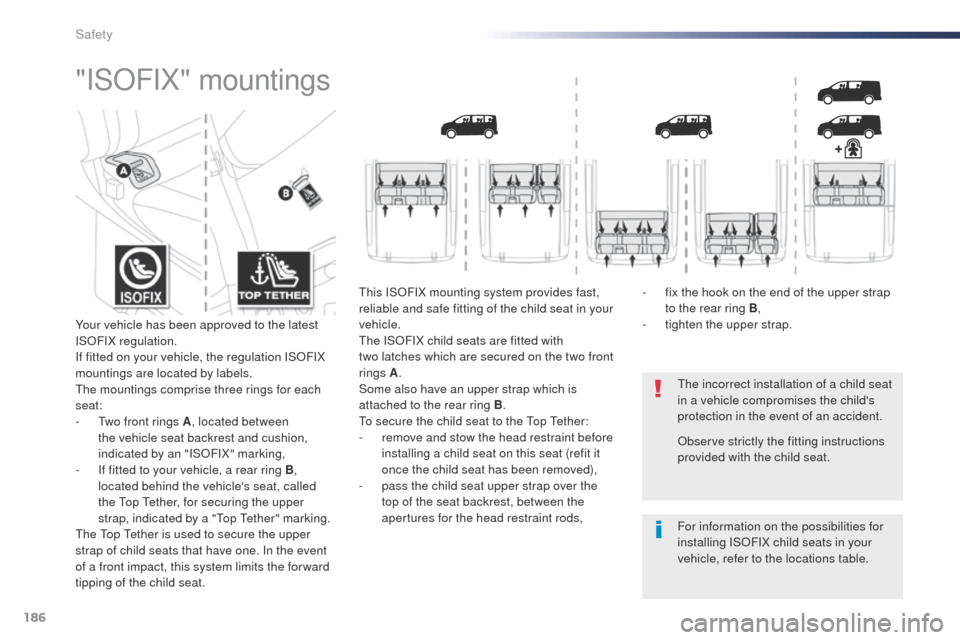
Your vehicle has been approved to the latest
IS
oF
IX regulation.
If fitted on your vehicle, the regulation IS
oF
IX
mountings are located by labels.the
mountings comprise three rings for each
seat:
-
t
w
o front rings A , located between
the vehicle seat backrest and cushion,
indicated by an "IS
o
F
IX" marking,
-
I
f fitted to your vehicle, a rear ring B ,
located behind the vehicle's seat, called
the
t
o
p
t
e
ther, for securing the upper
strap, indicated by a "
to
p
t
e
ther" marking.
th
e
t
o
p
t
e
ther is used to secure the upper
strap of child seats that have one. In the event
of a front impact, this system limits the for ward
tipping of the child seat.
th
is IS
oF
IX mounting system provides fast,
reliable and safe fitting of the child seat in your
vehicle.
th
e IS
oF
IX child seats are fitted with
two
latches which are secured on the two front
rings A .
Some also have an upper strap which is
attached to the rear ring B .
to s
ecure the child seat to the
t
o
p
t
e
ther:
-
r
emove and stow the head restraint before
installing a child seat on this seat (refit it
once the child seat has been removed),
-
p
ass the child seat upper strap over the
top of the seat backrest, between the
apertures for the head restraint rods, -
f
ix the hook on the end of the upper strap
to the rear ring B ,
-
t
ighten the upper strap.
Safety