Page 65 of 364

63
508_en_Chap02_ouvertures_ed01-2016
Do not throw the remote control
batteries away, they contain metals
which are harmful to the environment.
ta
ke them to an approved collection
point.
Changing the battery of the
electronic key
Battery ref.: CR2032 / 3 volts.th is replacement battery is available from a
P
e
uge
Ot
dealer or a qualified workshop.
A message is displayed in the instrument panel
screen when replacement of the battery is
needed.
F
u
n
clip the cover using a pointed object at
the key ring.
F
S
lide the flat battery out of its location.
F
S
lide the new battery into its location
observing the original direction of fitment.
F
C
lip the cover in place starting at the front.
F
R
einitialise the electronic key.
Electronic key fault
Following disconnection of the vehicle battery,
replacement of the remote control battery or
in the event of a fault with the remote control,
you can no longer unlock, lock or locate your
vehicle.
F
F
irst of all, use the key in the door lock to
unlock or lock your vehicle.
F
t
hen
, reinitialise the remote control.
If the problem persists, contact a P
e
uge
Ot
dealer or a qualified workshop as soon as
possible.
Reinitialisation
F Switch the ignition off.
F I mmediately press one of the remote
control buttons for a few seconds.
F
S
witch the ignition on.
th
e electronic key is fully operational again.
2
Access
Page 67 of 364
65
508_en_Chap02_ouvertures_ed01-2016
Boot
Saloon
F After unlocking the vehicle totally or after pressing the boot opening button using the
remote control or the key, press this button.
SW and non-hybrid RXH
F After unlocking the vehicle totally or after pressing the boot opening button using the
remote control or the key, press the lever A
and raise the tailgate.
Opening from inside
Opening
Hold this button down until the boot is heard to
unlock.
-
w
hen the engine is running ,
this warning lamp and a message
in the instrument panel screen
appear for a few seconds,
-
w
hen the vehicle is moving (speed
above
6 mph (10 km/h)), this warning
lamp and a message, accompanied by an
audible signal, appear in the instrument
panel screen for a few seconds.
Closing
F Lower the tailgate using the interior grab handle.
If the tailgate is not closed correctly:
2
Access
Page 70 of 364

68
508_en_Chap02_ouvertures_ed01-2016
Back-up release (Saloon,
SW and non-hybrid RHX)
System for mechanically unlocking the boot in
the event of a battery or central locking fault.
Unlocking
F Fold the rear seats to gain access to the lock from inside the boot.
F
I
nsert a small screwdriver into hole A of
the lock, then move the lever to the left to
unlock the boot."Boot open" warning
With the engine running or when the vehicle is moving,
if the tailgate is not properly closed, a message
accompanied by an audible signal (from 6 mph
(10
km/h)) is displayed in the instrument panel screen.
Locking again after closing
Once closed again, the boot will remain locked
if the problem persists.
Adjusting the opening
height
the maximum opening height of the tailgate
can be set and memorised (restricted overhead
clearance, ...).
th
is memorisation is done in two steps, by
successive presses on button C :
-
d
uring opening, a first press stops the
tailgate at the desired height,
-
a s
econd maintained press memorises the
position of the tailgate; an audible signal
confirms the memorisation.
t
o d
elete this memorisation, make a new
maintained press until the audible signal is
heard.
th
e tailgate is not designed to support
a bicycle carrier.
If fitting a bicycle carrier to a towbar,
the automatic operation must be
deactivated. Precautions in use
If snow has accumulated on the
tailgate, remove the snow before any
automatic operation of the tailgate.
Ice can prevent opening of the tailgate:
wait until the ice has melted following
heating of the passenger compartment.
When washing the vehicle in an
automatic car wash, don't forget to
lock your vehicle to prevent any risk of
unwanted opening.
Repeated opening and closing of the
tailgate can overheat the electric motor;
neither closing nor opening is then
possible.
Allow the motor to cool down for
ten
minutes before operating the
tailgate again.
Access
Page 99 of 364

97
508_en_Chap03_ergonomie-et-confort_ed01-2016
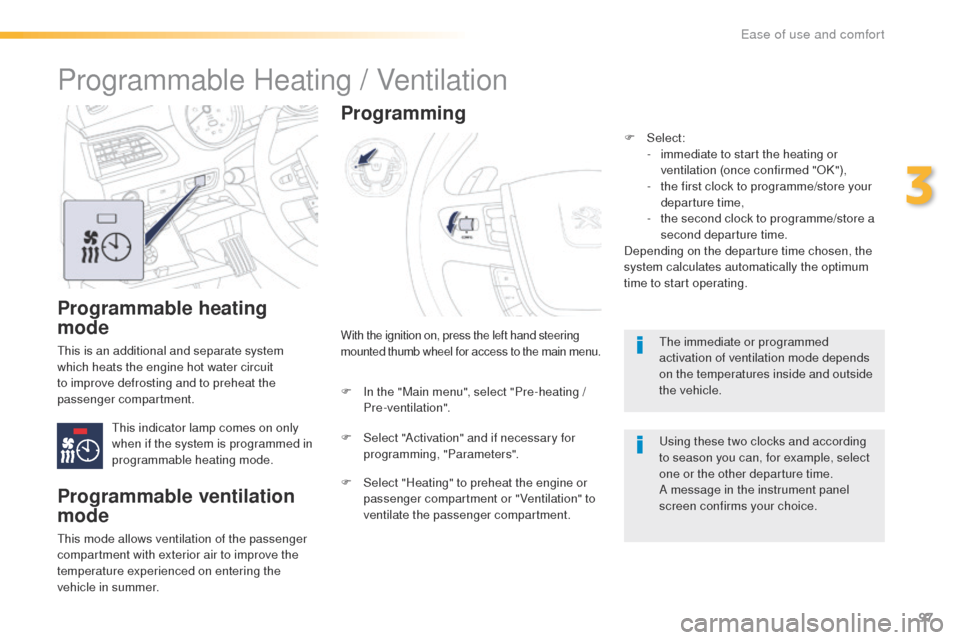
Programmable heating
mode
this is an additional and separate system
which heats the engine hot water circuit
to improve defrosting and to preheat the
passenger compartment.
th
is indicator lamp comes on only
when if the system is programmed in
programmable heating mode.With the ignition on, press the left hand steering
mounted thumb wheel for access to the main menu.
Programming
F In the "Main menu", select "Pre-heating /
Pre-ventilation".
F
S
elect "Activation" and if necessary for
programming, "Parameters".
F
S
elect "Heating" to preheat the engine or
passenger compartment or "Ventilation" to
ventilate the passenger compartment.
Programmable Heating / Ventilation
Programmable ventilation
mode
this mode allows ventilation of the passenger
compartment with exterior air to improve the
temperature experienced on entering the
vehicle in summer. F
Select:
-
i
mmediate to start the heating or
ventilation (once confirmed "OK"),
-
t
he first clock to programme/store your
departure time,
-
t
he second clock to programme/store a
second departure time.
Depending on the departure time chosen, the
system calculates automatically the optimum
time to start operating.
th
e immediate or programmed
activation of ventilation mode depends
on the temperatures inside and outside
the vehicle.
us
ing these two clocks and according
to season you can, for example, select
one or the other departure time.
A message in the instrument panel
screen confirms your choice.
3
ease of use and comfort
Page 105 of 364
103
508_en_Chap03_ergonomie-et-confort_ed01-2016
Interior mood lightingthe dimmed passenger compartment lighting improves visibility in the vehicle when the light is
p o o r.
Switching on
At night, interior mood light emitting diodes -
LeD s come on automatically when the
sidelamps are switched on.
Switching off
the interior mood lighting switches off
automatically when the sidelamps are switched
of f.
It can be switched off manually by adjusting the
instrument panel lighting dimmer button to the
lowest setting.
3
ease of use and comfort
Page 120 of 364
118
508_en_Chap04_eclairage-et-visibilite_ed01-2016
Model without AUTO lighting
Model with AUTO lighting Selection ring for main lighting
mode
turn the ring to align the desired symbol with
the marking.
Lighting off (ignition off) / Front daytime
running lamps (engine running).
Automatic illumination of headlamps.
Sidelamps only.
Dipped or main beam headlamps.Pull the stalk to switch the lighting between
dipped / main beam headlamps.
In the lighting off and sidelamps modes, the
driver can switch on the main beam headlamps
temporarily ("headlamp flash") by maintaining a
pull on the stalk.
Display
Illumination of the corresponding indicator lamp
in the instrument panel confirms the lighting
switched on.
Dipping the headlamps
Lighting and visibility
Page 123 of 364

121
508_en_Chap04_eclairage-et-visibilite_ed01-2016
In fog or snow, the sunshine sensor
may detect sufficient light. In this
case, the lighting will not come on
automatically.
Do not cover the sunshine sensor,
coupled with the rain sensor and
located in the centre of the windscreen
behind the rear view mirror; the
associated functions would no longer
be controlled.
the sidelamps and dipped beam headlamps are
switched on automatically, without any action on
the part of the driver, when a low level of external
light is detected or in certain cases of activation
of the windscreen wipers.
As soon as the brightness returns to a sufficient
level or after the windscreen wipers are switched
off, the lamps are switched off automatically.
Automatic illumination of headlamps
Activation
F turn the ring to the "AUTO" position. th
e automatic illumination of headlamps
is accompanied by a message in the
instrument panel screen.
Deactivation
F turn the ring to another position. Deactivation is accompanied by a message
in the instrument panel screen.
Association with automatic
guide-me-home lighting
Association with automatic illumination of
headlamps provides the guide-me-home
lighting with the following additional options:
-
s
election of the lighting duration of 15, 30
or 60 seconds,
-
a
utomatic activation of guide-me-home
lighting when the automatic illumination of
headlamps is in operation.
Operating fault
In the event of a fault with the
sunshine sensor, the lighting comes
on, this warning lamp is displayed
in the instrument panel and/or a
message appears in the instrument
panel screen, accompanied by an
audible signal.
Contact a P
e
uge
Ot
dealer or a
qualified workshop.
4
Lighting and visibility
Page 126 of 364

124
508_en_Chap04_eclairage-et-visibilite_ed01-2016
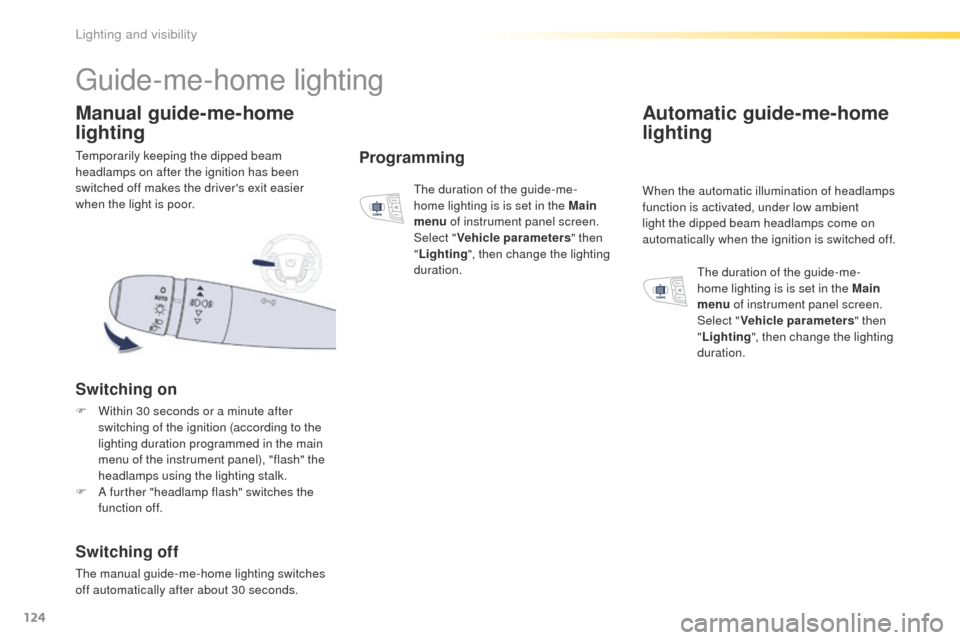
temporarily keeping the dipped beam
headlamps on after the ignition has been
switched off makes the driver's exit easier
when the light is poor.
Manual guide-me-home
lighting
Switching on
F Within 30 seconds or a minute after switching of the ignition (according to the
lighting duration programmed in the main
menu of the instrument panel), "flash" the
headlamps using the lighting stalk.
F
A f
urther "headlamp flash" switches the
function off.
Switching off
the manual guide-me-home lighting switches
off automatically after about 30 seconds.
Programming
the duration of the guide-me-
home lighting is is set in the Main
menu of instrument panel screen.
Select " Vehicle parameters " then
" Lighting ", then change the lighting
duration.
guide-me-home lighting
Automatic guide-me-home
lighting
When the automatic illumination of headlamps
function is activated, under low ambient
light the dipped beam headlamps come on
automatically when the ignition is switched off.
th
e duration of the guide-me-
home lighting is is set in the Main
menu of instrument panel screen.
Select " Vehicle parameters " then
" Lighting ", then change the lighting
duration.
Lighting and visibility