Page 42 of 364
40
508 _en_Chap01_instrument-bord_ed01-2016
Trip reset
F When the trip required is displayed, press the control for more than two seconds or
make a long press on the left hand thumb
wheel of the steering mounted controls.
t
r i p s "1" and "2" are independent but their use
is identical.
For example, trip "1" can be used for daily
figures, and trip "2" for monthly figures.
Instruments
Page 73 of 364

71
508_en_Chap02_ouvertures_ed01-2016
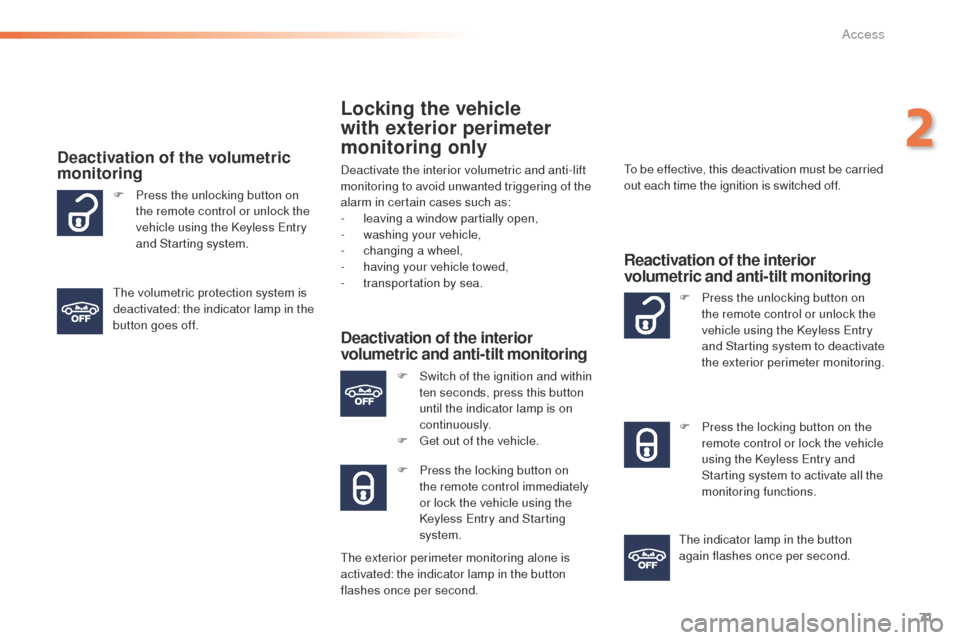
Locking the vehicle
with exterior perimeter
monitoring only
Deactivate the interior volumetric and anti-lift
monitoring to avoid unwanted triggering of the
alarm in certain cases such as:
-
l
eaving a window partially open,
-
w
ashing your vehicle,
-
c
hanging a wheel,
-
h
aving your vehicle towed,
-
t
ransportation by sea.
Deactivation of the interior
volumetric and anti-tilt monitoring
F Switch of the ignition and within ten seconds, press this button
until the indicator lamp is on
continuously.
F
g
e
t out of the vehicle.
F
P
ress the locking button on
the remote control immediately
or lock the vehicle using the
Keyless
e
n
try and Starting
system.
to b
e effective, this deactivation must be carried
out each time the ignition is switched off.
Reactivation of the interior
volumetric and anti-tilt monitoring
F Press the unlocking button on the remote control or unlock the
vehicle using the Keyless
e
n
try
and Starting system to deactivate
the exterior perimeter monitoring.
F
P
ress the locking button on the
remote control or lock the vehicle
using the Keyless
e
n
try and
Starting system to activate all the
monitoring functions.
th
e indicator lamp in the button
again flashes once per second.
F
P
ress the unlocking button on
the remote control or unlock the
vehicle using the Keyless
e
n
try
and Starting system.
Deactivation of the volumetric
monitoring
the volumetric protection system is
deactivated: the indicator lamp in the
button goes off.
th
e exterior perimeter monitoring alone is
activated: the indicator lamp in the button
flashes once per second.
2
Access
Page 80 of 364

78
508_en_Chap03_ergonomie-et-confort_ed01-2016
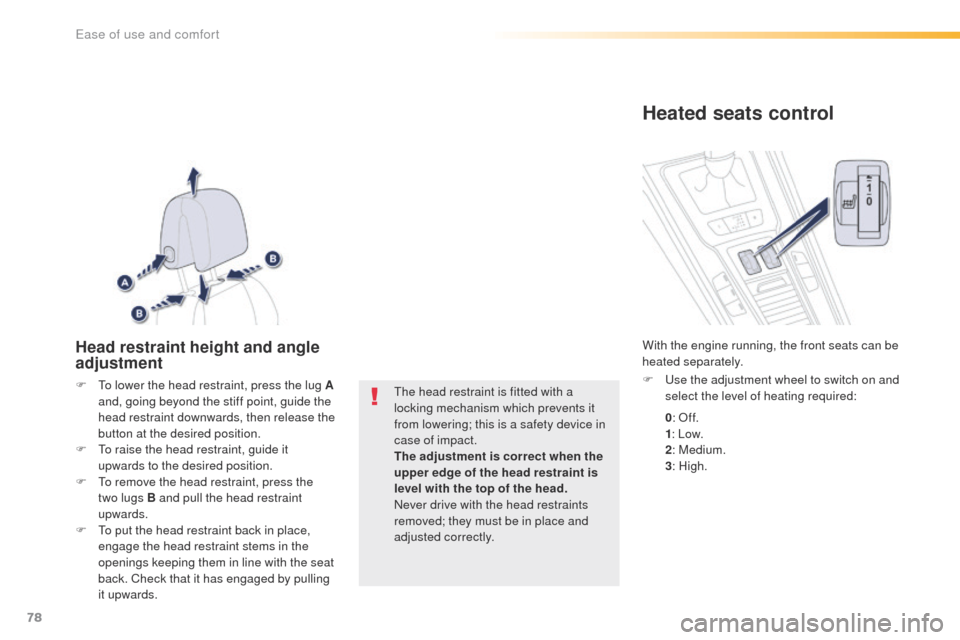
Head restraint height and angle
adjustment
F to lower the head restraint, press the lug A and, going beyond the stiff point, guide the
head restraint downwards, then release the
button at the desired position.
F
t
o r
aise the head restraint, guide it
upwards to the desired position.
F
t
o r
emove the head restraint, press the
two
lugs B and pull the head restraint
upwards.
F
t
o p
ut the head restraint back in place,
engage the head restraint stems in the
openings keeping them in line with the seat
back. Check that it has engaged by pulling
it upwards.th e head restraint is fitted with a
locking mechanism which prevents it
from lowering; this is a safety device in
case of impact.
The adjustment is correct when the
upper edge of the head restraint is
level with the top of the head.
Never drive with the head restraints
removed; they must be in place and
adjusted correctly.
Heated seats control
F use the adjustment wheel to switch on and select the level of heating required:
With the engine running, the front seats can be
heated separately.
0: Of f.
1 : Low.
2 : Medium.
3 : High.
ease of use and comfort
Page 81 of 364

79
508_en_Chap03_ergonomie-et-confort_ed01-2016
Massage function
this function provides the driver with a back
massage. It only operates when the engine is
running as well as in S
tO
P mode of the Stop &
Start system.
Activation
F Press this button.
th
e warning lamp comes on and the massage
function is activated for a period of 1 hour.
During this time, massage is per formed in
cycles of 6 minutes (4 minutes of massage
followed by 2 minutes break). In total, the
system will per form 10 cycles.
After one hour, the function is deactivated, the
warning lamp goes off.
Deactivation
You can deactivate the massage
function at any time by pressing this
button.
Steering wheel adjustment
F When stationary , lower the control lever
to release the steering wheel adjustment
mechanism.
F
A
djust the height and reach to suit your
driving position.
F
P
ull the control lever to lock the steering
wheel adjustment mechanism.
As a safety precaution, these
operations should only be carried out
while the vehicle is stationary.
3
ease of use and comfort
Page 99 of 364

97
508_en_Chap03_ergonomie-et-confort_ed01-2016
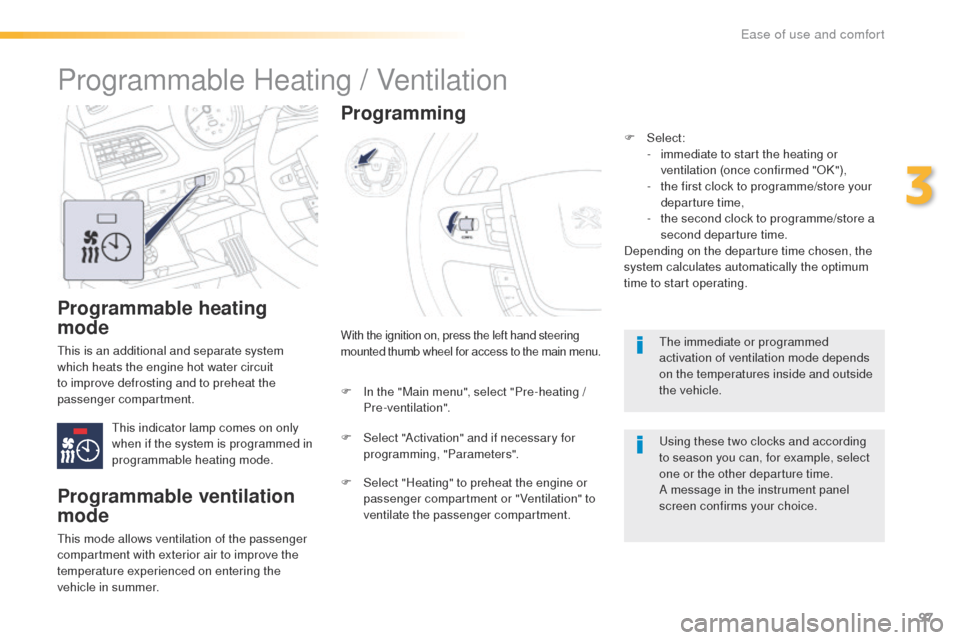
Programmable heating
mode
this is an additional and separate system
which heats the engine hot water circuit
to improve defrosting and to preheat the
passenger compartment.
th
is indicator lamp comes on only
when if the system is programmed in
programmable heating mode.With the ignition on, press the left hand steering
mounted thumb wheel for access to the main menu.
Programming
F In the "Main menu", select "Pre-heating /
Pre-ventilation".
F
S
elect "Activation" and if necessary for
programming, "Parameters".
F
S
elect "Heating" to preheat the engine or
passenger compartment or "Ventilation" to
ventilate the passenger compartment.
Programmable Heating / Ventilation
Programmable ventilation
mode
this mode allows ventilation of the passenger
compartment with exterior air to improve the
temperature experienced on entering the
vehicle in summer. F
Select:
-
i
mmediate to start the heating or
ventilation (once confirmed "OK"),
-
t
he first clock to programme/store your
departure time,
-
t
he second clock to programme/store a
second departure time.
Depending on the departure time chosen, the
system calculates automatically the optimum
time to start operating.
th
e immediate or programmed
activation of ventilation mode depends
on the temperatures inside and outside
the vehicle.
us
ing these two clocks and according
to season you can, for example, select
one or the other departure time.
A message in the instrument panel
screen confirms your choice.
3
ease of use and comfort
Page 101 of 364
99
508_en_Chap03_ergonomie-et-confort_ed01-2016
Front fittings
1. Cooled glove box I
t has a ventilation nozzle (delivering cool
air) which can be closed* using a thumb
wheel.
2.
Sto
rage
3.
R
etractable cup holder
P
ress the cover to open the cup holder
4.
Re
movable ashtray
P
ress the lid to open the ashtray.
t
o e
mpty it, pull it out by pulling it upwards.
5.
C
ontrols *
M
assage, Adaptive lighting, Blind spot
monitoring system, Alarm, P
e
uge
Ot
Connect SOS, P
e
uge
Ot
Connect
Assistance.
6.
S
torage with sliding cover
7.
F
ront armrest
8.
1 2
V accessory socket (120 W )*
O
bserve the maximum power rating to
avoid damaging your accessory
9.
P
EUGEOT Connect USB
* Depending on version.
3
ease of use and comfort
Page 114 of 364
112
508_en_Chap03_ergonomie-et-confort_ed01-2016
Boot fittings (Saloon)
1. Retractable hooks
2. Storage pockets
W
ith a towing eye, a wheel chock and a
temporary puncture repair kit (depending
on the country of sale and equipment).
3.
S
towing rings
4.
R
etaining straps
5.
B
oot lamp
6.
B
oot floor
F
or access to the storage compartments or
the spare wheel (depending on the country
of sale), raise the floor.
7.
A
djustable divider
ease of use and comfort
Page 115 of 364
113
508_en_Chap03_ergonomie-et-confort_ed01-2016
Boot fittings (SW and non-hybrid RHX)
1. Boot lamps
2. Rear seats folding controls
3.
R
etractable hooks
4.
1
2 V accessor y socket (120 W max)
5.
Sto
rage pockets
W
ith a towing eye, a wheel chock and a
temporary puncture repair kit (depending
on the country of sale and equipment).
6.
S
towing rings
7.
L
oad space cover
(
see following page)
8.
B
oot floor
F
or access to the storage compartments or
the spare wheel (depending on the country of
sale), position the floor vertically in its guide.
3
ease of use and comfort