Page 9 of 371
7
508_en_Chap00b_vue-ensemble_ed01-2016
Instruments and controls
Courtesy lamps 102
Seat belt / passenger's front airbag warning lamps display
1
37, 140
Rear view mirror
8
2
Sunroof
10
4 -105
Panoramic sunroof (SW and non-hybrid R XH)
1
06
em
ergency or assistance
2
74
Door mirrors
8
0 - 81
el
ectric windows, deactivating
7
3-74
Manual parking brake
1
67 Heating, ventilation
8
3-85
Manual air conditioning
8
6-87
Dual-zone air conditioning
8
8-90
Quad-zone front air conditioning
91-93
Demisting / defrosting
9
6
P
e
uge
Ot
Connect
u
S
B
1
08
el
ectric parking
b r a ke
1
6 8 -173
6-speed manual gearbox
1
74
ge
ar shift indicator
1
75
A u t o m at i c g e a r b ox
17
6 -179
Stop & Start
1
80 -182
Hill start assist
1
72, 183 Fuses behind the glove
box
2
49, 251
Quad-zone rear air conditioning
9
4-95
to
uch screen
2
77-335
Setting the date/time
4
8
Audio system
3
37-352
Setting the date/time
4
7
Opening the bonnet
2
14
Dashboard fuses
2
49-250
.
Over view
Page 12 of 371
10
508_en_Chap00b_vue-ensemble_ed01-2016
Maintenance - technical data
Identification markings 2 73
Dimensions 271-272
Running out of fuel (Diesel)
2
28
Checking levels
2
18-220
-
oil
-
b
rake fluid
-
p
ower steering fluid
-
coolant
-
s
creenwash/headlamp wash fluid
-
f
uel additive (Diesel)
AdBlue
® additive 3 5-38, 223-226
Checking components 2 21-222
-
1
2 V battery
-
a
ir filter
-
p
assenger compartment filter
-
o
il filter
-
p
article filter (Diesel)
-
gearbox
-
b
rake pads / discs
-
par
king brake
-
e
lectric parking brake
Changing bulbs
2
42-248
-
front
-
rear 12V battery
2
53 -256
Removing/refitting the 12V battery
257-260
Load reduction, economy mode
26
1
en
gine compartment fuses
2
49, 252
Opening the bonnet
2
14
un
der the bonnet, petrol
2
15
un
der the bonnet, Diesel
2
16 -217
Petrol engines
2
64
Diesel engines
26
6-267Petrol weights
2
65
Diesel weights
26
8-269
Over view
Page 133 of 371

131
508_en_Chap05_securite_ed01-2016
Labels are applied at various
points on your vehicle. th ey carry
safety warnings as well as vehicle
identification information. Do not
remove them: they form an integral part
of your vehicle.
For any work on your vehicle, use
a qualified workshop that has the
technical information, skills and
equipment required, all of which a
P
e
uge
Ot d
ealer is able to provide. We draw your attention to the following
points:
-
t
h
e fitting of electrical equipment
or accessories not listed by
P
e
uge
Ot
may cause faults and
failures with the electrical system of
your vehicle. Contact a P
e
uge
Ot
dealer for information on the range
of recommended accessories.
-
A
s a safety measure, access to
the diagnostic socket, used for
the vehicle's electronic systems,
is reserved strictly for P
e
uge
Ot
dealers or qualified workshops,
equipped with the special
diagnostic tool required (risk
of malfunctions of the vehicle's
electronic systems that could cause
breakdowns or serious accidents).
th
e manufacturer cannot be held
responsible if this advice is not
followed.
-
A
ny modification or adaptation
not intended or authorised by
Automobiles P
e
uge
Ot
or
carried out without meeting the
technical requirements defined
by the manufacturer would lead
to the suspension of the legal and
contractual warranties.Installation of accessory
radio communication
transmitters
Before installing a radio communication
transmitter, you must contact a
P
e
uge
Ot
dealer for the specification
of transmitters which can be fitted
(frequency, maximum power,
aerial position, specific installation
requirements), in line with the Vehicle
el
ectromagnetic Compatibility Directive
(2004/104/
eC
).
Depending on the legislation in force in
the country, certain safety equipment
may be compulsory: high visibility
safety vests, warning triangles,
breathalyzers, spare bulbs, spare fuses,
fire extinguisher, first aid kit, mud flaps
at the rear of the vehicle.
th
e fitting of electrical equipment
or accessories which are not
recommended by P
e
uge
Ot
may result
in a failure of your vehicle's electronic
system and excessive electrical
consumption.
Contact a P
e
uge
Ot
dealer
for information on the range of
recommended equipment and
accessories.
general safety recommendations
5
Safety
Page 217 of 371
215
508_en_Chap07_info-pratiques_ed01-2016
1. Power steering fluid reservoir.
2. Screenwash and headlamp wash fluid
reservoir.
3.
C
oolant header tank.
4.
B
rake fluid reservoir.
5.
B
attery / Fuses.
6.
Fusebox.
7.
R
emote earth point (-).
8.
A
i r f i l t e r.
9.
e
n
gine oil dipstick.
10.
e
n
gine oil filler cap.
Petrol engines
1.6 litre THP 1501.6 litre THP 156
1.6 litre e-THP 165 S&S
7
Practical information
Page 218 of 371
216
508_en_Chap07_info-pratiques_ed01-2016
1. Power steering fluid reservoir.
2. Screenwash and headlamp wash fluid
reservoir.
3.
C
oolant reservoir.
4.
B
rake fluid reservoir.
5.
B
attery / Fuses.
6.
Fusebox.
7.
e
ar
th point ("-" terminal).
8.
A
i r f i l t e r.
9.
e
n
gine oil dipstick.
10.
e
n
gine oil filler cap.
11.
P
riming pump*.
12 .
B
leed screw*.
* According to engine.
Diesel engines
2.0 litre HDi 140 2.0 litre HDi 136
2.0 litre HDi 163
Practical information
Page 219 of 371
217
508_en_Chap07_info-pratiques_ed01-2016
BlueHDi Diesel
engines
1. Power steering fluid reservoir.
2. Screenwash and headlamp wash fluid
reservoir.
3.
C
oolant header tank.
4.
B
rake fluid reservoir.
5.
B
attery / Fuses.
6.
Fusebox.
7.
e
ar
th point ("-" terminal).
8.
A
i r f i l t e r.
9.
e
n
gine oil dipstick.
10.
e
n
gine oil filler cap.
2.0 litre BlueHDi 136 S&S
2.0 litre BlueHDi 150 S&S
2.0 litre BlueHDi 180 S&S
1.6 litre BlueHDi 120 S&S
7
Practical information
Page 251 of 371

249
508_en_Chap08_en-cas-de-pannes_ed01-2016
Changing a fuseProcedure for replacing a failed fuse with a new fuse to rectify a failure of the corresponding function.
th
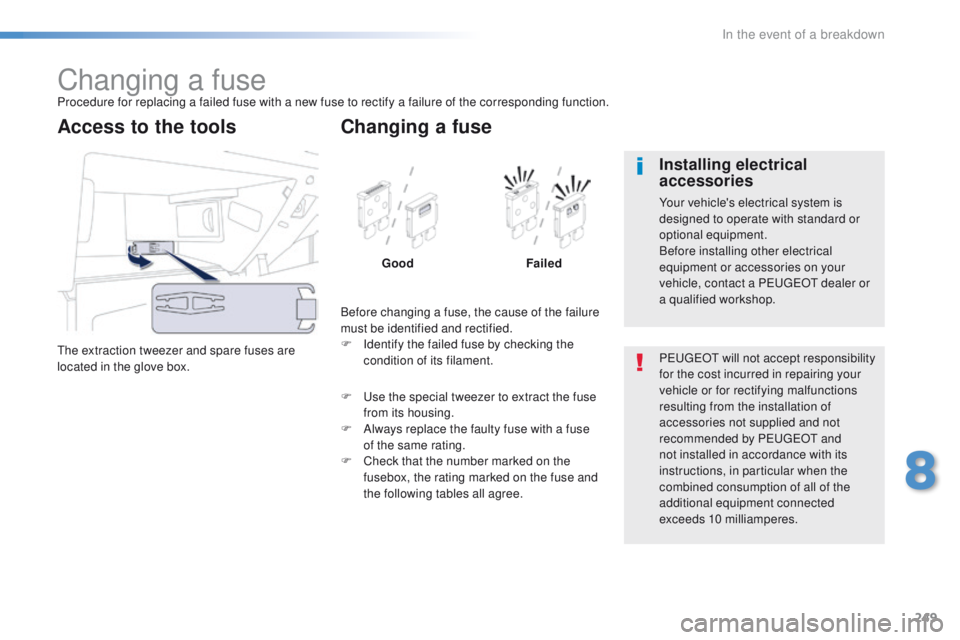
e extraction tweezer and spare fuses are
located in the glove box.
Access to the tools
Before changing a fuse, the cause of the failure
must be identified and rectified.
F
I
dentify the failed fuse by checking the
condition of its filament.
Changing a fuse
Good Failed
F
u
s
e the special tweezer to extract the fuse
from its housing.
F
A
lways replace the faulty fuse with a fuse
of the same rating.
F
C
heck that the number marked on the
fusebox, the rating marked on the fuse and
the following tables all agree. P
e
uge
Ot
will not accept responsibility
for the cost incurred in repairing your
vehicle or for rectifying malfunctions
resulting from the installation of
accessories not supplied and not
recommended by P
e
uge
Ot
and
not installed in accordance with its
instructions, in particular when the
combined consumption of all of the
additional equipment connected
exceeds 10 milliamperes.
Installing electrical
accessories
Your vehicle's electrical system is
designed to operate with standard or
optional equipment.
Before installing other electrical
equipment or accessories on your
vehicle, contact a P
e
uge
Ot
dealer or
a qualified workshop.
8
In the event of a breakdown
Page 252 of 371
250
508_en_Chap08_en-cas-de-pannes_ed01-2016
Dashboard fuses
the fusebox is placed in the lower dashboard
(left-hand side).
Access to the fuses
F Open the hinged panel, then apply light force to bypass the stops. Fuse
N° Rating
(A) Functions
F6 A or B 15Audio system.
F8 3Alarm.
F13 10Front cigar lighter.
F14 10Front 12 V socket.
F16 3Rear courtesy lamp, rear map reading lamps.
F17 3Front courtesy lamp, courtesy mirror.
F28 A or B 15Audio system.
F30 20Rear wiper.
F32 10Audio amplifier.
In the event of a breakdown