2016 Peugeot 508 display
[x] Cancel search: displayPage 179 of 364
177
Displays in the instrument panel
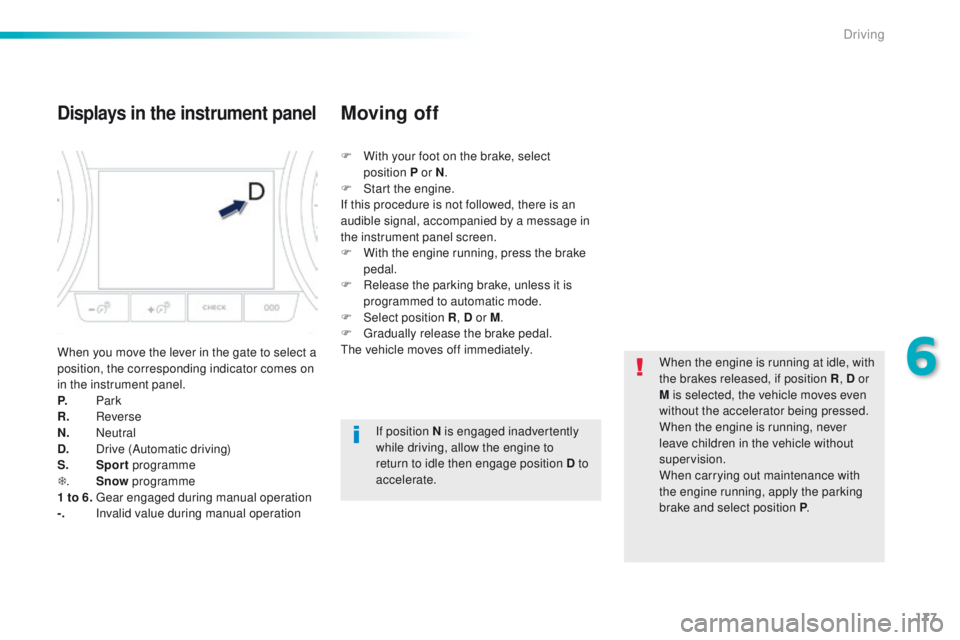
When you move the lever in the gate to select a
position, the corresponding indicator comes on
in the instrument panel.
P.
Park
R.
Reverse
N.
Neutral
D.
D
rive (Automatic driving)
S.
Sport programme
T .
Sn ow pro
gramme
1 to 6.
g
ea
r engaged during manual operation
-.
I
nvalid value during manual operation F
W
ith your foot on the brake, select
position
P or N
.
F
S
tart the engine.
If this procedure is not followed, there is an
audible signal, accompanied by a message in
the instrument panel screen.
F
W
ith the engine running, press the brake
pedal.
F
R
elease the parking brake, unless it is
programmed to automatic mode.
F
Sel
ect position R
, D or M.
F g
r
adually release the brake pedal.th
e vehicle moves off immediately.
Moving off
When the engine is running at idle, with
the brakes released, if position R
, D or
M is selected, the vehicle moves even
without the accelerator being pressed.
When the engine is running, never
leave children in the vehicle without
supervision.
When carrying out maintenance with
the engine running, apply the parking
brake and select position P .
If position N is engaged inadvertently
while driving, allow the engine to
return to idle then engage position D to
accelerate.
6
Driving
Page 181 of 364
179
Manual operation
F Select position M for sequential changing
of the six gears.
F
P
ull the lever towards the + sign to change
up a gear.
F
P
ush the lever towards the - sign to change
down a gear.
It is only possible to change from one gear to
another if the vehicle speed and engine speed
permit; otherwise, the gearbox will operate
temporarily in automatic mode.
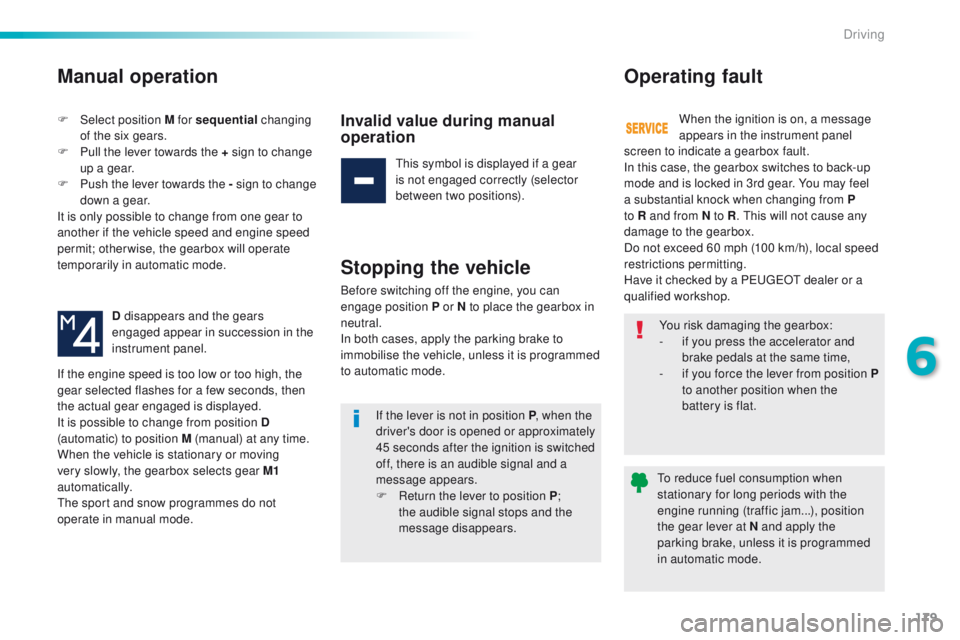
D disappears and the gears
engaged appear in succession in the
instrument panel.Invalid value during manual
operation
this symbol is displayed if a gear
is not engaged correctly (selector
between two positions).
Stopping the vehicle
Before switching off the engine, you can
engage position P or N to place the gearbox in
neutral.
In both cases, apply the parking brake to
immobilise the vehicle, unless it is programmed
to automatic mode.
Operating fault
When the ignition is on, a message
appears in the instrument panel
If the engine speed is too low or too high, the
gear selected flashes for a few seconds, then
the actual gear engaged is displayed.
It is possible to change from position D
(automatic) to position M (manual) at any time.
When the vehicle is stationary or moving
very slowly, the gearbox selects gear M1
automatically.
th
e sport and snow programmes do not
operate in manual mode. You risk damaging the gearbox:
-
i
f you press the accelerator and
brake pedals at the same time,
-
i
f you force the lever from position P
to another position when the
battery is flat.
If the lever is not in position P , when the
driver's door is opened or approximately
45 seconds after the ignition is switched
off, there is an audible signal and a
message appears.
F
R
eturn the lever to position P ;
the audible signal stops and the
message disappears.
to r
educe fuel consumption when
stationary for long periods with the
engine running (traffic jam...), position
the gear lever at N and apply the
parking brake, unless it is programmed
in automatic mode.
screen to indicate a gearbox fault.
In this case, the gearbox switches to back-up
mode and is locked in 3rd gear. You may feel
a substantial knock when changing from P
to R and from N to R
.
t
h
is will not cause any
damage to the gearbox.
Do not exceed 60 mph (100 km/h), local speed
restrictions permitting.
Have it checked by a P
e
uge
Ot
dealer or a
qualified workshop.
6
Driving
Page 186 of 364
184
Head-up display
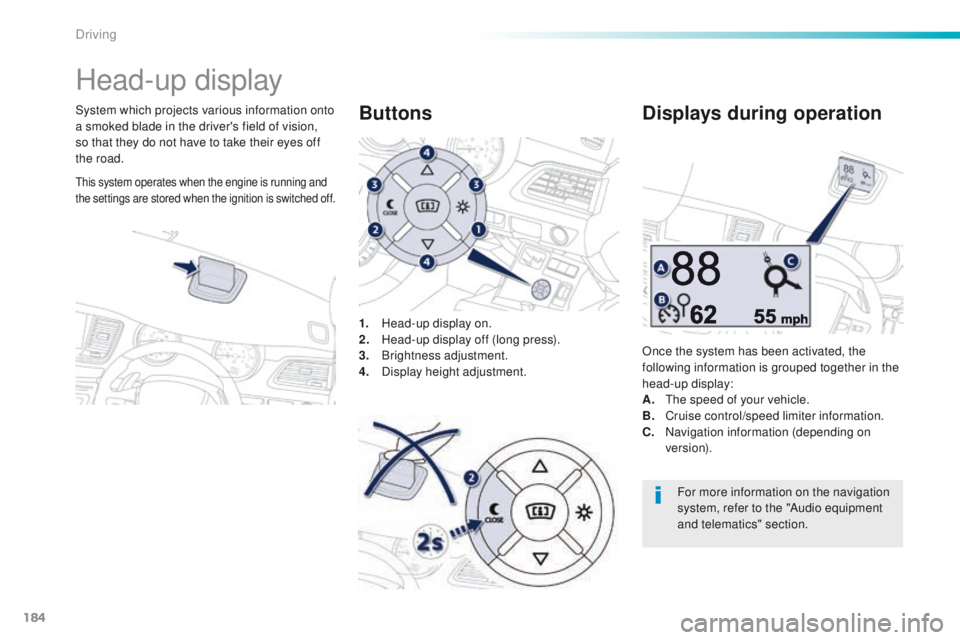
System which projects various information onto
a smoked blade in the driver's field of vision,
so that they do not have to take their eyes off
the road.1.
H
ead-up display on.
2.
H
ead-up display off (long press).
3.
Br
ightness adjustment.
4.
D
isplay height adjustment.Buttons
Once the system has been activated, the
following information is grouped together in the
head-up display:
A.
t
h
e speed of your vehicle.
B.
C
ruise control/speed limiter information.
C.
N
avigation information (depending on
ve r s i o n).
Displays during operation
For more information on the navigation
system, refer to the "Audio equipment
and telematics" section.
this system operates when the engine is running and
the settings are stored when the ignition is switched off.
Driving
Page 187 of 364
185
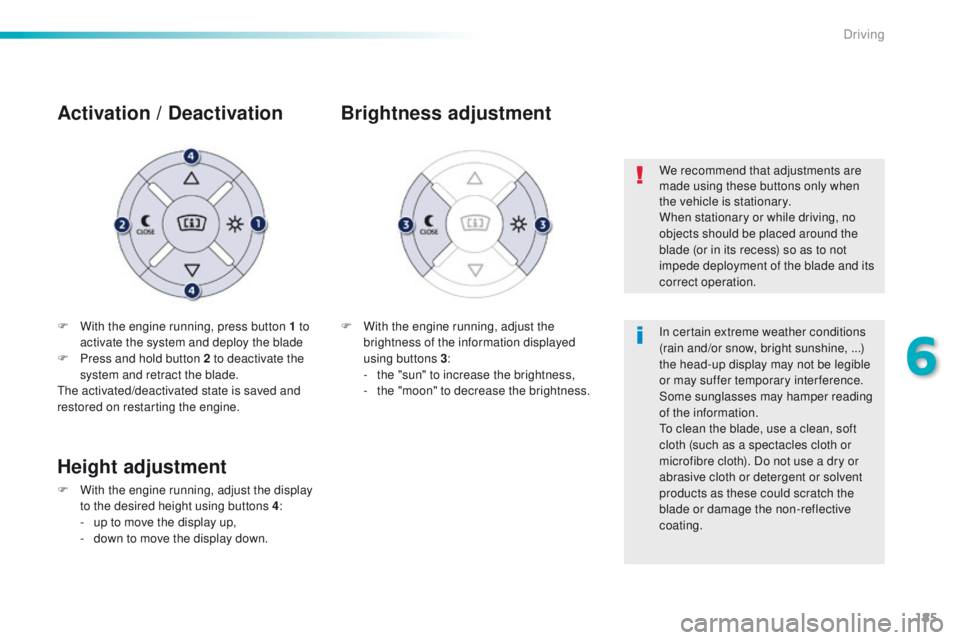
F With the engine running, press button 1 to activate the system and deploy the blade
F
P
ress and hold button 2 to deactivate the
system and retract the blade.
th
e activated/deactivated state is saved and
restored on restarting the engine.
Activation / D eactivation
F With the engine running, adjust the
brightness of the information displayed
using buttons 3 :
-
t
he "sun" to increase the brightness,
-
t
he "moon" to decrease the brightness.
Brightness adjustment
We recommend that adjustments are
made using these buttons only when
the vehicle is stationary.
When stationary or while driving, no
objects should be placed around the
blade (or in its recess) so as to not
impede deployment of the blade and its
correct operation.
In certain extreme weather conditions
(rain and/or snow, bright sunshine,
...)
the head-up display may not be legible
or may suffer temporary interference.
Some sunglasses may hamper reading
of the information.
to c
lean the blade, use a clean, soft
cloth (such as a spectacles cloth or
microfibre cloth). Do not use a dry or
abrasive cloth or detergent or solvent
products as these could scratch the
blade or damage the non-reflective
coating.
Height adjustment
F With the engine running, adjust the display to the desired height using buttons 4 :
-
u
p to move the display up,
-
d
own to move the display down.
6
Driving
Page 189 of 364
187
the loss of pressure detected does not
always lead to visible deformation of
the tyre.
Do not rely on just a visual check.
th
e alert is maintained until the tyre or
tyres concerned is reinflated, repaired
or replaced.
th
e spare wheel (space-saver type or a
steel rim) does not have a sensor.
Under-inflation alert
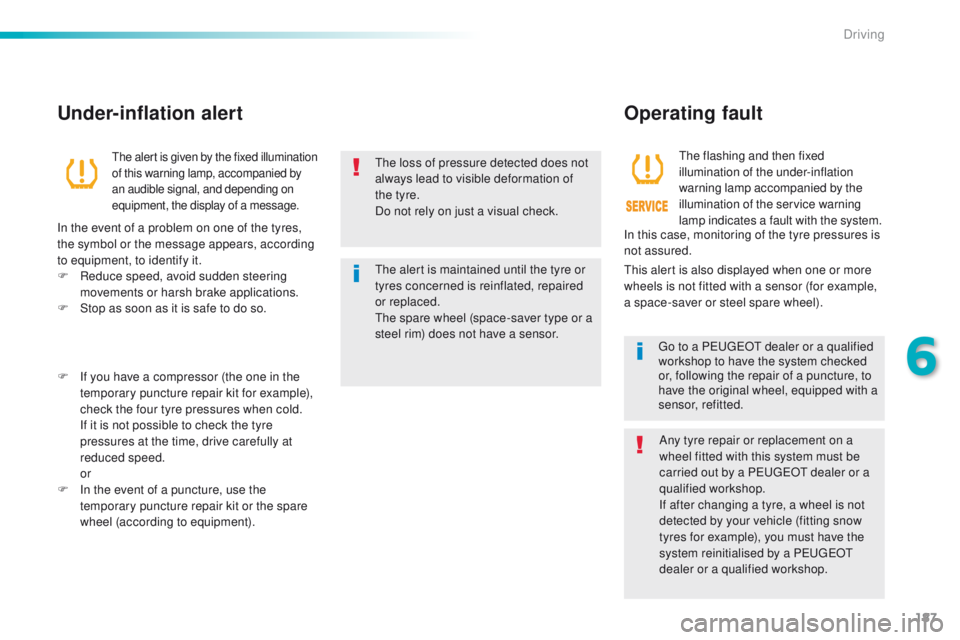
the alert is given by the fixed illumination
of this warning lamp, accompanied by
an audible signal, and depending on
equipment, the display of a message.
In the event of a problem on one of the tyres,
the symbol or the message appears, according
to equipment, to identify it.
F
R
educe speed, avoid sudden steering
movements or harsh brake applications.
F
S
top as soon as it is safe to do so.
F
I
f you have a compressor (the one in the
temporary puncture repair kit for example),
check the four tyre pressures when cold.
I
f it is not possible to check the tyre
pressures at the time, drive carefully at
reduced speed.
or
F
I
n the event of a puncture, use the
temporary puncture repair kit or the spare
wheel (according to equipment).
Operating fault
the flashing and then fixed
illumination of the under-inflation
warning lamp accompanied by the
illumination of the service warning
lamp indicates a fault with the system.
th
is alert is also displayed when one or more
wheels is not fitted with a sensor (for example,
a space-saver or steel spare wheel).
go t
o a P
e
uge
Ot
dealer or a qualified
workshop
to have the system checked
or, following the repair of a puncture, to
have the original wheel, equipped with a
sensor, refitted.
Any tyre repair or replacement on a
wheel fitted with this system must be
carried out by a P
e
uge
Ot
dealer or a
qualified workshop.
If after changing a tyre, a wheel is not
detected by your vehicle (fitting snow
tyres for example), you must have the
system reinitialised by a P
e
uge
Ot
dealer or a qualified workshop.
In this case, monitoring of the tyre pressures is
not assured.
6
Driving
Page 190 of 364
188
Speed limiter
System which prevents the vehicle from
exceeding the speed programmed by the
driver.
When the programmed speed limit is reached,
pressing the accelerator pedal no longer
has any effect unless it is pressed firmly,
which allows you to temporarily exceed the
programmed speed.
to r
eturn to the programmed speed, simply
slow down to a speed below the programmed
speed by releasing the accelerator.
th
e speed limiter is switched on manually:
it requires a programmed speed of at least
20
mph (30 km/h).
th
e speed limiter is switched off by manual
operation of the control.
th
e programmed speed remains in the memory
when the ignition is switched off.
th
e speed limiter cannot, in any
circumstances, replace the need to
observe speed limits, nor can it replace
the need for vigilance and responsibility
on the part of the driver.
th
is information also appears in the
head-up display.
For more information, refer to the
"Head-up display" section.
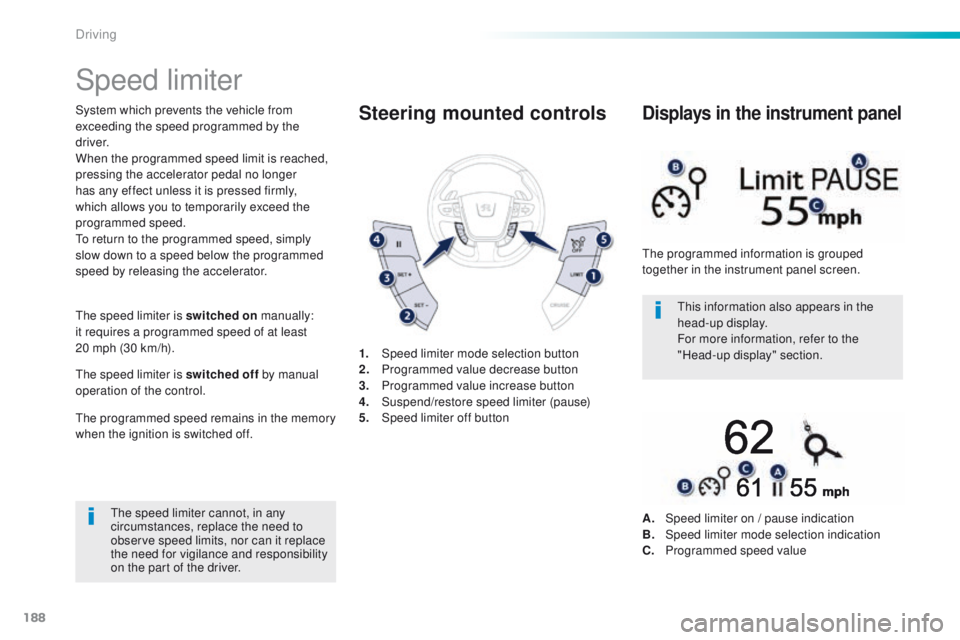
1.
Spe
ed limiter mode selection button
2.
P
rogrammed value decrease button
3.
P
rogrammed value increase button
4.
S
uspend/restore speed limiter (pause)
5.
Spe
ed limiter off buttonSteering mounted controls
the programmed information is grouped
together in the instrument panel screen.
Displays in the instrument panel
A. Speed limiter on / pause indication
B. Spe ed limiter mode selection indication
C.
P
rogrammed speed value
Driving
Page 191 of 364
189
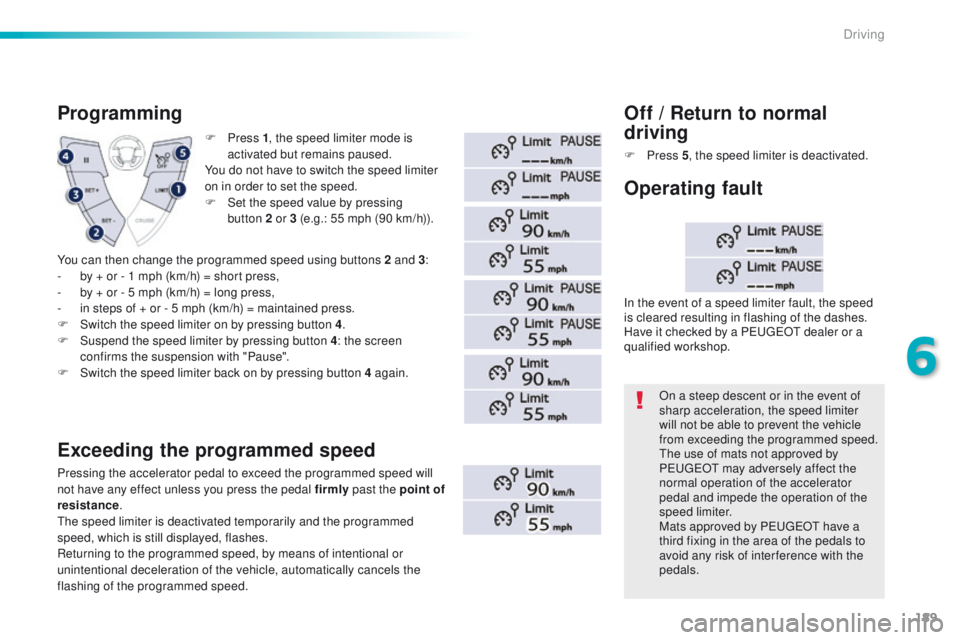
F Press 1, t he speed limiter mode is
activated but remains paused.
You do not have to switch the speed limiter
on in order to set the speed.
F
S
et the speed value by pressing
button
2 or 3 (e.g.: 55 mph (90 km/h)).
Programming
Exceeding the programmed speed
Pressing the accelerator pedal to exceed the programmed speed will
not have any effect unless you press the pedal firmly past the point of
resistance .
th
e speed limiter is deactivated temporarily and the programmed
speed, which is still displayed, flashes.
Returning to the programmed speed, by means of intentional or
unintentional deceleration of the vehicle, automatically cancels the
flashing of the programmed speed.
Off / Return to normal
d riving
F Press 5, t he speed limiter is deactivated.
On a steep descent or in the event of
sharp acceleration, the speed limiter
will not be able to prevent the vehicle
from exceeding the programmed speed.
th
e use of mats not approved by
P
e
uge
Ot
may adversely affect the
normal operation of the accelerator
pedal and impede the operation of the
speed limiter.
Mats approved by P
e
uge
Ot
have a
third fixing in the area of the pedals to
avoid any risk of inter ference with the
pedals.
In the event of a speed limiter fault, the speed
is cleared resulting in flashing of the dashes.
Have it checked by a P
e
uge
Ot
dealer or a
qualified workshop.
Operating fault
You can then change the programmed speed using buttons 2 and 3 :
- b y + or - 1 mph (km/h) = short press,
-
b
y + or - 5 mph (km/h) = long press,
-
i
n steps of + or - 5 mph (km/h) = maintained press.
F
S
witch the speed limiter on by pressing button 4 .
F
S
uspend the speed limiter by pressing button 4 : the screen
confirms the suspension with "Pause".
F
S
witch the speed limiter back on by pressing button 4 again.
6
Driving
Page 192 of 364
190
Cruise control
System which automatically maintains the
speed of the vehicle at the value programmed
by the driver, without any action on the
accelerator pedal.
th
e cruise control is switched on manually: it
requires a minimum vehicle speed of 25 mph
(40 km/h) and the engagement of:
-
4
th gear or higher with a manual gearbox,
-
2nd gear or higher with an automatic
gearbox,
-
position D with an automatic gearbox.
th
e cruise control is switched off manually
or by pressing the brake or clutch pedal or
on triggering of the
e SC system for safety
reasons.
It is possible to exceed the programmed speed
temporarily by pressing the accelerator pedal.
to r
eturn to the programmed speed, simply
release the accelerator pedal.
Switching off the ignition cancels any
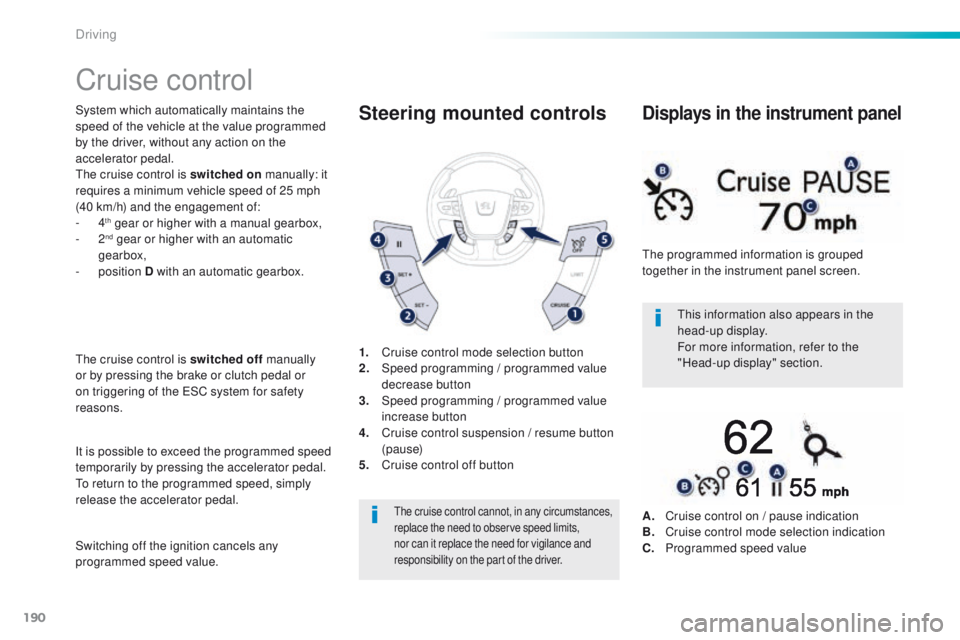
programmed speed value. 1.
C
ruise control mode selection button
2.
S
peed programming
/ programmed value
decrease button
3.
S
peed programming
/ programmed value
increase button
4.
C
ruise control suspension / resume button
(pause)
5.
C
ruise control off button
Steering mounted controls
the cruise control cannot, in any circumstances,
replace the need to observe speed limits,
nor can it replace the need for vigilance and
responsibility on the part of the driver.
this information also appears in the
head-up display.
For more information, refer to the
"Head-up display" section.
th
e programmed information is grouped
together in the instrument panel screen.
Displays in the instrument panel
A. Cruise control on / pause indication
B. C ruise control mode selection indication
C.
P
rogrammed speed value
Driving