Page 110 of 398
108
308_en_Chap04_eclairage-et-visibilite_ed02-2015
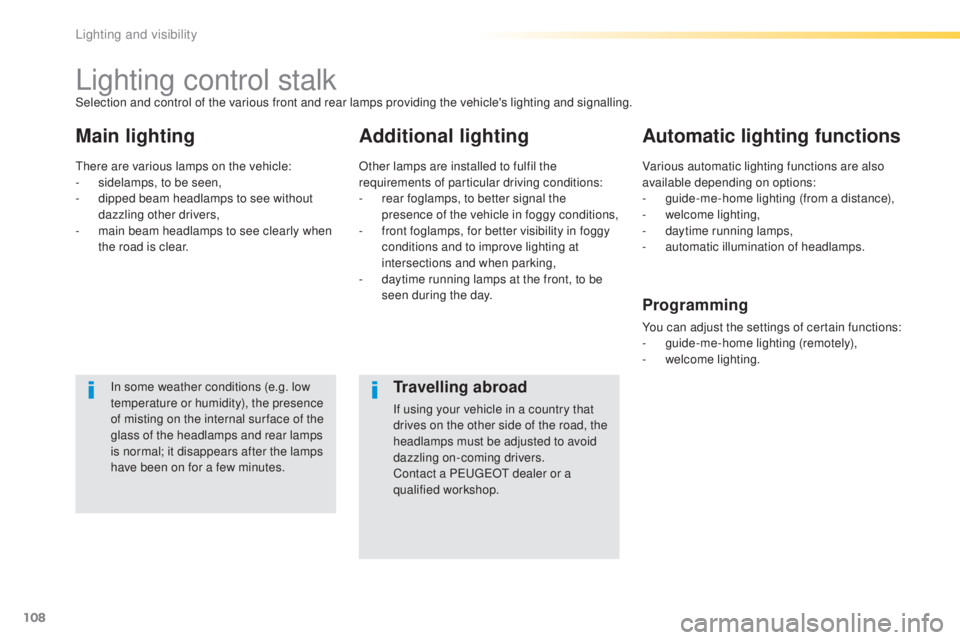
Lighting control stalk
Main lightingAdditional lightingAutomatic lighting functions
In some weather conditions (e.g. low
temperature or humidity), the presence
of misting on the internal sur face of the
glass of the headlamps and rear lamps
is normal; it disappears after the lamps
have been on for a few minutes.
Selection and control of the various front and rear lamps providing the vehicle's lighting and signalling.
the
re are various lamps on the vehicle:
-
si
delamps, to be seen,
-
di
pped beam headlamps to see without
dazzling other drivers,
-
ma
in beam headlamps to see clearly when
the road is clear. Other lamps are installed to fulfil the
requirements of particular driving conditions:
-
re
ar foglamps, to better signal the
presence of the vehicle in foggy conditions,
-
fr
ont foglamps, for better visibility in foggy
conditions and to improve lighting at
intersections and when parking,
-
da
ytime running lamps at the front, to be
seen during the day. Various automatic lighting functions are also
available depending on options:
-
gu
ide-me-home lighting (from a distance),
-
we
lcome lighting,
-
da
ytime running lamps,
-
au
tomatic illumination of headlamps.
Programming
You can adjust the settings of certain functions:
- gui
de-me-home lighting (remotely),
-
we
lcome lighting.
Travelling abroad
If using your vehicle in a country that
drives on the other side of the road, the
headlamps must be adjusted to avoid
dazzling on-coming drivers.
Contact a P
eu
ge
Ot d
ealer or a
qualified workshop.
Lighting and visibility
Page 111 of 398
109
308_en_Chap04_eclairage-et-visibilite_ed02-2015
Model without AUTO lighting
Model with AUTO lighting Selection ring for main lighting
mode
turn the ring to align the desired symbol with
t he marking.
Lighting off (ignition off) / Front daytime
running lamps (engine running).
Automatic illumination of headlamps.
Sidelamps only.
Dipped or main beam headlamps.
Dipping the headlamps
In the lighting off and sidelamps modes, the
driver can switch on the main beam headlamps
temporarily ("headlamp flash") by maintaining a
pull on the stalk.
Displays
Illumination of the corresponding indicator lamp
in the instrument panel confirms the lighting
switched on. Pull the stalk to switch the lighting between
dipped / main beam headlamps.
4
Lighting and visibility
Page 112 of 398
110
308_en_Chap04_eclairage-et-visibilite_ed02-2015
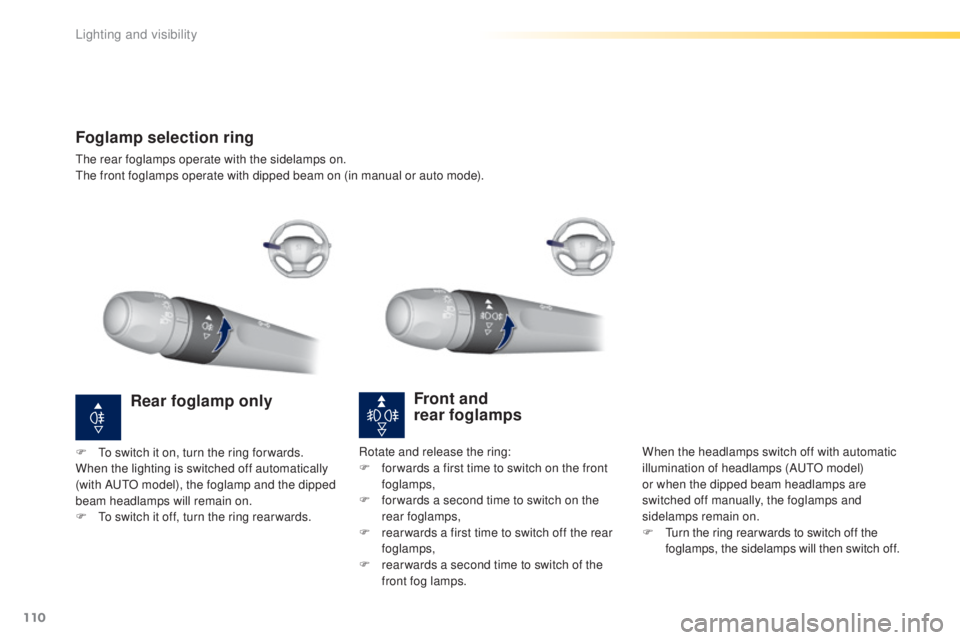
Foglamp selection ring
the rear foglamps operate with the sidelamps on.the front foglamps operate with dipped beam on (in manual or auto mode).
Front and
rear foglamps
When the headlamps switch off with automatic
illumination of headlamps (AutO mo del)
or when the dipped beam headlamps are
switched off manually, the foglamps and
sidelamps remain on.
F
tur
n the ring rear wards to switch off the
foglamps, the sidelamps will then switch off.
Rear foglamp only
F to switch it on, turn the ring for wards.
W hen the lighting is switched off automatically
(with A
utO mo
del), the foglamp and the dipped
beam headlamps will remain on.
F
t
o sw
itch it off, turn the ring rear wards. Rotate and release the ring:
F fo
r wards a first time to switch on the front
foglamps,
F
fo
r wards a second time to switch on the
rear foglamps,
F
re
ar wards a first time to switch off the rear
foglamps,
F
re
ar wards a second time to switch of the
front fog lamps.
Lighting and visibility
Page 113 of 398
111
308_en_Chap04_eclairage-et-visibilite_ed02-2015
In good or rainy weather, both day
and night, the front foglamps and the
rear foglamps are prohibited. In these
situations, the power of their beams
may dazzle other drivers.
they
should
only be used in fog or snow.
In these weather conditions, it is your
responsibility to switch on the foglamps
and dipped headlamps manually as the
sunshine sensor may detect sufficient
light.
Do not forget to switch off the front
foglamps and the rear foglamps when
they are no longer needed.Lighting left on audible signal
An audible signal when a front door
is opened warns the driver that the
vehicle's exterior lighting is on, with the
ignition off and in manual lighting mode.
In this case, switching off the lighting
stops the audible signal.
With the ignition off, if the dipped
headlamps remain on, the vehicle goes
into "
eCO
" mode to avoid discharging
the battery.
the l
ighting goes off when you switch
off the ignition, but you can always
switch it on again using the lighting
control stalk.
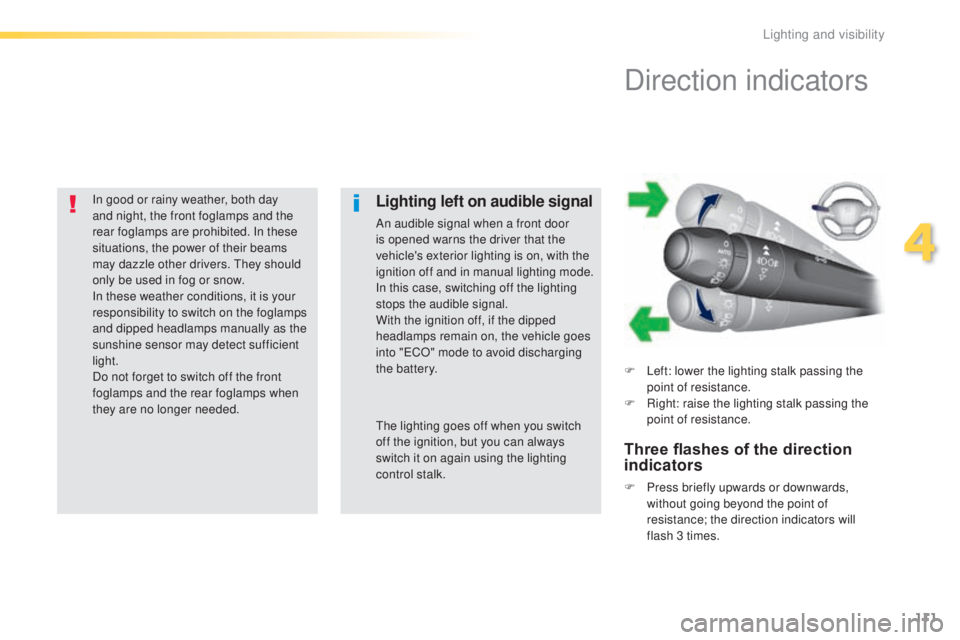
Direction indicators
F Left: lower the lighting stalk passing the
p oint of resistance.
F
Ri
ght: raise the lighting stalk passing the
point of resistance.
Three flashes of the direction
indicators
F Press briefly upwards or downwards,
w ithout going beyond the point of
resistance; the direction indicators will
flash 3 times.
4
Lighting and visibility
Page 114 of 398
112
308_en_Chap04_eclairage-et-visibilite_ed02-2015
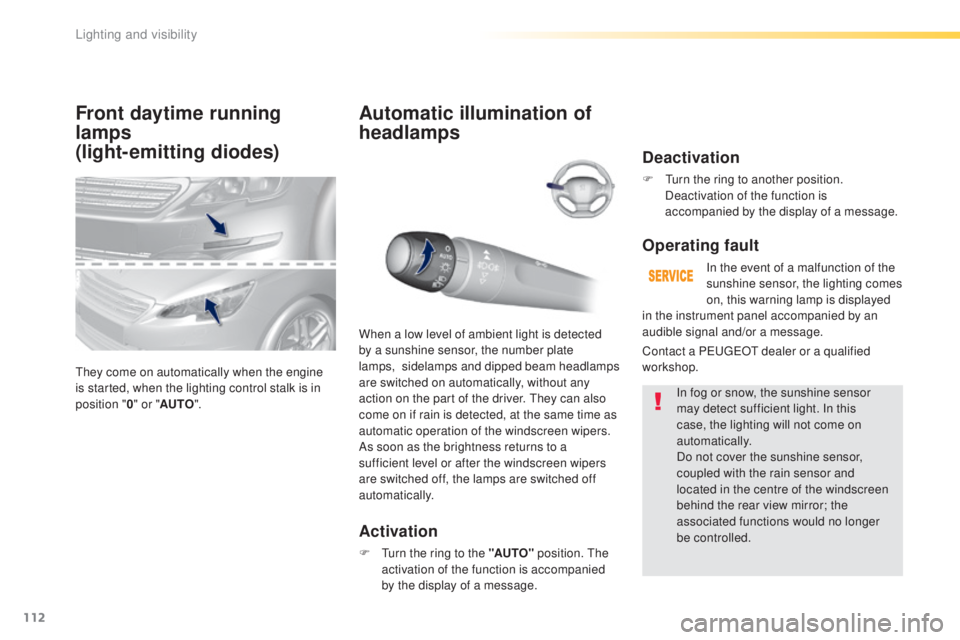
Front daytime running
lamps
(light-emitting diodes)
they come on automatically when the engine
i s started, when the lighting control stalk is in
position " 0" or " AUTO ".
Automatic illumination of
headlamps
Activation
F turn the ring to the "AUTO" p osition. the
a ctivation of the function is accompanied
by the display of a message.
When a low level of ambient light is detected
by a sunshine sensor, the number plate
lamps,
si
delamps and dipped beam headlamps
are switched on automatically, without any
action on the part of the driver.
the
y can also
come on if rain is detected, at the same time as
automatic operation of the windscreen wipers.
As soon as the brightness returns to a
sufficient level or after the windscreen wipers
are switched off, the lamps are switched off
automatically.
Deactivation
F turn the ring to another position.
D eactivation of the function is
accompanied by the display of a message.
Operating fault
In the event of a malfunction of the
sunshine sensor, the lighting comes
on, this warning lamp is displayed
In fog or snow, the sunshine sensor
may detect sufficient light. In this
case, the lighting will not come on
automatically.
Do not cover the sunshine sensor,
coupled with the rain sensor and
located in the centre of the windscreen
behind the rear view mirror; the
associated functions would no longer
be controlled.
Contact a P
eu
ge
Ot d
ealer or a qualified
workshop. in the instrument panel accompanied by an
audible signal and/or a message.
Lighting and visibility
Page 115 of 398
113
308_en_Chap04_eclairage-et-visibilite_ed02-2015
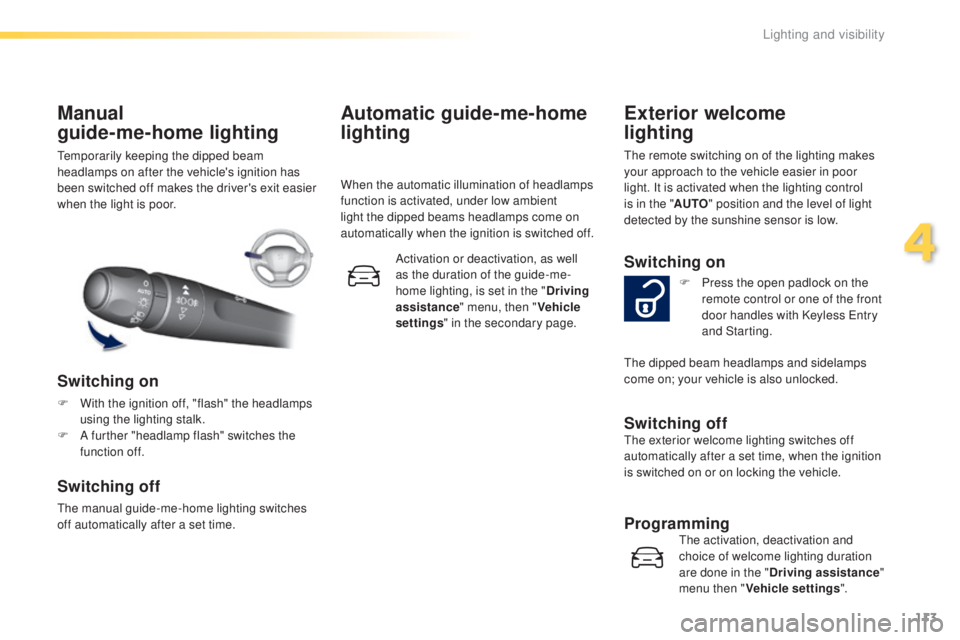
temporarily keeping the dipped beam
h eadlamps on after the vehicle's ignition has
been switched off makes the driver's exit easier
when the light is poor.
Manual
guide-me-home lighting
Switching on
F With the ignition off, "flash" the headlamps
us ing the lighting stalk.
F
A fu
rther "headlamp flash" switches the
function off.
Switching off
the manual guide-me-home lighting switches
o ff automatically after a set time.
Automatic guide-me-home
lighting
When the automatic illumination of headlamps
function is activated, under low ambient
light the dipped beams headlamps come on
automatically when the ignition is switched off.
Activation or deactivation, as well
as the duration of the guide-me-
home lighting, is set in the " Driving
assistance " menu, then " Vehicle
settings " in the secondary page.
Exterior welcome
lighting
the remote switching on of the lighting makes
y our approach to the vehicle easier in poor
light. It is activated when the lighting control
is in the " AUTO" position and the level of light
detected by the sunshine sensor is low.
Switching on
F Press the open padlock on the
r emote control or one of the front
door handles with Keyless
ent
ry
and Starting.
Switching offthe exterior welcome lighting switches off
a utomatically after a set time, when the ignition
is switched on or on locking the vehicle.
Programmingthe activation, deactivation and
c hoice of welcome lighting duration
are done in the " Driving assistance "
menu then " Vehicle settings ".
the
dipped beam headlamps and sidelamps
come on; your vehicle is also unlocked.
4
Lighting and visibility
Page 116 of 398

114
308_en_Chap04_eclairage-et-visibilite_ed02-2015
to make your approach to the vehicle easier,
t hese illuminate:
-
th
e zones facing the driver’s and
passenger’s doors,
-
th
e zones for ward of the door mirrors and
rear ward of the front doors.
Door mirror
spotlamps
Switching on
the spotlamps come on:
- wh en you unlock the vehicle,
-
wh
en you switch off the ignition,
-
wh
en you open a door,
-
wh
en you use the remote control to locate
the vehicle.
Switching off
they are timed to go off automatically.
Manual adjustment of
halogen headlamps Automatic adjustment of
"full-LED" headlamps
to avoid causing a nuisance to other road
u sers, the beams of the halogen headlamps
should be adjusted according to the load in the
vehicle.
0
Dr
iver or driver + front passenger.
-
Dr
iver + front passenger + rear
passengers.
1
5 p
eople.
-
5 pe
ople + a load in the boot.
2
Dr
iver + a load in the boot.
If a fault occurs, this warning lamp
is displayed in the instrument panel,
accompanied by an audible signal and a
message in the instrument panel screen.
In order to avoid causing a nuisance to other
road users, this system corrects the height of
the "full L
eD"
headlamps beam automatically,
according to the load in the vehicle.
the s
ystem then places your headlamps in the
lowest position.
the i
nitial setting is position "0" .
If a fault occurs, do not touch the "full
L
eD" l
ight sources. Contact a P
eu
ge
Ot
de
aler or a qualified workshop.
Headlamp beam height adjustment
Lighting and visibility
Page 117 of 398
115
308_en_Chap04_eclairage-et-visibilite_ed02-2015
Wiper control stalk
Manual controls
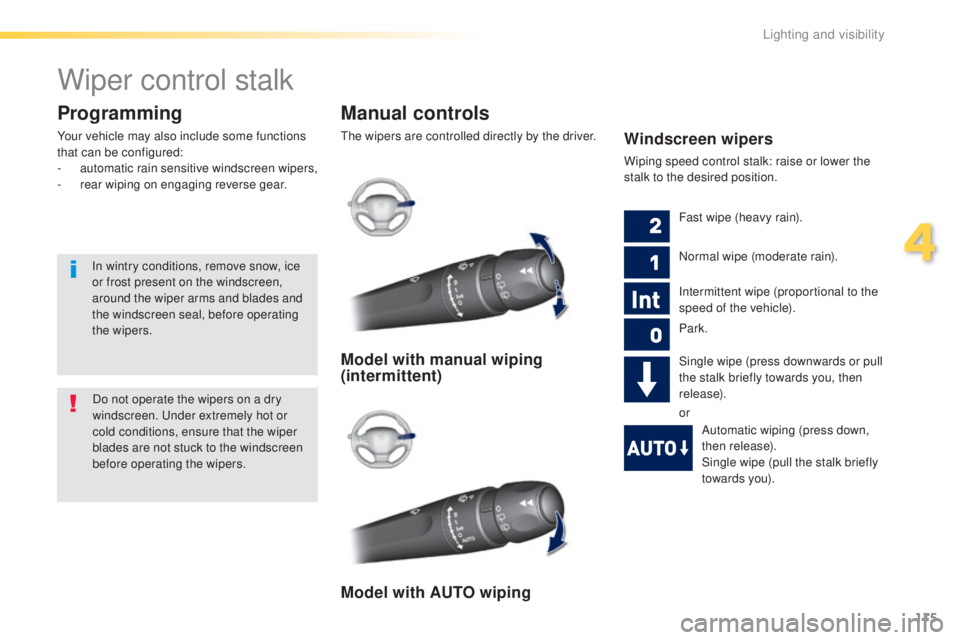
the wipers are controlled directly by the driver.
Programming
Your vehicle may also include some functions
that can be configured:
-
au
tomatic rain sensitive windscreen wipers,
-
rea
r wiping on engaging reverse gear.Windscreen wipers
Wiping speed control stalk: raise or lower the
stalk to the desired position.
Model with manual wiping
(intermittent)
Model with AUTO wiping
Fast wipe (heavy rain).
Normal wipe (moderate rain).
Intermittent wipe (proportional to the
speed of the vehicle).
Park.
Single wipe (press downwards or pull
the stalk briefly towards you, then
release).
orAutomatic wiping (press down,
then release).
Single wipe (pull the stalk briefly
towards you).
Do not operate the wipers on a dry
windscreen.
und
er extremely hot or
cold conditions, ensure that the wiper
blades are not stuck to the windscreen
before operating the wipers.
In wintry conditions, remove snow, ice
or frost present on the windscreen,
around the wiper arms and blades and
the windscreen seal, before operating
the wipers.
4
Lighting and visibility