Page 59 of 398
57
308_en_Chap02_ouvertures_ed02-2015
Locking
F With the electronic key in the recognition
zone A , press with a finger on one of the
front door handles (at the markings) to lock
the vehicle.
Ma
intain pressure with your finger until the
windows close completely.
Locking is confirmed by fixed lighting of
the direction indicators for a few
s
econds.
Depending on your version, the door
mirrors fold, the alarm is activated.ens ure that no one prevents the correct
operation of the windows.
Be aware of children when operating
the windows.
For reasons of safety and theft
protection, do not leave your electronic
key in the vehicle, even when you are
close to it.
It is recommended that you keep it on
your person.
If a door or the boot is not properly
closed, with the engine running
or the vehicle moving (speed
above 6
m
ph (10 km/h)), a message
appears for a few seconds. F Wi
th the key in the recognition zone A,
press the tailgate locking control to lock
the
v
ehicle.
2
Access
Page 66 of 398
64
308_en_Chap02_ouvertures_ed02-2015
Locking/ unlocking from the inside
After unlocking, if no door is opened
within 30 seconds, the doors lock again
automatically.If the vehicle is deadlocked or locked
with the remote control or the door
handles, the button is not active. In this
case, use the key or the remote control
to unlock. Driving with the doors locked may make
access to the passenger compartment
by the emergency services more
difficult in an emergency.
F
Pr
ess the button.
thi
s allows the doors and the boot to be locked
or unlocked. When carrying large objects with the
boot open, you can press this button to
lock just the doors.
When locking from inside, the door
mirrors do not fold.
to ac
tivate or deactivate this
function, press and hold the button
until a message appears in the
screen.
Automatic central locking of the
doors
the doors can lock automatically while driving
( speed above 6 mph (10 km/h)).
Access
Page 73 of 398

71
308_en_Chap03_ergonomie-et-confort_ed02-2015
Steering wheel adjustment
F When stationary, l ower the control lever
to release the steering wheel adjustment
mechanism.
F
Ad
just the height and reach to suit your
driving position.
F
Pu
ll the control lever to lock the steering
wheel adjustment mechanism.
As a safety precaution, these
operations should only be carried out
while the vehicle is stationary.
PeugeOt i- Cockpit
Before taking to the road and to make the most
of the special ergonomics of the Peu
geOt
i
- Cockpit, carry out these adjustments in the
following order:
-
head
restraint height,
-
ba
ckrest angle,
-
seat
cushion height,
-
se
at longitudinal position,
-
st
eering wheel reach and then height
-
th
e interior and door mirrors.
Once these adjustments have been made,
ensure that from your driving position you can
see the "head-up" instrument panel clearly,
over the reduced diameter steering wheel.
Before moving the seat backwards,
ensure that there is nothing that might
prevent the full travel of the seat, so
as to avoid the risk of of jamming the
seat caused by the presence of objects
on the floor behind the seat or rear
passengers. If the seat jams, stop the
movement immediately.
3
ease of use and comfort
Page 76 of 398

74
308_en_Chap03_ergonomie-et-confort_ed02-2015
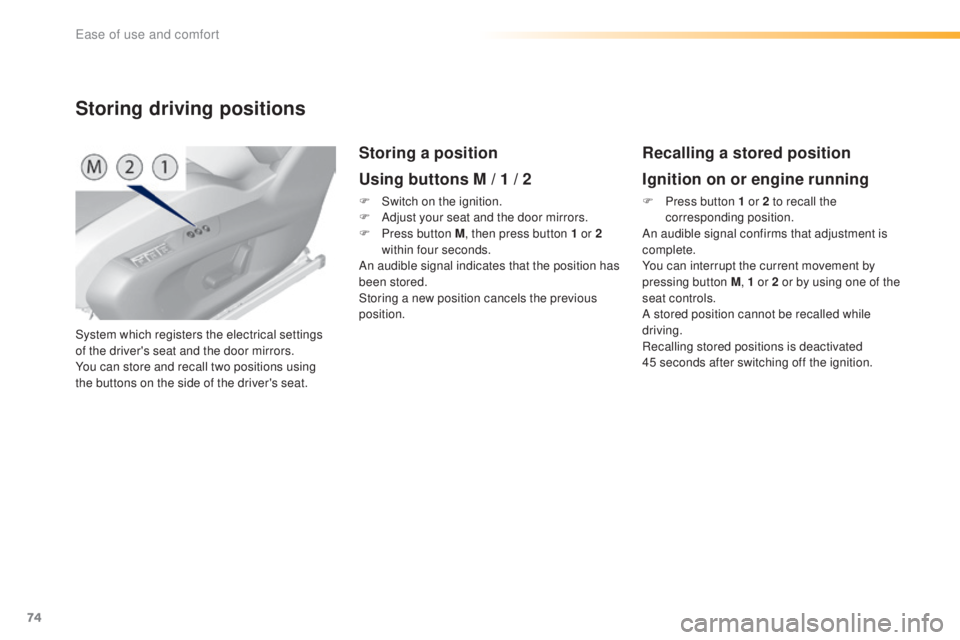
System which registers the electrical settings
of the driver's seat and the door mirrors.
You can store and recall two positions using
the buttons on the side of the driver's seat.
Storing driving positions
Storing a position
Using buttons M / 1 / 2
F Switch on the ignition.
F Ad just your seat and the door mirrors.
F
Pr
ess button M , then press button 1 or 2
within four seconds.
An audible signal indicates that the position has
been stored.
Storing a new position cancels the previous
position.
Recalling a stored position
Ignition on or engine running
F Press button 1 or 2 to recall the
c orresponding position.
An audible signal confirms that adjustment is
complete.
You can interrupt the current movement by
pressing button M , 1 or 2 or by using one of the
seat controls.
A stored position cannot be recalled while
driving.
Recalling stored positions is deactivated
45
s
econds after switching off the ignition.
ease of use and comfort
Page 104 of 398
102
308_en_Chap03_ergonomie-et-confort_ed02-2015
Rear screen demist - defrost
Switching onSwitching off
F Press this button to demist /
d
efrost the rear screen and
(depending on version) the door
mirrors.
the i
ndicator lamp associated with
the button comes on.
the demisting/defrosting switches off automatically
t o prevent an excessive consumption of current.
the rear screen demist - defrost
c an only operate when the engine is
running.
Switch off the heating of the rear screen
and door mirrors as soon as you judge it
possible, as reducing the consumption
of electrical current reduces fuel
consumption. F
It i
s possible to stop the
demisting/defrosting operation
before it is switched off
automatically by pressing the
button again.
the i
ndicator lamp associated with
the button goes off.
ease of use and comfort
Page 108 of 398

106
308_en_Chap04_eclairage-et-visibilite_ed02-2015
Mirrors
Adjustment
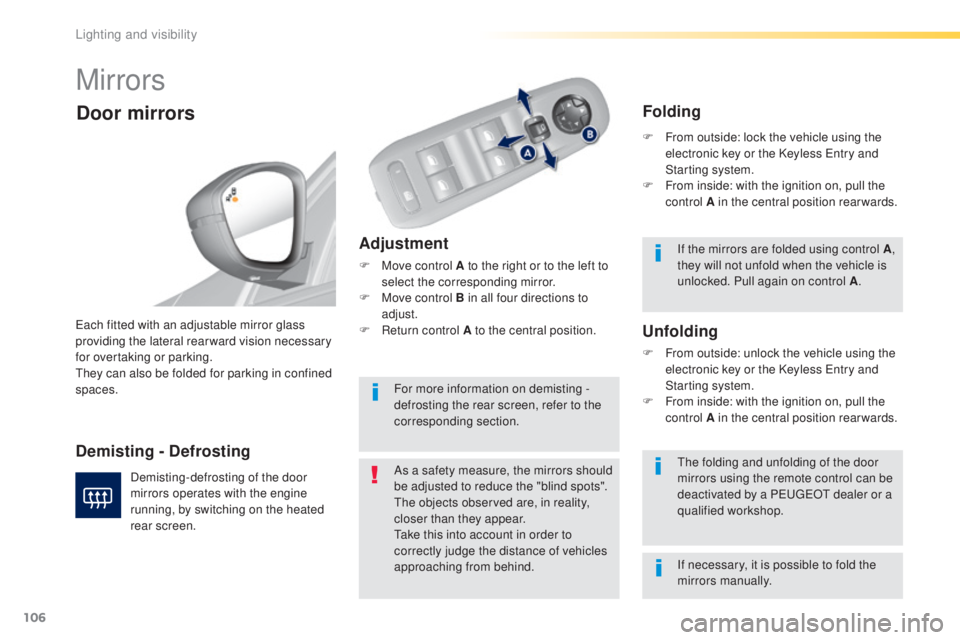
F Move control A to the right or to the left to
select the corresponding mirror.
F
Mov
e control B in all four directions to
adjust.
F
Re
turn control A to the central position.
eac
h fitted with an adjustable mirror glass
providing the lateral rear ward vision necessary
for overtaking or parking.
the
y can also be folded for parking in confined
spaces.
Demisting - Defrosting
Door mirrors
Demisting-defrosting of the door
mirrors operates with the engine
running, by switching on the heated
rear screen. As a safety measure, the mirrors should
be adjusted to reduce the "blind spots".
the o
bjects observed are, in reality,
closer than they appear.
tak
e this into account in order to
correctly judge the distance of vehicles
approaching from behind.the f olding and unfolding of the door
mirrors using the remote control can be
deactivated by a P
eu
ge
Ot d
ealer or a
qualified workshop.
Unfolding
F From outside: unlock the vehicle using the
e lectronic key or the Keyless ent ry and
Starting system.
F
Fr
om inside: with the ignition on, pull the
control A in the central position rearwards.
Folding
F From outside: lock the vehicle using the
e lectronic key or the Keyless ent ry and
Starting system.
F
Fr
om inside: with the ignition on, pull the
control A in the central position rearwards.
If the mirrors are folded using control A ,
they will not unfold when the vehicle is
unlocked. Pull again on control A .
For more information on demisting -
defrosting the rear screen, refer to the
corresponding section.
If necessary, it is possible to fold the
mirrors manually.
Lighting and visibility
Page 109 of 398
107
308_en_Chap04_eclairage-et-visibilite_ed02-2015
Rear view mirror
equipped with an anti-dazzle system, which darkens the mirror glass and reduces the nuisance to
t he driver caused by the sun, headlamps from other vehicles...
Manual day/night model
Adjustment
F Adjust the mirror so that the glass is
d irected correctly in the "day" position.
In order to ensure optimum visibility
during your manoeuvres, the mirror
lightens automatically when reverse
gear is engaged.
Day / night position
F Pull the lever to change to the "night"
anti-dazzle position.
F
Pu
sh the lever to change to the normal
"day" position.
Automatic day/night model
By means of a sensor, which measures the
light from the rear of the vehicle, this system
automatically and progressively changes
between the day and night uses.
4
Lighting and visibility
Page 114 of 398

112
308_en_Chap04_eclairage-et-visibilite_ed02-2015
Front daytime running
lamps
(light-emitting diodes)
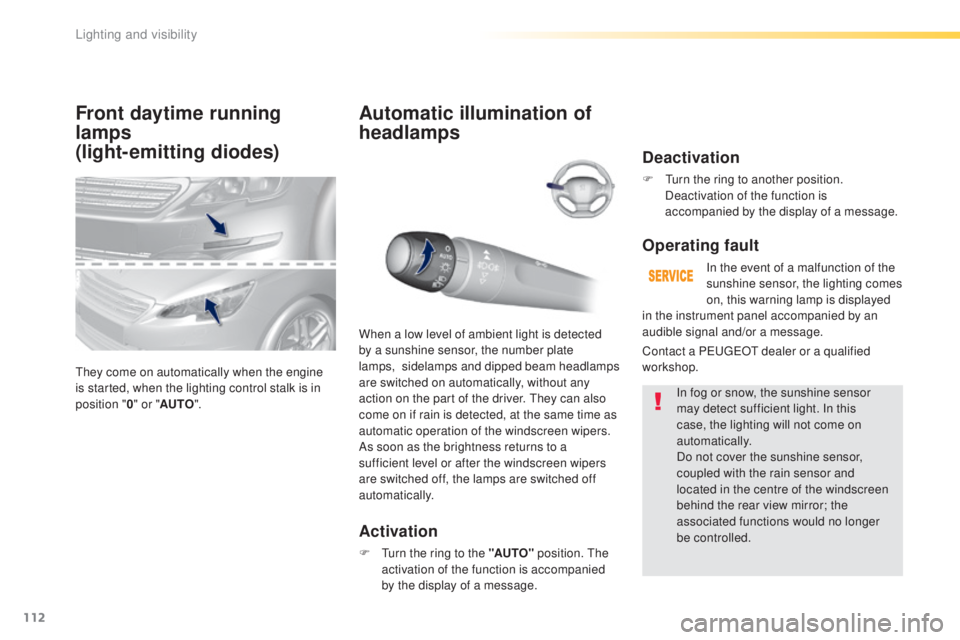
they come on automatically when the engine
i s started, when the lighting control stalk is in
position " 0" or " AUTO ".
Automatic illumination of
headlamps
Activation
F turn the ring to the "AUTO" p osition. the
a ctivation of the function is accompanied
by the display of a message.
When a low level of ambient light is detected
by a sunshine sensor, the number plate
lamps,
si
delamps and dipped beam headlamps
are switched on automatically, without any
action on the part of the driver.
the
y can also
come on if rain is detected, at the same time as
automatic operation of the windscreen wipers.
As soon as the brightness returns to a
sufficient level or after the windscreen wipers
are switched off, the lamps are switched off
automatically.
Deactivation
F turn the ring to another position.
D eactivation of the function is
accompanied by the display of a message.
Operating fault
In the event of a malfunction of the
sunshine sensor, the lighting comes
on, this warning lamp is displayed
In fog or snow, the sunshine sensor
may detect sufficient light. In this
case, the lighting will not come on
automatically.
Do not cover the sunshine sensor,
coupled with the rain sensor and
located in the centre of the windscreen
behind the rear view mirror; the
associated functions would no longer
be controlled.
Contact a P
eu
ge
Ot d
ealer or a qualified
workshop. in the instrument panel accompanied by an
audible signal and/or a message.
Lighting and visibility