Page 236 of 398

234
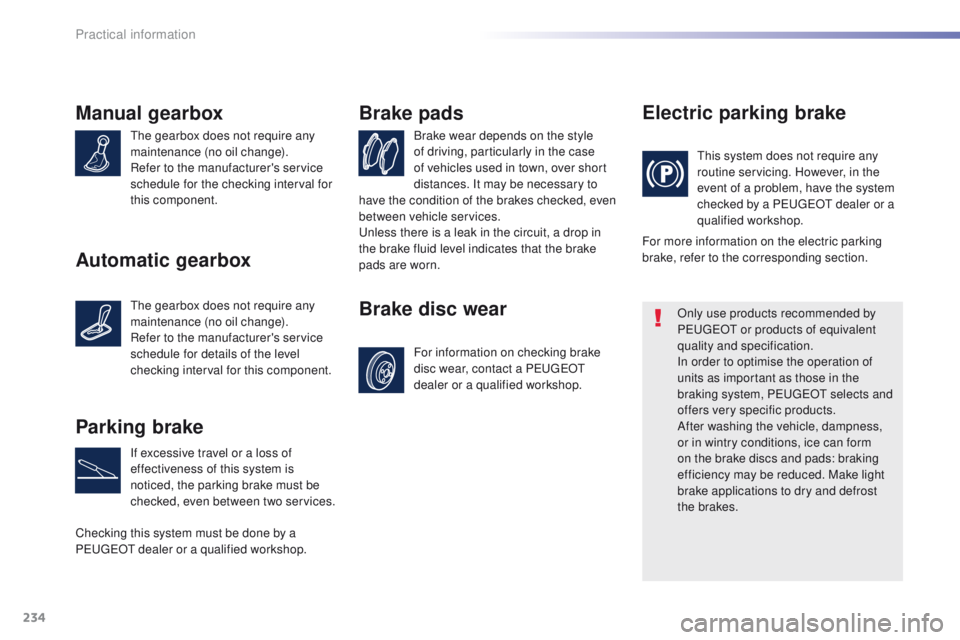
Manual gearbox
the gearbox does not require any
maintenance (no oil change).
Refer to the manufacturer's service
schedule for the checking interval for
this component.Brake wear depends on the style
of driving, particularly in the case
of vehicles used in town, over short
distances. It may be necessary to
Brake pads
For information on checking brake
disc wear, contact a Pe
ugeOt
dealer or a qualified workshop.
Brake disc wear Electric parking brake
this system does not require any
routine servicing. However, in the
event of a problem, have the system
checked by a P
e
uge
Ot
dealer or a
qualified workshop.
Only use products recommended by
P
e
uge
Ot
or products of equivalent
quality and specification.
In order to optimise the operation of
units as important as those in the
braking system, P
e
uge
Ot
selects and
offers very specific products.
After washing the vehicle, dampness,
or in wintry conditions, ice can form
on the brake discs and pads: braking
efficiency may be reduced. Make light
brake applications to dry and defrost
the brakes.
Parking brake
If excessive travel or a loss of
effectiveness of this system is
noticed, the parking brake must be
checked, even between two services.
Checking this system must be done by a
P
e
uge
Ot
dealer or a qualified workshop. have the condition of the brakes checked, even
between vehicle services.
un
less there is a leak in the circuit, a drop in
the brake fluid level indicates that the brake
pads are worn. For more information on the electric parking
brake, refer to the corresponding section.
Automatic gearbox
the gearbox does not require any
maintenance (no oil change).
Refer to the manufacturer's service
schedule for details of the level
checking interval for this component.
Practical information
Page 245 of 398
243
Warning triangle (stowing)
Before leaving your vehicle to set up
and install the triangle, switch on the
hazard warning lamps and put on your
high visibility vest.
th
is safety equipment should be used in
addition to the hazard warning lamps.
Its presence in the vehicle is mandatory.
Placing the triangle in the
road
Refer to the manufacturer's instructions on
unfolding and installing supplied with the
triangle. F
P
lace the triangle behind the vehicle, as
required by the legislation in force in your
c o unt r y.
th
e triangle is available as an
accessory; contact a P
e
uge
Ot
dealer
or a qualified workshop.
th
e storage location for a folded triangle or its
box is under the boot floor.
8
In the event of a breakdown
Page 246 of 398

244
this kit is installed in the storage box, under the
boot floor.
th
is kit consists of a compressor and a sealant
cartridge.
It allows the temporary repair of a tyre.
You are then able to go to the nearest garage.
It is designed to repair most punctures which
could affect the tyre, located on the tyre tread
or shoulder.
Its compressor can be used to check and
adjust the pressure of the tyre.
temporary puncture repair kit
Access to the kit
List of tools
these tools are specific to your vehicle and can
vary according to equipment. Do not use them
for other purposes.
1.
1
2 V compressor.
C
ontains a sealant cartridge for the
temporary repair of a tyre and can also be
used for adjusting tyre pressures.
2.
t
o
wing eye.
th
e tyre inflation pressures are given on
this label.
th
e vehicle's electric system allows the
connection of a compressor for long
enough to inflate a tyre after a puncture
repair or for inflating a small inflatable
accessory.
For more information on towing refer to
the corresponding section.
In the event of a breakdown
Page 250 of 398

248
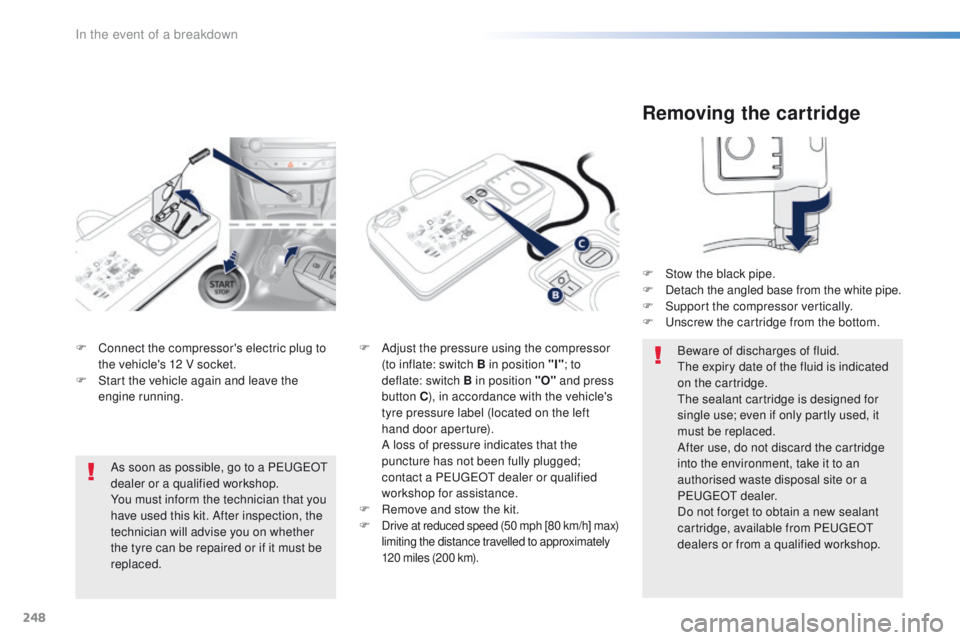
F Connect the compressor's electric plug to the vehicle's 12 V socket.
F
S
tart the vehicle again and leave the
engine running. F
A djust the pressure using the compressor
(to inflate: switch B in position "I" ; to
deflate: switch B
in position "O" and press
button C ), in accordance with the vehicle's
tyre pressure label (located on the left
hand door aperture).
A l
oss of pressure indicates that the
puncture has not been fully plugged;
contact a P
e
uge
Ot
dealer or qualified
workshop for assistance.
F
R
emove and stow the kit.
F
Drive at reduced speed (50 mph [80 km/h] max)
limiting the distance travelled to approximately
120 miles (200 km).
As soon as possible, go to a PeugeOt
dealer or a qualified workshop.
You must inform the technician that you
have used this kit. After inspection, the
technician will advise you on whether
the tyre can be repaired or if it must be
replaced.
Removing the cartridge
F Stow the black pipe.
F D etach the angled base from the white pipe.
F
S
upport the compressor vertically.
F
u
n
screw the cartridge from the bottom.
Beware of discharges of fluid.
th
e expiry date of the fluid is indicated
on the cartridge.
th
e sealant cartridge is designed for
single use; even if only partly used, it
must be replaced.
After use, do not discard the cartridge
into the environment, take it to an
authorised waste disposal site or a
P
e
uge
Ot d
ealer.
Do not forget to obtain a new sealant
cartridge, available from P
e
uge
Ot
dealers or from a qualified workshop.
In the event of a breakdown
Page 251 of 398

249
Checking tyre pressures /
inflating accessories
You can also use the compressor, without
injecting any product, to:
-
c
heck or adjust the pressure of your tyres,
-
i
nflate other accessories (balls, bicycle
tyres...).
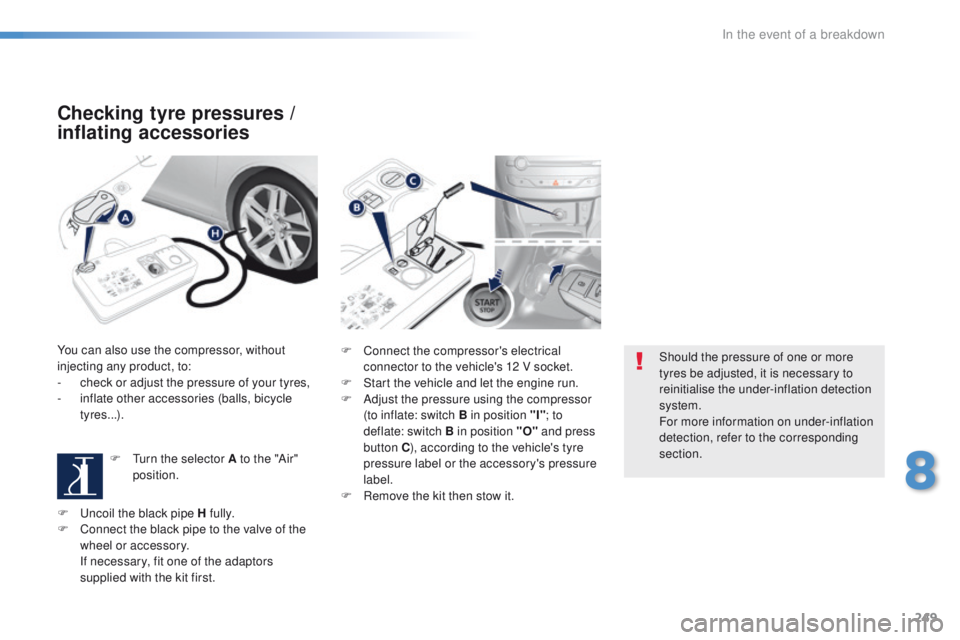
F
t
u
rn the selector A to the "Air"
position. F
C onnect the compressor's electrical
connector to the vehicle's 12 V socket.
F
S
tart the vehicle and let the engine run.
F
A
djust the pressure using the compressor
(to inflate: switch B in position "I" ; to
deflate: switch B in position "O" and press
button C ), according to the vehicle's tyre
pressure label or the accessory's pressure
label.
F
R
emove the kit then stow it.Should the pressure of one or more
tyres be adjusted, it is necessary to
reinitialise the under-inflation detection
system.
For more information on under-inflation
detection, refer to the corresponding
section.
F
u
n
coil the black pipe H fully.
F
C
onnect the black pipe to the valve of the
wheel or accessory.
I
f necessary, fit one of the adaptors
supplied with the kit first.
8
In the event of a breakdown
Page 252 of 398
250
Changing a wheel
the tools are installed in the boot under the
f l o o r.
Access to the tooling
List of tools
these tools are specific to your vehicle and can
vary according to the level of equipment. Do
not use them for other purposes.
1.
Wheelbrace.
F
or removing the wheel trim and removing
the wheel bolts.
2.
J
ack with integral handle.
F
or raising the vehicle. 3.
"
Bolt cover" tool.
F
or removing the bolt protectors (covers)
on alloy wheels.
4.
S
ocket for the security bolts (located in the
glove box).
F
or adapting the wheelbrace to the special
"security" bolts.
5.
t
o
wing eye.
Procedure for changing a wheel with a damaged or punctured tyre for the spare wheel using the tools provided with the vehicle.
For more information on towing, refer to
the corresponding section.
Wheel with trim
When refitting the wheel, refit the trim
starting by placing its notch facing the
valve and press around its edge with
the palm of your hand.
In the event of a breakdown
Page 253 of 398
251
Taking out the wheel
F unscrew the (coloured) central bolt.
F R aise the spare wheel towards you from
the rear.
F
t
a
ke the wheel out of the boot.
Access to the spare wheel
the spare wheel is located in the boot under
t h e f l o o r.
Depending on the country of sale, the spare
wheel may be steel, alloy or of the "space-
saver" type.
Putting the wheel back in place
F Put the wheel back in its housing.
F un screw the (coloured) central bolt by a
few turns then put it in place in the centre
of the wheel.
F
t
i
ghten fully until the central bolt clicks to
retain the wheel correctly. F
P ut the box back in place in the centre of
the wheel and clip it.
F
P
ut the polystyrene storage box back in
place.
8
In the event of a breakdown
Page 259 of 398

257
In some weather conditions (e.g. low
temperature or humidity), the presence
of misting on the internal sur face of the
glass of the headlamps and rear lamps
is normal; it disappears after the lamps
have been on for a few minutes.th
e headlamps are fitted with
polycarbonate glass with a protective
coating:
F
d
o not clean them using a dr y
or abrasive cloth, nor with a
detergent or solvent product,
F
u
se a sponge and soapy water or a
pH neutral product,
F
w
hen using a high pressure washer
on persistent marks, do not keep
the lance directed towards the
lamps or their edges for too long,
so as not to damage their protective
coating and seals.
Changing a bulb should only be done
after the headlamp has been switched
off for several minutes (risk of serious
burns).
F
D
o not touch the bulb directly with
your fingers, use a lint-free cloth.
It is imperative to use only anti-
ultraviolet (
uV
) type bulbs to avoid
damaging the headlamp.
Always replace a failed bulb with a
new bulb with the same type and
specification.
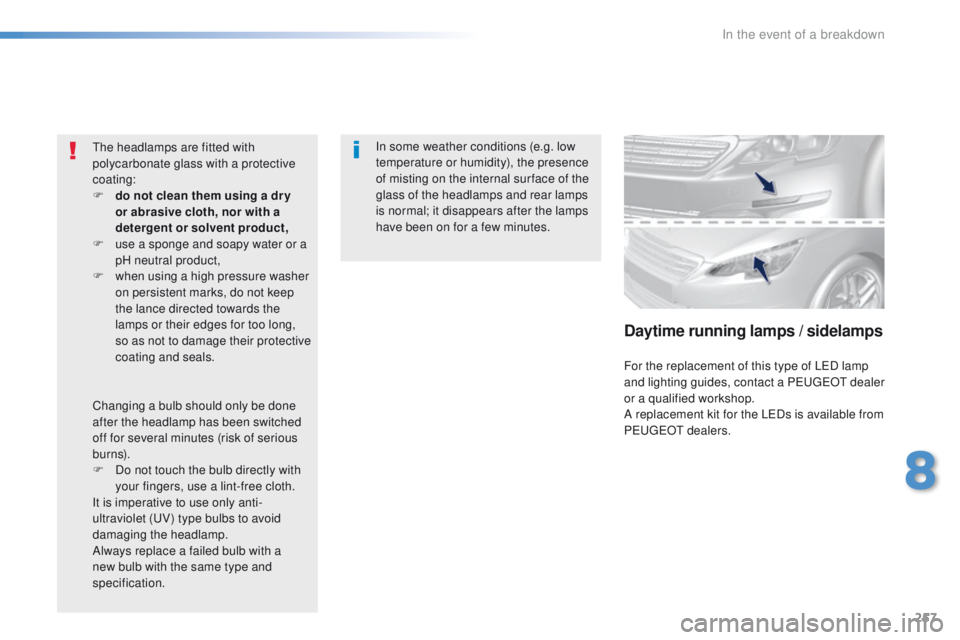
Daytime running lamps / sidelamps
For the replacement of this type of LeD l amp
and lighting guides, contact a Pe ugeOt dealer
or a qualified workshop.
A replacement kit for the L
eD
s is available from
P
e
uge
Ot d
ealers.
8
In the event of a breakdown