2016 PEUGEOT 108 wipers
[x] Cancel search: wipersPage 6 of 268

4
108_en_Chap00b_vue-ensemble_ed01-2016
Keys 31
Remote control 3 2-33
"Keyless
e
n
try and Starting"
system
34-37
Remote control battery
3
3, 37
Starting
7
1, 72-73
exterior
Door mirrors 5 0
Lighting control stalk
9
8 -103
Adjusting the headlamps
1
03
Changing bulbs
1
63-165, 167
-
f
ront lamps
-
d
irection indicator repeaters
Doors
38-40
-
ope
ning / closing
-
c
entral locking
el
ectric windows
4
1
Quarter lights (5 -door)
4
1 Wipers
10
4 -105
Changing a wiper blade
1
44
Boot 39-40te
mporary puncture
repair kit
1
53-157
Reversing camera
9
2
to
w i n g
18 0
Changing bulbs
1
66-167
-
r
ear lamps
-
3
rd brake lamp
-
n
umber plate lamps
Fuel tank, ref uelling
13 8 -13 9
Fuel gauge
26
ele
ctronic stability
programme
107-109
Snow chains
1
40
un
der-inflation detection
9
5-97
ty
re pressures
1
56 -157, 184
Changing a wheel
1
58-162
-
tools
-
r
emoval / fitting
ele
ctric fabric roof
4
2-45
Roof bars
1
44
Accessories
1
42-143
Over view
Page 9 of 268

7
108_en_Chap00b_vue-ensemble_ed01-2016
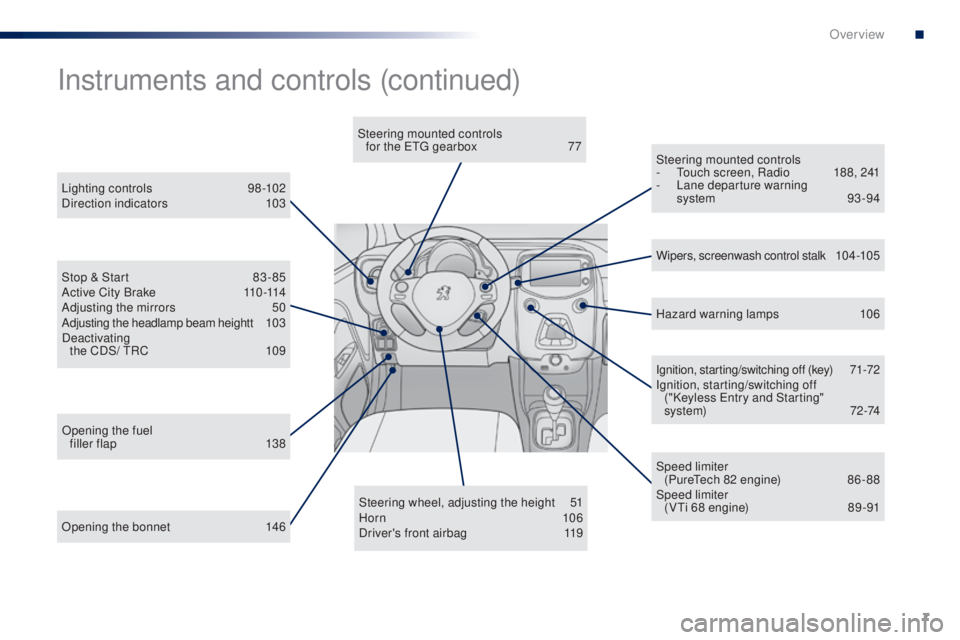
Opening the bonnet 146Steering wheel, adjusting the height
5
1
Horn 10 6
Driver's front airbag 1 19Ignition, starting/switching off (key)
7
1-72
Ignition, starting/switching off ("Keyless e
n
try and Starting"
system)
7
2-74
Steering mounted controls
- t
o
uch screen, Radio
1
88, 241
-
L
ane departure warning
system 93 -94
Instruments and controls (continued)
Lighting controls 9
8-102
Direction indicators 1 03
Stop & Start
8
3 - 85
Active City Brake
1
10 -114
Adjusting the mirrors
5
0
Adjusting the headlamp beam heightt
1
03
Deactivating the CDS/
t
R
C
1
09 Wipers, screenwash control stalk
1
0 4 -10 5
Speed limiter (Pure
te
ch 82 engine)
8
6 - 88
Speed limiter (V
ti 6
8 engine)
8
9 -91
Opening the fuel
filler flap
1
38 Hazard warning lamps
1
06
Steering mounted controls
for the etg gearbox
7
7
.
Over view
Page 103 of 268

101
108_en_Chap05_eclairage-visibilite_ed01-2016
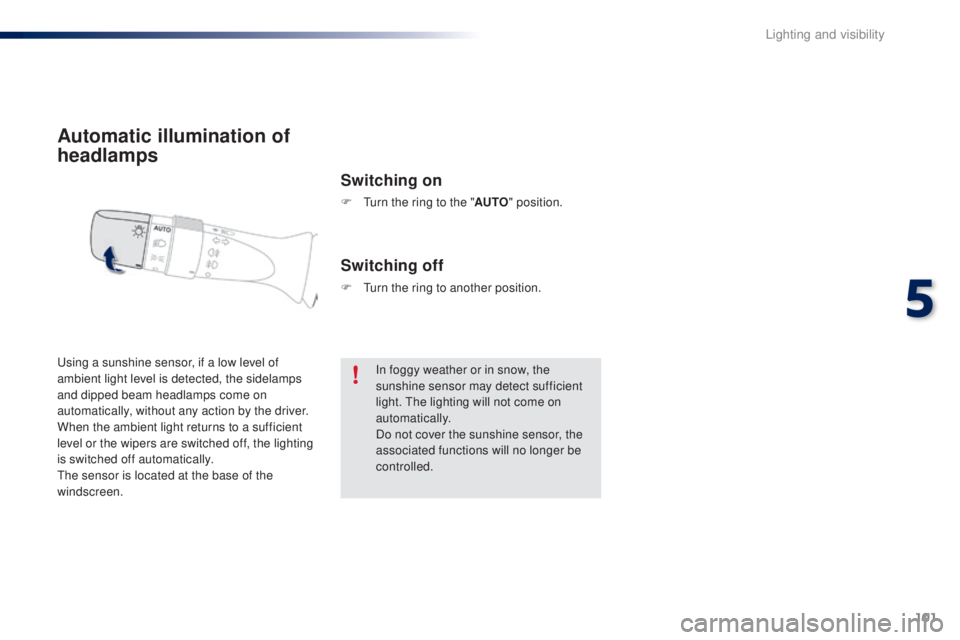
Automatic illumination of
headlamps
Switching on
F turn the ring to the "A uto" position.
us
ing a sunshine sensor, if a low level of
ambient light level is detected, the sidelamps
and dipped beam headlamps come on
automatically, without any action by the driver.
When the ambient light returns to a sufficient
level or the wipers are switched off, the lighting
is switched off automatically.
th
e sensor is located at the base of the
windscreen.
Switching off
F turn the ring to another position.
In foggy weather or in snow, the
sunshine sensor may detect sufficient
light.
t
h
e lighting will not come on
automatically.
Do not cover the sunshine sensor, the
associated functions will no longer be
controlled.
5
Lighting and visibility
Page 106 of 268

104
108_en_Chap05_eclairage-visibilite_ed01-2016
Wiper control stalk
Manual controls
the wipers are controlled directly by the driver.
Windscreen wipers
Wiping speed control stalk: raise or lower the
stalk to the desired position.Single wipe.
Park.
Intermittent wipe.
Normal wipe (moderate rain).
Fast wipe (heavy rain).
Do not operate the wipers on a dry
windscreen.
u
n
der extremely hot or
cold conditions, ensure that the wiper
blades are not stuck to the windscreen
before operating the wipers. In wintry conditions, remove snow, ice
or frost present on the windscreen,
around the wiper arms and blades and
the windscreen seal, before operating
the wipers.
For a single wipe of the windscreen, raise and
release the control stalk.
Lighting and visibility
Page 107 of 268

105
108_en_Chap05_eclairage-visibilite_ed01-2016
Rear wiperRear screenwash
Wiper off, turn the control stalk towards you to
operate the rear screenwash, accompanied by
several sweeps of the rear wiper.
Windscreen wash
turn the ring to this position for a
steady wipe.
Pushing the stalk away from you operates the
wash during wiping.
Pull the wiper stalk towards you.
th
e
windscreen wash, then the windscreen wipers,
operate for a pre-determined time.
Do not use the front or rear screenwash
when the screenwash reservoir is
empty. You risk damaging the pump.
5
Lighting and visibility
Page 143 of 268

141
108_en_Chap07_info-pratiques_ed01-2016
electrical energy economy mode*
System which manages the duration of use of certain functions to conserve a sufficient level of
charge in the battery.
After the engine has stopped, you can still use functions such as the audio system, windscreen
wipers, dipped beam headlamps,
courtesy lamps, etc. for a maximum combined duration of
twenty
minutes.
th
is period may be greatly reduced if the battery is not fully charged. Let the engine run for the duration
specified to ensure that the battery
charge is sufficient.
Do not repeatedly and continuously
restart the engine in order to charge the
battery.
A flat battery prevents the engine from
starting.
Refer to the "Battery" section.
Switching to economy mode
Once this time has elapsed the active functions
are put on standby.
exiting economy mode
these functions are reactivated automatically
next time the vehicle is driven.
to r
estore the use of these functions
immediately, start the engine and let it run for at
least 5 minutes.
*
O
nly on vehicles with the "Keyless e
n
try and
Starting" system.
7
Practical information
Page 180 of 268

178
108_en_Chap08_en-cas-pannes_ed01-2016
Starting using another battery
F Start the engine of the vehicle with the good battery and leave it running for a
few
minutes.
F
O
perate the starter on the broken down
vehicle and let the engine run.
I
f the engine does not start straight
away, switch off the ignition and wait a
few
moments before trying again.
Never try to start the engine by
connecting a battery charger.
Never use a 24 V or higher battery
b o o s t e r.
First check that the slave battery has a
nominal voltage of 12 V and a capacity
at least equal to that of the discharged
battery.
th
e two vehicles must not be in contact
with each other.
Switch off the electrical consumers on
both vehicles (audio system, wipers,
lighting, ...).
en
sure that the jump lead cables do
not pass close to moving parts of the
engine (cooling fan, belts, ...).
Do not disconnect the (+) terminal when
the engine is running. F
W
ait until the engine returns to idle then
disconnect the jump lead cables in the
reverse order.
F
R
efit the plastic cover to the (+) terminal,
if
your vehicle has one.
F
A
llow the engine to run for at least
30
minutes, by driving or with the vehicle
stationary, so that the battery reaches an
adequate state of charge.
When your vehicle's battery is discharged, the
engine can be started using a slave battery
(external or on another vehicle) and jump lead
cables or a battery booster.
F
R
aise the plastic cover on the (+) terminal,
if your vehicle has one.
F
C
onnect the red cable to the positive
terminal (+) of the flat battery A (at the
(+)
of the slave battery B or the booster. F
C
onnect one end of the green or black
cable to the negative terminal (-) of the
slave battery B or the booster (or earth
point on the other vehicle).
F
C
onnect the other end of the green or black
cable to the earth point C on the broken
down vehicle.
In the event of a breakdown
Page 260 of 268

258
108_en_Chap11_index-alpha_ed01-2016
Safety, children .......................11 7, 11 9 , 12 3 -12 7
Screen, touch ............................... .................185
Screen menu map
.................................... 190, 202, 208, 220
Screenwash
.................................................. 105
Screenwash fluid level
............................................................. 150
Seat adjustment
...............................
.........46, 48
Seat belts
................................. 4
8 , 115 -117, 12 9
Seats, rear
................................................. 4 7, 4 8
Selector, gear
.................................................. 77
Servicing
...............................
............................9
Setting the clock
....................................... 29, 30
Sidelamps
...................................... 98, 16 4, 166
Side repeater
..............................
..................167
Snow chains
.................................................. 14
0
Speed limiter
.............................................86, 89
Speedometer
............................................ 11, 12
Starting the vehicle
.............................71, 72, 74
Starting using another battery
......................................................... 17
8
Steering mounted controls, audio
................................................... 18 8 , 2 41
Steering wheel adjustment
.................................................... 51
S
topping the vehicle
...........................71, 72, 74
Stop & Start
......................... 28, 83, 85, 151, 177
Storage
...................................................... 63, 64
Sun visor
................................................... 63, 64
S
U
under floor storage ......................................... 69un
der-inflation (detection) ................ 1
9, 95, 157
unl
ocking
..............................
....................32, 34
u
SB
.......................................... 63, 65, 198, 245Warning lamps
..........................................
15 -25
Washing (advice) ........................................... 152
Wash-wipe, rear
............................................
105
Weights
.........................................................
182
Wheel, spare
.................................................
15 8
Wheel traction control (
tR
C)
.................
10
7-109
Window controls
.............................................
41
Wipers
...........................................................
104
W
tables of fuses .............................................. 168t
a n k , f u e l ................................................. 26, 13 8
te
lephone
............................................. 20 4, 247
TV
Ventilation .............................. ......52, 54, 55, 58
Visibility ........................................................... 52
te
mporary puncture
repair kit
...............
.........................................
69
th
ird brake lamp
...........................................
167
thr
ee flashes function
(direction indicators)
...................................
103
tim
e
..........................................................
29, 30
to
o l s
..............................................................
15 8
to
uch screen
................................................. 185
to
uch screen
( M e nu s)
.......................................................
189
to
w i n g
.....................................................
69, 180
tra
ction control (
tR
C)
...............
17, 24, 107-109
tr
affic information (
tA
)
.........................
191, 24 3
tr
ip computer
............................................
2 7, 2 8
tr
ip distance recorder
.....................................
26
ty
re pressures
..............................................
18 4
ty
re under-inflation detection
...........
19, 95, 157
Alphabetical index