2016 NISSAN TITAN traction control
[x] Cancel search: traction controlPage 109 of 636
Operation
The MIL will come on in one of two ways:● MIL on steady — An emission control system
malfunction has been detected. Check the
fuel-filler cap. If the LOOSE FUEL CAP
warning message (if so equipped) is dis-
played in the odometer, and the fuel-filler
cap is loose or missing, tighten or install the
cap and continue to drive the vehicle.
The
light should turn off after a few
driving trips. If the
light does not turn
off after a few driving trips, have the vehicle
inspected. It is recommended that you visit a
NISSAN dealer for this service. You do not
need to have your vehicle towed to the
dealer.
● MIL blinking — An engine misfire has been
detected which may damage the emission
control system. To reduce or avoid emission
control system damage:
– do not drive at speeds above 45 mph (72 km/h);
– avoid hard acceleration or deceleration;
– avoid steep uphill grades;
– if possible, reduce the amount of cargo being hauled. The MIL may stop blinking and come on steady.
Have the vehicle inspected. It is recommended
that you visit a NISSAN dealer for this service.
You do not need to have your vehicle towed to the
dealer.
CAUTION
Continued vehicle operation without hav-
ing the emission control system checked
and repaired as necessary could lead to
poor driveability, reduced fuel economy,
and possible damage to the emission con-
trol system.
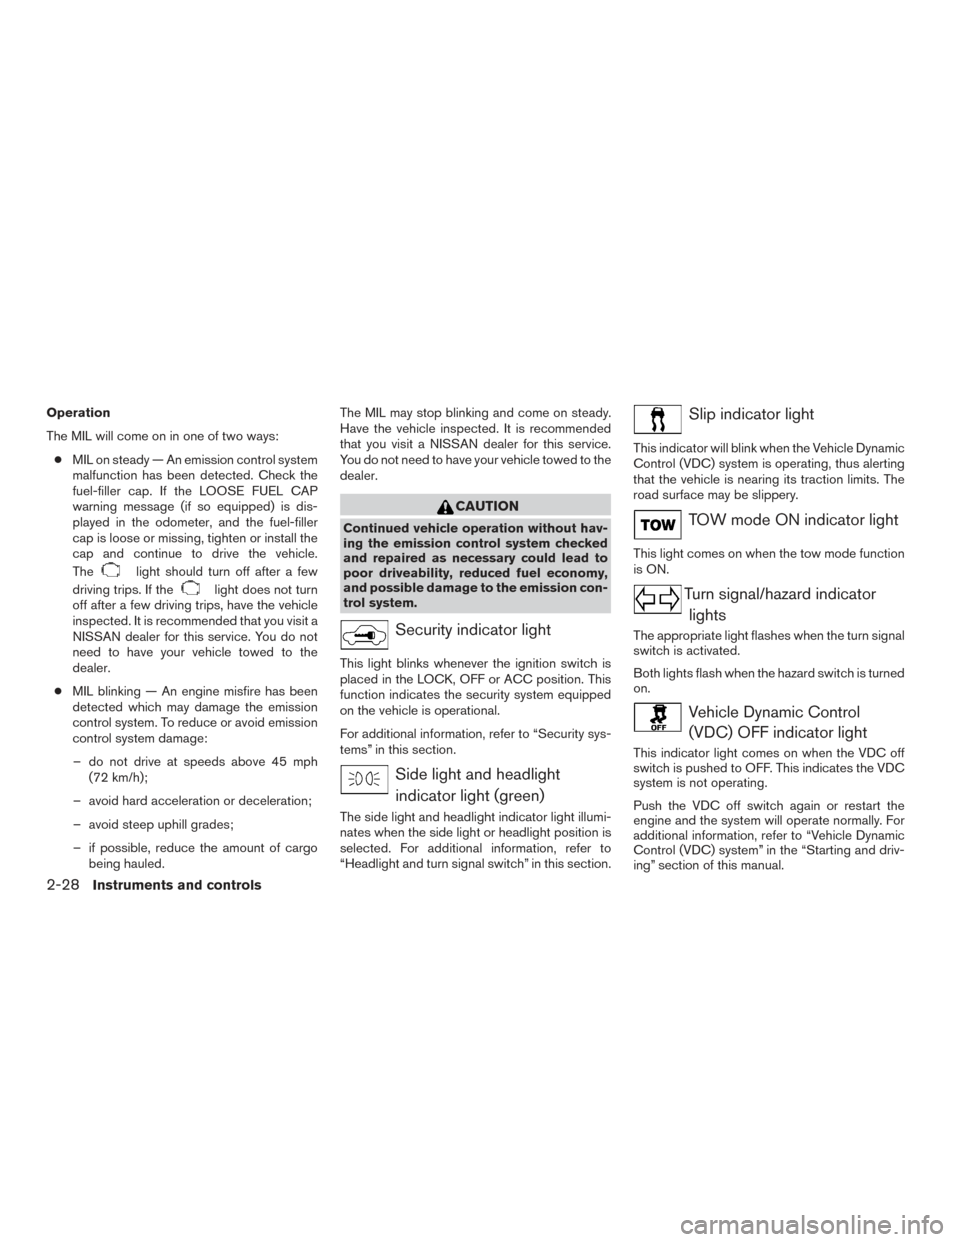
Security indicator light
This light blinks whenever the ignition switch is
placed in the LOCK, OFF or ACC position. This
function indicates the security system equipped
on the vehicle is operational.
For additional information, refer to “Security sys-
tems” in this section.
Side light and headlight
indicator light (green)
The side light and headlight indicator light illumi-
nates when the side light or headlight position is
selected. For additional information, refer to
“Headlight and turn signal switch” in this section.
Slip indicator light
This indicator will blink when the Vehicle Dynamic
Control (VDC) system is operating, thus alerting
that the vehicle is nearing its traction limits. The
road surface may be slippery.
TOW mode ON indicator light
This light comes on when the tow mode function
is ON.
Turn signal/hazard indicator lights
The appropriate light flashes when the turn signal
switch is activated.
Both lights flash when the hazard switch is turned
on.
Vehicle Dynamic Control(VDC) OFF indicator light
This indicator light comes on when the VDC off
switch is pushed to OFF. This indicates the VDC
system is not operating.
Push the VDC off switch again or restart the
engine and the system will operate normally. For
additional information, refer to “Vehicle Dynamic
Control (VDC) system” in the “Starting and driv-
ing” section of this manual.
2-28Instruments and controls
Page 262 of 636
USB (Universal Serial Bus)
Connection Port
WARNING
Do not connect, disconnect or operate the
USB device while driving. Doing so can be
a distraction. If distracted you could lose
control of your vehicle and cause an acci-
dent or serious injury.
CAUTION
●Do not force the USB device into the
USB port. Inserting the USB device
tilted or up-side-down into the port may
damage the port. Make sure that the
USB device is connected correctly into
the USB port.
● Do not grab the USB port cover (if so
equipped) when pulling the USB device
out of the port. This could damage the
port and the cover.
● Do not leave the USB cable in a place
where it can be pulled unintentionally.
Pulling the cable may damage the port.
The vehicle is not equipped with a USB device.
USB devices should be purchased separately as
necessary. This system cannot be used to format USB de-
vices. To format a USB device, use a personal
computer.
In some jurisdictions, the USB device for the front
seats plays only sound without images for regu-
latory reasons, even when the vehicle is parked.
This system supports various USB memory de-
vices, USB hard drives and iPod® players. Some
USB devices may not be supported by this sys-
tem.
● Partitioned USB devices may not play cor-
rectly.
● Some characters used in other languages
(Chinese, Japanese, etc.) may not appear
properly in the display. Using English lan-
guage characters with a USB device is rec-
ommended.
General notes for USB use ● Refer to your device manufacturer’s owner
information regarding the proper use and
care of the device.
Notes for iPod® use
iPod® is a trademark of Apple Inc., registered in
the U.S. and other countries. ●
Improperly plugging in the iPod® may cause
a checkmark to be displayed on and off
(flickering) . Always make sure that the
iPod® is connected properly.
● An iPod® nano (1st Generation) may remain
in fast forward or rewind mode if it is con-
nected during a seek operation. In this case,
please manually reset the iPod®.
● An iPod® nano (2nd Generation) will con-
tinue to fast-forward or rewind if it is discon-
nected during a seek operation.
● An incorrect song title may appear when the
Play Mode is changed while using an iPod®
nano (2nd Generation) .
● Audiobooks may not play in the same order
as they appear on an iPod®.
● Large video files cause slow responses in an
iPod®. The vehicle center display may mo-
mentarily black out, but will soon recover.
● If an iPod® automatically selects large video
files while in the shuffle mode, the vehicle
center display may momentarily black out,
but will soon recover.
Monitor, climate, audio, phone and voice recognition systems4-51
Page 280 of 636
SEEK/TRACK (Reverse orFast Forward) buttons
Press and hold the
SEEK button orTRACK button for 1.5 seconds while the com-
pact disc is playing to reverse or fast forward the
track being played. The compact disc plays at an
increased speed while reversing or fast forward-
ing. When the button is released, the compact
disc returns to normal play speed.
SEEK/TRACK buttons
Press the
SEEK button while a CD or
MP3/WMA CD is playing to return to the begin-
ning of the current track. Press the
SEEK
button several times to skip backward several
tracks.
Press the
TRACK button while a CD or
MP3/WMA CD is playing to advance one track.
Press the
TRACK button several times to
skip forward several tracks. If the last track on a
CD is skipped, the first track on the disc is played.
If the last track in a folder of an MP3/WMA CD is
skipped, the first track of the next folder is played. AUX button
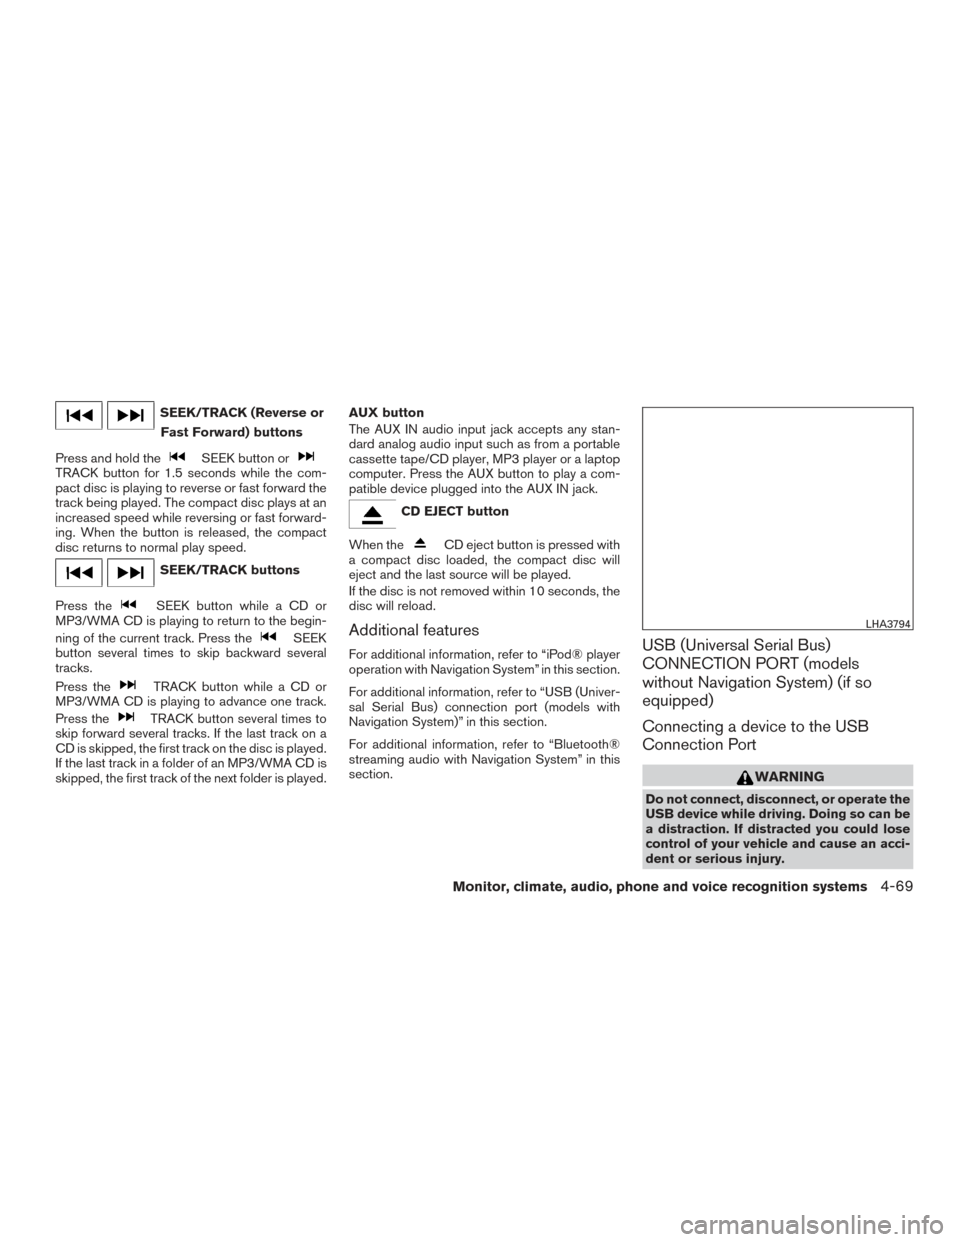
The AUX IN audio input jack accepts any stan-
dard analog audio input such as from a portable
cassette tape/CD player, MP3 player or a laptop
computer. Press the AUX button to play a com-
patible device plugged into the AUX IN jack.
CD EJECT button
When the
CD eject button is pressed with
a compact disc loaded, the compact disc will
eject and the last source will be played.
If the disc is not removed within 10 seconds, the
disc will reload.
Additional features
For additional information, refer to “iPod® player
operation with Navigation System” in this section.
For additional information, refer to “USB (Univer-
sal Serial Bus) connection port (models with
Navigation System)” in this section.
For additional information, refer to “Bluetooth®
streaming audio with Navigation System” in this
section.USB (Universal Serial Bus)
CONNECTION PORT (models
without Navigation System) (if so
equipped)
Connecting a device to the USB
Connection Port
WARNING
Do not connect, disconnect, or operate the
USB device while driving. Doing so can be
a distraction. If distracted you could lose
control of your vehicle and cause an acci-
dent or serious injury.
LHA3794
Monitor, climate, audio, phone and voice recognition systems4-69
Page 282 of 636
The current play pattern of the USB device is
displayed on the screen unless no pattern is
applied.
RPT (repeat) button
When the RPT (repeat) button is pressed while
an audio file on the USB device is playing, the
play pattern can be changed as follows:
1 Folder Repeat→1 Track Repeat →OFF
1 Track Repeat: the current track will be re-
peated.
1 Folder Repeat: the current folder will be re-
peated.
OFF: No repeat play pattern is applied. The indi-
cator on the display will turn off.
The current play pattern of the USB device is
displayed on the screen unless no pattern is
applied.
TUNE/SCROLL knob (If so equipped)
If there are multiple folders with audio files on the
USB device, turn the TUNE/SCROLL knob to
change folders. Turn the knob to the left to skip
back a folder. Turn the knob to the right to skip
ahead a folder. If there is only one folder of audio
files on the USB device, turning the
TUNE/SCROLL knob in either direction will re-
turn to the first track on the USB device. TUNE/FOLDER knob (if so equipped)
If there are multiple folders with audio files on the
USB device, turn the TUNE/FOLDER knob to
change folders. Turn the knob to the left to skip
back a folder. Turn the knob to the right to skip
ahead a folder. If there is only one folder of audio
files on the USB device, turning the
TUNE/FOLDER knob in either direction will re-
turn to the first track on the USB device.
USB (Universal Serial Bus)
CONNECTION PORT (models with
Navigation System) (if so equipped)
Connecting a device to the USB
Connection Port
WARNING
Do not connect, disconnect, or operate the
USB device while driving. Doing so can be
a distraction. If distracted you could lose
control of your vehicle and cause an acci-
dent or serious injury.
LHA3794
Monitor, climate, audio, phone and voice recognition systems4-71
Page 284 of 636
Press theSEEK/TRACK while an audio
file on the USB device is playing to advance one
track. Press the
SEEK/TRACK several
times to skip forward several tracks. If the last
track in a folder on the USB device is skipped, the
first track of the next folder is played.
Random and repeat play mode
While files on a USB device are playing, the play
pattern can be altered so that songs are repeated
or played randomly.
Random
Touch the “Random” key to apply a random play
pattern to the USB device. When the Random
mode is active, the icon will illuminate. By touch-
ing the “Random” key again, the ”Random
Folder” key appears. By touching the “Random”
key once more, the “Random All” key appears. To
cancel Random mode, touch the “Random” key
until no icons are illuminated.
Repeat
Touch the “Repeat” key to apply a repeat play
pattern to the USB device. When the Repeat
mode is active, the icon will illuminate. By touch-
ing the “Repeat” key again, the ”Repeat Track”
key appears. By touching the “Repeat” key once
more, the “Repeat Folder” key appears. . To can-
cel Repeat mode, touch the “Repeat” key until no
icons are illuminated.
iPod®* PLAYER OPERATION
WITHOUT NAVIGATION SYSTEM (if
so equipped)
Connecting iPod®
WARNING
Do not connect, disconnect, or operate the
USB device while driving. Doing so can be
a distraction. If distracted you could lose
control of your vehicle and cause an acci-
dent or serious injury.
CAUTION
● Do not force the USB device into the
USB port. Inserting the USB device
tilted or up-side-down into the port may
damage the port. Make sure that the
USB device is connected correctly into
the USB port.
● Do not grab the USB port cover (if so
equipped) when pulling the USB device
out of the port. This could damage the
port and the cover.
● Do not leave the USB cable in a place
where it can be pulled unintentionally.
Pulling the cable may damage the port.
Refer to your device manufacturer’s owner infor-
mation regarding the proper use and care of the
device.
To connect an iPod® to the vehicle so that the
iPod® can be controlled with the audio system
controls and display screen, use the USB con-
nection port located on the center console below
the heater and air conditioner controls. Connect
the iPod®-specific end of the cable to the iPod®
and the USB end of the cable to the USB con-
nection port on the vehicle. If your iPod® sup-
ports charging via a USB connection, its battery
LHA3794
Monitor, climate, audio, phone and voice recognition systems4-73
Page 286 of 636
All Repeat: all songs in the current list are re-
peated.
Repeat Off: no repeat play pattern is applied.
RANDOM (RDM)
When the RDM button is pressed while a track is
being played, the play pattern can be changed as
follows:
Shuffle Off→Track Shuffle →Album Shuffle →
Shuffle Off
Track Shuffle: the tracks in the current list will be
played randomly.
Album Shuffle: the albums in the current list will
be played randomly.
Shuffle Off: no random play pattern is applied.
BACK button
When the
BACK button is pressed, it re-
turns to the previous menu.
iPod®* PLAYER OPERATION WITH
NAVIGATION SYSTEM (if so
equipped)
Connecting iPod®
WARNING
Do not connect, disconnect, or operate the
USB device while driving. Doing so can be
a distraction. If distracted you could lose
control of your vehicle and cause an acci-
dent or serious injury.
CAUTION
● Do not force the USB device into the
USB port. Inserting the USB device
tilted or up-side-down into the port may
damage the port. Make sure that the
USB device is connected correctly into
the USB port.
● Do not grab the USB port cover (if so
equipped) when pulling the USB device
out of the port. This could damage the
port and the cover.
● Do not leave the USB cable in a place
where it can be pulled unintentionally.
Pulling the cable may damage the port.
Refer to your device manufacturer’s owner infor-
mation regarding the proper use and care of the
device.
To connect an iPod® to the vehicle so that the
iPod® can be controlled with the audio system
controls and display screen, use the USB connec-
tion port located on the center console below the
heater and air conditioner controls. Connect the
iPod®-specific end of the cable to the iPod® and
the USB end of the cable to the USB connection
port on the vehicle. If your iPod® supports charg-
ing via a USB connection, its battery will be
charged while connected to the vehicle with the
ignition switch in the ACC or ON position.
LHA3794
Monitor, climate, audio, phone and voice recognition systems4-75
Page 295 of 636
NissanConnectSMServices is a suite of telemat-
ics tools that provide emergency preparedness,
remote access, customizable alerts and conve-
nience services. This feature is an option on
Navigation equipped vehicles. For additional in-
formation, refer to the separate Navigation Sys-
tem Owner’s Manual. Apple Siri® Eyes Free personal assistant can be
accessed from the vehicle. Siri Eyes Free can be
accessed in Siri Eyes Free mode to reduce user
distraction. In this mode, Siri Eyes Free is avail-
able for interaction by voice control. After con-
necting a compatible Apple device by using
Bluetooth®, Siri Eyes Free can be activated from
the
TALK switch on the steering wheel.
Siri® is a trademark of Apple Inc., registered in
the U.S. and other countries.
● Some Siri Eyes Free functions, such as dis-
playing pictures or opening apps, may not
be available while driving.
● For best results, always update your device
to the latest software version.
● Keep the interior of the vehicle as quiet as
possible. Close the windows to eliminate the
surrounding noises (traffic noises, vibration
sounds, etc.) , which may prevent the system
from recognizing the voice commands cor-
rectly.
● For functions that can be used in Siri Eyes
Free, please refer to the Apple website.
REQUIREMENTS
Siri is only available on the iPhone® 4S or later.
Devices released before iPhone® 4S are not
supported by the Siri Eyes Free system. Visit
www.apple.com/ios/siri for details about device
compatibility.
Siri must be enabled on the phone. Please check
phone settings.
If the device has a lock screen, Siri must be
accessible from the lock screen. Please check
phone settings.
For best results, always update your device to the
latest software version.
NISSANCONNECTSMSERVICES (if so
equipped) SIRI® EYES FREE (if so equipped)
4-84Monitor, climate, audio, phone and voice recognition systems
Page 400 of 636
The transfer case 4WD shift switch is used to
select either 2WD or 4WD depending on the
driving conditions. There are three types of drive
modes available, 2WD, 4H and 4LO.
The 4WD shift switch electronically controls the
transfer case operation. Rotate the switch to
move between each mode, 2WD, 4H and 4LO.
To change into or out of 4LO, the vehicle
MUST be stationary, shift the shift lever to
(N) Neutral, and depress the brake pedal.
The switch must be pushed and turned to
select 4LO.
WARNING
●When parking, apply the parking brake
before stopping the engine and make
sure that the 4WD shift indicator light is
on and the ATP warning light goes off.
Otherwise, the vehicle could unexpect-
edly move even if the automatic trans-
mission is in the P position.
● The 4LO indicator light must stop blink-
ing and remain illuminated or turn off
before shifting the transmission into
gear. If the shift lever is shifted from the
“N” position to any other gear when the
4LO indicator light is blinking, the ve-
hicle may move unexpectedly.
CAUTION
● Never shift the 4WD shift switch be-
tween 4LO and 4H while driving.
● The 4H position provides greater trac-
tion. Avoid excessive speed, as it will
cause increased fuel consumption and
higher oil temperatures, and could
damage drivetrain components. Speeds
over 62 mph (100 km/h) in 4H is not
recommended.
● The 4LO position provides maximum
power and traction. Avoid raising ve-
hicle speed excessively, as the maxi-
mum speed is approximately 31 mph
(50 km/h).
● When driving straight, shift the 4WD
shift switch to the 2WD or 4H position.
Do not move the 4WD shift switch when
making a turn or reversing.
● Do not shift the 4WD shift switch (be-
tween 2WD and 4H) while driving on
steep downhill grades. Use the engine
brake and low automatic transmission
gears (D1 or D2) for engine braking.
● Do not operate the 4WD shift switch
(between 2WD and 4H) with the rear
wheels spinning. ●
Do not drive on dry hard surface roads
in the 4H or 4LO position. Driving on dry
hard surfaces in 4H or 4LO may cause
unnecessary noise and tire wear.
NISSAN recommends driving in the
2WD position under these conditions.
● The 4WD transfer case may not be
shifted between 4H and 4LO at low am-
bient temperatures and the transfer
4LO position indicator light may blink
even when the 4WD shift switch is
shifted. After driving for a while you can
change the 4WD transfer case between
4H and 4LO.
When driving on rough roads, ● Set the 4WD shift switch to 4H or 4LO.
● Drive carefully according to the road surface
conditions.
When the vehicle is stuck, ● Set the 4WD shift switch to 4H or 4LO.
● Place stones or wooden blocks under the
tires to free the vehicle.
Starting and driving5-47