2016 NISSAN ROGUE light
[x] Cancel search: lightPage 85 of 478
Repair and replacement procedure
The front air bags, side air bags, curtain air bags
and pretensioner(s) are designed to inflate on a
one-time-only basis. As a reminder, unless it is
damaged, the supplemental air bag warning light
remains illuminated after inflation has occurred.
These systems should be repaired and/or re-
placed as soon as possible. It is recommended
that you visit a NISSAN dealer for this service.
When maintenance work is required on the ve-
hicle, the front air bags, side air bags, curtain air
bags, pretensioner(s) and related parts should be
pointed out to the person performing the mainte-
nance. The ignition switch should always be
placed in the LOCK position when working under
the hood or inside the vehicle.
WARNING
●Once a front air bag, side air bag, or
curtain air bag has inflated, the air bag
module will not function again and
must be replaced. Additionally, the acti-
vated pretensioner(s) must also be re-
placed. The air bag module and preten-
sioner(s) should be replaced. It is
recommended that you visit a NISSAN
dealer for this service. However, the air
bag module and pretensioner(s) cannot
be repaired. ●
The front air bag, side air bag, curtain
air bag systems and the pretensioner
system should be inspected if there is
any damage to the front end or side
portion of the vehicle. It is recom-
mended that you visit a NISSAN dealer
for this service.
● If you need to dispose of the supple-
mental air bag or pretensioner systems
or scrap the vehicle, it is recommended
that you visit a NISSAN dealer. Incorrect
disposal procedures could cause per-
sonal injury.
● If there is an impact to your vehicle from
any direction, your Occupant Classifica-
tion Sensor (OCS) should be checked to
verify it is still functioning correctly. It is
recommended that you visit a NISSAN
dealer for this service. The OCS should
be checked even if no air bags deploy as
a result of the impact. Failure to verify
proper OCS function may result in an
improper air bag deployment resulting
in injury or death.
1-66Safety—Seats, seat belts and supplemental restraint system
Page 87 of 478
2 Instruments and controls
Instrument panel...................................2-2
Meters and gauges ................................2-3
Speedometer and odometer .....................2-4
Tachometer ....................................2-5
Engine coolant temperature gauge ...............2-5
Fuel gauge ....................................2-6
Compass (if so equipped) ..........................2-6
Compass display ...............................2-7
Warning lights, indicator lights and audible
reminders ........................................ 2-10
Checking lights ............................... 2-11
Warning lights ................................ 2-11
Indicator lights ................................ 2-15
Audible reminders ............................. 2-18
Vehicle Information Display ........................2-19
How to use the vehicle information display .......2-19
Startup display ................................ 2-19
Main Menu Selections ......................... 2-20
Resetting the trip computer .....................2-21
Settings ...................................... 2-21
Vehicle information display warnings and
indicators ..................................... 2-29
Security systems ................................. 2-32Vehicle security system
......................... 2-32
NISSAN vehicle immobilizer system .............2-33
Wiper and washer switch ......................... 2-34
Switch operation .............................. 2-34
Rear switch operation .......................... 2-35
Rear window and outside mirror (if so equipped)
defroster switch .................................. 2-36
Headlight and turn signal switch ....................2-37
Headlight control switch ........................ 2-37
Daytime running light system ....................2-40
Instrument brightness control ...................2-40
Turn signal switch ............................. 2-41
Fog light switch (if so equipped) ................2-41
Horn ............................................ 2-42
Heated seats (if so equipped) ......................2-42
Vehicle Dynamic Control (VDC) off switch ...........2-43
All-wheel
drive (AWD) lock switch (if so equipped) . . . 2-44
SPORT mode switch (if so equipped) ...............2-44
Hill descent control switch (if so equipped) ..........2-44
Warning systems switch (if so equipped) ............2-45
E-call (SOS) switch (if so equipped) ................2-46
Power outlets .................................... 2-46
12v outlets ................................... 2-46
Page 88 of 478
Extended storage switch.......................... 2-48
Storage ......................................... 2-49
Seatback pockets ............................. 2-49
Sunglasses holder ............................. 2-50
Cup holders .................................. 2-50
Glove box .................................... 2-52
Console box .................................. 2-53
Luggage hooks ................................ 2-53
Cargo area storage bin (if so equipped) ..........2-54
Divide-n-hide® adjustable floor (if so
equipped) .................................... 2-54Cargo cover (if so equipped)
....................2-55
Roof rack (if so equipped) ......................2-56
Windows ........................................ 2-57
Power windows ............................... 2-57
Power moonroof (if so equipped) ...................2-60
Interior lights ..................................... 2-62
Console light .................................. 2-63
Map lights .................................... 2-63
Personal Lights (if so equipped) .................2-64
Cargo light ...................................... 2-64
Page 89 of 478
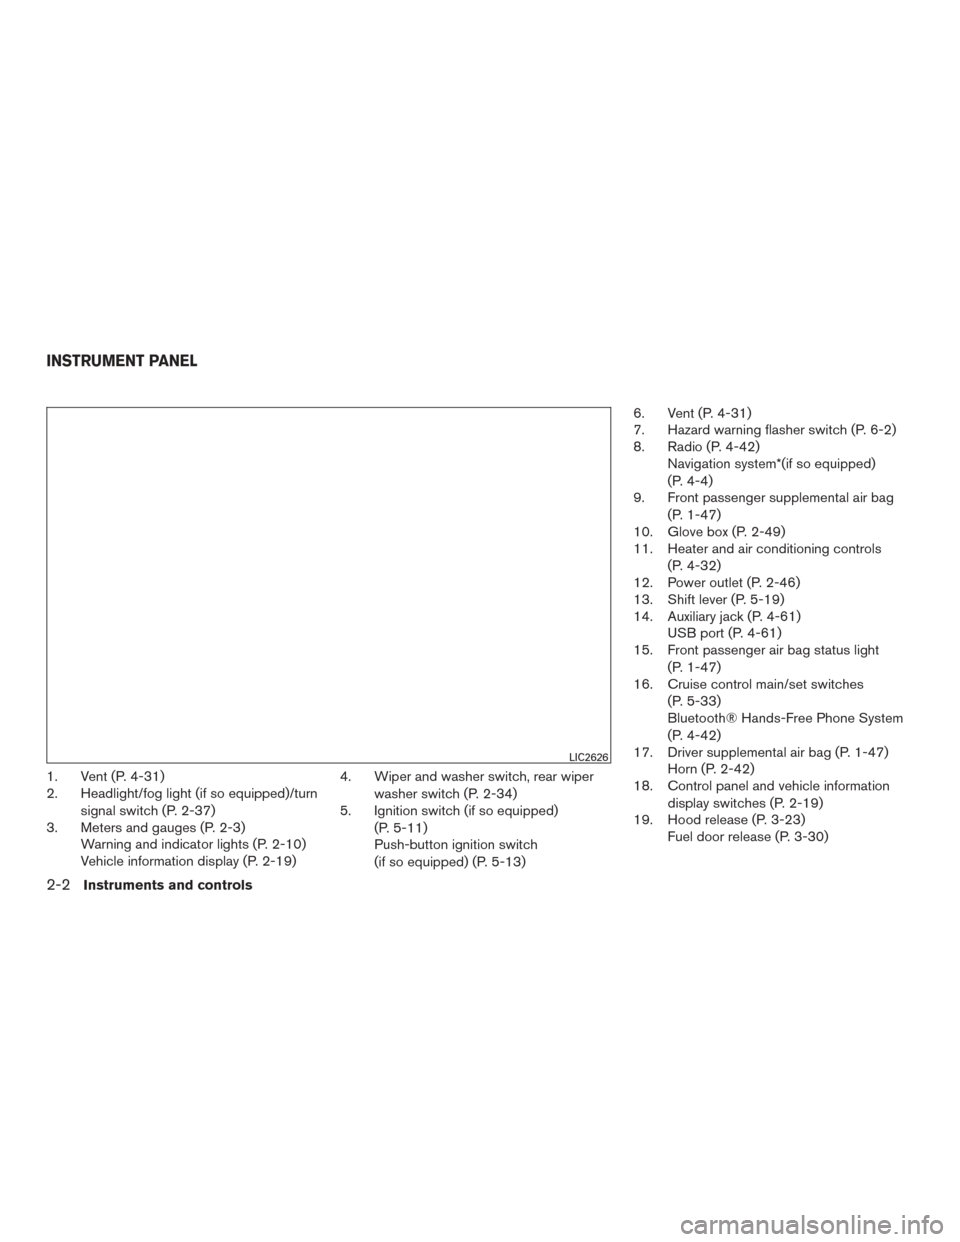
1. Vent (P. 4-31)
2. Headlight/fog light (if so equipped)/turnsignal switch (P. 2-37)
3. Meters and gauges (P. 2-3) Warning and indicator lights (P. 2-10)
Vehicle information display (P. 2-19) 4. Wiper and washer switch, rear wiper
washer switch (P. 2-34)
5. Ignition switch (if so equipped)
(P. 5-11)
Push-button ignition switch
(if so equipped) (P. 5-13) 6. Vent (P. 4-31)
7. Hazard warning flasher switch (P. 6-2)
8. Radio (P. 4-42)
Navigation system*(if so equipped)
(P. 4-4)
9. Front passenger supplemental air bag
(P. 1-47)
10. Glove box (P. 2-49)
11. Heater and air conditioning controls
(P. 4-32)
12. Power outlet (P. 2-46)
13. Shift lever (P. 5-19)
14. Auxiliary jack (P. 4-61) USB port (P. 4-61)
15. Front passenger air bag status light
(P. 1-47)
16. Cruise control main/set switches
(P. 5-33)
Bluetooth® Hands-Free Phone System
(P. 4-42)
17. Driver supplemental air bag (P. 1-47) Horn (P. 2-42)
18. Control panel and vehicle information
display switches (P. 2-19)
19. Hood release (P. 3-23) Fuel door release (P. 3-30)
LIC2626
INSTRUMENT PANEL
2-2Instruments and controls
Page 90 of 478
20. Vehicle Dynamic Control (VDC) OFFswitch (P. 2-43)
SPORT mode switch (P. 5-23)
ECO mode switch (if so equipped)
(P. 5-23)
Warning system switch
(if so equipped) (P. 2-45)
Power liftgate switch (if so equipped)
(P. 3-24)
Power liftgate main switch
(if so equipped) (P. 3-24)
All-Wheel Drive (AWD) lock switch
(if so equipped) (P. 2-44)
Hill descent control switch
(if so equipped) (P. 2-44)
21. Instrument brightness control (P. 2-37) Twin trip odometer reset switch (P. 2-3)
*: Refer to the separate Navigation System Own-
er’s Manual (if so equipped) .
Refer to the page number indicated in pa-
rentheses for operating details.
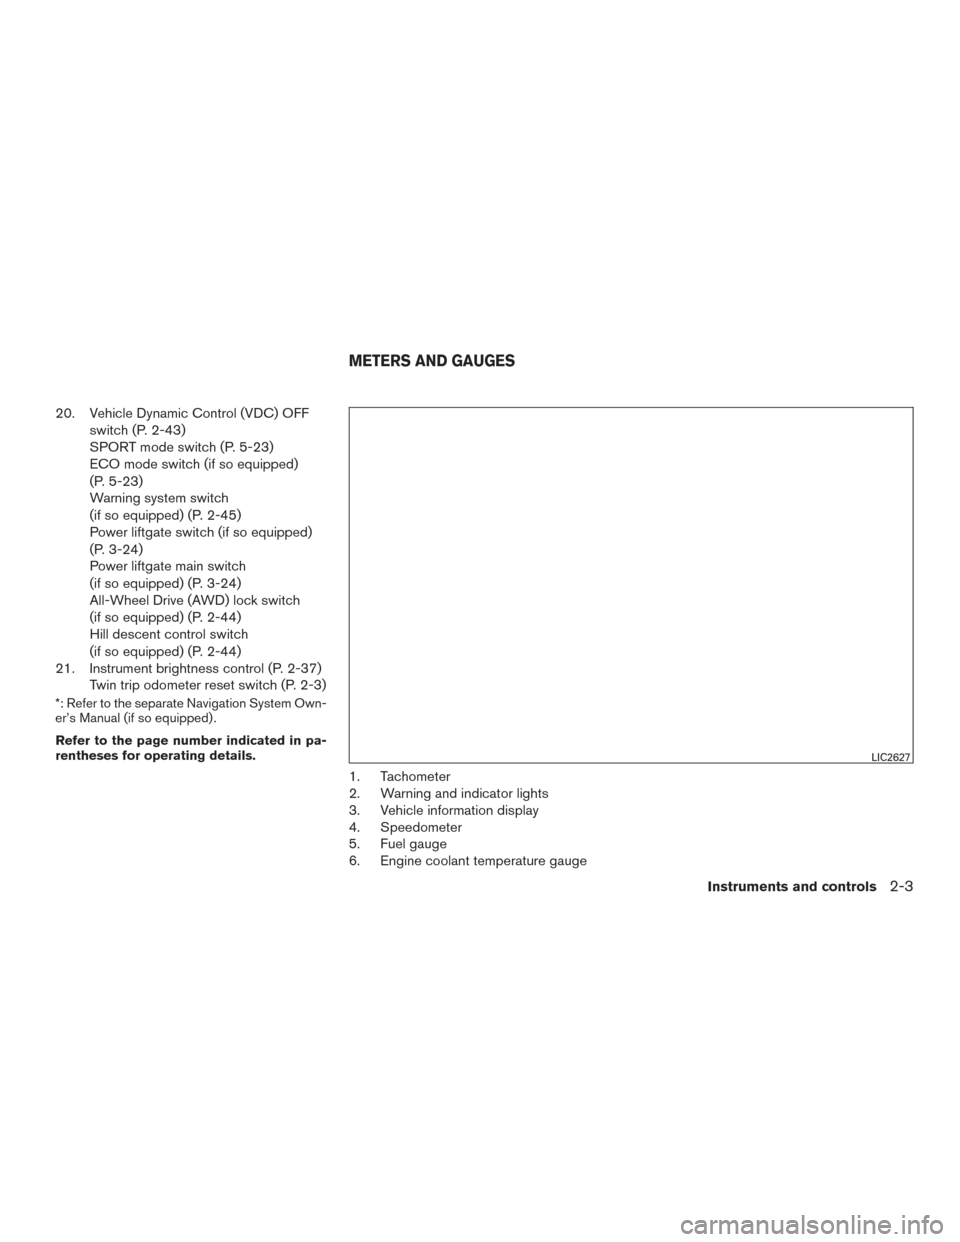
1. Tachometer
2. Warning and indicator lights
3. Vehicle information display
4. Speedometer
5. Fuel gauge
6. Engine coolant temperature gauge
LIC2627
METERS AND GAUGES
Instruments and controls2-3
Page 93 of 478
FUEL GAUGE
The gauge indicates theapproximatefuel level
in the tank.
The gauge may move slightly during braking,
turning, acceleration, or going up or down hills.
The gauge needle returns to 0 (Empty) after the
ignition switch is placed in the OFF position.
The low fuel warning message appears in the
vehicle information display when the amount of
fuel in the tank is getting low.
Refill the fuel tank before the gauge regis-
ters 0 (Empty) . The
indicates that the fuel-filler door is
located on the passenger’s side of the vehicle.
CAUTION
● If the vehicle runs out of fuel, theMalfunction Indicator Light (MIL) may
come on. Refuel as soon as possible.
After a few driving trips. the
light
should turn off. If the light remains on
after a few driving trips, have the vehicle
inspected. It is recommended you visit a
NISSAN dealer for this service.
● For additional information, refer to
“Malfunction Indicator Light (MIL)” in
this section. This unit measures terrestrial magnetism and in-
dicates the heading direction of the vehicle.
With the ignition switch in the ON position, press
the
button as described in the charts be-
low to activate various features of the automatic
anti-glare rearview mirror.
Push and hold
the
button for about: Feature:
(Push button again for about 1 sec-
ond to change settings)
1 second Compass display toggles on/off
8 seconds Compass zone can be changed to
correct false compass readings
10 seconds Compass enters calibration mode
For additional information about the automatic
anti-glare feature, refer to “Automatic anti-glare
rearview mirror” in the “Pre-driving checks and
adjustments” section of this manual.LIC2222
COMPASS (if so equipped)
2-6Instruments and controls
Page 97 of 478
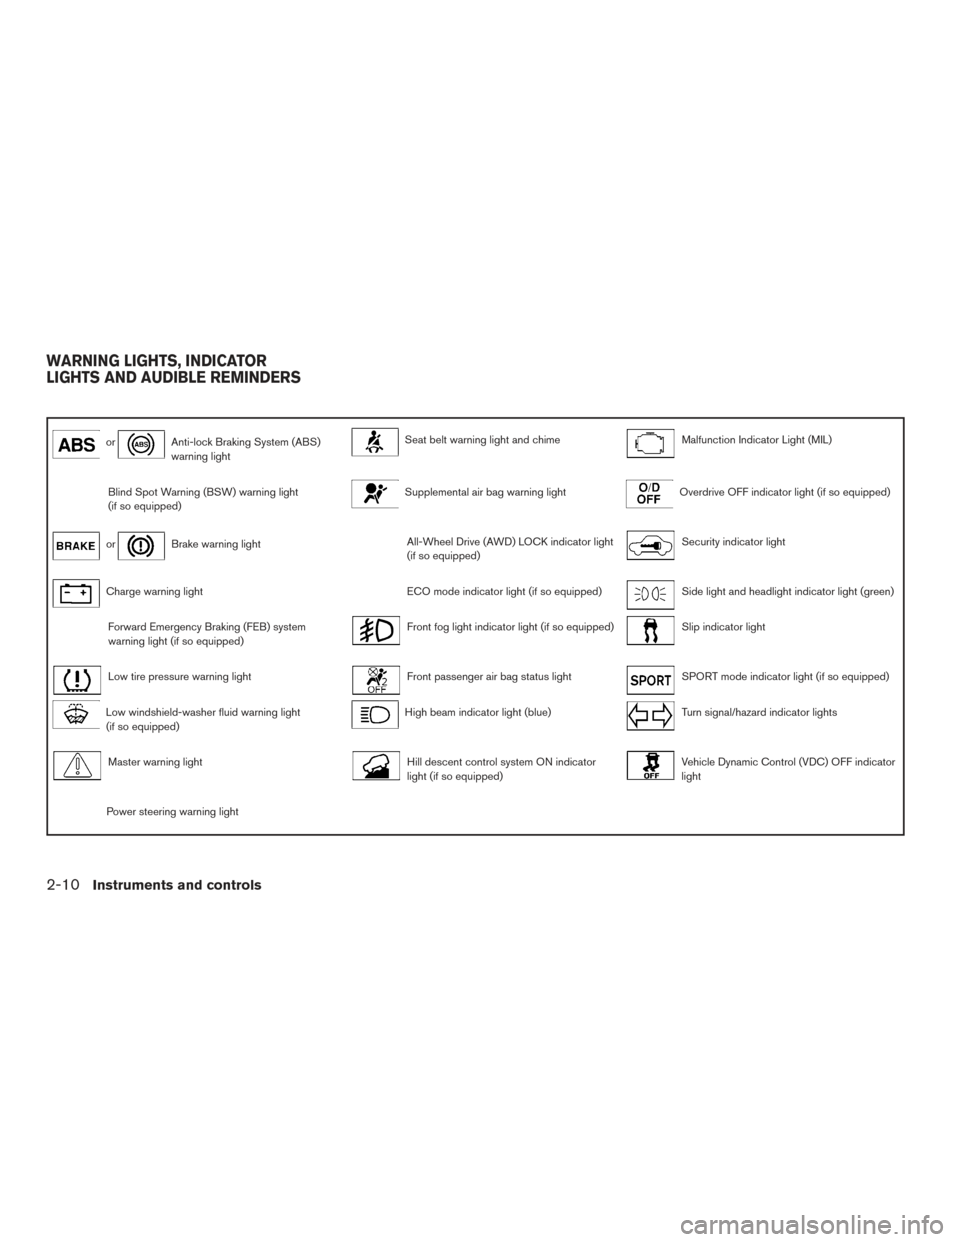
orAnti-lock Braking System (ABS)
warning lightSeat belt warning light and chimeMalfunction Indicator Light (MIL)
Blind Spot Warning (BSW) warning light
(if so equipped)Supplemental air bag warning lightOverdrive OFF indicator light (if so equipped)
orBrake warning lightAll-Wheel Drive (AWD) LOCK indicator light
(if so equipped)Security indicator light
Charge warning lightECO mode indicator light (if so equipped)Side light and headlight indicator light (green)
Forward Emergency Braking (FEB) system
warning light (if so equipped)Front fog light indicator light (if so equipped)Slip indicator light
Low tire pressure warning lightFront passenger air bag status lightSPORT mode indicator light (if so equipped)
Low windshield-washer fluid warning light
(if so equipped)High beam indicator light (blue)Turn signal/hazard indicator lights
Master warning lightHill descent control system ON indicator
light (if so equipped)Vehicle Dynamic Control (VDC) OFF indicator
light
Power steering warning light
WARNING LIGHTS, INDICATOR
LIGHTS AND AUDIBLE REMINDERS
2-10Instruments and controls
Page 98 of 478
CHECKING LIGHTS
With all doors closed, apply the parking brake,
fasten the seat belts and place the ignition switch
in the ON position without starting the engine.
The following lights (if so equipped) will come on:
,or,
The following lights (if so equipped) come on
briefly and then go off:
or,,,
,,,,
If any light fails to come on or operate in a way
other than described, it may indicate a burned-
out bulb and/or a system malfunction. Have the
system checked by a NISSAN dealer.
Some indicators and warnings are also displayed
on the vehicle information display between the
speedometer and tachometer. For additional in-
formation, refer to “Vehicle information display” in
this section.
WARNING LIGHTS
For additional information, refer to “Vehicle infor-
mation display” in this section.
orAnti-lock BrakingSystem (ABS)
warning light
When the ignition switch is placed in the ON
position, the ABS warning light illuminates and
then turns off. This indicates the ABS is opera-
tional.
If the ABS warning light illuminates while the
engine is running or while driving, it may indicate
the ABS is not functioning properly. Have the
system checked. It is recommended you visit a
NISSAN dealer for this service.
If an ABS malfunction occurs, the anti-lock func-
tion is turned off. The brake system then operates
normally but without anti-lock assistance. For
additional information, refer to “Brake system” in
the “Starting and driving” section of this manual.
Blind Spot Warning (BSW)warning light (if so equipped)
When enabled, the BSW warning light appears
in the vehicle information display. The BSW system is designed to detect ap-
proaching vehicles when backing out from a
parking space. This option (if so equipped) can
be enabled/disabled in the “Settings” menu un-
der “Driver Assistance.” For additional informa-
tion, refer to “Blind Spot Warning (BSW)” in the
“Starting and driving” section of this manual.
orBrake warning light
This light functions for both the parking brake and
the foot brake systems.
Low brake fluid warning light
When the ignition switch is placed in the ON
position, the light warns of a low brake fluid level.
If the light comes on while the engine is running,
with the parking brake not applied, stop the ve-
hicle and perform the following:
1. Check the brake fluid level. Add brake fluid as necessary. For additional information, re-
fer to “Brake fluid” in the “Maintenance and
do-it-yourself” section of this manual.
2. If the brake fluid level is correct, have the warning system checked. It is recommended
you visit a NISSAN dealer for this service.
Instruments and controls2-11