2016 NISSAN PATHFINDER PLATINUM light
[x] Cancel search: lightPage 372 of 558
WARNING
The following actions can increase the
chance of losing control of the vehicle if
there is a sudden loss of tire air pressure.
Losing control of the vehicle may cause a
collision and result in personal injury.
●The vehicle generally moves or pulls in
the direction of the flat tire.
● Do not rapidly apply the brakes.
● Do not rapidly release the accelerator
pedal.
● Do not rapidly turn the steering wheel.
1. Remain calm and do not overreact.
2. Maintain a firm grip on the steering wheel with both hands and try to hold a straight
course.
3. When appropriate, slowly release the accel- erator pedal to gradually slow the vehicle.
4. Gradually steer the vehicle to a safe location off the road and away from traffic if possible.
5. Lightly apply the brake pedal to gradually stop the vehicle.
6. Turn on the hazard warning flashers and contact a roadside emergency service to
change the tire. For additional information, refer to “Changing a flat tire” in the “In case
of emergency” section of this manual.DRINKING ALCOHOL/DRUGS AND
DRIVING
Page 373 of 558
●Do not drive across steep slopes. In-
stead drive either straight up or straight
down the slopes. Off-road vehicles can
tip over sideways much more easily
than they can forward or backward.
● Many hills are too steep for any vehicle.
If you drive up them, you may stall. If
you drive down them, you may not be
able to control your speed. If you drive
across them, you may roll over.
● Do not shift gears while driving on
downhill grades as this could cause
loss of control of the vehicle.
● Stay alert when driving to the top of a
hill. At the top there could be a drop-off
or other hazard that could cause an
accident.
● If your engine stalls or you cannot make
it to the top of a steep hill, never at-
tempt to turn around. Your vehicle could
tip or roll over. Always back straight
down in R (Reverse) gear and apply
brakes to control your speed.
● Heavy braking going down a hill could
cause your brakes to overheat and fade,
resulting in loss of control and an acci-
dent. Apply brakes lightly and use a low
gear to control your speed. ●
Unsecured cargo can be thrown around
when driving over rough terrain. Prop-
erly secure all cargo so it will not be
thrown forward and cause injury to you
or your passengers.
● Secure heavy loads in the cargo area as
far forward and as low as possible. Do
not equip the vehicle with tires larger
than specified in this manual. This could
cause your vehicle to roll over.
● Do not grip the inside or spokes of the
steering wheel when driving off-road.
The steering wheel could move sud-
denly and injure your hands. Instead
drive with your fingers and thumbs on
the outside of the rim.
● Before operating the vehicle, ensure
that the driver and all passengers have
their seat belts fastened.
● Always drive with the floor mats in place
as the floor may become hot.
● Lower your speed when encountering
strong crosswinds. With a higher center
of gravity, your NISSAN is more affected
by strong side winds. Slower speeds
ensure better vehicle control. ●
Do not drive beyond the performance
capability of the tires, even with 4WD
engaged.
● For 4WD equipped vehicles, do not at-
tempt to raise two wheels off the
ground and shift the transmission to
any drive or reverse position with the
engine running. Doing so may result in
drivetrain damage or unexpected ve-
hicle movement which could result in
serious vehicle damage or personal
injury.
● Do not attempt to test a 4WD equipped
vehicle on a 2-wheel dynamometer
(such as the dynamometers used by
some states for emissions testing) , or
similar equipment even if the other two
wheels are raised off the ground. Make
sure you inform test facility personnel
that your vehicle is equipped with 4WD
before it is placed on a dynamometer.
Using the wrong test equipment may
result in drivetrain damage or unex-
pected vehicle movement which could
result in serious vehicle damage or per-
sonal injury.
● When a wheel is off the ground due to
an unlevel surface, do not spin the
wheel excessively.
Starting and driving5-9
Page 378 of 558
●Make sure the area around the vehicle is
clear.
● Check fluid levels such as engine oil, cool-
ant, brake fluid, and windshield-washer fluid
as frequently as possible, or at least when-
ever you refuel.
● Check that all windows and lights are clean.
● Visually inspect tires for their appearance
and condition. Also check tires for proper
inflation.
● Check that all doors are closed.
● Position seat and adjust head
restraints/headrests.
● Adjust inside and outside mirrors.
● Fasten seat belts and ask all passengers to
do likewise.
● Check the operation of warning lights when
the ignition switch is placed in the ON posi-
tion. For additional information, refer to
“Warning lights, indicator lights and audible
reminders” in the “Instruments and controls”
section of this manual. 1. Apply the parking brake.
2. Move the shift lever to P (Park) or N (Neu-
tral) . P (Park) is recommended.
The starter is designed not to operate if
the shift lever is in any of the driving
positions.
3. Push the ignition switch to the ON position. Depress the brake pedal and push the igni-
tion switch to start the engine.
To start the engine immediately, push and
release the ignition switch while depressing
the brake pedal with the ignition switch in
any position.
● If the engine is very hard to start in ex-
tremely cold weather or when restarting,
depress the accelerator pedal a little (ap-
proximately 1/3 to the floor) and while
holding, crank the engine. Release the
accelerator pedal when the engine starts.
● If the engine is very hard to start because
it is flooded, depress the accelerator
pedal all the way to the floor and hold it.
Push the ignition switch to the ON posi-
tion to start cranking the engine. After five
or six seconds, stop cranking by pushing
the ignition switch to LOCK. After crank-
ing the engine, release the accelerator
pedal. Crank the engine with your foot off the accelerator pedal by depressing the
brake pedal and pushing the push-button
ignition switch to start the engine. If the
engine starts, but fails to run, repeat the
above procedure.
Page 380 of 558
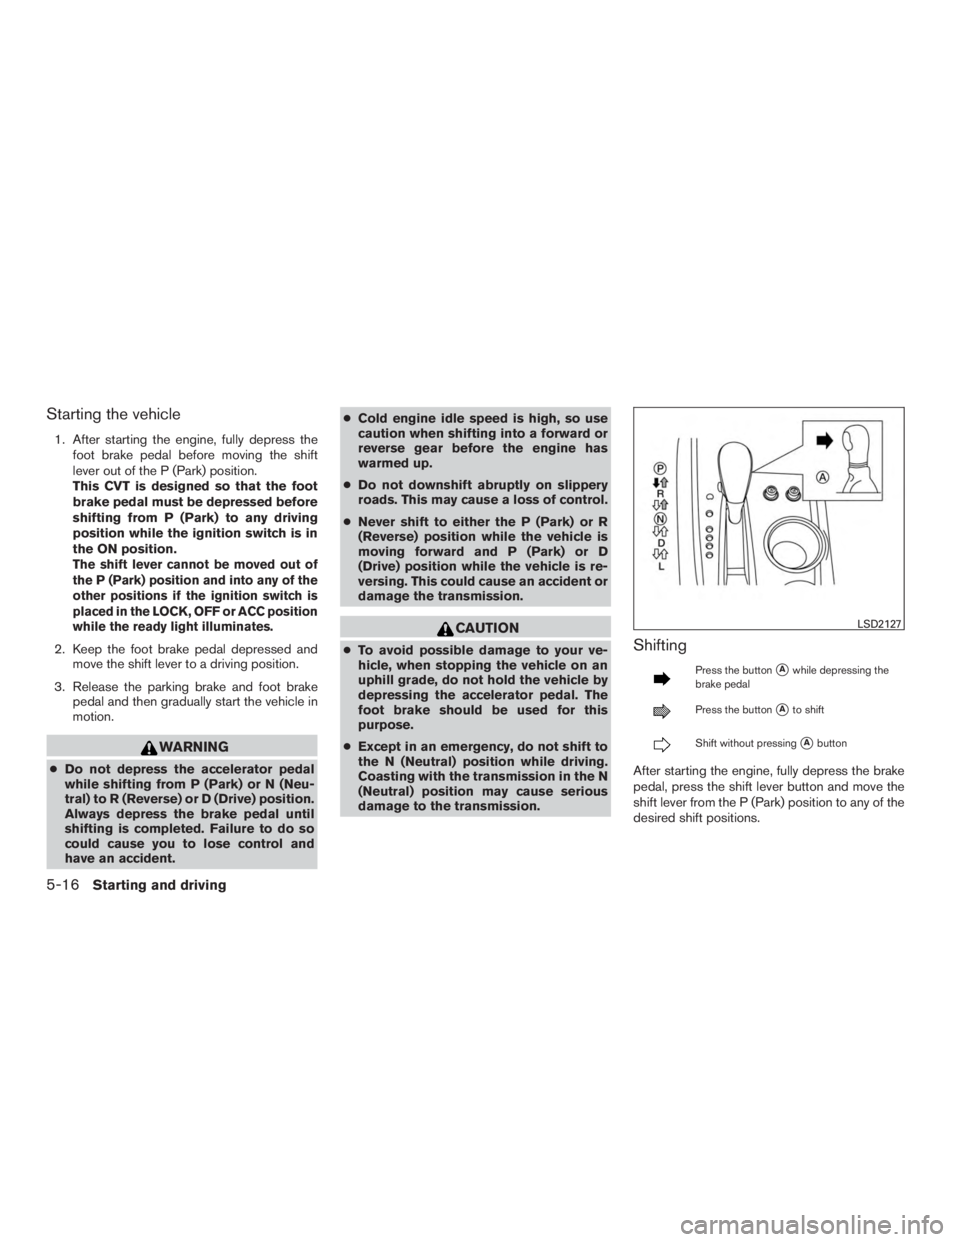
Starting the vehicle
1. After starting the engine, fully depress thefoot brake pedal before moving the shift
lever out of the P (Park) position.
This CVT is designed so that the foot
brake pedal must be depressed before
shifting from P (Park) to any driving
position while the ignition switch is in
the ON position.
The shift lever cannot be moved out of
the P (Park) position and into any of the
other positions if the ignition switch is
placed in the LOCK, OFF or ACC position
while the ready light illuminates.
2. Keep the foot brake pedal depressed andmove the shift lever to a driving position.
3. Release the parking brake and foot brake pedal and then gradually start the vehicle in
motion.
Page 383 of 558
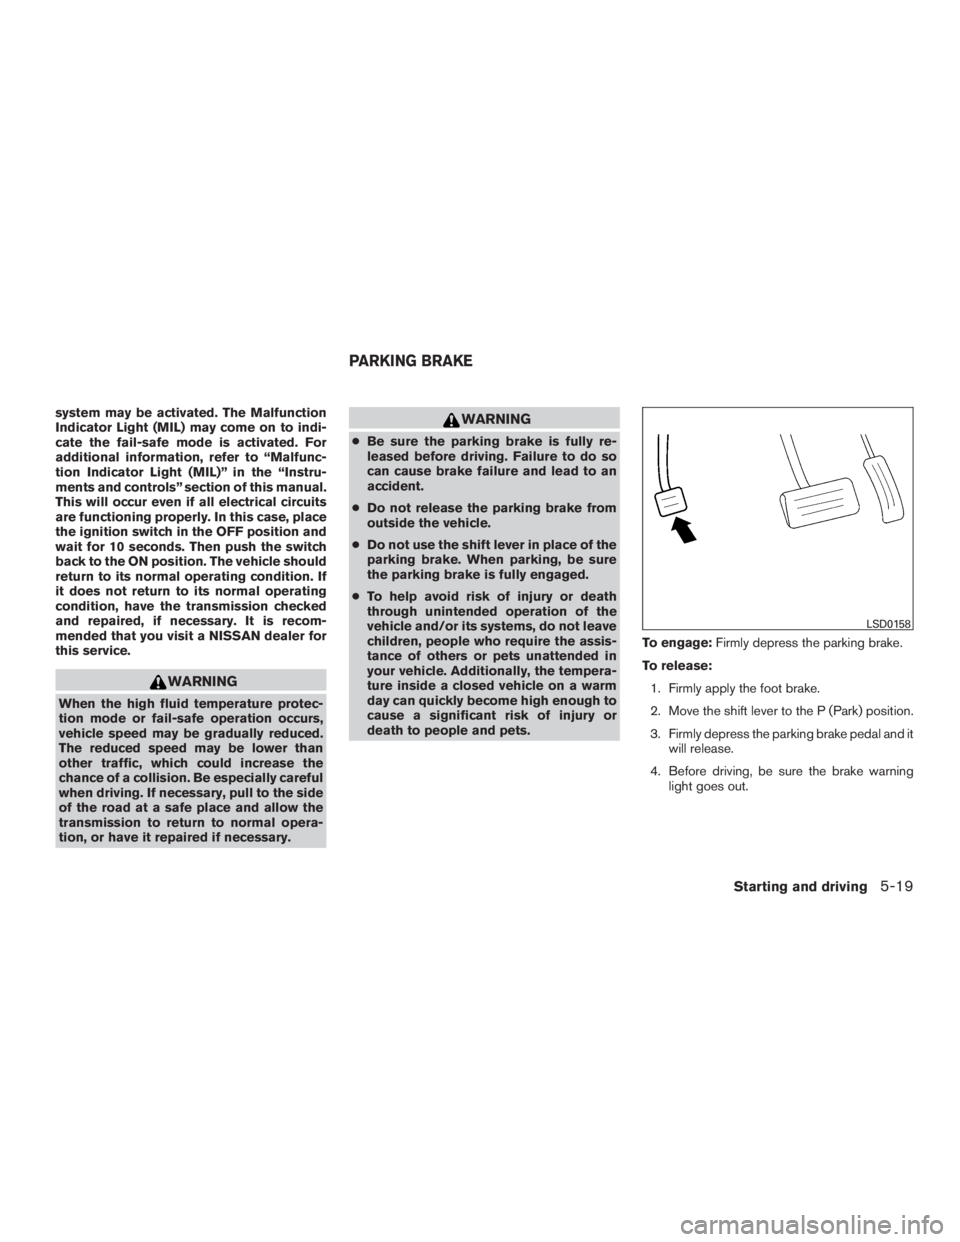
system may be activated. The Malfunction
Indicator Light (MIL) may come on to indi-
cate the fail-safe mode is activated. For
additional information, refer to “Malfunc-
tion Indicator Light (MIL)” in the “Instru-
ments and controls” section of this manual.
This will occur even if all electrical circuits
are functioning properly. In this case, place
the ignition switch in the OFF position and
wait for 10 seconds. Then push the switch
back to the ON position. The vehicle should
return to its normal operating condition. If
it does not return to its normal operating
condition, have the transmission checked
and repaired, if necessary. It is recom-
mended that you visit a NISSAN dealer for
this service.
Page 427 of 558
●If a warning message continues to be
displayed after the above operations,
have your vehicle checked as soon as
possible. It is recommended that you
visit a NISSAN dealer for this service.
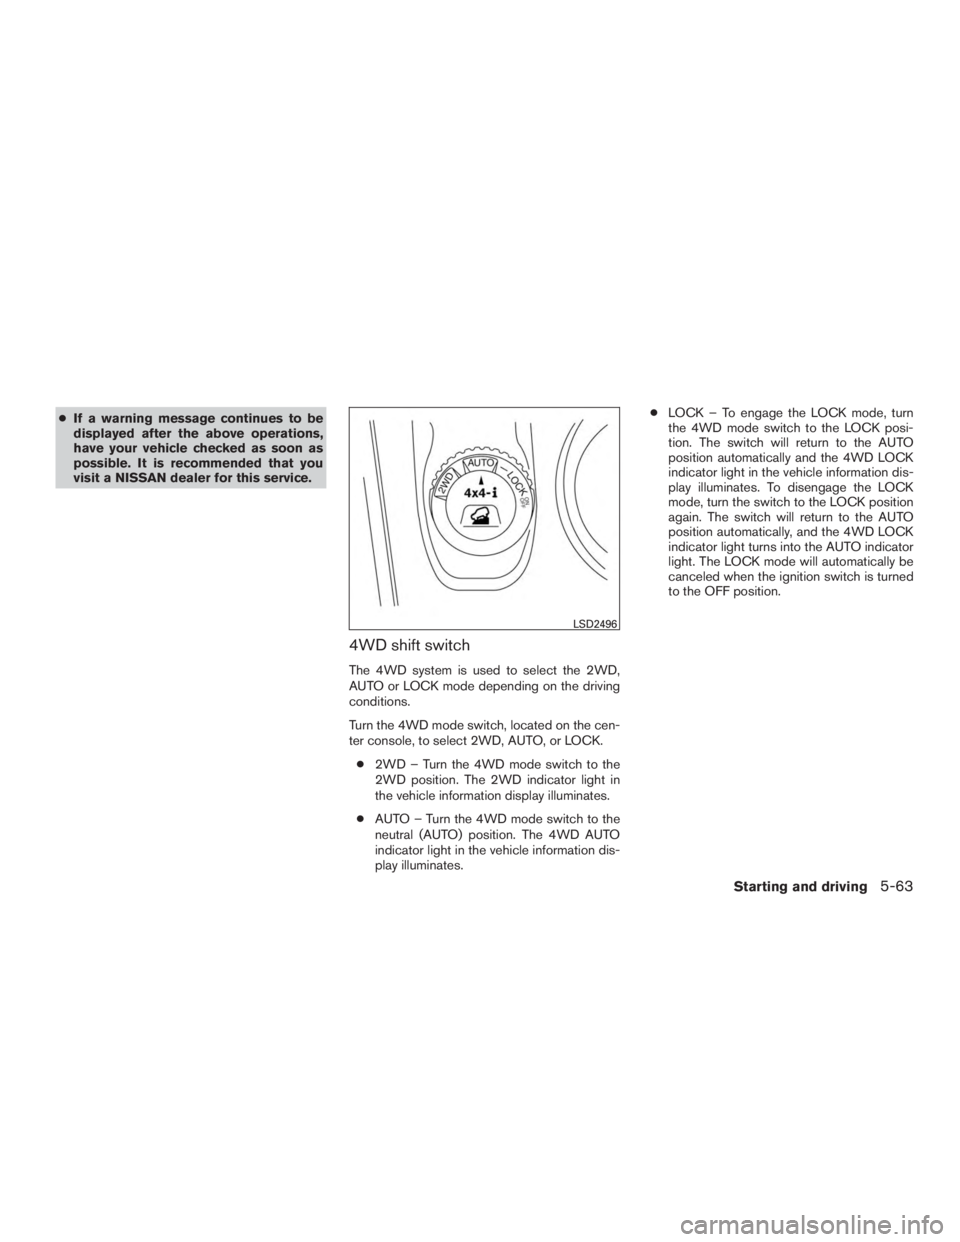
4WD shift switch
The 4WD system is used to select the 2WD,
AUTO or LOCK mode depending on the driving
conditions.
Turn the 4WD mode switch, located on the cen-
ter console, to select 2WD, AUTO, or LOCK.
● 2WD – Turn the 4WD mode switch to the
2WD position. The 2WD indicator light in
the vehicle information display illuminates.
● AUTO – Turn the 4WD mode switch to the
neutral (AUTO) position. The 4WD AUTO
indicator light in the vehicle information dis-
play illuminates. ●
LOCK – To engage the LOCK mode, turn
the 4WD mode switch to the LOCK posi-
tion. The switch will return to the AUTO
position automatically and the 4WD LOCK
indicator light in the vehicle information dis-
play illuminates. To disengage the LOCK
mode, turn the switch to the LOCK position
again. The switch will return to the AUTO
position automatically, and the 4WD LOCK
indicator light turns into the AUTO indicator
light. The LOCK mode will automatically be
canceled when the ignition switch is turned
to the OFF position.
Page 429 of 558
CAUTION
●Depending on the driving condition, the
4WD mode may automatically change
from 2WD to 4WD even when the 2WD
mode is selected. If this occurs while
driving, the 4WD mode indicator light
will not illuminate.
● Do not start the engine with the 4WD
mode switch in any mode in the follow-
ing cases:
– when the vehicle is placed on a fre- eroller or jacking up the vehicle with
the front tires raised and the rear
tires on the ground.
– when towing the vehicle with the rear tires raised from the ground.
● Operate the 4WD mode switch only
when driving straight. Do not operate
the 4WD mode switch when making a
turn or backing up.
● Do not operate the 4WD mode switch
with the front wheel spinning.
● Engine idling speed is high while warm-
ing up the engine. Be especially careful
when starting or driving on slippery sur-
faces with the 4WD mode switch set in
the AUTO mode.
4WD mode indicator lights
The 2WD, 4WD AUTO and LOCK mode indica-
tor lights are located in the vehicle information
display.
The 4WD mode indicator lights will display the
mode selected by the 4WD mode switch while
the engine is running.
The 4WD AUTO indicator light illuminates when
selecting the AUTO mode.
The 4WD LOCK indicator light illuminates when
selecting the LOCK mode and the 2WD indicator
light illuminates when selecting the 2WD mode.
Starting and driving5-65
Page 431 of 558
WARNING
●If the engine is not running or is turned
off while driving, the power assist for
the steering will not work. Steering will
be harder to operate.
● When the power steering warning light
illuminates with the engine running,
there will be no power assist for the
steering. You will still have control of
the vehicle, but the steering will be
harder to operate. Have the power
steering system checked. It is recom-
mended that you visit a NISSAN dealer
for this service.
The power steering system is designed to pro-
vide power assist while driving to operate the
steering wheel with light force.
When the steering wheel is operated repeatedly
or continuously while parking or driving at a very
low speed, the power assist for the steering
wheel will be reduced. This is to prevent over-
heating of the power steering system and protect
it from getting damaged. While the power assist
is reduced, steering wheel operation will become
heavy. When the temperature of the power steer-
ing system goes down, the power assist level will
return to normal. Avoid repeating such steering wheel operations that could cause the power
steering system to overheat.
You may hear a sound when the steering wheel is
operated quickly. However, this is not a malfunc-
tion.
If the electric power steering warning light illumi-
nates while the engine is running, it may indicate
the power steering system is not functioning
properly and may need servicing. Have the power
steering system checked. It is recommended that
you visit a NISSAN dealer for this service.
When the electric power steering warning light
illuminates with the engine running, there will be
no power assist for the steering, but you will still
have control of the vehicle. At this time, greater
steering effort is required to operate the steering
wheel, especially in sharp turns and at low
speeds.
For additional information, refer to “Power steer-
ing warning light” in the “Instruments and con-
trols” section of this manual.
The brake system has two separate hydraulic
circuits. If one circuit malfunctions, you will still
have braking at two wheels.
BRAKE PRECAUTIONS
Vacuum assisted brakes
The brake booster aids braking by using engine
vacuum. If the engine stops, you can stop the
vehicle by depressing the brake pedal. However,
greater foot pressure on the brake pedal will be
required to stop the vehicle and stopping dis-
tance will be longer.
Using the brakes
Avoid resting your foot on the brake pedal while
driving. This will overheat the brakes, wear out the
brake pads faster, and reduce gas mileage.
To help reduce brake wear and to prevent the
brakes from overheating, reduce speed and
downshift to a lower gear before going down a
slope or long grade. Overheated brakes may
reduce braking performance and could result in
loss of vehicle control.
POWER STEERING
BRAKE SYSTEM
Starting and driving5-67