2016 MITSUBISHI SHOGUN wheel
[x] Cancel search: wheelPage 82 of 404

3.Insert the key into the ignition switch,
and turn the ignition to the “ON” posi-
tion. The front passenger’s airbag OFF
indication lamp will stay on.
The front passenger’s airbag is now deactiva- ted and will not deploy until switched on
again.
Driver’s and passenger’s front
airbag system
E00407400372
The driver’s airbag is located under the pad- ded cover in the middle of the steering wheel. The front passenger’s airbag is contained in
the instrument panel above the glove box.
The driver’s airbag inflates at two different rates according to the severity of the impact.
The front passenger’s airbag deploys at the
same time as the driver’s airbag, even if the
passenger seat is not occupied, and inflates at two different rates according to the severity of the impact.Deployment of front airbags
E00407501279
The front airbags ARE DE- SIGNED TO DEPLOY when…
The front airbags are designed to deploy when the vehicle suffers a moderate to severefrontal impact. A typical condition is shown
in the illustration.
1- Head-on collision with a solid wall at a
speed of approximately 25 km/h
(16 mph) or higher
2- Moderate-to-severe frontal impact with-
in the shaded area between the arrows
Supplemental restraint system (SRS) - airbag
4-41OVWE16E1Seat and seat belts4LHD
RHD
Page 83 of 404

The front airbags will deploy if the severityof impact is above the designed threshold
level, comparable to an approximately
25 km/h (16 mph) collision when impacting straight into a solid wall that does not move
or deform. If the severity of the impact is be- low the above threshold level, the front air- bags may not deploy. However, this thresh- old speed will be considerably higher if the
vehicle strikes an object that absorbs the im-
pact by either deforming or moving (for ex-
ample, another stationary vehicle, pole or a guard rail).
Because frontal collisions can easily move you out of position, it is important to always
properly wear your seat belts. Your seat belts will help keep you in a safe distance from the
steering wheel and instrument panel during
the initial stages of airbag deployment. The initial stage of airbag inflation is the most
forceful, and can possibly cause serious or fa- tal injuries. Moreover, the seat belts in your
vehicle are your primary means of protection in a collision. The SRS airbags are designed
to provide additional protection. Therefore,
for your safety and the safety of all occu- pants, be sure to always properly wear your
seat belts.The front airbags MAY NOT
DEPLOY when…
With certain types of frontal collisions, the
vehicle’s body structure is designed to absorb the shock to help protect the occupants fromharm. (The vehicle body’s front area may de-form significantly as it absorbs the impact.) Under such circumstances, the front airbags
may not deploy irrespective of the deforma- tion and damage to the vehicle body.
Examples of some typical conditions are
shown in the illustration.
1- Collision with a utility pole, tree or other
narrow objects
2- Vehicle slides under the rear body of a
truck
3- Oblique frontal impacts
Because the front airbags do not protect the
occupant in all types of frontal collisions, be
sure to always properly wear your seat belts.
The front airbags ARE NOT DESIGNED TO DEPLOY
when…
The front airbags are not designed to deploy
in conditions where they cannot typically provide protection to the occupant. Such con-ditions are shown in the illustration.
1- Rear end collisions
2- Side collisions
3- Vehicle rolls onto its side or roof
Because the front airbags do not protect the occupant in all types of collisions, be sure to
always properly wear your seat belts.
Supplemental restraint system (SRS) - airbag
4-42OVWE16E1Seat and seat belts4
Page 84 of 404
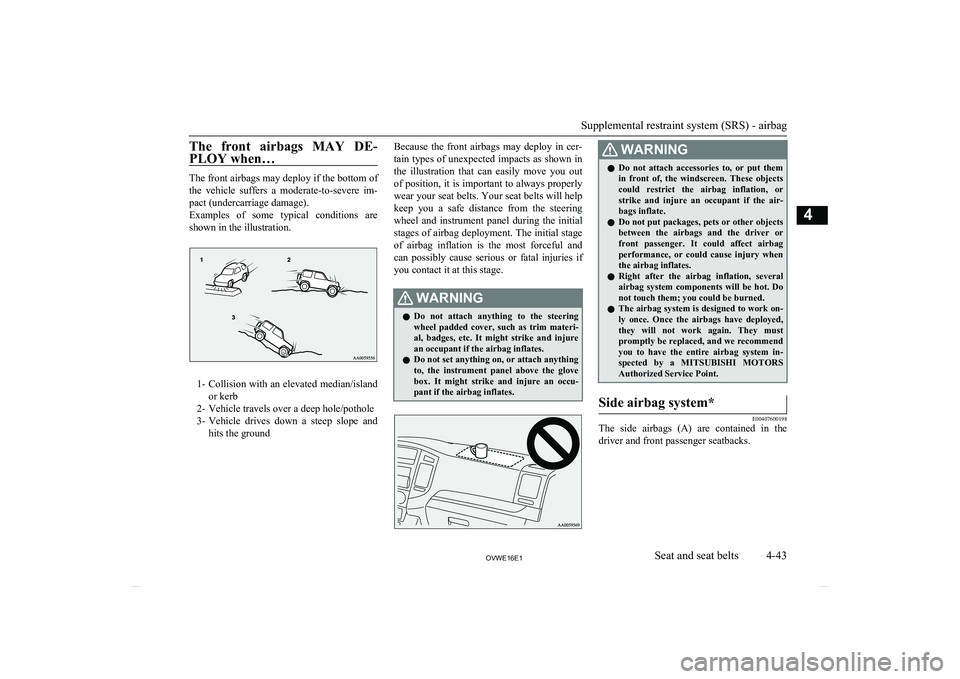
The front airbags MAY DE-PLOY when…
The front airbags may deploy if the bottom ofthe vehicle suffers a moderate-to-severe im-
pact (undercarriage damage).
Examples of some typical conditions are shown in the illustration.
1- Collision with an elevated median/island
or kerb
2- Vehicle travels over a deep hole/pothole
3- Vehicle drives down a steep slope and
hits the ground
Because the front airbags may deploy in cer- tain types of unexpected impacts as shown in
the illustration that can easily move you out
of position, it is important to always properly wear your seat belts. Your seat belts will help
keep you a safe distance from the steering
wheel and instrument panel during the initial
stages of airbag deployment. The initial stage of airbag inflation is the most forceful andcan possibly cause serious or fatal injuries if
you contact it at this stage.WARNINGl Do not attach anything to the steering
wheel padded cover, such as trim materi- al, badges, etc. It might strike and injure
an occupant if the airbag inflates.
l Do not set anything on, or attach anything
to, the instrument panel above the glove box. It might strike and injure an occu- pant if the airbag inflates.WARNINGl Do not attach accessories to, or put them
in front of, the windscreen. These objects
could restrict the airbag inflation, or strike and injure an occupant if the air-
bags inflate.
l Do not put packages, pets or other objects
between the airbags and the driver orfront passenger. It could affect airbagperformance, or could cause injury when the airbag inflates.
l Right after the airbag inflation, several
airbag system components will be hot. Do
not touch them; you could be burned.
l The airbag system is designed to work on-
ly once. Once the airbags have deployed, they will not work again. They must
promptly be replaced, and we recommend
you to have the entire airbag system in- spected by a MITSUBISHI MOTORS
Authorized Service Point.Side airbag system*
E00407600198
The side airbags (A) are contained in the
driver and front passenger seatbacks.
Supplemental restraint system (SRS) - airbag
4-43OVWE16E1Seat and seat belts4
Page 88 of 404

SRS warning lamp
E00407801706
There is a Supplemental Restraint System
(“SRS”) warning lamp on the instrument panel. The system checks itself every time the ignition switch is turned to the “ON” po-
sition. The SRS warning lamp will come on
for several seconds and then go out. This is
normal and means the system is working properly. If there is a problem involving one or more of the SRS components, the warning
lamp will come on and stay on.
The SRS warning lamp is shared by the SRS
airbag and the seat belt pretensioner system.
WARNINGl If any of the following conditions occur,
there may be a problem with the SRS air- bags and/or seat belt pretensioners, and they may not function properly in a colli-WARNINGsion or may suddenly activate without a
collision:
• Even when the ignition switch is
in“ON” position, the SRS warning lamp does not come on or it remains
on.
• The SRS warning lamp comes on while
driving.
The SRS airbags and seat belt pretension- ers are designed to help reduce the risk of
serious injury or death in certain colli- sions. If either of the above conditions oc-
curs, immediately have your vehicle checked by a MITSUBISHI MOTORS
Authorized Service Point.SRS servicing
E00407901390
WARNINGl We recommend any maintenance per-
formed on or near the components of the
SRS to be performed by a MITSUBISHI
MOTORS Authorized Service Point.
Improper work on the SRS components
or wiring could result in inadvertent de- ployment of the airbags, or could render
the SRS inoperative; either situation could result in serious injury.WARNINGl Do not modify your steering wheel, seat
belt retractor or any other SRS compo- nents. For example, replacement of the
steering wheel, or modifications to the
front bumper or body structure can ad- versely affect SRS performance and lead
to possible injury.
l If your vehicle has sustained any damage,
we recommend you to have the SRS in- spected to ensure it is in proper workingorder.
l On vehicles equipped with side airbags,
do not modify your front seats, centre pil- lar and centre console.
It can adversely affect SRS performance and lead to possible injury. If you found
any tear, scratch, crack or damage to the
seat fabric near the side airbag, the por-
tion of the front and rear pillars and roof side rail, you should have the SRS inspec- ted by a MITSUBISHI MOTORS Au-
thorized Service Point.NOTEl When you transfer ownership of the vehicle
to some other person, we urge you to alert
the new owner that it is equipped with the SRS and refer the new owner to the applica- ble section in this owner’s manual.
Supplemental restraint system (SRS) - airbag
4-47OVWE16E1Seat and seat belts4
Page 139 of 404

NOTElThe switch is automatically turned off after
operating for approximately 20 minutes. To
turn off the switch while it is operating,
press the switch again.Rear window demister
switch E00507901030
The rear window demister switch can be op-erated with the ignition switch in the “ON”position.
Push the switch to turn on the rear window
demister. It will be turned off automatically
in about 20 minutes. To turn off the demister
within 20 minutes, push the switch again.
The indication lamp (A) will illuminate while the demister is on.
NOTEl If your vehicle is equipped with wiper de-
icer, when the rear window demister switch
is pushed, the window glass becomes warm
and the wipers become operable. Refer to “Wiper de-icer switch” on page 5-49.
l If your vehicle is equipped with heated mir-
rors, when the rear window demister switchis pressed, the outside rear-view mirrors are defogged or defrosted. Refer to “Heated mir-
ror” on page 6-11.
l The demister switch is not to melt snow but
to clear mist. Remove snow before use of the demister switch.
l To avoid unnecessary discharge of the bat-
tery, do not use the rear window demister
during starting of the engine or when the en- gine is not running. Turn the demister off
immediately after the window is clear.
l When cleaning the inside of the rear win-
dow, use a soft cloth and wipe gently along
the heater wires, being careful not to damage
the wires.
l Do not allow objects to touch the inside of
the rear window glass, damaged or broken
wires may result.Horn switch
E00508000347
Press the steering wheel on or around the
“
” mark.
Rear window demister switch
5-50OVWE16E1Instruments and controls5
Page 140 of 404

Economical driving............................................................................. 6-02
Driving, alcohol and drugs.................................................................. 6-02
Safe driving techniques....................................................................... 6-03
Running-in recommendations............................................................. 6-04 Parking brake...................................................................................... 6-05
Parking................................................................................................ 6-06
Steering wheel height adjustment....................................................... 6-07
Inside rear-view mirror....................................................................... 6-08 Outside rear-view mirrors................................................................... 6-09
Ignition switch.....................................................................................6-11 Steering wheel lock............................................................................. 6-13
Starting................................................................................................ 6-13 NOx trap catalyst (dieselpowered vehicles)*......................................6-16
Diesel particulate filter (DPF)*........................................................... 6-16 Manual transmission........................................................................... 6-17Automatic transmission INVECS-II Sports Mode 5A/T (Intelligent & Innovative Vehicle Electronic Control System II)...6-19
Super select 4WD II (SS4 II).............................................................. 6-25
Rear differential lock*........................................................................ 6-30 4-wheel drive operation...................................................................... 6-34
Inspection and maintenance following rough road operation............. 6-37
Cautions on handling of 4-wheel drive vehicles................................. 6-38
Braking................................................................................................ 6-39
Brake assist system............................................................................. 6-41
Anti-lock brake system (ABS)............................................................ 6-41
Power steering system.........................................................................6-44
Active stability & traction control (ASTC).........................................6-44
Cruise control*.................................................................................... 6-48 Tyre pressure monitoring system (TPMS)*........................................ 6-53Reversing sensor system*................................................................... 6-57
Rear-view camera*............................................................................. 6-61Cargo loads......................................................................................... 6-64Trailer towing......................................................................................6-65Starting and driving
OVWE16E16
Page 145 of 404

To apply the parking brake
1- Firmly depress and hold the brake pedal,then pull the lever up without pushing
the button at the end of hand grip.
CAUTIONl When you intend to apply the parking brake,
firmly press the brake pedal to bring the ve-hicle to a complete stop before pulling theparking brake lever. Pulling the parking brake lever with the vehicle moving could
make the rear wheels lock up, thereby mak- ing the vehicle unstable. It could also make
the parking brake malfunction.NOTEl Apply sufficient force to the parking brake
lever to hold the vehicle stationary after the foot brake is released.NOTEl If the parking brake does not hold the vehi-
cle stationary after the foot brake is released,
have your vehicle checked immediately.
To release the parking brake
1- Firmly depress and hold the brake pedal,
then pull the lever up slightly.
2- Push the button at the end of hand grip.
3- Lower the lever fully.
CAUTIONl Before driving, be sure that the parking
brake is fully released and brake warning
lamp is off.
If a vehicle is driven without releasing the
parking brake, the brake will be overheated, resulting in ineffective braking and possible
brake failure.CAUTIONl If the brake warning lamp does not extin-
guish when the parking brake is fully re- leased, the brake system may be abnormal.
Have your vehicle checked immediately.
For details, refer to “Brake warning lamp” on page 5-10.Parking
E00600601097
To park the vehicle, fully engage the parkingbrake, and then move the gearshift lever to 1 st
or “R” (Reverse) position for vehicles with
M/T , or set the selector lever to “P” (PARK)
position on A/T vehicles.
Parking on a hill
To prevent the vehicle from rolling, follow these procedures:
Parking on a downhill slope
Turn the front wheels towards the kerb and move the vehicle forward until the kerb side
wheel gently touches the kerb.
Apply the parking brake and place the gear- shift lever into the “R” (Reverse) position
(with M/T) or the selector lever into the “P”
(PARK) position (with A/T).
If necessary, apply chocks to wheels.
Parking
6-06OVWE16E1Starting and driving6
Page 146 of 404
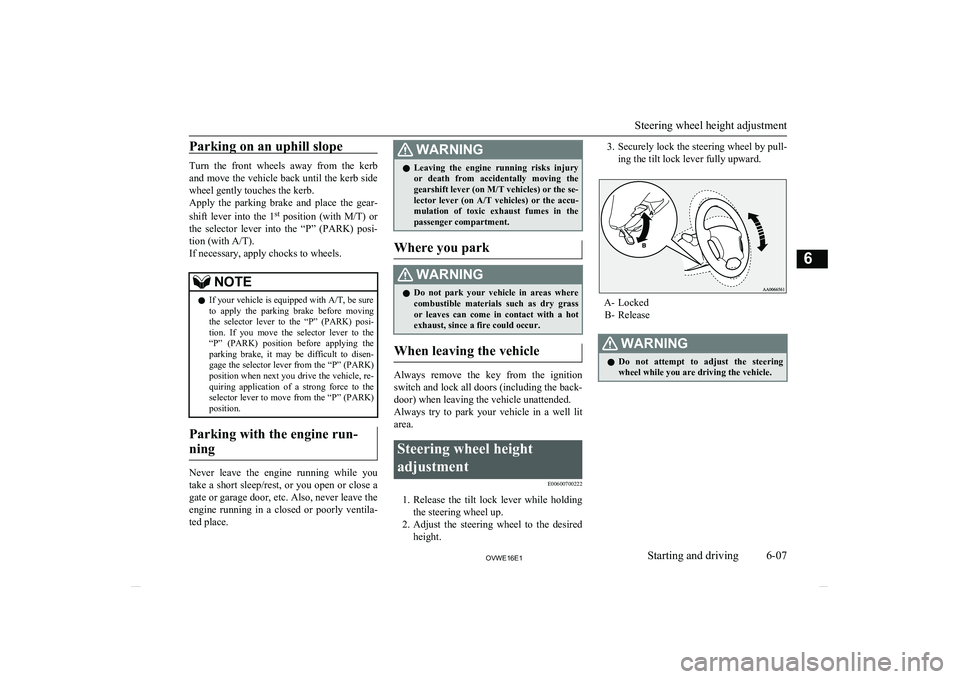
Parking on an uphill slope
Turn the front wheels away from the kerband move the vehicle back until the kerb side
wheel gently touches the kerb.
Apply the parking brake and place the gear-
shift lever into the 1st
position (with M/T) or
the selector lever into the “P” (PARK) posi- tion (with A/T).
If necessary, apply chocks to wheels.
NOTEl If your vehicle is equipped with
A/T, be sure
to apply the parking brake before moving the selector lever to the “P” (PARK) posi-
tion. If you move the selector lever to the “P” (PARK) position before applying theparking brake, it may be difficult to disen-
gage the selector lever from the “P” (PARK)
position when next you drive the vehicle, re- quiring application of a strong force to the selector lever to move from the “P” (PARK)
position.
Parking with the engine run-
ning
Never leave the engine running while you
take a short sleep/rest, or you open or close a gate or garage door, etc. Also, never leave the
engine running in a closed or poorly ventila-
ted place.
WARNINGl Leaving the engine running risks injury
or death from accidentally moving the
gearshift lever (on M/T vehicles) or the se- lector lever (on A/T vehicles) or the accu-
mulation of toxic exhaust fumes in the
passenger compartment.
Where you park
WARNINGl Do not park your vehicle in areas where
combustible materials such as dry grass
or leaves can come in contact with a hot exhaust, since a fire could occur.
When leaving the vehicle
Always remove the key from the ignition
switch and lock all doors (including the back-
door) when leaving the vehicle unattended. Always try to park your vehicle in a well lit area.
Steering wheel height
adjustment E00600700222
1.Release the tilt lock lever while holding
the steering wheel up.
2. Adjust the steering wheel to the desired
height.
3. Securely lock the steering wheel by pull-
ing the tilt lock lever fully upward.
A- Locked B- Release
WARNINGl Do not attempt to adjust the steering
wheel while you are driving the vehicle.
Steering wheel height adjustment
6-07OVWE16E1Starting and driving6