2016 MITSUBISHI OUTLANDER brake
[x] Cancel search: brakePage 251 of 464

Information screen display (Vehicle equipped with the multi information display - Type 1)
Features and controls 5-175
5
N00575701021
This light comes on in red if the coolant tem- perature becomes excessively high.
N00520901339
This light comes on when any door or the lift-gate is open or not completely closed. When the vehicle is moving at more than 5mph (8 km/h) and any door or the liftgate is open or ajar, a tone will sound 4 times to inform the driver that any door or the liftgate is not properly shut.
N00558301048 N00558401153
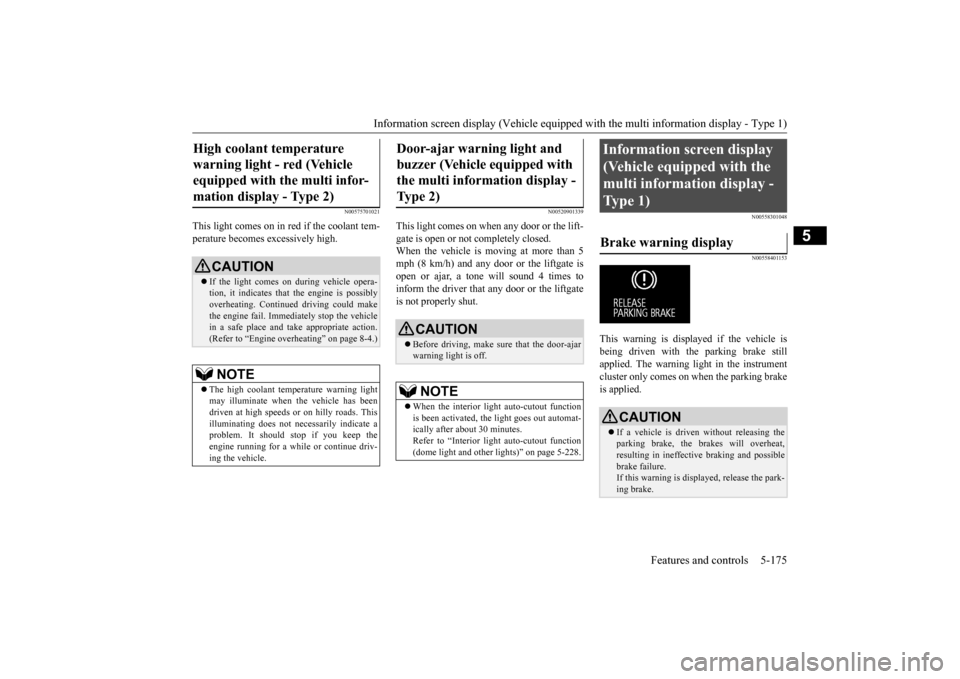
This warning is displayed if the vehicle is being driven with the parking brake stillapplied. The warning light in the instrument cluster only comes on when the parking brake is applied.
High coolant temperature warning light - red (Vehicle equipped with the multi infor- mation display - Type 2)
CAUTION If the light comes on during vehicle opera- tion, it indicates that
the engine is possibly
overheating. Continue
d driving could make
the engine fail. Immedi
ately stop the vehicle
in a safe place and ta
ke appropriate action.
(Refer to “Engine overheating” on page 8-4.)NOTE
The high coolant temp
erature warning light
may illuminate when
the vehicle has been
driven at high speeds or on hilly roads. This illuminating does not ne
cessarily indicate a
problem. It should stop if you keep theengine running for a whil
e or continue driv-
ing the vehicle.
Door-ajar warning light and buzzer (Vehicle equipped with the multi information display - Type 2)
CAUTION Before driving, make sure that the door-ajar warning light is off.NOTE
When the interior light auto-cutout function is been activated, th
e light goes out automat-
ically after about 30 minutes. Refer to “Interior light
auto-cutout function
(dome light and other
lights)” on page 5-228.
Information screen display (Vehicle equipped with the multi information display - Type 1) Brake warning display
CAUTION If a vehicle is driven without releasing the parking brake, the brakes will overheat, resulting in ineffectiv
e braking and possible
brake failure. If this warning is displayed, release the park- ing brake.
BK0223400US.book 175 ページ 2015年2月13日 金曜日 午後12時15分
Page 252 of 464

Information screen display (Vehicle equipped with the multi information display - Type 1) 5-176 Features and controls
5
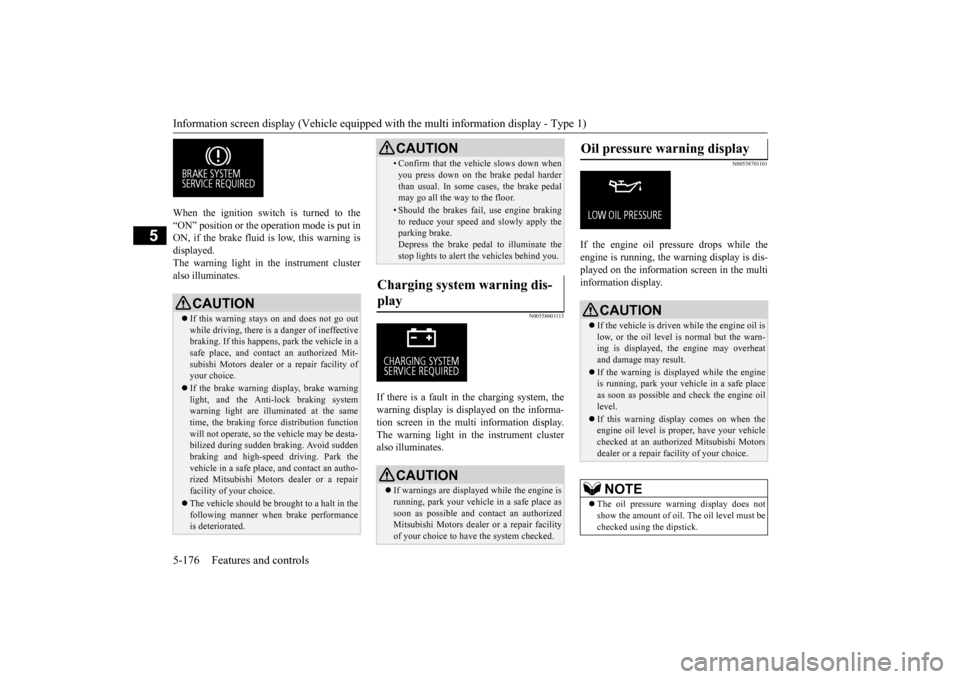
When the ignition switch is turned to the “ON” position or the ope
ration mode is put in
ON, if the brake fluid is
low, this warning is
displayed. The warning light in the instrument cluster also illuminates.
N00558601113
If there is a fault in the charging system, the warning display is di
splayed on the informa-
tion screen in the multi information display. The warning light in th
e instrument cluster
also illuminates.
N00558701101
If the engine oil pressure drops while the engine is running, the
warning display is dis-
played on the information screen in the multi information display.
CAUTION If this warning stays on and does not go out while driving, there is
a danger of ineffective
braking. If this happens
, park the vehicle in a
safe place, and contac
t an authorized Mit-
subishi Motors dealer or a repair facility ofyour choice. If the brake warning display, brake warning light, and the Anti-lock braking system warning light are illu
minated at the same
time, the braking forc
e distribution function
will not operate, so th
e vehicle may be desta-
bilized during sudden br
aking. Avoid sudden
braking and high-speed driving. Park thevehicle in a safe place,
and contact an autho-
rized Mitsubishi Motors
dealer or a repair
facility of your choice. The vehicle should be brought to a halt in the following manner when
brake performance
is deteriorated.
• Confirm that the vehicle slows down whenyou press down on the brake pedal harderthan usual. In some cases, the brake pedalmay go all the way to the floor.• Should the brakes fail, use engine brakingto reduce your speed and slowly apply the parking brake. Depress the brake pedal to illuminate thestop lights to alert th
e vehicles behind you.
Charging system warning dis- play
CAUTION If warnings are displa
yed while the engine is
running, park your vehicl
e in a safe place as
soon as possible and c
ontact an authorized
Mitsubishi Motors dealer
or a repair facility
of your choice to have the system checked.CAUTION
Oil pressure warning display
CAUTION If the vehicle is driven while the engine oil is low, or the oil level is normal but the warn-ing is displayed, th
e engine may overheat
and damage may result. If the warning is displayed while the engine is running, park your ve
hicle in a safe place
as soon as possible and check the engine oillevel. If this warning display comes on when the engine oil level is pr
oper, have your vehicle
checked at an authorized Mitsubishi Motors dealer or a repair fa
cility of your choice.
NOTE
The oil pressure wa
rning display does not
show the amount of oil. The oil level must bechecked using the dipstick.
BK0223400US.book 176 ページ 2015年2月13日 金曜日 午後12時15分
Page 253 of 464

Combination headlights and dimmer switch
Features and controls 5-177
5
N00522501834
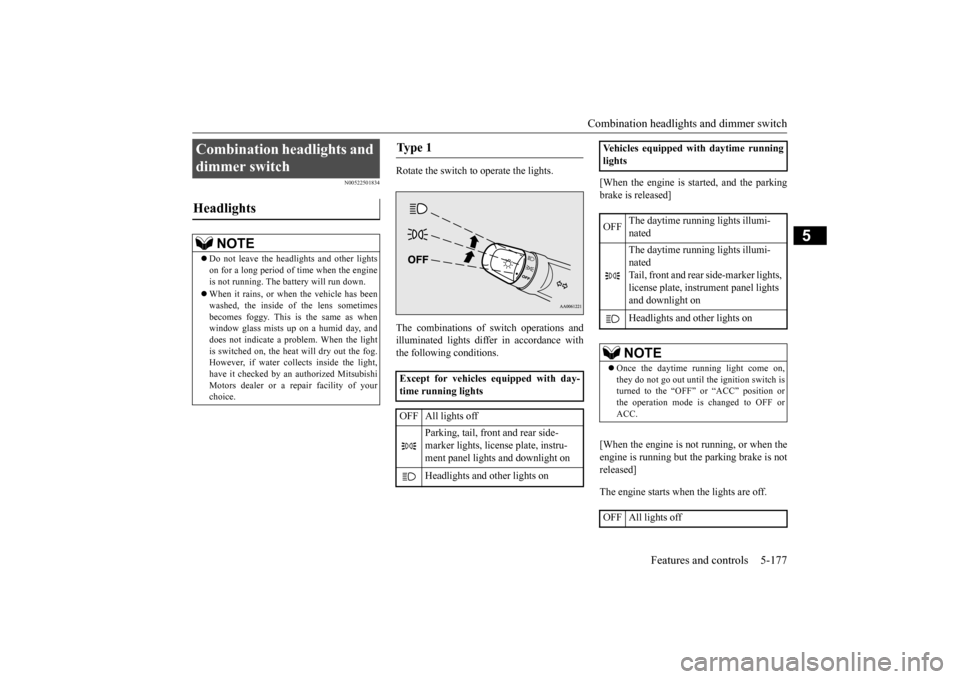
Rotate the switch to operate the lights. The combinations of
switch operations and
illuminated lights differ in accordance withthe following conditions.
[When the engine is started, and the parking brake is released] [When the engine is not running, or when the engine is running but the parking brake is not released] The engine starts when the lights are off.
Combination headlights and dimmer switch Headlights
NOTE
Do not leave the head
lights and ot
her lights
on for a long period of time when the engineis not running. The battery will run down. When it rains, or wh
en the vehicle has been
washed, the inside of the lens sometimes becomes foggy. This is the same as when window glass mists up
on a humid day, and
does not indicate a problem. When the light is switched on, the heat
will dry out the fog.
However, if water collects inside the light,have it checked by an
authorized Mitsubishi
Motors dealer or a repair facility of your choice.
Ty p e 1 Except for vehicles equipped with day- time running lights OFF All lights off
Parking, tail, front and rear side- marker lights, license plate, instru- ment panel lights and downlight on Headlights and other lights on
Vehicles equipped with daytime running lights OFF
The daytime running lights illumi- nated The daytime running lights illumi- natedTail, front and rear
side-marker lights,
license plate, inst
rument panel lights
and downlight on Headlights and other lights onNOTE
Once the daytime running light come on, they do not go out until the ignition switch is turned to the “OFF” or “ACC” position orthe operation mode is changed to OFF or ACC.
OFF All lights off
BK0223400US.book 177 ページ 2015年2月13日 金曜日 午後12時15分
Page 254 of 464

Combination headlights and dimmer switch 5-178 Features and controls
5
Rotate the switch to operate the lights. The combinations of
switch operations and
illuminated lights differ in accordance with the following conditions.
[When the engine is started, and the parking brake is released]
[When the engine is not running, or when the engine is running but the parking brake is not released] The engine starts when the lights are off.
Parking, tail, front and rear side- marker lights, license plate, instru- ment panel lights and downlight on Headlights and
other lights on
Ty p e 2 Except for vehicles equipped with day- time running lights OFF All lights off AUTO
Headlights and other lights turn on and off automatically in accor- dance with outside light level.
Parking, tail, front
and rear side-
marker lights, license plate, instru- ment panel lights
and downlight on
Headlights and other lights on
Vehicles equipped
with daytime running
lights OFF
The daytime runni
ng lights illumi-
nated
AUTO
The daytime runni
ng lights illumi-
nated (when it is light outside the vehicle) Headlights and other lights turn on and off automatically in accor-dance with outside light level. The daytime runni
ng lights illumi-
natedTail, front and rear side-marker lights, license pl
ate, instrument
panel lights and downlight on Headlights and other lights on
NOTE
Once the daytime running light come on, they do not go out until the ignition switch isturned to the “OFF” or “ACC” position orthe operation mode is changed to OFF or ACC.OFF All lights off AUTO
Headlights and other lights turn on and off automatically in accor- dance with outside light level. Parking, tail, front
and rear side-
marker lights, license plate, instru-ment panel lights and downlight on Headlights and other lights on
BK0223400US.book 178 ページ 2015年2月13日 金曜日 午後12時15分
Page 274 of 464

Bluetooth® 2.0 interface (if so equipped) 5-198 Features and controls
5
1. Stop your vehicle in a safe area, put the selector lever in the “P” (PARK) positionand pull the parking brake lever. 2. Press the SPEECH button (except for vehicles with Mitsubishi Multi-Commu-nication System) or
PICK-UP button (for
vehicles with Mitsubishi Multi-Commu- nication System).3. Say “Voice training.” 4. The voice guide will
say “This operation
must be performed in
a quiet environment
while the vehicle is stopped. See the owner’s manual for th
e list of required
training phrases. Press and release theSPEECH button when you are ready to begin. Press the HANG-UP button to can- cel at any time.”Press the SPEECH button to start the speaker enrollment process.
5. The voice guide will prompt for phrase 1. Repeat the correspondi
ng phrase listed in
table “Enrollment commands” on page 5-215.The system will register your voice and then move on to the registration of the next command. Continue the process untilall phrases have been registered. 6. When all enrollment commands have been read out, the voice guide will say “Speaker enrollment is complete.” Thesystem will then end the speaker enroll- ment process and return to the main menu.
N00564901078
You can turn a voice model registered with the speaker enrollment function on and off whenever you want.You can also retrain the system. Use the following procedure to perform these actions. 1. Press the SPEECH button (except for vehicles with Mitsubishi Multi-Commu- nication System) or
PICK-UP button (for
vehicles with Mitsubishi Multi-Commu-nication System). 2. Say “Voice training.” 3. If you have completed a speaker enroll-ment process once already, the voice guide will say eith
er “Enrollment is
enabled. Would you like to disable orretrain?” or “Enrol
lment is disabled.
Would you like to enable or retrain?”
NOTE
Speaker enrollment is not possible unless the vehicle is parked. Make sure you park the vehicle in a safe area before attempting speaker enrollment.
NOTE
If you do not start the speaker enrollment process within 3 minut
es after pressing the
SPEECH button, the speaker enrollmentfunction will time out. The voice guide will say “Speaker enroll- ment has timed out.” The system will thenbeep and the voice reco
gnition mode will be
deactivated. NOTE
To repeat the most re
cent voice training com-
mand, press and release the SPEECH button. If you press the HANG-UP button anytime during the process, the
system will beep and
stop the speaker enrollment process.
NOTE
Completing the speaker enrollment process will turn on the voice model automatically. The commands “Help”
and “Cancel” will not
work in this mode.
Enabling and disabling the voice model and retraining
BK0223400US.book 198 ページ 2015年2月13日 金曜日 午後12時15分
Page 275 of 464

Bluetooth® 2.0 interface (if so equipped)
Features and controls 5-199
5
4. When enrollment is “enabled,” the voice model is on; when enrollment is “dis-abled,” the voice model is off. Say the command that fits your needs. Say “Retrain” to start the speaker enroll-ment process and re
create a new voice
model. (Refer to “Speaker enrollment” on page 5-197.)
N00565001281
Before you can make
or receive hands-free
calls or play music using the Bluetooth
® 2.0
interface function, you must pair the Blue- tooth
® device and Bluetooth
® 2.0 interface.
Up to 7 Bluetooth
® devices can be paired
with the Bluetooth
® 2.0 interface.
If multiple paired Bluetooth
® devices are
available in the vehicle,
the cellular phone or
music player most recently connected is auto- matically connected
to the Bluetooth
® 2.0
interface. You can also change a Bluetooth
® device to
be connected. To pair a Bluetooth
® device with the Blue-
tooth
® 2.0 interface, use either one of the fol-
lowing 2 methods (Type 1 or Type 2). 1. Stop your vehicle in a safe area, put the selector lever in the “P” (PARK) position and pull the parking brake lever.
2. Press the SPEECH button (except for vehicles with Mitsubishi Multi-Commu-nication System) or PICK-UP button (for vehicles with Mitsubishi Multi-Commu- nication System).3. Say “Setup.” 4. Say “Pairing Options.” 5. The voice guide will
say “Select one of
the following: pair, edit, delete, or list.” Say “Pair.” 6. The voice guide will
say “Please say a 4-
digit pairing code.” Say a 4-digit number. When the confirmation function is on, the system will confirm
whether the number
said is acceptable. Answer “Yes.” Answer “No” to return to pairing code selection.
Connecting the Bluetooth
® 2.0
interface and Bluetooth
® device
NOTE
Pairing is required only when the device is used for the first time. Once the device has been paired with
the Bluetooth
® 2.0 inter-
face, all you need is to
bring the device into
the vehicle next time
and the device will
connect to the Bluetooth
® 2.0 interface auto-
matically (if supported by the device). The device must have Bluetooth
® turned ON to
connect.
To p a i r
Pairing procedure- Type 1
(if so
equipped)NOTE
You cannot pair any Bluetooth
® device with
the Bluetooth
® 2.0 interface unless the vehi-
cle is parked. Before pairing a Bluetooth
®
device with the Bluetooth
® 2.0 interface,
confirm that the vehicle is parked in a safe location.
NOTE
If 7 devices have alre
ady been paired, the
voice guide will sa
y “Maximum devices
paired” and then the system will end the pairing process. To re
gister a ne
w device,
delete one device and th
en repeat the pairing
process. (Refer to “Selecting a device: Deleting a device” on page 5-203.)
BK0223400US.book 199 ページ 2015年2月13日 金曜日 午後12時15分
Page 276 of 464

Bluetooth® 2.0 interface (if so equipped) 5-200 Features and controls
5
7. The voice guide will say “Start pairing procedure on the device. See the device manual for instructions.” Enter in the Bluetooth
® device the 4-digit number you
have registered in Step 6.
8. The voice guide will
say “Please say the
name of the device after the beep.” You can assign a desired name for the Blue- tooth
® device and register it as a device
tag. Say the name you want to register after the beep. 9. The voice guide will say “Pairing com- plete,” and the pairing process will end.
1. Stop your vehicle in a safe area, put the selector lever in the “P” (PARK) position and pull the parking brake lever. 2. Press the SPEECH button (except for vehicles with Mitsubishi Multi-Commu-nication System) or
PICK-UP button (for
vehicles with Mitsubishi Multi-Commu- nication System).3. Say “Pair Device.”
NOTE
Some Bluetooth
® devices requi
re a specific
pairing code. Please re
fer to the device man-
ual for pairing code requirements. The pairing code ente
red here is only used
for the Bluetooth
® connection ce
rtification.
It is any 4-digit numbe
r the user would like
to select. Remember the pairing c
ode as it needs to be
keyed into the Bluetooth
® device later in the
pairing process. Depending on the connecti
on settings of the
Bluetooth
® device, this code may have to be
entered each time you connect the Blue- tooth
® device to the Bluetooth
® 2.0 inter-
face. For the default
connection settings,
refer to the instructions for the device.NOTE
Depending on the Bluetooth
® device, it may
take a few minutes to pair it with the Blue- tooth
® 2.0 interface.
If the Bluetooth
® 2.0 interface cannot recog-
nize the Bluetooth
® device, the voice guide
will say “Pairing has tim
ed out” and the pair-
ing process will be cancelled. Confirm that the devi
ce you are pairing sup-
ports Bluetooth
®, and try pairing it again.
If you enter the wrong number, the voice guide will say “Pairing
failed” and the pair-
ing process will be cancelled. Confirm the number is right, and try pairingit again.NOTE
When the confirmation function is on, after repeating the device
tag you have said, the
voice guide will ask “Is this correct?” Answer “Yes.”To change the device
tag, answer “No” and
then say the device tag again.NOTE
Pairing procedure- Type 2
(if so
equipped)NOTE
You cannot pair any Bluetooth
® device with
the Bluetooth
® 2.0 interface unless the vehi-
cle is parked. Before pairing a Bluetooth
®
device with the Bluetooth
® 2.0 interface,
confirm that the vehicle is parked in a safelocation.
BK0223400US.book 200 ページ 2015年2月13日 金曜日 午後12時15分
Page 315 of 464

Floor mat
Driving safety 6-3
6
N00628600033
The original equipment floor mat provided with your vehicle was
specifically designed
for your vehicle.Always properly positio
n the floor mat and
assure it does not inte
rfere with operation of
the pedals. Always use the retaining clip onthe driver’s floorboard to secure the floor mat. When used, this clip will help prevent the floor mat from moving forward and possi- bly interfering with the operation of the ped- als. To prevent the floor mat from movingforward and possibly interfering with the operation of the pedals, Mitsubishi genuine floor mats are recommended.
N00628700050
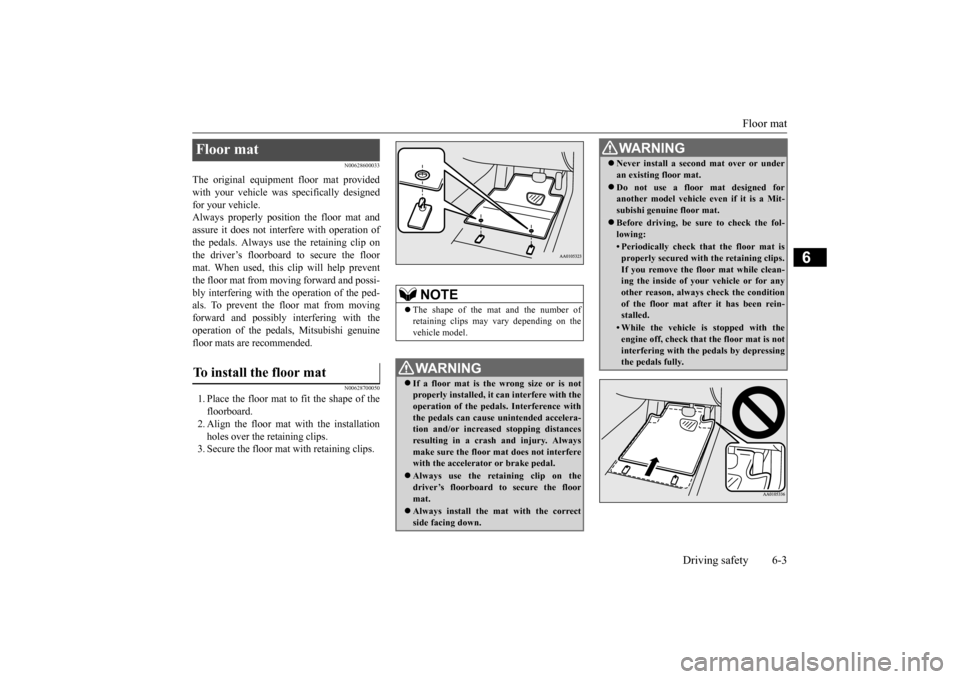
1. Place the floor mat to fit the shape of thefloorboard.2. Align the floor mat with the installation holes over the retaining clips. 3. Secure the floor mat with retaining clips.Floor mat To install the floor mat
NOTE
The shape of the mat and the number of retaining clips may vary depending on the vehicle model.WA R N I N G If a floor mat is the
wrong size or is not
properly installed, it can interfere with theoperation of the pedals. Interference with the pedals can cause unintended accelera- tion and/or increased stopping distancesresulting in a cras
h and injury. Always
make sure the floor mat does not interfere with the accelerator or brake pedal. Always use the reta
ining clip on the
driver’s floorboard to secure the floormat. Always install the mat with the correct side facing down.
Never install a second mat over or under an existing floor mat. Do not use a floor mat designed for another model vehicle ev
en if it is a Mit-
subishi genuine floor mat. Before driving, be sure to check the fol- lowing:• Periodically check that the floor mat isproperly secured with the retaining clips.If you remove the fl
oor mat while clean-
ing the inside of you
r vehicle or for any
other reason, always
check the condition
of the floor mat afte
r it has been rein-
stalled.• While the vehicle is stopped with theengine off, check that
the floor mat is not
interfering with the pedals by depressingthe pedals fully.WA R N I N G
BK0223400US.book 3 ページ 2015年2月13日 金曜日 午後12時15分