2016 MITSUBISHI OUTLANDER mirror
[x] Cancel search: mirrorPage 135 of 464
![MITSUBISHI OUTLANDER 2016 3.G Owners Manual Outside rearview mirrors
Features and controls 5-59
5
[Vehicles with the keyless entry system] The mirrors automatically retract or extend when the doors are locked or unlocked usingthe remote contro MITSUBISHI OUTLANDER 2016 3.G Owners Manual Outside rearview mirrors
Features and controls 5-59
5
[Vehicles with the keyless entry system] The mirrors automatically retract or extend when the doors are locked or unlocked usingthe remote contro](/manual-img/19/7535/w960_7535-134.png)
Outside rearview mirrors
Features and controls 5-59
5
[Vehicles with the keyless entry system] The mirrors automatically retract or extend when the doors are locked or unlocked usingthe remote control switches of the keyless entry system. Refer to “Keyless entry system” on page 5-7. [Vehicles with the Free-hand Advanced Secu- rity Transmitter (F.A.S.T-key)]The mirrors automatically retract or extend when the doors are locked or unlocked using the remote control switches or the F.A.S.T-key. Refer to “Keyless entry system” on page 5-29 or “To operate using the F.A.S.T.-key” onpage 5-15.
N00549301260
When the rear window defogger switch ispressed with the engine running, the outsiderearview mirrors are defogged or defrosted. Current will flow thr
ough the heater element
inside the mirrors, thus clearing away frost orcondensation. The indicator light (A) will illuminate while the defogger is on.The heater will be turned off automatically in about 15 to 20 minutes depending on the out- side temperature.
CAUTION It is possible to retract and extend the mirrors by hand. After retracti
ng a mirror using the
mirror retractor switch, however, you shouldextend it by using the switch again, not by hand. If you extended the mirror by hand after retracting it using
the switch, it would
not properly lock in pos
ition. As a result, it
could move because of the wind or vibration while you are driving, taking away your rear-ward visibility.NOTE
Be careful not to get your hands trapped while a mirror is moving. If you move a mirror by hand or it moves after hitting a person or object, you may not be able to return it to its original positionusing the mirror retractor switch. If this hap- pens, push the mirror retractor switch to place the mirror in its
retracted position and
then push the switch again to return the mir- ror to its original position. When freezing has occurred and mirrors fail to operate as intended,
please refrain from
repeated pushing of the retractor switch asthis action can result
in burn-out of the mir-
ror motor circuits.
Retracting and extending the mir- rors without using the mirror retractor switch (automatic exten- sion function)
NOTE
Functions can be modified as stated below. Please consult an au
thorized Mitsubishi
Motors dealer. On vehicles equipped
with Mitsubishi Multi-
Communication System, screen operations can be used to make
the adjustment. Refer to
the separate owner’s manual for details.
• Automatically extend when the ignitionswitch is turned to the “ON” position or theoperation mode is put in ON with thedriver’s door closed
, and automatically
retract when the ignition switch is turned to the “LOCK” position or the operation modeis put in OFF with the driver’s door opened. • Automatically extend when the vehicle speed reaches approximately 19 mph (30 km/h). • Deactivate the automatic extension func- tion.
Door mirror heater
(if so equipped)
NOTE
BK0223400US.book 59 ページ 2015年2月13日 金曜日 午後12時15分
Page 136 of 464
![MITSUBISHI OUTLANDER 2016 3.G Owners Manual Ignition switch 5-60 Features and controls
5
N00512401696
[For vehicles equipped with the Free-hand Advanced Security Transmitter (F.A.S.T.- key).]For information on operations for vehicles equipped w MITSUBISHI OUTLANDER 2016 3.G Owners Manual Ignition switch 5-60 Features and controls
5
N00512401696
[For vehicles equipped with the Free-hand Advanced Security Transmitter (F.A.S.T.- key).]For information on operations for vehicles equipped w](/manual-img/19/7535/w960_7535-135.png)
Ignition switch 5-60 Features and controls
5
N00512401696
[For vehicles equipped with the Free-hand Advanced Security Transmitter (F.A.S.T.- key).]For information on operations for vehicles equipped with the Free-hand Advanced Secu- rity Transmitter (F.A.S.T.-key), refer to
“Free-hand Advanced
Security Transmitter
(F.A.S.T.-key):Engine switch” on page 5-18. [Except for vehicles equipped with the Free-hand Advanced Se
curity Transmit-
ter (F.A.S.T.-key).] The engine is off and the steering wheel is locked. The key can be inserted and removed only when the switch is in this position. The engine is off. The key can be inserted and removed only when the switch is in this posi-tion.
Allows operation of el
ectrical accessories
with the engine off. All accessories can be used. Engages the starter. Release the key when the engine starts.It will automatically return to the “ON” position.
N00539601071
After about 30 minutes
has elapsed with the
ignition switch in th
e “ACC” position, the
NOTE
The door mirror heater can be turned on automatically.For further information, please contact your authorized Mitsubishi Motors dealer. On vehicles e
quipped with Mitsubishi Multi-
Communication System, screen operations can be used to ma
ke the adjustment.
Refer to the separate
owner’s manual for
details.
Ignition switch
LOCK (Type 2) OFF (Type 1) Type 1 Type 2
ACC ON START
NOTE
Your vehicle is equippe
d with an electronic
immobilizer. To start
the engine, the ID code
which the transponder inside the key sendsmust match the one regi
stered to the immobi-
lizer computer. (Refer to “Electronic immo- bilizer” on page 5-4.)
ACC power auto-cutout func- tion
BK0223400US.book 60 ページ 2015年2月13日 金曜日 午後12時15分
Page 202 of 464
Instrument cluster 5-126 Features and controls
5
N00519001402
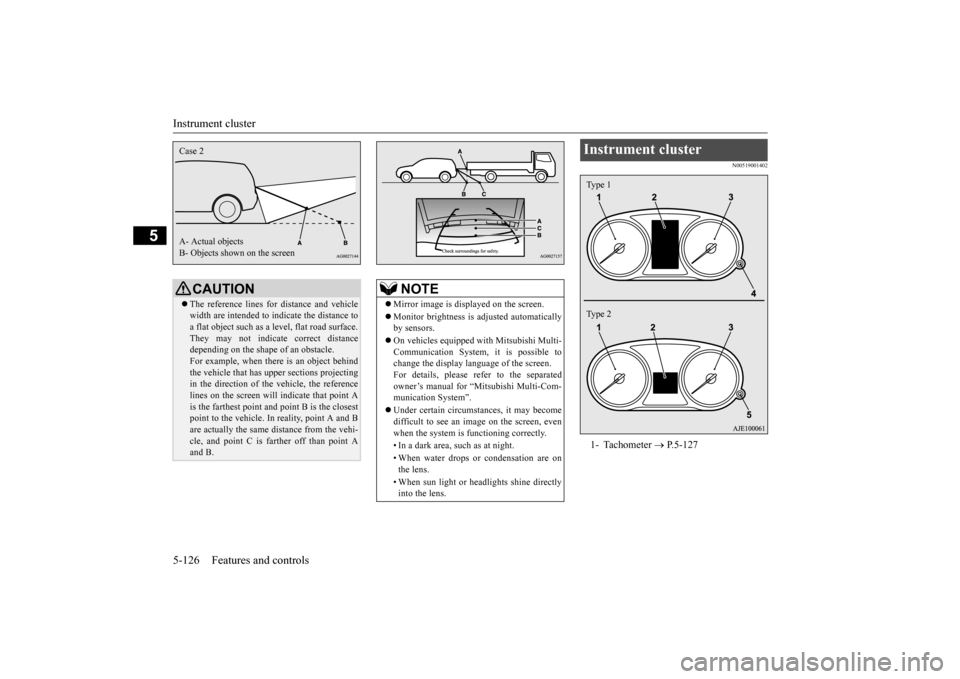
CAUTION The reference lines for
distance and vehicle
width are intended to i
ndicate the distance to
a flat object such as a level, flat road surface. They may not indicate correct distance depending on the shape of an obstacle.For example, when there is an object behind the vehicle that has u
pper sections projecting
in the direction of the
vehicle, the reference
lines on the screen will
indicate that point A
is the farthest point an
d point B is the closest
point to the vehicle. In
reality, point A and B
are actually the same distance from the vehi- cle, and point C is fa
rther off than point A
and B.Case 2 A- Actual objects B- Objects shown on the screen
NOTE
Mirror image is displayed on the screen. Monitor brightness is adjusted automatically by sensors. On vehicles equipped
with Mitsubishi Multi-
Communication System,
it is possible to
change the display language of the screen.For details, please refer to the separated owner’s manual for “Mitsubishi Multi-Com- munication System”. Under certain circumst
ances, it may become
difficult to see an image on the screen, evenwhen the system is functioning correctly. • In a dark area, such as at night. • When water drops or
condensation are on
the lens. • When sun light or he
adlights shine directly
into the lens.
Instrument cluster 1- Tachometer
P.5-127
Type 1 Type 2
BK0223400US.book 126 ページ 2015年2月13日 金曜日 午後12時15分
Page 267 of 464
Horn switch
Features and controls 5-191
5
After about 15 to 20 minutes of operation, the system will shut off automatically.To switch the defogger OFF before 15 to 20 minutes have passed, pr
ess the switch again.
The indicator light will go out and the defog-ger will turn off. If you need the defogger for more than 15 to 20 minutes, press the switch again. This willadd 15 to 20 more minutes.
N00523801195
To honk the horn, press around the “ ” markon the steering wheel.
CAUTION The rear window defogge
r is not designed to
melt snow. Remove
any snow manually
before using the rear window defogger. Use the rear window de
fogger only after the
engine has started and
is running. Be sure to
turn the defogger swit
ch off immediately
after the window is cl
ear to save on battery
power.
Do not place stickers
, tape, or other items
that are attached with
adhesive over the grid
wires on the rear window. When cleaning the insi
de rear window, use a
soft cloth and wipe lightly over the gridwires.NOTE
If your vehicle is equi
pped with door mirror
heater, mist can also be removed from the outside rearview mirrors
when the rear win-
dow defogger switch is pressed. (Refer to“Door mirror heater” on page 5-59.) On vehicles equipped wi
th the wiper deicer,
when the rear window defogger switch is pushed, the windshield becomes warm and the wipers become operable. (Refer to“Wiper deicer switch” on page 5-190.)CAUTION
It is possible to change the setting to make the rear window defogger operate automati-cally when ambient temperature becomeslow while the engine is running, even if you do not push the rear window defogger switch.It operates automati
cally only once after
turning the ignition sw
itch to the “ON” posi-
tion or putting the ope
ration mode in ON.
If you choose this setting, the door mirror heater (if so equipped)
and wiper deicer (if
so equipped) will also
operate automatically
at the same time. For further informati
on, please contact your
authorized Mitsubish
i Motors dealer.
On vehicles equipped
with Mitsubishi Multi-
Communication System
, screen operations
can be used to make the adjustment.Refer to the separate owner’s manual for details.
Horn switch
NOTE
BK0223400US.book 191 ページ 2015年2月13日 金曜日 午後12時15分
Page 294 of 464
Sun visors 5-218 Features and controls
5
N00567201056
You can play music files of the following specifications that are saved in a USB mem- ory device or other device supporting mass storage class. When you connect your iPod,playable file specifications depend on the connected iPod.
N00524601363
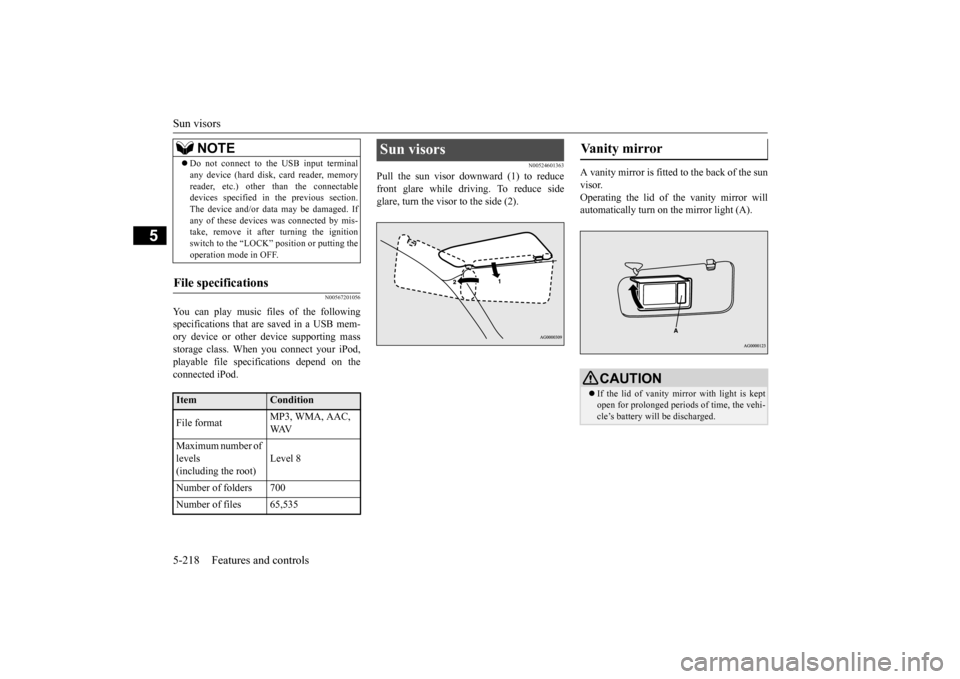
Pull the sun visor downward (1) to reducefront glare while driving. To reduce side glare, turn the visor to the side (2).
A vanity mirror is fitted to the back of the sun visor. Operating the lid of the vanity mirror will automatically turn on the mirror light (A).
Do not connect to the USB input terminal any device (hard disk, card reader, memoryreader, etc.) other than the connectabledevices specified in the previous section. The device and/or data
may be damaged. If
any of these devices
was connected by mis-
take, remove it afte
r turning the ignition
switch to the “LOCK”
position or putting the
operation mode in OFF.
File specifications
Item
Condition
File format
MP3, WMA, AAC, WAV
Maximum number of levels (including the root)
Level 8
Number of folders 700 Number of files 65,535
NOTE
Sun visors
Vanity mirror
CAUTION If the lid of vanity mirror with light is kept open for prolonged periods
of time, the vehi-
cle’s battery will be discharged.
BK0223400US.book 218 ページ 2015年2月13日 金曜日 午後12時15分
Page 326 of 464
Trailer towing 6-14 Driving safety
6
Trailer lights and equipment must comply with federal, state,
and local regulations.
Check with your loca
l recreational vehicle
dealer for the requirements in your area, and use only equipment designed for your vehi- cle. Since lighting and wiring
vary by trailer type
and brand, you should have a qualified tech- nician install a suitable connector between thevehicle and the trailer.
Improper equipment or
installation can cause da
mage to your vehi-
cle’s electrical system
and affect your vehicle
warranty. Many states and Canadi
an provinces require
special outside mirrors when towing a trailer. Even if not required,
you should install spe-
cial mirrors if you ca
nnot clearly see behind
you, or if the trailer
creates a blind spot.
Ask your trailer sales or
rental agency if any
other items are recomm
ended or required for
your towing situation.
Towing a trailer requires a certain amount of experience. Before setting out for the open road, you’ll want to get to know your trailer. Acquaint
yourself with the feel of handling and braking with the added weight of the trailer. Alwayskeep in mind that the vehicle you are driving is now a good deal longer and not nearly as responsive as your vehicl
e is without a trailer.
Before you start, check the trailer hitch, safety chains, tires
and mirror adjustment.
Be sure your vehicle’s ti
res are inflated to the
cold inflation pressure listed in the manual. You’ll find these numbe
rs on the tire and
loading information placard at the sill of thedriver’s door. Refer to “Tire inflati
on pressures” on page
9-18. Stay at least twice as far behind the vehicle ahead as you would when driving your vehi- cle without a trailer.
This can help you avoid
situations that require
heavy braking and sud-
den turns.
Trailer lights Additional trailer equipment
Operating hints
WA R N I N G If you have a rear window open and you tow a trailer with
your vehicle, carbon
monoxide gas which
you cannot see or
smell could come into your vehicle. It can cause unconsciousness or death. Refer to“Exhaust system” on page 9-24. To maximize your safe
ty when towing a
trailer: Have your exhaust system inspected for leaks, and make necessary repairs beforestarting on your trip. Keep the rear windows closed.If exhaust does come into your vehicle through a window or
another opening,
drive with your front, main heating or cooling system on an
d with the blower on
any speed. This will
bring fresh, outside
air into your vehicle. Do not use recircula- tion because it only recirculates the air inside your vehicle. Refer to “Air selectionswitch” on page 7-9.
Driver preparation
Vehicle preparation Tire Following distance
BK0223400US.book 14 ページ 2015年2月13日 金曜日 午後12時15分
Page 425 of 464
Fuses
Vehicle care and maintenance 9-27
9
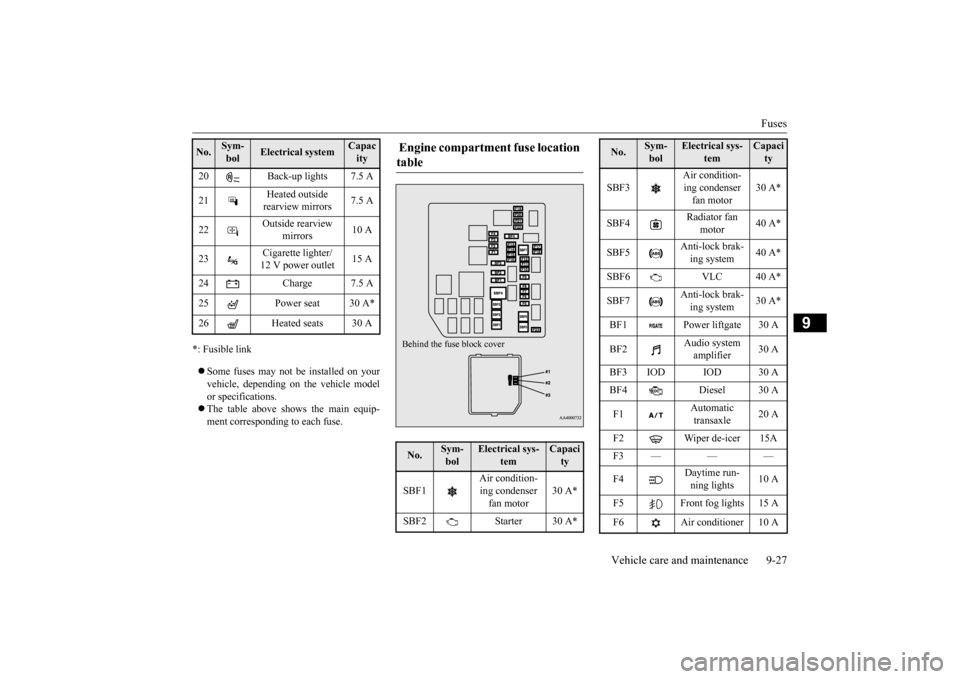
*: Fusible link Some fuses may not be installed on your vehicle, depending on
the vehicle model
or specifications. The table above show
s the main equip-
ment corresponding to each fuse. 20 Back-up lights 7.5 A 21
Heated outside rearview mirrors
7.5 A
22
Outside rearview
mirrors
10 A
23
Cigarette lighter/ 12 V power outlet
15 A
24 Charge 7.5 A 25 Power seat 30 A*26 Heated seats 30 ANo.
Sym- bol
Electrical system
Capacity
Engine compartment fuse location table No.
Sym- bol
Electrical sys-
tem
Capacity
SBF1
Air condition- ing condenser fan motor
30 A*
SBF2 Starter 30 A*Behind the fuse block cover
SBF3
Air condition- ing condenser fan motor
30 A*
SBF4
Radiator fan
motor
40 A*
SBF5
Anti-lock brak- ing system
40 A*
SBF6 VLC 40 A* SBF7
Anti-lock brak- ing system
30 A*
BF1 Power liftgate 30 A BF2
Audio system amplifier
30 A
BF3 IOD IOD 30 A BF4 Diesel 30 A F1
Automatic transaxle
20 A
F2 Wiper de-icer 15A F3——— F4
Daytime run- ning lights
10 A
F5 Front fog lights 15 A F6 Air conditioner 10 ANo.
Sym- bol
Electrical sys-
tem
Capacity
BK0223400US.book 27 ページ 2015年2月13日 金曜日 午後12時15分
Page 430 of 464
Replacement of light bulbs 9-32 Vehicle care and maintenance
9
N00950401656
N00901801173
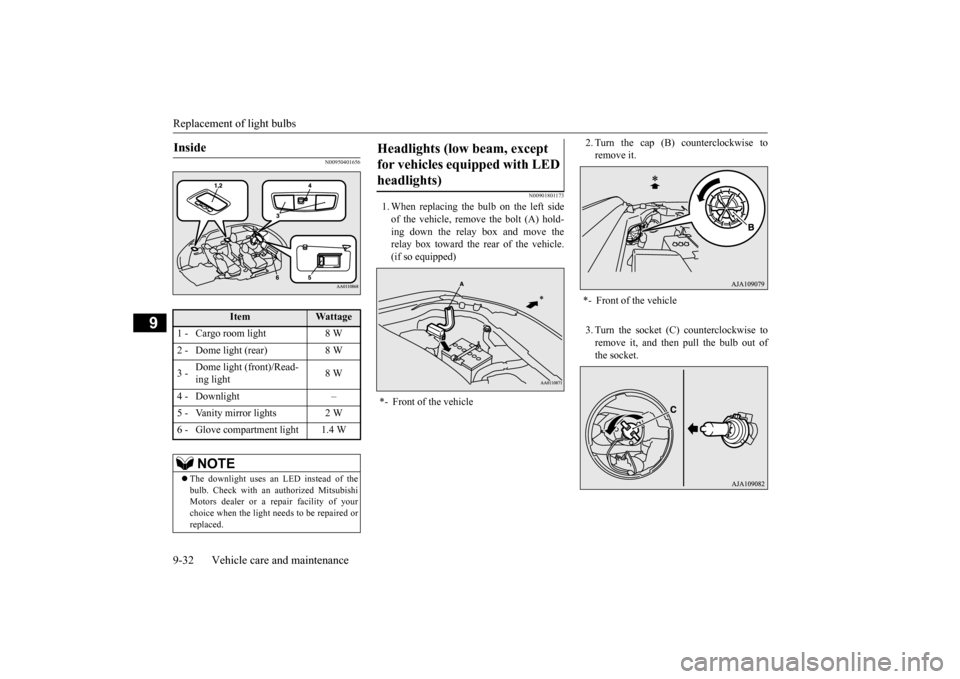
1. When replacing the bulb on the left side of the vehicle, remo
ve the bolt (A) hold-
ing down the relay box and move the relay box toward the rear of the vehicle.(if so equipped)
2. Turn the cap (B) counterclockwise to remove it. 3. Turn the socket (C) counterclockwise to remove it, and then pull the bulb out of the socket.
Inside
Item
Wattage
1 - Cargo room light 8 W 2 - Dome light (rear) 8 W 3 -
Dome light (front)/Read- ing light
8 W
4 - Downlight – 5 - Vanity mirror lights 2 W 6 - Glove compartment light 1.4 W
NOTE
The downlight uses an LED instead of the bulb. Check with an
authorized Mitsubishi
Motors dealer or a re
pair facility of your
choice when the light needs to be repaired or replaced.
Headlights (low beam, except for vehicles e
quipped with LED
headlights) *- Front of the vehicle
*- Front of the vehicle
BK0223400US.book 32 ページ 2015年2月13日 金曜日 午後12時15分