2016 MINI Hardtop 4 Door turn signal bulb
[x] Cancel search: turn signal bulbPage 54 of 251

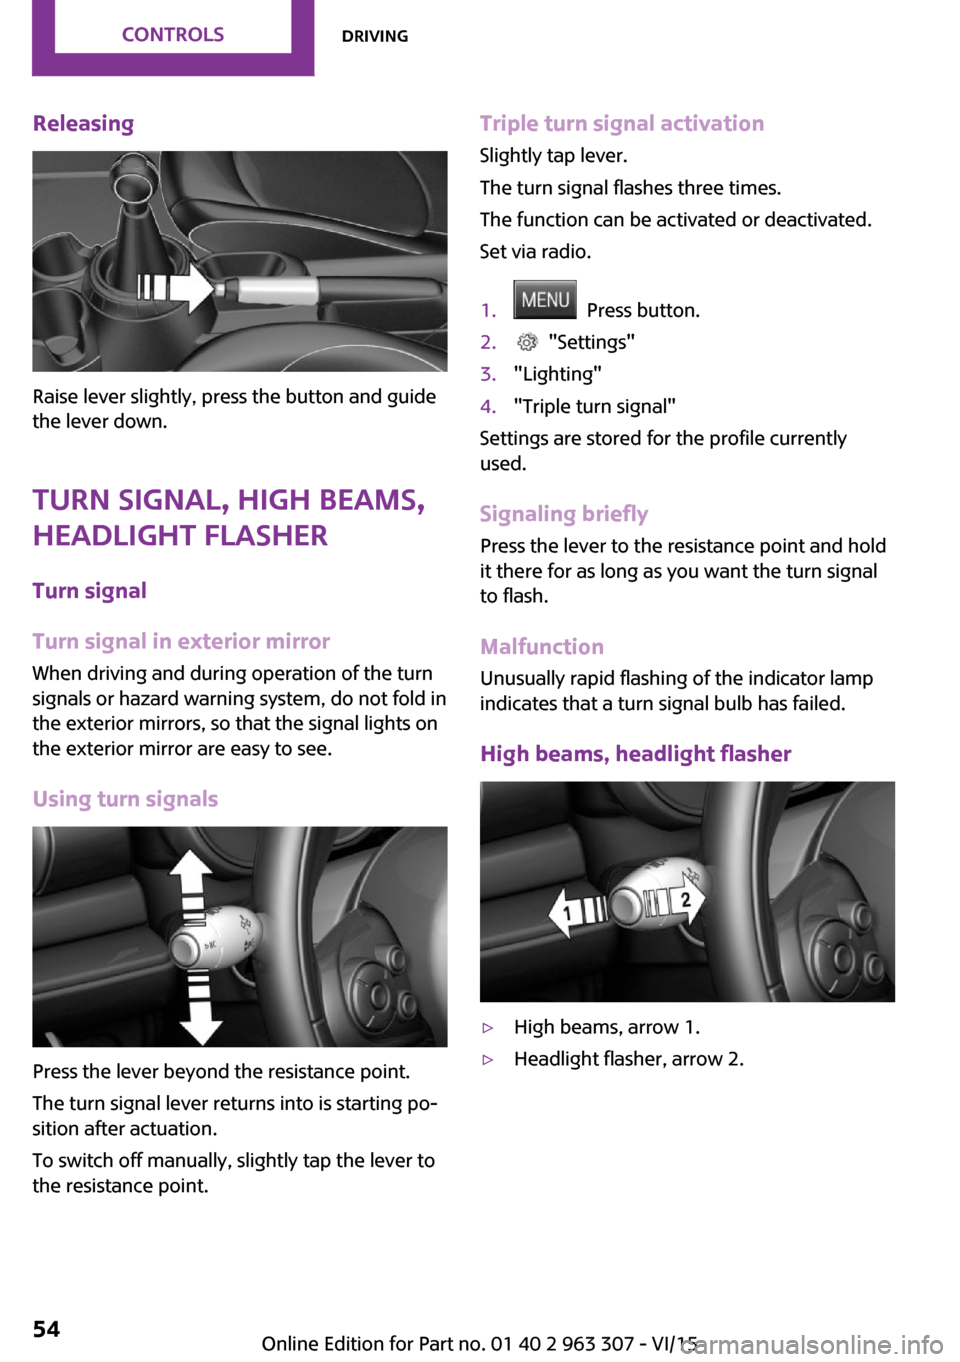
Releasing
Raise lever slightly, press the button and guide
the lever down.
Turn signal, high beams,
headlight flasher
Turn signal
Turn signal in exterior mirror When driving and during operation of the turn
signals or hazard warning system, do not fold in
the exterior mirrors, so that the signal lights on
the exterior mirror are easy to see.
Using turn signals
Press the lever beyond the resistance point.
The turn signal lever returns into is starting po‐
sition after actuation.
To switch off manually, slightly tap the lever to
the resistance point.
Triple turn signal activation
Slightly tap lever.
The turn signal flashes three times.
The function can be activated or deactivated.
Set via radio.1. Press button.2. "Settings"3."Lighting"4."Triple turn signal"
Settings are stored for the profile currently
used.
Signaling briefly Press the lever to the resistance point and hold
it there for as long as you want the turn signal
to flash.
Malfunction
Unusually rapid flashing of the indicator lamp
indicates that a turn signal bulb has failed.
High beams, headlight flasher
▷High beams, arrow 1.▷Headlight flasher, arrow 2.Seite 54CONTROLSDriving54
Online Edition for Part no. 01 40 2 963 307 - VI/15
Page 65 of 251

DSC Dynamic Stability Control is deactivated
or DTC Dynamic Traction Control is activated
Dynamic Stability Control DSC is
switched off or Dynamic Traction Con‐
trol DTC is switched on.
For additional information, refer to Dynamic
Stability Control DSC, refer to page 97, and
Dynamic Traction Control DTC, refer to
page 98.
Flat Tire Monitor FTM The Flat Tire Monitor signals a loss of
tire inflation pressure in a tire.
Reduce your speed and stop cautiously.
Avoid sudden braking and steering maneuvers.
For additional information, refer to Flat Tire
Monitor, refer to page 88.
Tire Pressure Monitor TPM Illuminated: the Tire Pressure Monitor
signals a loss of tire inflation pressure in
a tire.
Reduce your speed and stop cautiously. Avoid
sudden braking and steering maneuvers.
Flashing and then continuously illuminated: no
flat tire or loss of tire inflation pressure can be
detected.▷Interference through systems or devices
with the same radio frequency: After leav‐
ing the area of the interference, the system
automatically becomes active again.▷TPM could not conclude the reset: perform
the reset of the system again.▷A wheel without TPM electronics is
mounted: Have it checked by a dealer’s
service center or another qualified service
center or repair shop as needed.▷Malfunction: Have system checked by a
dealer’s service center or another qualified
service center or repair shop.For additional information, refer to Tire Pres‐
sure Monitor, refer to page 84.
Steering system Steering system in some cases not
working.
Have steering system checked immedi‐
ately by a dealer’s service center or another
qualified service center or repair shop.
Engine functions Have vehicle checked immediately by a
dealer’s service center or another quali‐
fied service center or repair shop.
For additional information, refer to On-board
Diagnostics socket, refer to page 201.
Green lights
Turn signal Turn signal switched on.
Unusually rapid flashing of the indicator
lamp indicates that a turn signal bulb
has failed.
For additional information, refer to Turn signal, refer to page 54.
Parking lights, headlight control Parking lights or headlights are acti‐
vated.
For additional information, refer to
Parking lights/low beams, headlight control, re‐
fer to page 76.
Front fog lights Front fog lights are activated.
For additional information, refer to
Front fog lights, refer to page 79.Seite 65DisplaysCONTROLS65
Online Edition for Part no. 01 40 2 963 307 - VI/15
Page 204 of 251

Headlight glass
Condensation can form on the inside of the ex‐
ternal lights in cool or humid weather. When
driving with the lights switched on, the conden‐
sation evaporates after a short time. The head‐
light glass does not need to be changed.
If despite driving with the lights switched on,
increasing humidity forms, e. g. water droplets
in the lamp, the manufacturer of your vehicle
recommends having it checked by a dealer’s
service center or another qualified service cen‐
ter or repair shop.
Front lights, bulb replacement
Overview Halogen headlights1Low beams/high beams2Turn signalLED headlights1Daytime running lights2Low beams/high beams3Turn signal
Bug light
1Parking lights2Daytime running lights3Fog lights
LED bug light
1Parking lights2Fog lightsSeite 204MOBILITYReplacing components204
Online Edition for Part no. 01 40 2 963 307 - VI/15
Page 205 of 251

LED low beams/LED high beamsFollow the general instructions on lights and
bulbs, refer to page 203.
The lights feature LED technology. Contact a
dealer’s service center or another qualified
service center or repair shop in the event of a
malfunction.
Halogen low beams/halogen high
beams
Follow the general instructions on lights and
bulbs, refer to page 203.
Bulbs: H41.Open the hood, refer to page 194.2.Turn the lid counterclockwise, arrow, and
remove.3.Pull off the connector.4.Unclip spring clip, arrow, and fold down.5.Remove the bulb from the headlight hous‐
ing.6.Insert the new bulb and install the cover in
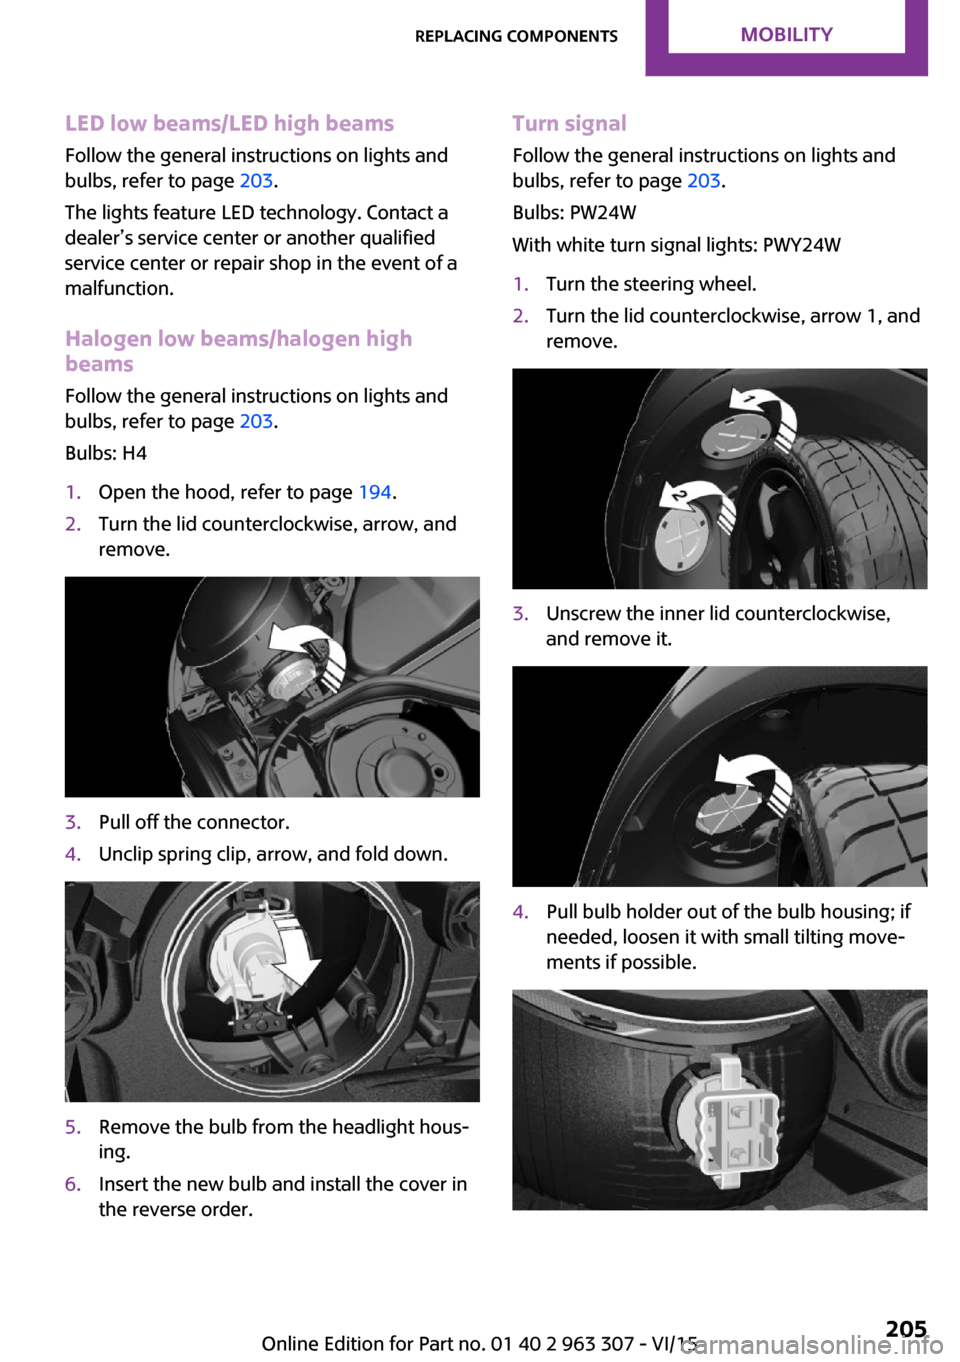
the reverse order.Turn signal
Follow the general instructions on lights and
bulbs, refer to page 203.
Bulbs: PW24W
With white turn signal lights: PWY24W1.Turn the steering wheel.2.Turn the lid counterclockwise, arrow 1, and
remove.3.Unscrew the inner lid counterclockwise,
and remove it.4.Pull bulb holder out of the bulb housing; if
needed, loosen it with small tilting move‐
ments if possible.Seite 205Replacing componentsMOBILITY205
Online Edition for Part no. 01 40 2 963 307 - VI/15
Page 207 of 251

Vehicle with two rear fog lights1Side tail lights2Rear fog lights3License plate lamp4Center brake lamp
Side tail lights
1Brake lights/tail lights2Turn signal3Reversing lights
Side LED tail lights
1Tail lights2Turn signal3Brake light4Reversing lights
Side tail lights
Follow the general instructions on lights and
bulbs, refer to page 203.
Bulbs: P21W
1.Open tailgate, refer to page 27.2.Remove left or right cover.3.Through the opening, loosen the plug con‐
nector, arrow 2 on the bulb holder.
Press the latches together, arrows 1, and
remove the bulb holder.4.Remove the bulb holder from the opening.5.Press the nonworking bulb gently into the
socket, turn counterclockwise and remove.▷Arrow 1: brake lights/tail lights▷Arrow 2: turn signalSeite 207Replacing componentsMOBILITY207
Online Edition for Part no. 01 40 2 963 307 - VI/15
Page 209 of 251

The wire is long enough to guide the socket
down and through between any heat shield
that may be installed and the bumper.4.Replace nonworking bulb.5.To install the new bulb, proceed in reverse
order of removal.
Right fog lamp:
1.Turn the bulb socket counterclockwise and
remove.
The wire is long enough to guide the socket
down and through between any heat shield
that may be installed and the bumper.2.Replace nonworking bulb.3.To install the new bulb, proceed in reverse
order of removal.
Side turn signal, bulb replacement
Follow the general instructions on lights and
bulbs, refer to page 203.
Bulbs:
▷With orange lens: W5W▷With white lens: WY5W diadem1.Open the hood. The covers of the side turn
signal lights are on the left and right next to
the hinges of the hood.2.Loosen nuts of the cover by hand and re‐
move the cover.3.Turn the bulb holder counterclockwise and
remove.4.Replace the bulb.5.To insert the new bulb, proceed in reverse
order of removal. Insert the nuts of the
cover and press down.Seite 209Replacing componentsMOBILITY209
Online Edition for Part no. 01 40 2 963 307 - VI/15
Page 249 of 251

Tire damage 186
Tire identification marks 184
Tire inflation pressure 178
Tire inflation pressure moni‐ tor, refer to FTM 88
Tire Pressure Monitor TPM 84
Tires, changing 186
Tire sealant 188
Tires, everything on wheels and tires 178
Tires, run-flat tires 187
Tire tread 185
Tools 202
Total vehicle weight 227
Tow fitting 218
Towing 216
Tow-starting 216
TPM Tire Pressure Monitor 84
Traction control 98
TRACTION drive mode, driving dynamics 98
Transmission lock, releasing manually 60
Transmission, manual trans‐ mission 58
Transmission, see Steptronic transmission 58
Transporting children safely 45
Tread, tires 185
Treble 150
Triple turn signal activa‐ tion 54
Trip odometer 67
Trip recorder, see Trip odome‐ ter 67
Turn signal, front 204
Turn signal, side 209
Turn signals, operation 54
Turn signals, rear, bulb re‐ placement 206
U
Unintentional alarm 31
Units 72 Units, setting 72
Universal remote control 121
Unlock button, Steptronic transmission 59
Unlocking/locking via door lock 26
Unlocking/locking with re‐ mote control 24
Unlocking, settings 29
Updates made after the edito‐ rial deadline 7
Upholstery care 222
USB audio interface 157
USB interface 126
V
Vanity mirror 125
Vehicle battery 212
Vehicle battery, replacing 212
Vehicle, break-in 136
Vehicle care 221
Vehicle features and op‐ tions 6
Vehicle identification num‐ ber 9
Vehicle jack 210
Vehicle paint 221
Vehicle storage 223
Vehicle wash 220
Ventilation 120
VIN, see vehicle identification number 9
W Warning and indicator lamps, see Check Control 63
Warning displays, see Check Control 63
Warning messages, see Check Control 63
Warning triangle 214
Warranty 7
Washer fluid 57
Washing, vehicle 220 Water on roads 137
Weights 227
Welcome lamps during un‐ locking 24
Welcome lights 77
Wheels, changing 186
Wheels, everything on wheels and tires 178
Wheels, Flat Tire Monitor FTM 88
Wheels, Tire Pressure Monitor TPM 84
Window defroster, rear 117, 119
Windows, powered 31
Windshield cleaning sys‐ tem 55
Windshield de‐ froster 117, 119
Windshield washer fluid 57
Windshield wipers, fold-out position 57
Windshield wipers, see wiper system 55
Winter storage, care 223
Winter tires, suitable tires 187
Winter tires, tread 185
Wiper blades, replacing 202
Wiper fluid 57
Wiper system 55
Wood, care 222
Wrench 202 Seite 249Everything from A to ZREFERENCE249
Online Edition for Part no. 01 40 2 963 307 - VI/15