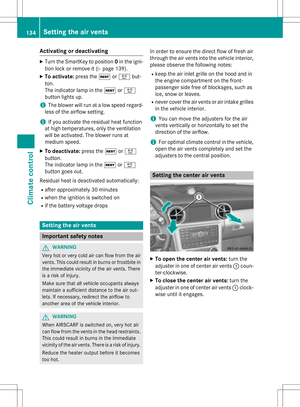
Page 257 of 358

Stowage compartment/telephone
compartment under the armrest
XTo open:push button :up and raise arm-
rest ;.
The stowage compartment can be locked and
unlocked centrally using the SmartKey
(
Ypage 72).
iDepending on the vehicle equipment, a
12 V power socket, USB port or a Media
Interface is installed in the stowage com-
partment. A Media Interface is a universal
interface for mobile audio equipment, e.g.
for an iPod
®or MP3 player (see the sepa-
rate COMAND Operating Instructions).
Eyeglasses compartment
XTo open: press marking :.
Make sure that the eyeglasses compartment
is always closed while the vehicle is in motion.
Stowage compartment in the center
console
XTo open: briefly press the lower section of
cover :.
XTo remove the insert: pull the left-hand
side of the insert up and out.
XTo install the insert: press the insert into
the housing.
Depending on the vehicle equipment, there
may be an ashtray in the center console
instead of a storage compartment.
Stowage compartment in the doors
In the door trim, there is a ruffled pocket ;
with storage slot :.
Stowage box in the rear wall between
the seats
A ruffled pocket is located on the rear wall
between the seats.
Stowage areas255
Stowage and features
Z
Page 258 of 358

:Ruffled pocket
Stowage net
Stowage nets are locate din th efront-
passenger footwell and on th erear wall
behind th edriver's seat .
Reversible floor panel in th etrunk
Using th eflat side of th ereversible floor panel
will giv eyou alevel trunk .If you tur nth e
reversible floor panel over, you can transpor t
objects ,for exampl e adrink scrate ,on it .
XTo turn over :pull up reversible floor
panel ;usin gstrap :.
XTurn ove rreversible floor panel ;and re-
inser tit.
Attached to th ereversible floor panel are tw o
flexible straps ;that you can use to secure
objects ,for exampl ewin dscree n=, when
reversible floor panel :has been turne d
over.
Roof carrier
!
This vehicl eis no tdesigned to transpor t
items on th eroof. Roof carriers and other
device swhic hare mounte don th eroo fthat
hav eno tbeen specifically approve dfor this
model by Mercedes-Ben zmus tno tbe used
as they could damag eth evehicl eand th e
retractable hardtop (vario-roof).
At th etime of goin gto print ,Mercedes -
Benz does no toffer any roo fcarrie ror other
roof-installed device sfor this model.
!This vehicl eis no tdesigned to transpor t
any items on th etrunk lid or to allow lug-
gage carriers or equipmen tof any kind to
be installed to th etrunk lid. Otherwise th e
vehicl eand th eretractable hardtop could
be damaged.
Features
Cup holder
Important safety notes
GWARNIN G
If you do no tcorrectl ystore objects in th e
vehicl einterior, they can slip or be flun g
around ,thus strikin gvehicl eoccupants.
256Features
Stowage and features
Page 259 of 358

There is a risk of injury, especially when brak-ing or abruptly changing directions.
RAlways store objects so that they cannot be
flung around in these or in similar situa-
tions.
RAlways make sure that objects do not pro-
trude from stowage compartments, parcel
nets or stowage nets.
RClose lockable stowage compartments
while driving.
RStow and secure objects that are heavy,
hard, pointy, sharp-edged, fragile or too
large in the trunk.
!Only use the cup holders for containers of
the right size and which have lids. The
drinks could otherwise spill.
!Do not expose drinks bottles in the cup
holder in the center console to continuous, strong and direct sunlight. The passenger
compartment in the area of the center con-
sole can otherwise be damaged by the con-
centrated and reflected sunlight.
Cup holder in the center console
XTo open: slide cover ;back.
XTo remove the insert: slide catch:
inwards on both sides in the direction of the arrow.
XRemove the cup holder insert upwards.
XTo re-install the insert: place the insert in
the stowage space.
XSlide catch :outwards in the direction of
the arrow until it engages. You can remove the cup holder insert for
cleaning. Clean with clear, lukewarm water
only.
Bottle holder
Observe the "Important safety notes" in the
"Stowage compartments" section
(
Ypage 254).
!Make sure that any bottles weighing more
than 1.1 lb(0.5 kg) that are stored in the
bottle holder, rest on the vehicle floor. The
bottle holder could otherwise be damaged.
XPress the outer edge of button :and slide
in the direction of the arrow until the bottle
fits into the opening.
XInsert the bottle into the bottle holder.
The bottle holder is suitable for bottles with a
capacity of 25 fl. oz. (0.7 l) to 54 fl. oz. (1.5 l).
The bottle holder does not secure the bottles;
it merely prevents them from tipping over.
Sun visors
Overview
GWARNING
If the mirror cover of the vanity mirror is folded
up when the vehicle is in motion, you could be
blinded by incident light. There is a risk of an
accident.
Always keep the mirror cover folded down
while driving.
Features257
Stowage and features
Z
Page 260 of 358

:Mirror light
;Bracket
=Retaining strip, e.g. for a parking lot ticket
?Vanity mirror
AMirror cover
iWhen driving at high speeds with the side
window or roof open:
If you have inserted a car park ticket into
retaining strip =, make sure that it is not
blown away by the wind.
Vanity mirror in the sun visor
Mirror light :only functions if the sun visor
is clipped into bracket ;and mirror cover A
has been folded up.
Glare from the side
XFold down the sun visor.
XPull the sun visor out of retainer ;.
XSwing the sun visor to the side.
XSlide the sun visor horizontally as desired.
Ashtray
XTo open:push the lower section of
cover :.
The cover opens.
XTo remove the insert: lift insert=up;
and out.
XTo re-install the insert: press insert=
into the holder until it engages.
Cigarette lighter
GWARNING
You can burn yourself if you touch the hot
heating element or the socket of the cigarette lighter.
In addition, flammable materials can ignite if:
Rthe hot cigarette lighter falls
Ra child holds the hot cigarette lighter to
objects, for example
There is a risk of fire and injury.
Always hold the cigarette lighter by the knob.
Always make sure that the cigarette lighter is
out of reach of children. Never leave children
unsupervised in the vehicle.
258Features
Stowage and features
Page 261 of 358

Your attention must always be focused on the
traffic conditions. Only use the cigarette
lighter when road and traffic conditions per-
mit.
XTurn the SmartKey to position2in the igni-
tion lock (
Ypage 139).
XTo open: push the lower section of
cover :.
The ashtray opens.
XPress in cigarette lighter ;.
Cigarette lighter ;will pop out automati-
cally when the heating element is red-hot.
12 V sockets
General notes
!If you are using all sockets in the vehicle,
make sure that you do not exceed the max-
imum current draw of 55 A. Otherwise, you
will overload the fuses.
XTurn the SmartKey to position 1in the igni-
tion lock (
Ypage 139).
The sockets can be used for accessories with a maximum draw of 180 W (15 A). Accesso-
ries include such items as chargers for mobile
phones.
If you use the sockets for long periods when
the engine is switched off, the battery may
discharge.
iAn emergency cut-out ensures that the
on-board voltage does not drop too low. If
the on-board voltage is too low, the power
to the sockets is automatically cut. This ensures that there is sufficient power to
start the engine.
Socket under the armrest
XOpen the stowage compartment under the
armrest (
Ypage 255).
XLift up the cover of socket :.
On vehicles without ashtrays or lighters, there
is an additional socket in the center console.
Socket in the front-compartment center
console
XTo open: push the lower section of
cover :.
The stowage compartment opens.
XLift up the cover of socket ;.
mbrace
General notes
You must have a license agreement to acti-
vate the mbrace service. Make sure that your
Features259
Stowage and features
Z
Page 262 of 358

system is activated and operational. To log in,
press theïMB Info call button. If any of
the steps mentioned are not carried out, the
system may not be activated.
If you have questions about the activation,
contact one of the following telephone hot-
lines:
RUSA: Mercedes-Benz Customer Assistance
Center at 1-800-FOR-MERCedes
(1-800-367-6372) or 1-866-990-9007
RCanada: Customer Service at
1-888-923-8367
Shortly after successfully registering with the
service, a user ID and password will be sent to
you by post.
USA only: you can use this password to log
onto the mbrace area under "Owners Online"
at http://www.mbusa.com.
The system is available if:
Rit has been activated and is operational
Rthe corresponding mobile phone network is
available for transmitting data to the Cus-
tomer Center
Ra service subscription is available
Rthe starter battery is sufficiently charged
iDetermining the location of the vehicle on
a map is only possible if:
RGPS reception is available.
Rthe vehicle position can be forwarded to the Customer Assistance Center.
The mbrace system
To adjust the volume during a call, proceed as
follows:
XPress the WorX button on the mul-
tifunction steering wheel.
or
XUse the volume controller of the audio sys-
tem/COMAND. The system offers various services, e.g.:
RAutomatic and manual emergency call
RRoadside Assistance call
RMB Info call
USA only: you can find information and a
description of all available features under
"Owners Online" at http://www.mbusa.com.
System self-test
After you have switched on the ignition, the
system carries out a self-diagnosis.
A malfunction in the system has been detec-
ted if one of the following occurs:
RThe indicator lamp in the SOS button does not come on during the system self-test.
RThe indicator lamp in the FRoadside
Assistance button does not light up during
self-diagnosis of the system.
RThe indicator lamp in the ïMB Info call
button does not light up during self-diag-
nosis of the system.
RThe indicator lamp in one or more of the
following buttons continues to light up red
after the system self-diagnosis:
-SOS button
-F Roadside Assistance call button
-ïMB Info call button
RAfter the system self-diagnosis, the Inop‐
erativeorService Not Activated
message appears in the multifunction dis-
play.
If a malfunction is indicated as outlined
above, the system may not operate as expec-
ted. In the event of an emergency, help will
have to be summoned by other means.
Have the system checked at the nearest
authorized Mercedes-Benz Center or contact
the following service hotlines:
RUSA: Mercedes-Benz Customer Assistance
Center at 1-800-FOR-MERCedes
(1-800-367-6372) or 1-866-990-9007
RCanada: Customer Service at
1-888-923-8367
260Features
Stowage and features
Page 263 of 358

Emergency call
Important safety notes
GWARNING
It can be dangerous to remain in the vehicle,
even if you have pressed the SOS button in an emergency if:
Ryou see smoke inside or outside of the vehi-
cle, e.g. if there is a fire after an accident
Rthe vehicle is on a dangerous section of
road
Rthe vehicle is not visible or cannot easily beseen by other road users, particularly when
dark or in poor visibility conditions
There is a risk of an accident and injury.
Leave the vehicle immediately in this or simi-
lar situations as soon as it is safe to do so.
Move to a safe location along with other vehi-
cle occupants. In such situations, secure the
vehicle in accordance with national regula-
tions, e. g. with a warning triangle.
You must have a license agreement to acti-
vate the mbrace service. Make sure that your
system is activated and operational. To reg-
ister, press the ïMB Info call button. If
any of the steps mentioned are not carried
out, the system may not be activated.
If you have questions about the activation,
contact one of the following telephone hot-
lines:
RUSA: Mercedes-Benz Customer Assistance
Center at 1-800-FOR-MERCedes
(1-800-367-6372) or 1-866-990-9007
RCanada: Customer Service at
1-888-923-8367
General notes
An emergency call is dialed automatically if an air bag or Emergency Tensioning Device is
t
riggered.
iYou cannot end an automatically trig-
gered emergency call yourself.
An emergency call can also be initiated man-
ually. As soon as the emergency call has been ini-
tiated, the indicator lamp in the SOS button
flashes. The multifunction display shows the
Connecting Call
message.
The audio output is muted.
Once the connection has been made, the
Call Connected
message appears in the
multifunction display.
All important information on the emergency is
transmitted, for example:
Rcurrent location of the vehicle (as deter-
mined by the GPS system)
Rvehicle identification number
Rinformation on the severity of the accident
Shortly after the emergency call has been ini- tiated, a voice connection is automatically
established between the Customer Assis-
tance Center and the vehicle occupants.
RIf the vehicle occupants respond, the
Mercedes-Benz Customer Assistance Cen-
ter attempts to get more information on the emergency.
RIf there is no response from the vehicle
occupants, an ambulance is immediately
sent to the vehicle.
If no voice connection can be established to
the Mercedes-Benz Customer Assistance
Center, the system has been unable to initiate
an emergency call.
This can occur, for example, if the relevant
mobile phone network is not available. The
indicator lamp in the SOS button flashes con- tinuously.
The Call Failed
message appears in the
multifunction display and must be confirmed.
In this case, summon assistance by other
means.
Features261
Stowage and features
Z
Page 264 of 358

Making an emergency call
XTo initiate an emergency call manually:
press cover:briefly to open.
XPress SOS button ;briefly.
The indicator lamp in SOS button ;
flashes until the emergency call is conclu-
ded.
XWait for a voice connection to the
Mercedes-Benz Customer Assistance Cen-
ter.
XAfter the emergency call, close cover :.
iIf the mobile phone network is unavaila-
ble, mbrace will not be able to make the
emergency call. If you leave the vehicle
immediately after pressing the SOS button,
you will not know whether mbrace placed
the emergency call. In this case, always
summon assistance by other means.
Roadside Assistance button
XPress Roadside Assistance button :.
This initiates a call to the Mercedes-Benz
Customer Assistance Center. The indicator lamp in Roadside Assistance
button
:flashes while the call is active.
The multifunction display shows the Con‐
necting Callmessage. The audio output
is muted.
If a connection can be made, the Call Con‐
nectedmessage appears in the multifunction
display.
If a mobile phone network and GPS reception
are available, the system transfers data to the
Mercedes-Benz Customer Assistance Center,
for example:
Rcurrent location of the vehicle
Rvehicle identification number
iThe audio system or COMAND display
indicates that a call is active. During the
call, you can change to the navigation menu
by pressing the NAVI button on COMAND,
for example.
Voice output is not available.
A voice connection is established between
the Mercedes-Benz Customer Assistance
Center and the vehicle occupants.
From the remote malfunction diagnosis, the
Mercedes-Benz Customer Assistance Center
can ascertain the nature of the problem
(
Ypage 266).
The Mercedes-Benz Customer Assistance
Center either sends a qualified Mercedes-
Benz technician or makes arrangements for
your vehicle to be transported to the nearest
authorized Mercedes-Benz Center.
You may be charged for services such as
repair work and/or towing.
Further details are available in your mbrace
manual.
iThe system has not been able to initiate a
Roadside Assistance call, if:
Rthe indicator lamp for Roadside Assis-
tance call button :is flashing continu-
ously.
Rno voice connection to the Mercedes-
Benz Customer Assistance Center was
established.
262Features
Stowage and features