2016 MERCEDES-BENZ SL-CLASS ROADSTER navigation
[x] Cancel search: navigationPage 426 of 614
You can save up to 20 routes and 50 desti-
nations for your vehicle on the server and dis-
play these in the list. If you send further routes
or destinations to the server, the existing
entries are deleted from the list.
iThe routes/destinations sent from Goo-
gle™ maps to the server are automatically
deleted from there after seven days.
Using destinations
Calling up the menu
XSelect an entry in the list by turning cVd
the COMAND controller and press Wto
confirm.
A menu appears.
Displaying details
XConfirm Detailsin the menu by pressing
W the COMAND controller.
The route or destination is displayed.
XTo call up a POI: confirm the entry by
pressing W.
iYou can use the function if:
Ra mobile phone is connected
(
Ypage 383)
Rthe destination address contains a tele-
phone number
Using as the destination
XSelect Navigatetoin the menu by turning
cVd the COMAND controller and press W
to confirm.
You then switch to navigation mode and
can start route calculation (
Ypage 329).
iA route can only be stored as a personal
POI on an SD memory card or taken directly
for route calculation (
Ypage 424).
Calling up the destination
XSelect Callin the menu by turning cVd
the COMAND controller and press Wto
confirm.
You then switch to the telephone function
and make the call (
Ypage 389). Importing a destination/route
When importing, you can choose whether you
want to save the destination as a personal POI
on an SD memory card or in the address book.
You can only save routes as personal POIs to
an SD memory card, but not in the address
book.
XSelect Importin the menu with the
COMAND controller and press Wto con-
firm.
iIf there is no SD memory card in the slot,
the As
PersonalPOImenu item is grayed
out.
XInsert the SD memory card (Ypage 447).
XTo save as a personal POI: confirmAs
Personal POIby pressing Wthe
COMAND controller.
The entry is saved as a personal POI on the SD memory card.
iYou can use a personal POI in navigation
mode for route calculation (
Ypage 344).
You can also use a personal POI in another
vehicle for route calculation.
XTo save to the address book: selectTo
Address Bookby turning cVdthe
COMAND controller and press Wto con-
firm.
The entry is stored in the address book.
Deleting a destination/route from the
server
XSelect an entry in the list by turning cVd
the COMAND controller and press Wto
confirm.
XSelect Deleteand press Wto confirm.
A query appears asking whether the desti-
nation or the route should be deleted.
XSelect YesorNoand press Wto confirm.
424Online and Internet functions
COMAND
Page 430 of 614
Internet radio
General notes
A good Internet connection isrequired to
transmit audio data efficiently. To ensure the
best-possible reception, your mobile phone
should beconnected to the vehicle's exterior
antenna via the phone bracket (optional).
Bear inmind that a relatively large volume of
data can betransmitted when using the Inter-
net radio. An average 12 8kbit per second
data transfer rate can transfer 56 MB of data
in one hour.
The data transfer rate of a station is displayed
while receiving data.
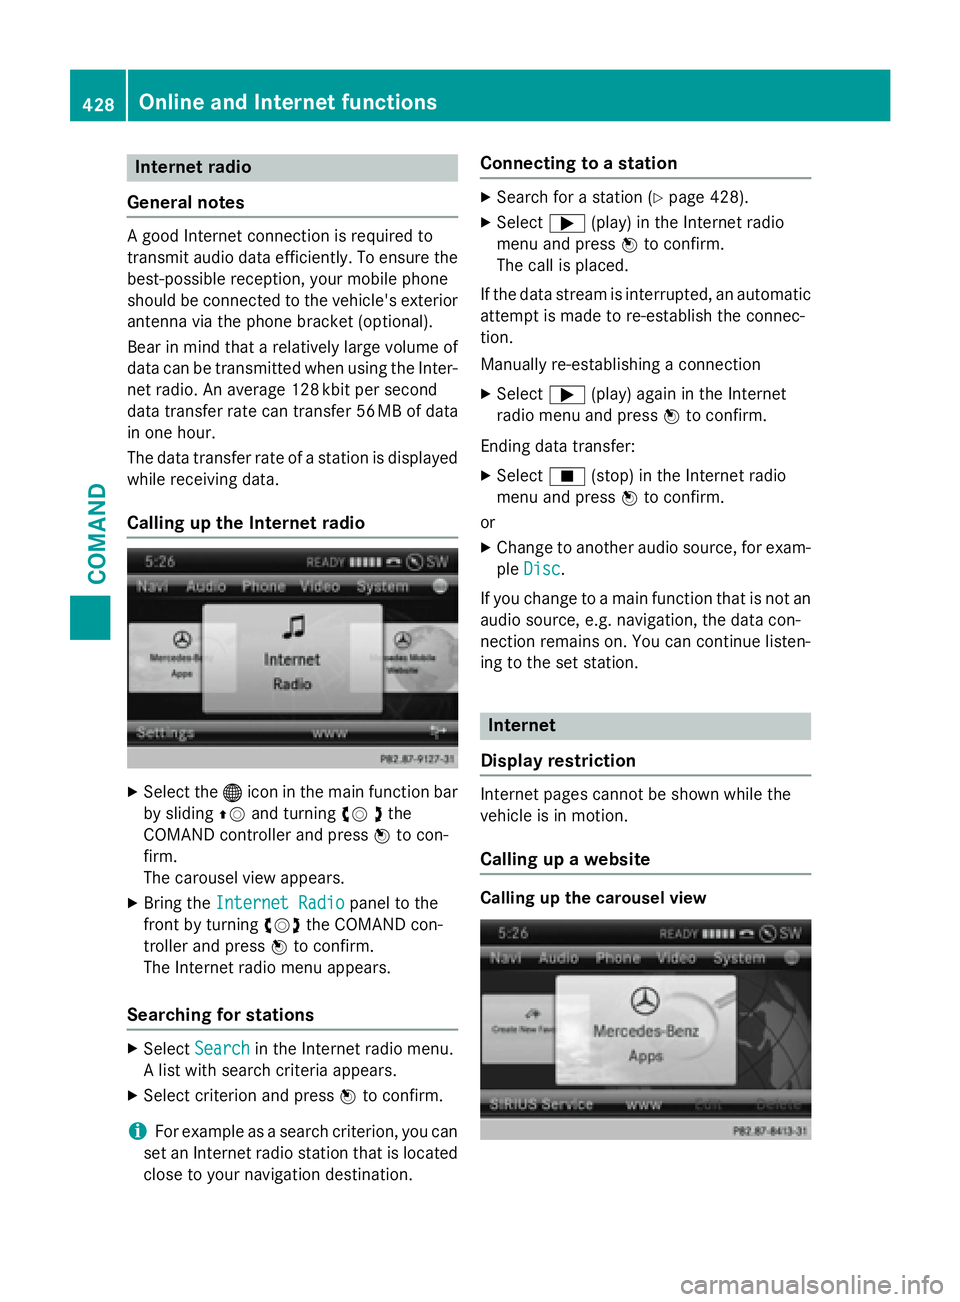
Calling up the Internet radio
XSelect the ®icon in the main function bar
by sliding ZVand turning cV dthe
COMAND controller and press Wto con-
firm.
The carousel view appears.
XBring the Internet Radiopanel to the
front by turning cVdthe COMAND con-
troller and press Wto confirm.
The Internet radio menu appears.
Searching for stations
XSelect Searchin the Internet radio menu.
A list with search criteria appears.
XSelect criterion and press Wto confirm.
iFor example as a search criterion, you can
set an Internet radio station that is located
close to your navigation destination.
Connecting to a station
XSearch for a station (Ypage 428).
XSelect ;(play) in the Internet radio
menu and press Wto confirm.
The call is placed.
If the data stream is interrupted, an automatic
attempt is made to re-establish the connec-
tion.
Manually re-establishing a connection
XSelect ;(play) again in the Internet
radio menu and press Wto confirm.
Ending data transfer:
XSelect É(stop) in the Internet radio
menu and press Wto confirm.
or
XChange to another audio source, for exam-
ple Disc
.
If you change to a main function that is not an
audio source, e.g. navigation, the data con-
nection remains on. You can continue listen-
ing to the set station.
Internet
Display restriction
Internet pages cannot be shown while the
vehicle is in motion.
Calling up a website
Calling up the carousel view
428Online and Internet functions
COMAND
Page 454 of 614
attained with up-to-date Gracenote®music
recognition technology. Information about
new versions can be obtained from an author-
ized Mercedes-Benz Center.
You can have your music recognition soft-
ware updated there with a DVD, or you can
update it yourself.
iThe Gracenote Media Database is upda-
ted in conjunction with the navigation sys-
tem's digital map (
Ypage 377).
Displaying the track and album
XPress the zbutton.
The current track and album are displayed
in a window.
Displaying metadata (MP3 mode)
COMAND can also display the album name
and artist (metadata) during playback if this
information has been entered into the sys-
tem.
For all media that contain MP3 data (e.g. MP3
CD, SD memory card, MUSIC REGISTER), you
can determine whether:
Rthe metadata contained in the tags of the
encoded music data should be displayed
Rthe file and directory names should be dis-
played during playback
XTo display the album and artist name:
select MP3
orUSBin the basic display by
sliding VÆand turning cVdthe COMAND
controller and press Wto confirm.
XSelect Display track informationand
press Wto confirm.
Selecting an active partition (USB mass
storage devices only)
You can select this function for USB mass
storage devices when the storage device is
partitioned. Up to 5 partitions (primary or log-
ical, FAT, FAT32 and NTFS) are supported.
XSelect MP3in the basic display by sliding
VÆ and turning cVdthe COMAND con-
troller and press Wto confirm.
XSelect Select active partitionand
press Wto confirm.
Playback options
XTo select options: switch on audio CD or
MP3 mode (
Ypage 448).
XSelect CDorMP3mode by sliding VÆand
turning cVdthe COMAND controller and
then pressing Wto confirm.
The options list appears. The #dot indi-
cates the option selected.
XSelect an option by turning cVdand press
W to confirm.
The option is switched on. For all options
except Normal track sequence
, you will
see a corresponding display in the display/
selection window.
The following options are available to you:
RNormal track sequence
The tracks are played in the normal order
(e.g. track 1, 2, 3, etc.).
In MP3 mode, the track order is determined
by the order in which the tracks are written
to the MP3 data carrier when it is created.
Alphabetical order is the most common.
Once all the tracks in a folder have been
played, the tracks in the next folder are
played.
RRandom media
All the tracks on the medium are played in
random order (e.g. track 3, 8, 5 etc.).
RRandom track list(MP3 mode only)
You will hear the tracks in the current play-
list or currently active folder (including all
subfolders) in random order.
iThe Normal track sequenceoption is
automatically selected when you change
the disc you are currently listening to or
when you select a different medium. If an
option is selected, it remains selected after
COMAND is switched on or off.
452Audio
COMAND
Page 475 of 614
Dataformats
MP3 and WMA are supported as dat aformats
wit hfixed and variable bit rates (up to
32 0kbits/s).
Specia lconsiderations when using MP 3
player s
Up to eigh tdirectory levels wit hup to 1,000
track sper directory are supported.
Do no tuse US Bextension leads or adapters .
The ycan impair functionality.
iDRM (Digital Rights Management) protec-
te dfiles are no tsupported by th eMedia
Interface .
Audio AUX mode
Note son audi oAUX mode
External audio source smay hav edifferen t
volumes ,whic hcan mean that system mes -
sage ssuc has traffic announcements and
navigation system announcements are muc h
louder. If necessary, deactivat eth esystem
message sor adjust their volume manually.
You can connec tan external audio source
(AUX) to COMAND .
Dependin gon th evehicl emodel series, th e
connection is made usin g ajackin th estow-
age compartmen tin th ecenter console or a
US Bpor t (
Ypage 447).
If COMAND is equipped wit hth eMedia Inter-
face, external audio source sare connecte d
usin gth ecable set provided. An AU Xsocke t
is no tprovided. The connection sfo rth e
Media Interface are locate din th estowage
compartmen tin th ecenter console.
iYou will fin dfurther information onlin eat
http://www.mbusa-mobile.co m.Or cal l
th eMercedes-Ben zCustome rAssistance
Cente rat 1-800-FOR-MERCedes
(1-800-367-6372 ) (for the USA) or Cus-
tomer Relations at 1-800-387-0100 (for
Canada).
Switching to audio AUX mode
Switching on using the DISC button
The external device is connected to the audio
AUX input.
XPress the hbutton one or more times.
By pressing the function button repeatedly,
you can change the operating mode in the
following order:
RCD/MP3 (disc)
RMemory card mode
RMUSIC REGISTER
RUSB storage device
RMedia Interface or audio AUX mode
RBluetooth®audio mode
Switching modes via the audio menu
When you connect an external audio source,
audio AUX is not selected automatically.
XSelect Audioin the main function bar by
sliding ZVand turning cVdthe COMAND
controller and press Wto confirm.
If AUX mode was the last mode selected, it
will now be active.
If another audio source is switched on, you
can now switch to audio AUX mode in the
audio menu.
XSelect AudiousingZVand press Wto
confirm.
The audio menu appears.
XSelect Auxby turning cVdand press Wto
confirm.
The audio AUX menu appears. The medium
in the external audio source is played if the
source is connected and playback selec-
ted.
Audio473
COMAND
Z
Page 480 of 614
Pause function
XShow the menu (Ypage 477).
XTo pause playback:selectËby turn-
ing cVd the COMAND controller and press
W to confirm.
The Ë display changes to Ì.
XTo continue playback: selectÌand
press Wto confirm.
The menu is hidden.
Selecting a scene/chapter
If the film is divided into scenes or chapters,
you can select them directly while the film is
running, or skip forwards step by step. Some
DVDs do not permit this at certain points (e.g.
during the opening credits).
It may also be possible to select the scene/
chapter from within the menu stored on the
DVD.
XTo skip forwards or back: in full screen
mode, turn cVdthe COMAND controller.
or
XSlide XVY the COMAND controller.
or
XPress the EorF button on the con-
trol panel.
The navigation menu (
Ypage 476) appears
for approximately eight seconds.
Selecting a film/track
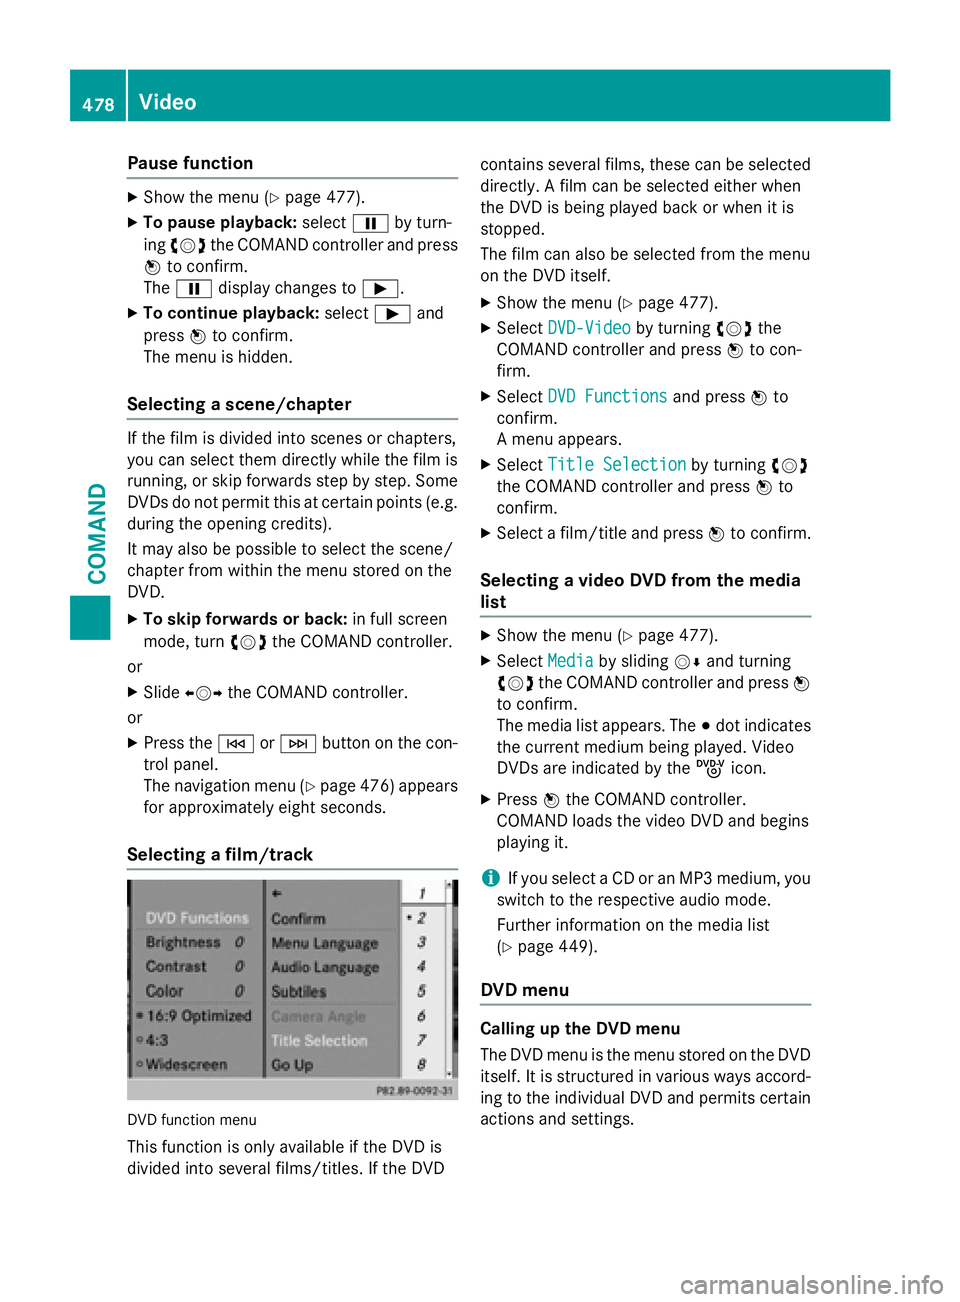
DVD function menu
This function is only available if the DVD is
divided into several films/titles. If the DVD contains several films, these can be selected
directly. A film can be selected either when
the DVD is being played back or when it is
stopped.
The film can also be selected from the menu
on the DVD itself.
XShow the menu (Ypage 477).
XSelect
DVD-Videoby turning cVdthe
COMAND controller and press Wto con-
firm.
XSelect DVD Functionsand press Wto
confirm.
A menu appears.
XSelect Title Selectionby turning cVd
the COMAND controller and press Wto
confirm.
XSelect a film/title and press Wto confirm.
Selecting a video DVD from the media
list
XShow the menu (Ypage 477).
XSelect Mediaby sliding VÆand turning
cVd the COMAND controller and press W
to confirm.
The media list appears. The #dot indicates
the current medium being played. Video
DVDs are indicated by the ýicon.
XPress Wthe COMAND controller.
COMAND loads the video DVD and begins
playing it.
iIf you select a CD or an MP3 medium, you
switch to the respective audio mode.
Further information on the media list
(
Ypage 449).
DVD menu
Calling up the DVD menu
The DVD menu is the menu stored on the DVD
itself. It is structured in various ways accord- ing to the individual DVD and permits certain
actions and settings.
478Video
COMAND
Page 482 of 614
XSelectMenu LanguageorAudio Lan‐
guageand press Wto confirm.
In both cases, a menu appears after a few
seconds. The #dot in front of an entry indi-
cates the currently selected language.
XSelect a setting by turning cVdthe
COMAND controller and press Wto con-
firm.
Subtitles and camera angle
These functions are not available on all DVDs.
The number of subtitle languages and camera
angles available depends on the content of
the DVD. It may also be possible to access the
settings from the DVD menu.
XShow the DVD menu (Ypage 478).
XSelect DVD-Videoin the menu by turning
cVd the COMAND controller and press W
to confirm.
XSelect DVD Functionsand press Wto
confirm.
XSelect SubtitlesorCamera Angleand
press Wto confirm.
In both cases, a menu appears. The #dot in
front of an entry indicates the current set-
ting.
XSelect a setting by turning cVdthe
COMAND controller and press Wto con-
firm.
Interactive content
DVDs can contain interactive content (e.g. a
video game). In a video game, for example,
you may be able to influence events by select-
ing and triggering actions. The type and num-
ber of actions depend on the DVD.
XSelect an action by sliding ZVÆorXVY the
COMAND controller and press Wto exe-
cute it.
A menu appears and the first entry, Select
,
is highlighted.
XPress Wthe COMAND controller.
Video AUX mode
Connecting external video sources
External video sources may have different
volumes, which can mean that system mes-
sages such as traffic announcements and
navigation system announcements are much
louder. If necessary, deactivate the system
messages or adjust their volume manually.
If your vehicle is equipped with Media Inter-
face, you can connect an external video
source (AUX video) (
Ypage 467).
The 1/8 inch audio/video jacks are in the
center console stowage compartment.
iIn vehicles with a rear view camera, the
AUX video jack cannot be used for external
video sources.
Switching to AUX video mode
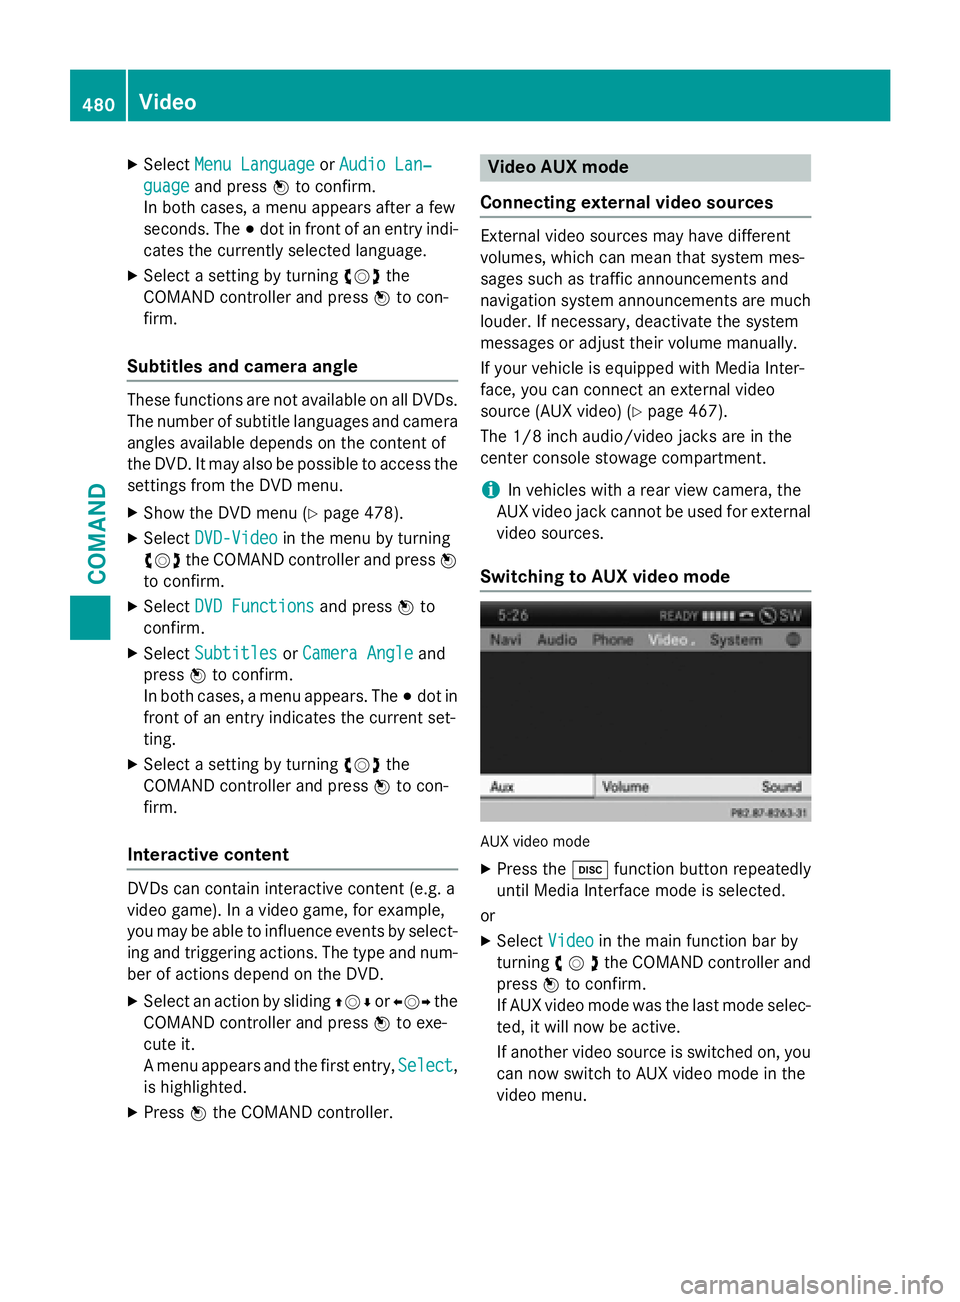
AUX video mode
XPress the hfunction button repeatedly
until Media Interface mode is selected.
or
XSelect Videoin the main function bar by
turning cVdthe COMAND controller and
press Wto confirm.
If AUX video mode was the last mode selec-
ted, it will now be active.
If another video source is switched on, you can now switch to AUX video mode in the
video menu.
480Video
COMAND
Page 491 of 614
Selecting sound settings
You can select the sound settings in the CD/
MP3, video DVD and AUX modes.
XSwitch on an operating mode (e.g. audio
CD mode) (
Ypage 491).
XSelectTrebleorBassusing
the :=; buttons on the remote
control and press the 9button to confirm.
An adjustment scale appears.
XSelect a setting using the 9:but-
tons and press the 9button to confirm.
Multiple users
Simultaneous use of the rear-compart-
ment disc drive
The two rear-compartment screens can be
operated almost entirely independently from
one another. However, there can be a conflict
in some menus if the two screens are used
simultaneously.
If the rear-compartment disc drive is being
used for both screens simultaneously, select-
ing certain menus or settings on one of the
screens also affects the other screen.
The following functions affect both screens:
Rchanging playback options
Rselecting a track (from a track list or folder)
Rusing the play, pause and stop functions
Rfast forwarding/rewinding or scrolling
Rcalling up the DVD menu and navigating
within it
Rsetting the language, subtitles and camera
angle
Rcalling up interactive DVD content
The following functions affect only one
screen:
Raudio and video functions as well as picture
settings
Rswitching between full screen and the
menu Switching between operating modes
When you exit an operating mode (e.g. audio
CD mode), the current setting is saved. If you
call up this operating mode again later, there
are two possibilities:
Rthe operating mode has been changed on
the other screen.
Rthe operating mode has not been changed.
In the first case, the operating mode appears as it is on the other screen.
In the second case, the setting appears on the
screen as it was when you last exited the
operating mode.
Picture settings
Overview
You can select picture settings in video DVD
and AUX mode (
Ypage 500).
Adjusting the brightness, contrast and
color
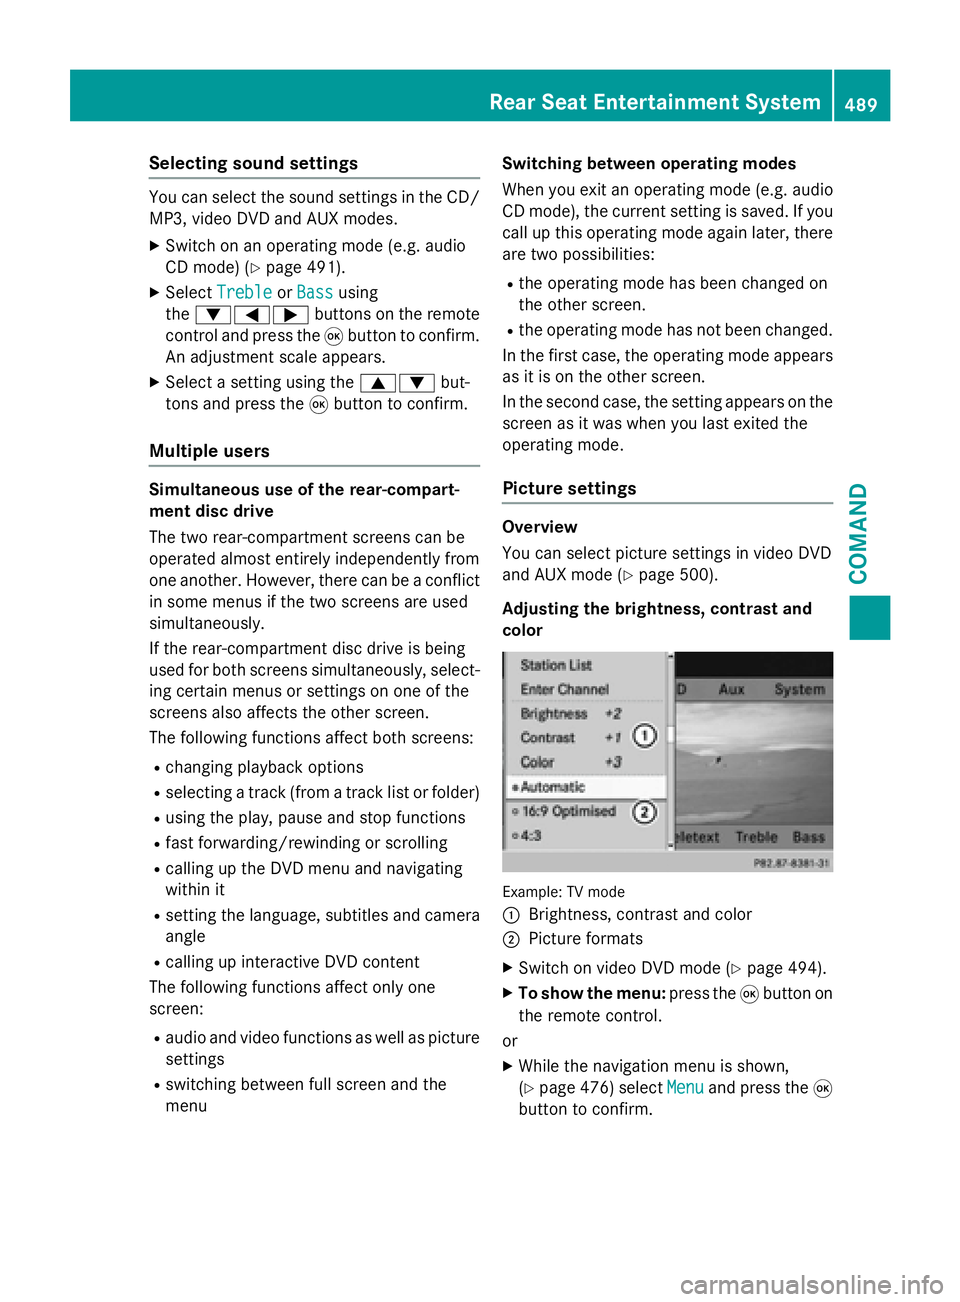
Example: TV mode
:
Brightness, contrast and color
;Picture formats
XSwitch on video DVD mode (Ypage 494).
XTo show the menu: press the9button on
the remote control.
or
XWhile the navigation menu is shown,
(
Ypage 476) select Menuand press the9
button to confirm.
Rear Seat Entertainment System489
COMAND
Z
Page 492 of 614
XSelectDVD-Videousing
the :=; buttons and press the
9 button to confirm.
XSelect Brightness,Contrastor Color
using the 9: buttons and press the
9 button to confirm.
An adjustment scale appears.
XSelect a setting using the 9:but-
tons and press the 9button to confirm.
Changing the picture format
XTo show the menu: press the9button on
the remote control.
or
XWhile the navigation menu is shown,
(
Ypage 476) select Menuand press the9
button to confirm.
XSelect DVD-Videousing
the :=; buttons and press the
9 button to confirm.
The dot in front of one of the menu items
16:9
Optimized, 4:3or Widescreenindi-
cates the format currently selected.
XSelect a format using the 9:but-
tons and press the 9button to confirm.
System settings
Note
You can adjust almost all system settings
individually for each screen without affecting
the other screen. You make these settings
using the remote control (
Ypage 484).
Selecting the display language
XSelect Systemusing the 9=;
buttons on the remote control and press 9
to confirm.
You see the system menu on the selected
rear screen.
XSelect Settingsusing the :button
and press 9to confirm.
XSelect Languageusing the 9: but-
tons and press the 9button to confirm.
The list of languages appears. A #dot
indicates the current setting.
XSelect a language using the 9:but-
tons and press the 9button to confirm.
The Rear Seat Entertainment System acti-
vates the selected language.
Switching the display design
XSelect Settingsusing the :button
and press 9to confirm.
XSelect Day Mode,Night Modeor Auto‐
maticusing the 9: buttons and
press the 9button to confirm.
The dot indicates the current setting.
DesignExplanation
Day ModeThe display is set per-
manently to day
design.
Night ModeThe display is set per-
manently to night
design.
AutomaticThe display design
changes depending on
the vehicle instrument
cluster illumination.
Setting the brightness
XSelect Settingsusing the :button
and press 9to confirm.
XSelect Brightnessusing the 9:
buttons and press the 9button to confirm.
A scale appears.
XAdjust the brightness using the 9:
buttons and press the 9button to confirm.
The brightness bar moves up or down. The
picture becomes lighter or darker in
accordance with the scale.
490Rear Seat Entertainment System
COMAND