2016 MERCEDES-BENZ S-Class SEDAN Heated seat
[x] Cancel search: Heated seatPage 120 of 438
Adjusting the 4-way lumbar support
The 4-way lumbar support can be adjusted with
th emultimedia system (see th eseparat eoper -
ating instructions).
Switching the seat heating on/off
Switching on/off
GWARNIN G
Repeatedly switching on th eseat heating can
caus eth eseat cushion and backrest pads to
become ver yhot .The healt hof person swit h
limite dtemperature sensitivit yor alimite d
abilit yto reac tto excessivel yhigh tempera-
tures may be affecte dor they may eve nsuffer
burn-like injuries. There is aris kof injury.
Therefore ,do no tswitch th eseat heating on
repeatedly.
Fo rvehicles equipped wit hth eWarmth Comfort
package: th earmres tin th edoor and th ecenter
console can also be heated when you switch on
th eseat heating of on eof th efron tseats. You
can adjust this usin gth emultimedia system
(see th eseparat eoperating instructions).
The three red indicator lamp sin th ebutto nindi-
cat eth eheating level you hav eselected.
The system automatically switches down from
level 3to level 2after approximately eigh t
minutes.
The system automatically switches down from
level 2to level 1after approximately te n
minutes.
The system automatically switches off approx -
imately 20 minute safter it is set to level 1.
Vehicles wit hth eSeat Heating Plus package:
you can set th edistribution of th eheated sec -
tion sof th eseat cushion and backrest on th e
fron tseat svia th emultimedia system (see th
e
s
eparat eoperating instructions).
Vehicles wit hth eSeat Heating Plus package:
you can adjust th edistribution of th eheated
section sof th eseat cushion and backrest on th e
fron tseat svia th emultimedia system (see th e
separat eoperating instructions).
Vehicles wit hRear Seat Entertainmen tSyste m
and electric seat adjustment: you can set th e
distribution of th eheated section sof th erear
seat cushion and backrest via th eRear Seat Entertainmen
tSyste m(see th eseparat eoper -
ating instructions).
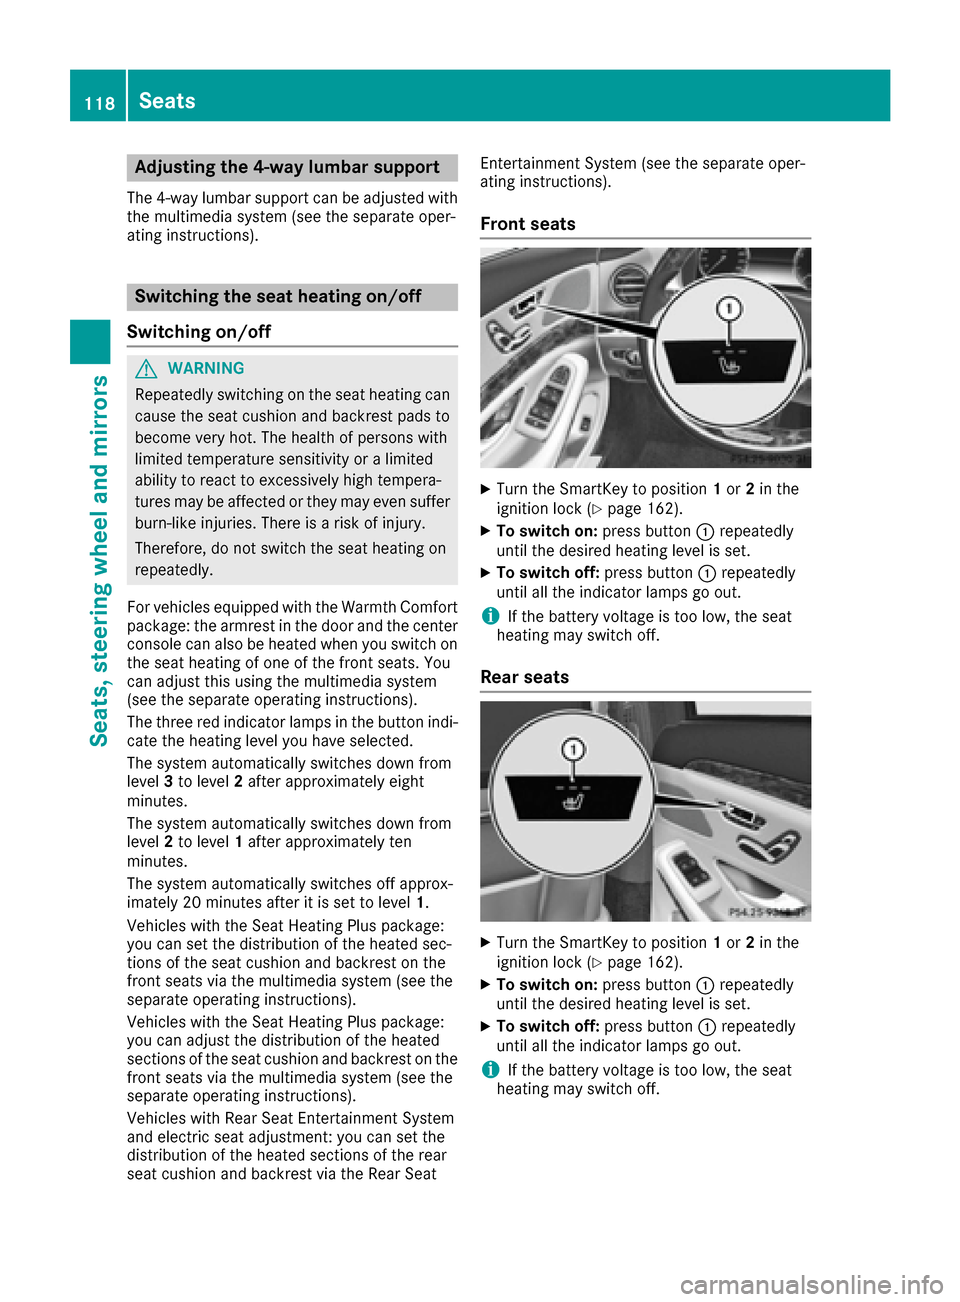
Front seats
XTurn th eSmartKey to position 1or 2in th e
ignition loc k (Ypage 162).
XTo switch on: press button: repeatedly
until th edesired heating level is set .
XTo switch off:press butto n: repeatedly
until all th eindicator lamp sgo out .
iIf thebattery voltag eis to olow, th eseat
heating may switch off .
Rear seats
XTurn theSmartKey to position 1or 2in th e
ignition loc k (Ypage 162).
XTo switch on: press button: repeatedly
until th edesired heating level is set .
XTo switch off:press butto n: repeatedly
until all th eindicator lamp sgo out .
iIf thebattery voltag eis to olow, th eseat
heating may switch off .
118Seats
Seats, steering wheel and mirrors
Page 126 of 438
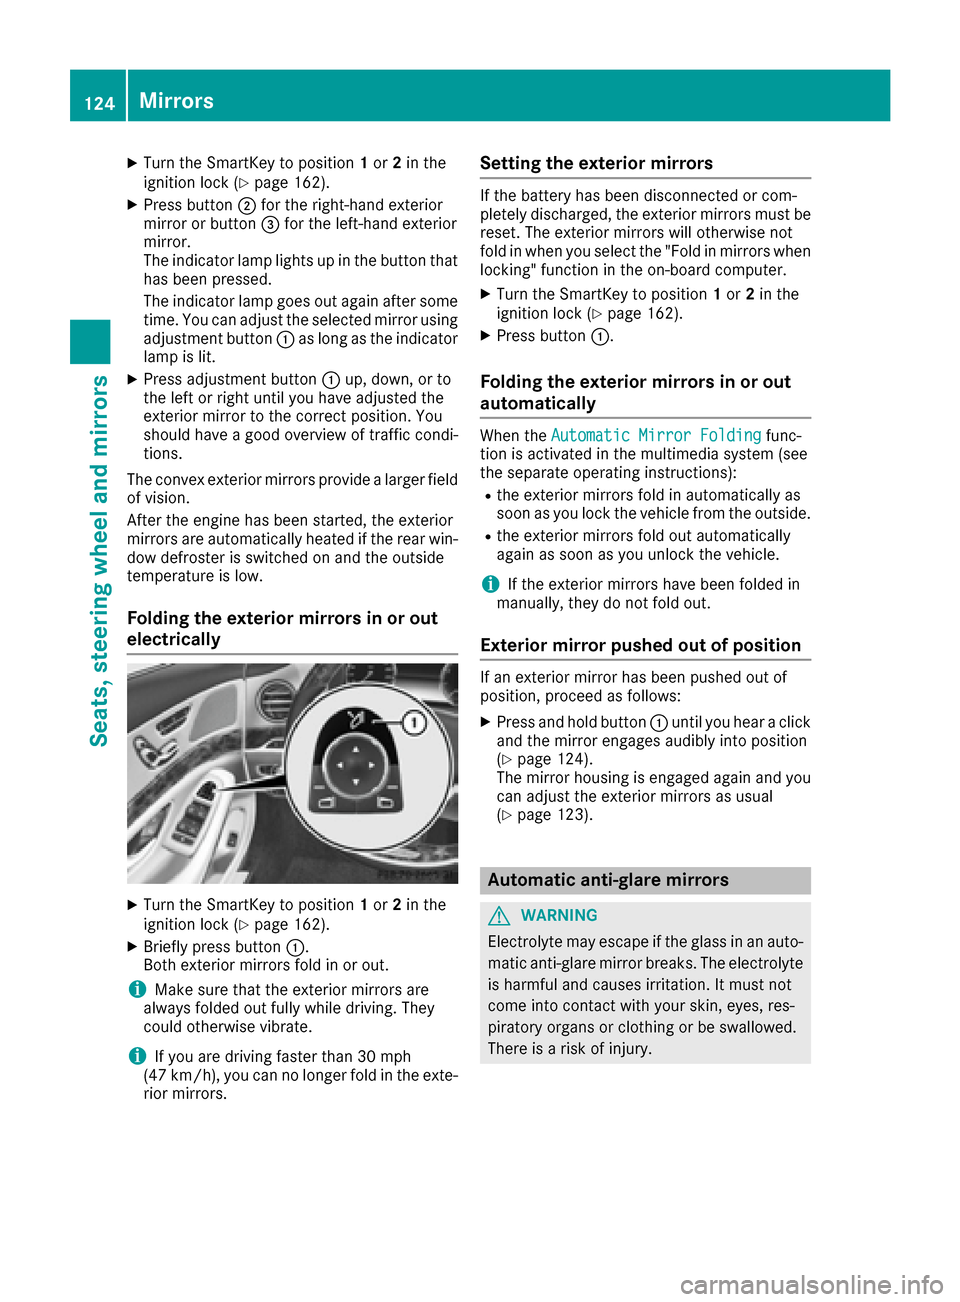
XTurn the SmartKey to position1or 2in the
ignition lock (Ypage 162).
XPress button ;for the right-hand exterior
mirror or button =for the left-hand exterior
mirror.
The indicator lamp lights up in the button that
has been pressed.
The indicator lamp goes out again after some
time. You can adjust the selected mirror using
adjustment button :as long as the indicator
lamp is lit.
XPress adjustment button :up, down, or to
the left or right until you have adjusted the
exterior mirror to the correct position. You
should have a good overview of traffic condi-
tions.
The convex exterior mirrors provide a larger field
of vision.
After the engine has been started, the exterior
mirrors are automatically heated if the rear win-
dow defroster is switched on and the outside
temperature is low.
Folding the exterior mirrors in or out
electrically
XTurn the SmartKey to position 1or 2in the
ignition lock (Ypage 162).
XBriefly press button :.
Both exterior mirrors fold in or out.
iMake sure that the exterior mirrors are
always folded out fully while driving. They
could otherwise vibrate.
iIf you are driving faster than 30 mph
(47 km/h), you can no longer fold in the exte-
rior mirrors.
Setting the exterior mirrors
If the battery has been disconnected or com-
pletely discharged, the exterior mirrors must be
reset. The exterior mirrors will otherwise not
fold in when you select the "Fold in mirrors when
locking" function in the on-board computer.
XTurn the SmartKey to position 1or 2in the
ignition lock (Ypage 162).
XPress button :.
Folding the exterior mirrors in or out
automatically
When theAutomatic Mirror Foldingfunc-
tion is activated in the multimedia system (see
the separate operating instructions):
Rthe exterior mirrors fold in automatically as
soon as you lock the vehicle from the outside.
Rthe exterior mirrors fold out automatically
again as soon as you unlock the vehicle.
iIf the exterior mirrors have been folded in
manually, they do not fold out.
Exterior mirror pushed out of position
If an exterior mirror has been pushed out of
position, proceed as follows:
XPress and hold button :until you hear a click
and the mirror engages audibly into position
(
Ypage 124).
The mirror housing is engaged again and you
can adjust the exterior mirrors as usual
(
Ypage 123).
Automatic anti-glare mirrors
GWARNING
Electrolyte may escape if the glass in an auto-
matic anti-glare mirror breaks. The electrolyte
is harmful and causes irritation. It must not
come into contact with your skin, eyes, res-
piratory organs or clothing or be swallowed.
There is a risk of injury.
124Mirrors
Seats, steering wheel and mirrors
Page 128 of 438
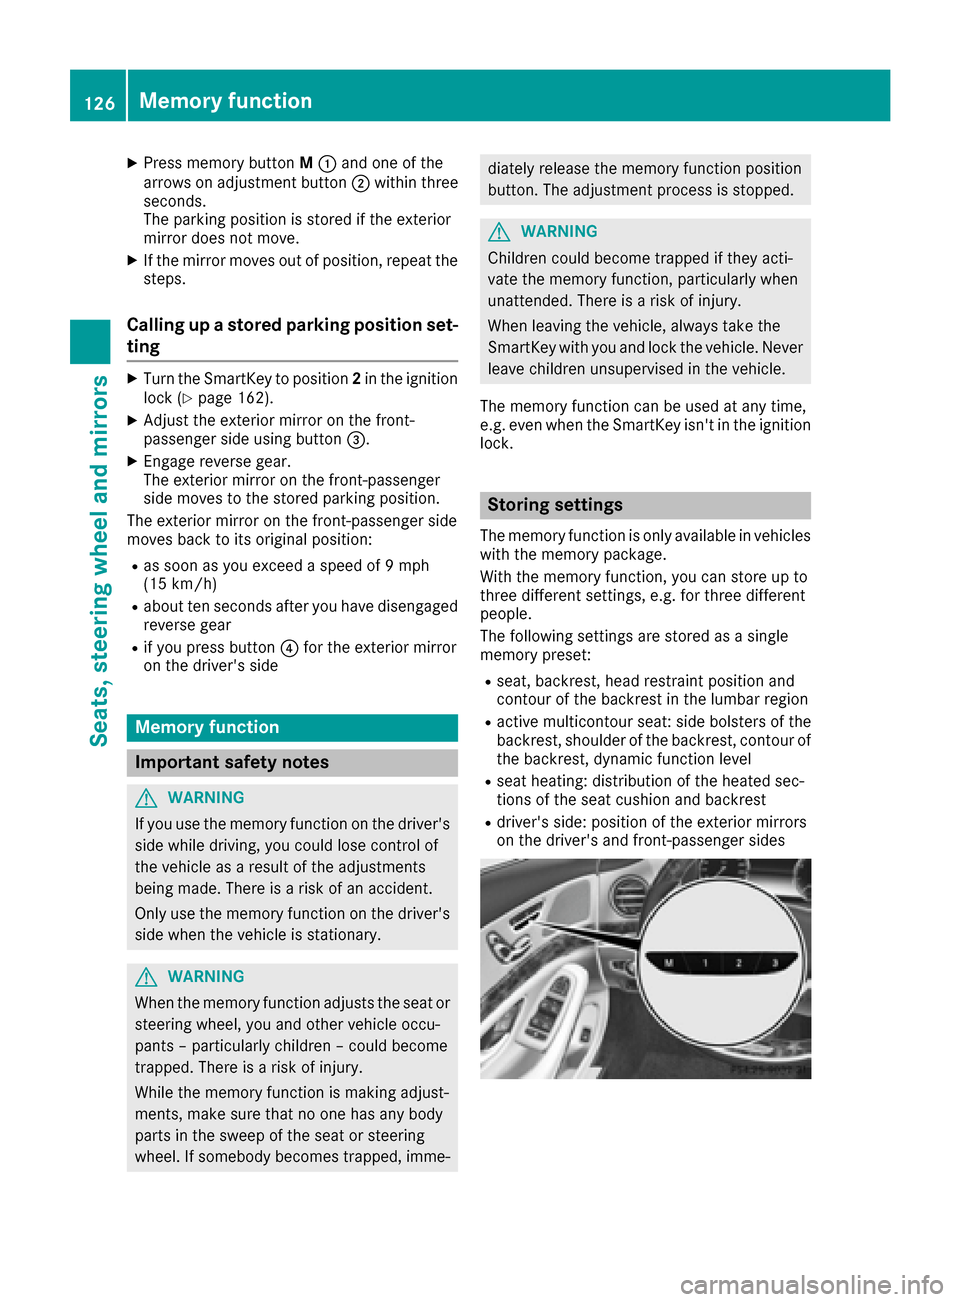
XPress memory buttonM: and one of the
arrows on adjustment button ;within three
seconds.
The parking position is stored if the exterior
mirror does not move.
XIf the mirror moves out of position, repeat the
steps.
Calling up a stored parking position set-
ting
XTurn the SmartKey to position 2in the ignition
lock (Ypage 162).
XAdjust the exterior mirror on the front-
passenger side using button =.
XEngage reverse gear.
The exterior mirror on the front-passenger
side moves to the stored parking position.
The exterior mirror on the front-passenger side
moves back to its original position:
Ras soon as you exceed a speed of 9 mph
(15 km/h)
Rabout ten seconds after you have disengaged
reverse gear
Rif you press button ?for the exterior mirror
on the driver's side
Memory function
Important safety notes
GWARNING
If you use the memory function on the driver's side while driving, you could lose control of
the vehicle as a result of the adjustments
being made. There is a risk of an accident.
Only use the memory function on the driver's
side when the vehicle is stationary.
GWARNING
When the memory function adjusts the seat or steering wheel, you and other vehicle occu-
pants – particularly children – could become
trapped. There is a risk of injury.
While the memory function is making adjust-
ments, make sure that no one has any body
parts in the sweep of the seat or steering
wheel. If somebody becomes trapped, imme-
diately release the memory function position
button. The adjustment process is stopped.
GWARNING
Children could become trapped if they acti-
vate the memory function, particularly when
unattended. There is a risk of injury.
When leaving the vehicle, always take the
SmartKey with you and lock the vehicle. Never
leave children unsupervised in the vehicle.
The memory function can be used at any time,
e.g. even when the SmartKey isn't in the ignition
lock.
Storing settings
The memory function is only available in vehicles
with the memory package.
With the memory function, you can store up to
three different settings, e.g. for three different
people.
The following settings are stored as a single
memory preset:
Rseat, backrest, head restraint position and
contour of the backrest in the lumbar region
Ractive multicontour seat: side bolsters of the
backrest, shoulder of the backrest, contour of
the backrest, dynamic function level
Rseat heating: distribution of the heated sec-
tions of the seat cushion and backrest
Rdriver's side: position of the exterior mirrors
on the driver's and front-passenger sides
126Memory function
Seats, steering wheel and mirrors
Page 129 of 438
XAdjust the seat accordingly (Ypage 106).
XOn the driver's side, adjust the steering wheel
(Ypage 120) and the exterior mirrors
(Ypage 123).
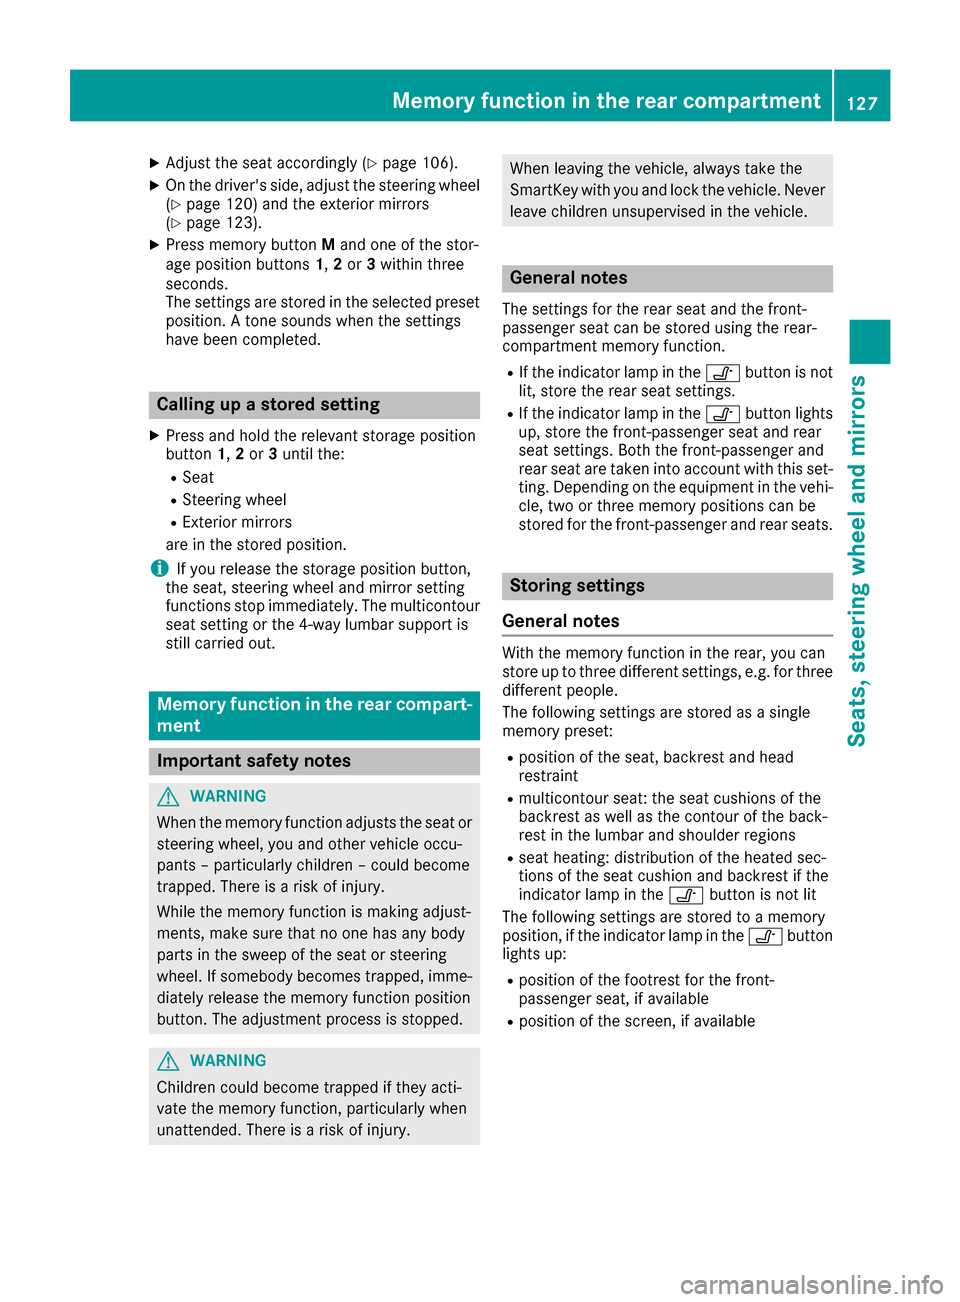
XPress memory button Mand one of the stor-
age position buttons 1,2 or 3within three
seconds.
The settings are stored in the selected preset
position. A tone sounds when the settings
have been completed.
Calling up a stored setting
XPress and hold the relevant storage position
button 1,2 or 3until the:
RSeat
RSteering wheel
RExterior mirrors
are in the stored position.
iIf you release the storage position button,
the seat, steering wheel and mirror setting
functions stop immediately. The multicontour
seat setting or the 4-way lumbar support is
still carried out.
Memory function in the rear compart-
ment
Important safety notes
GWARNING
When the memory function adjusts the seat or steering wheel, you and other vehicle occu-
pants – particularly children – could become
trapped. There is a risk of injury.
While the memory function is making adjust-
ments, make sure that no one has any body
parts in the sweep of the seat or steering
wheel. If somebody becomes trapped, imme-
diately release the memory function position
button. The adjustment process is stopped.
GWARNING
Children could become trapped if they acti-
vate the memory function, particularly when
unattended. There is a risk of injury.
When leaving the vehicle, always take the
SmartKey with you and lock the vehicle. Never
leave children unsupervised in the vehicle.
General notes
The settings for the rear seat and the front-
passenger seat can be stored using the rear-
compartment memory function.
RIf the indicator lamp in the vbutton is not
lit, store the rear seat settings.
RIf the indicator lamp in the vbutton lights
up, store the front-passenger seat and rear
seat settings. Both the front-passenger and
rear seat are taken into account with this set-
ting. Depending on the equipment in the vehi-
cle, two or three memory positions can be
stored for the front-passenger and rear seats.
Storing settings
General notes
With the memory function in the rear, you can
store up to three different settings, e.g. for three
different people.
The following settings are stored as a single
memory preset:
Rposition of the seat, backrest and head
restraint
Rmulticontour seat: the seat cushions of the
backrest as well as the contour of the back-
rest in the lumbar and shoulder regions
Rseat heating: distribution of the heated sec-
tions of the seat cushion and backrest if the
indicator lamp in the vbutton is not lit
The following settings are stored to a memory
position, if the indicator lamp in the vbutton
lights up:
Rposition of the footrest for the front-
passenger seat, if available
Rposition of the screen, if available
Memory function in the rear compartment127
Seats, steering wheel and mirrors
Z
Page 157 of 438
Problems with the perfume atomizer
ProblemPossible causes/consequences andMSolutions
The vehicle interior is not
perfumed although the
perfume atomizer is acti-
vated.The perfume vial has not been pushed into the holder as far as it will
go.
XSlide the perfume vial into the holder as far as it will go.
The perfume vial is not filled sufficiently.
XPre-filled vials:dispose of the empty vial.
XUse a new pre-filled vial.
XRefillable vials: fill the perfume vial with a maximum of 0.5 fl. oz.
(15 ml) of the same perfume.
The perfume atomizer is faulty.
XHave the perfume atomizer checked at a qualified specialist work-
shop.
Ionization
You can use the "Ionization" function to purify
the air in the vehicle interior and attain an
improved interior climate.
The ionization of the interior air is odorless and
cannot be perceived directly in the vehicle inte-
rior.
You can switch ionization on or off using the
multimedia system (see the separate operating
instructions).
Ionization can only be switched on if the front
climate control system is activated. The side air
vent on the driver's side must be open.
Pre-entry climate control via Smart-
Key
General notes
The "Pre-entry climate control via SmartKey"
function is only available in PLUG-IN HYBRID
vehicles.
Before getting in, the driver's seat area or the
whole interior can be briefly warmed or ventila-
ted in advance with the air from the air vents
being pre-cooled.
The high-voltage battery must be sufficiently
charged before "Pre-entry climate control via
SmartKey" can be activated. When the vehicle is pre-cooled, the following
functions are activated if required:
RClimate control system
RBlower
RSeat ventilation
When the vehicle is pre-heated, the following
functions are activated if required:
RClimate control system
RBlower
RSeat heating
RSteering wheel heating
RExterior mirror heating
RRear window defroster
If you have activated the following functions
using the multimedia system, they are activated
together with the "Pre-entry climate control via
SmartKey" function:
RArmrest heating
RPerfume atomizer
RIonization
Activating the perfume atomizer or ionization
(see separate operating instructions).
Activating or deactivating "Pre-entry
climate control via SmartKey"
Before "Pre-entry climate control via SmartKey"
can be activated, you must activate the function
via the multimedia system (see separate oper-
ating instructions).
Operating the climate control systems155
Climate control
Z
Page 159 of 438
Problems with "Pre-entry climate control via SmartKey"
ProblemPossible causes/consequences andMSolutions
"Pre-entry climate con-
trol via SmartKey" can-
not be switched on or
has switched itself off.The condition of charge of the high-voltage battery is under the speci-
fied minimum condition of charge.
XStart the engine when the vehicle is at a standstill.
The engine powers the electric motor. The electric motor operates
as a generator. The high-voltage battery is being charged.
Further information on charging the high-voltage battery via:
Ra mains socket (Ypage 183)
Ra charging station (Ypage 186)
Ra wallbox (Ypage 185)
"Pre-entry climate control via SmartKey" has been started more than
twice with the engine switched off.
XSwitch on the engine and let it run for more than ten seconds.
XTry again to switch on "Pre-entry climate control via SmartKey".
Pre-entry climate control at time of
departure
Important safety notes
GWARNING
If persons, particularly children are subjected to prolonged exposure to extreme heat or
cold, there is a risk of injury, possibly even
fatal. Never leave children unattended in the
vehicle.
General notes
The "Pre-entry climate control at departure
time" function is only available in PLUG-IN
HYBRID vehicles.
You can use the "Pre-entry climate control at
departure time" function to cool or heat the
vehicle interior if the engine is not running.
The "Pre-entry climate control at departure
time" function can be activated regardless of
whether or not the vehicle is connected to an
electric power supply. The condition of charge of
the high-voltage battery must be higher than the
specified minimum condition of charge, how-
ever.
When the vehicle is connected to an electric
power supply, priority is given to charging the
high-voltage battery to the specified minimum charge. "Pre-entry climate control at departure
time" is only activated subsequently.
The running time of the "Pre-entry climate con-
trol at departure time" function may be reduced
if:
Rthe vehicle is not connected to an electric
power supply and
Rthe high-voltage battery is not fully charged
With active "Pre-entry climate control at depar-
ture time" the condition of charge of the high-
voltage battery can be reduced, even if the
charge cable connector is connected.
When the vehicle is cooled, the following func-
tions are activated if required:
RClimate control system
RBlower
RSeat ventilation
When the vehicle is heated, the following func-
tions are activated if required:
RClimate control system
RBlower
RSeat heating
RSteering wheel heating
RArmrest heating
RExterior mirror heating
RRear window defroster
If you have switched on the perfume atomizer or the ionization using the multimedia system,
Operating the climate control systems157
Climate control
Z
Page 160 of 438
these will be activated together with the "Pre-
entry climate control at departure time".
Activating the perfume atomizer or ionization
(see separate operating instructions).
Setting the departure time
You can set the departure time using the on-
board computer or via the My Mercedes Electric
– Vehicle Homepage. The activation of the "Pre-
entry climate control at departure time" func-
tion can be linked to this departure time. Your
vehicle will then be cooled or heated until the
desired temperature is reached in time for the
set departure time. "Pre-entry climate control at departure time" will be activated a maximum of
55 minutes before departure. If the departure is
delayed, the vehicle will be heated or cooled for
another five minutes.
XTo set the departure time: set the departure
time using the on-board computer
(
Ypage 272). Set the departure time via the
My Mercedes Electric – Vehicle Homepage
(
Ypage 189).
XTo activate or deactivate "Pre-entry cli-
mate control at departure time": activate
or deactivate "Pre-entry climate control at
departure time" via the multimedia system
(see the separate operating instructions).
Activate or deactivate "Pre-entry climate con-
trol at departure time" via the My Mercedes
Electric – Vehicle Homepage (
Ypage 189).
When activating the "Pre-entry climate control
at departure time" function: you can sele ct
w
hether only the driver's area or the whole vehi-
cle interior should be heated or cooled.
The "Pre-entry climate control at departure
time" function switches off automatically when
the vehicle is started. The following functions
remain active:
RSeat heating
RSeat ventilation
RArmrest heating
RSteering wheel heating
RPerfume atomizer
RIonization
Switching off "Pre-entry climate control at
departure time": the activated "Pre-entry cli-
mate control at departure time" can be switched
off using the rocker switch (
Ypage 158).
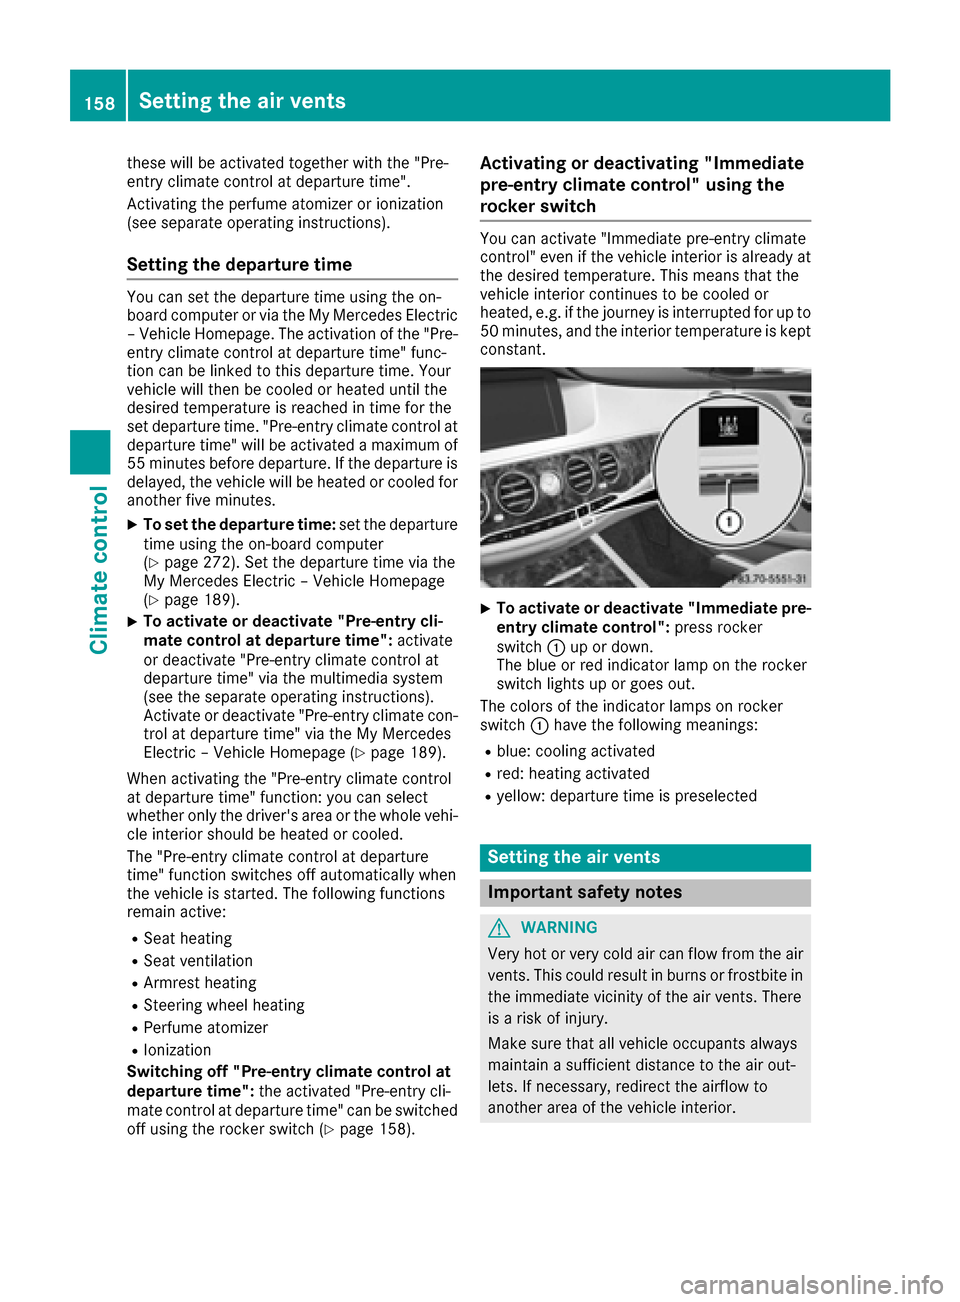
Activating or deactivating "Immediate
pre-entry climate control" using the
rocker switch
You can activate "Immediate pre-entry climate
control" even if the vehicle interior is already at
the desired temperature. This means that the
vehicle interior continues to be cooled or
heated, e.g. if the journey is interrupted for up to 50 minutes, and the interior temperature is kept
constant.
XTo activate or deactivate "Immediate pre-
entry climate control": press rocker
switch :up or down.
The blue or red indicator lamp on the rocker
switch lights up or goes out.
The colors of the indicator lamps on rocker
switch :have the following meanings:
Rblue: cooling activated
Rred: heating activated
Ryellow: departure time is preselected
Setting the air vents
Important safety notes
GWARNING
Very hot or very cold air can flow from the air
vents. This could result in burns or frostbite in
the immediate vicinity of the air vents. There
is a risk of injury.
Make sure that all vehicle occupants always
maintain a sufficient distance to the air out-
lets. If necessary, redirect the airflow to
another area of the vehicle interior.
158Setting the air vents
Climate control
Page 334 of 438
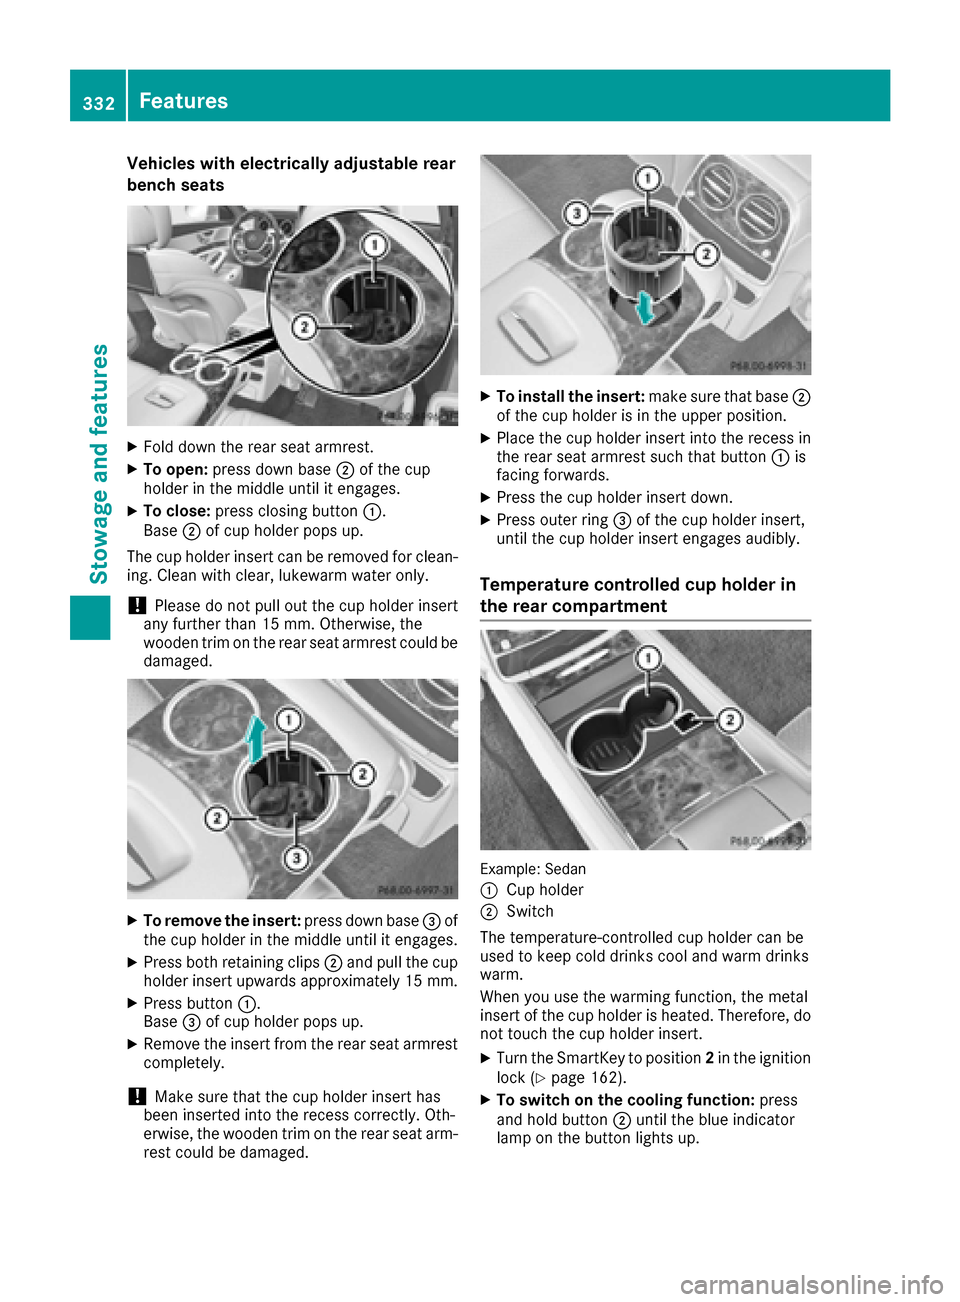
Vehicles with electrically adjustable rear
bench seats
XFold down the rear seat armrest.
XTo open:press down base ;of the cup
holder in the middle until it engages.
XTo close: press closing button :.
Base ;of cup holder pops up.
The cup holder insert can be removed for clean-
ing. Clean with clear, lukewarm water only.
!Please do not pull out the cup holder insert
any further than 15 mm. Otherwise, the
wooden trim on the rear seat armrest could be
damaged.
XTo remove the insert: press down base=of
the cup holder in the middle until it engages.
XPress both retaining clips ;and pull the cup
holder insert upwards approximately 15 mm.
XPress button :.
Base =of cup holder pops up.
XRemove the insert from the rear seat armrest
completely.
!Make sure that the cup holder insert has
been inserted into the recess correctly. Oth-
erwise, the wooden trim on the rear seat arm-
rest could be damaged.
XTo install the insert: make sure that base;
of the cup holder is in the upper position.
XPlace the cup holder insert into the recess in
the rear seat armrest such that button :is
facing forwards.
XPress the cup holder insert down.
XPress outer ring =of the cup holder insert,
until the cup holder insert engages audibly.
Temperature controlled cup holder in
the rear compartment
Example: Sedan
:
Cup holder
;Switch
The temperature-controlled cup holder can be
used to keep cold drinks cool and warm drinks
warm.
When you use the warming function, the metal
insert of the cup holder is heated. Therefore, do
not touch the cup holder insert.
XTurn the SmartKey to position 2in the ignition
lock (Ypage 162).
XTo switch on the cooling function: press
and hold button ;until the blue indicator
lamp on the button lights up.
332Features
Stowage and features