2016 MERCEDES-BENZ S-Class SEDAN engine oil
[x] Cancel search: engine oilPage 165 of 438
To start the vehicle without actively using the
Smartkey:
Rthe Start/Stop button must be inserted in the
ignition lock.
Rthe Smartkey must be in the vehicle.
Rthe vehicle must not be locked with the
SmartKey or KEYLESS-GO (Ypage 80).
Do not keep the SmartKey:
Rwith electronic devices, e.g. a mobile phone
or another SmartKey.
Rwith metallic objects, e.g. coins or metal foil.
Rinside metallic objects, e.g. a metal case.
This can affect the functionality of the Smart-
Key.
Do not keep the SmartKey in the temperature-
controlled cup holder (
Ypage 332). Otherwise,
the key will not be detected, e.g. when starting
the engine with the Start/Stop button.
If you lock the vehicle with the SmartKey's
remote control or with KEYLESS-GO, after a
short time:
Ryou will not be able to switch on the ignition
with the Start/Stop button.
Ryou will not be able to start the engine with the
Start/Stop button until the vehicle is
unlocked again.
If you lock the vehicle centrally using the button
on the front door (
Ypage 86), you can continue
to start the engine with the Start/Stop button.
The engine can be switched off while the vehicle
is in motion by pressing and holding the Start/
Stop button for three seconds. This function
operates independently of the ECO start/stop
automatic engine switch-off function.
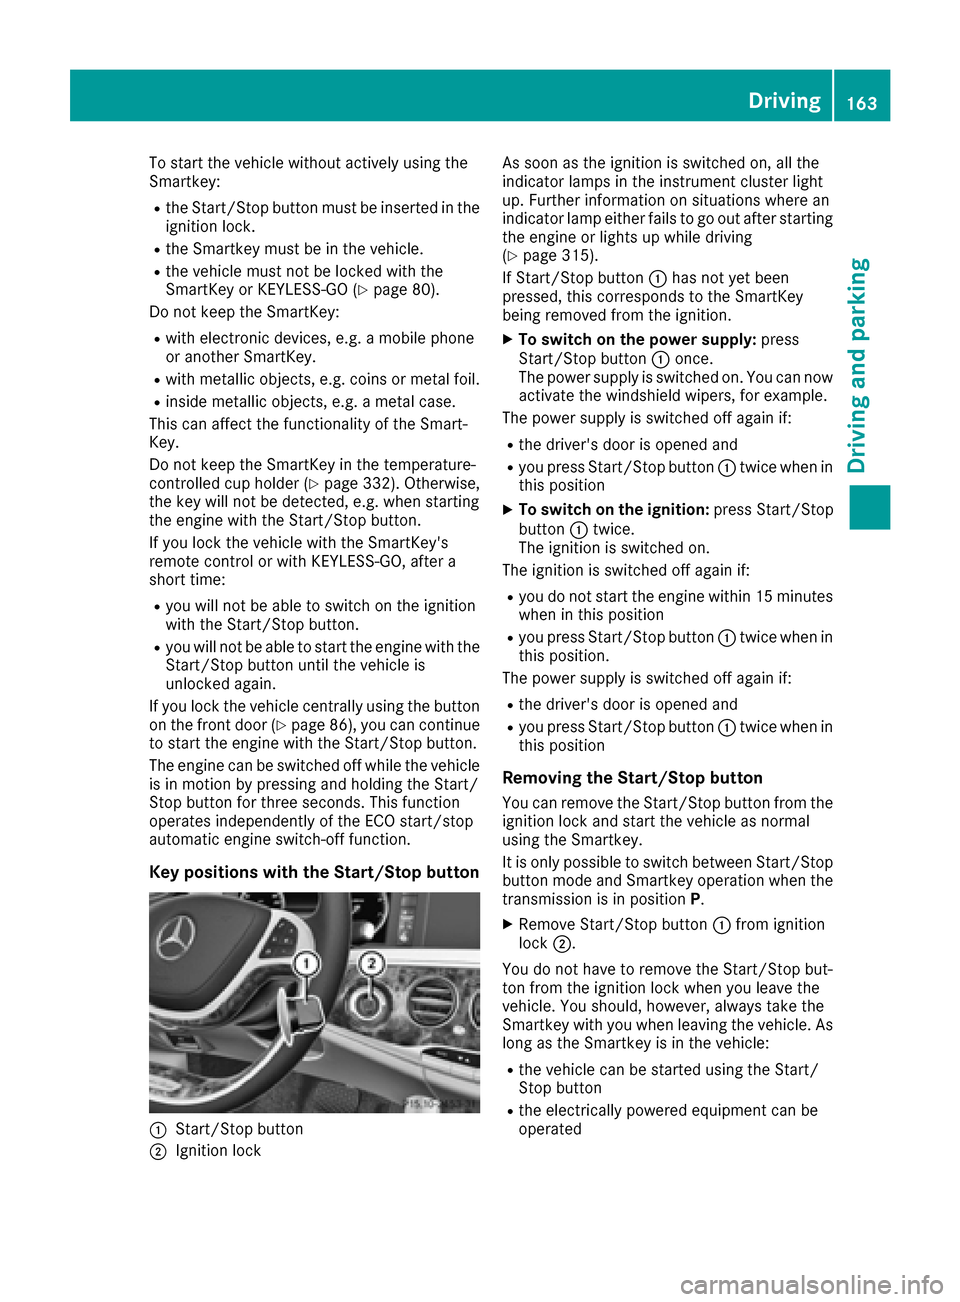
Key positions with the Start/Stop button
:Start/Stop button
;Ignition lock As soon as the ignition is switched on, all the
indicator lamps in the instrument cluster light
up. Further information on situations where an
indicator lamp either fails to go out after starting
the engine or lights up while driving
(
Ypage 315).
If Start/Stop button :has not yet been
pressed, this corresponds to the SmartKey
being removed from the ignition.
XTo switch on the power supply: press
Start/Stop button :once.
The power supply is switched on. You can now activate the windshield wipers, for example.
The power supply is switched off again if:
Rthe driver's door is opened and
Ryou press Start/Stop button :twice when in
this position
XTo switch on the ignition: press Start/Stop
button :twice.
The ignition is switched on.
The ignition is switched off again if:
Ryou do not start the engine within 15 minutes
when in this position
Ryou press Start/Stop button :twice when in
this position.
The power supply is switched off again if:
Rthe driver's door is opened and
Ryou press Start/Stop button :twice when in
this position
Removing the Start/Stop button
You can remove the Start/Stop button from the
ignition lock and start the vehicle as normal
using the Smartkey.
It is only possible to switch between Start/Stop button mode and Smartkey operation when the
transmission is in position P.
XRemove Start/Stop button :from ignition
lock ;.
You do not have to remove the Start/Stop but-
ton from the ignition lock when you leave the
vehicle. You should, however, always take the
Smartkey with you when leaving the vehicle. As long as the Smartkey is in the vehicle:
Rthe vehicle can be started using the Start/
Stop button
Rthe electrically powered equipment can be
operated
Driving163
Driving and parking
Z
Page 179 of 438
Problems with the transmission
ProblemPossible causes/consequences andMSolutions
The transmission has
problems shifting gear.The transmission is losing oil.
XHave the transmission checked at a qualified specialist workshop
immediately.
The acceleration ability
is deteriorating.
The transmission no lon-
ger changes gear.The transmission is in emergency mode.
7G-TRONIC:it is only possible to shift into secondgear and reverse
gear.
9G-TRONIC: it is only partly possible to engage the gears or the trans-
mission is in position N.
XStop the vehicle.
XShift the transmission to position P.
XSwitch off the engine.
XWait at least ten seconds before restarting the engine.
XShift the transmission to positionDor R.
7G-TRONIC: IfD is selected, the transmission shifts into second
gear, if Ris selected, the transmission shifts into reverse gear.
XHave the transmission checked at a qualified specialist workshop
immediately.
Problems with PLUG-IN HYBRID operation (Ypage 254).
Transfer case
This section is only valid for vehicles with 4-
wheel drive (4MATIC). Power is always trans-
mitted to both axles.
!Performance tests may only be carried out
on a 2-axle dynamometer. The brake system
or transfer case could otherwise be damaged. Contact a qualified specialist workshop for a
performance test.
!Since ESP®engages automatically, the igni-
tion must be switched off (the SmartKey or
Start/Stop button must be in position 0or 1)
if:
Rthe electric parking brake is being tested
on a brake dynamometer
Rthe vehicle is being towed with only one
axle raised (not permitted for vehicles with
4MATIC).
The brake system could otherwise be dam-
aged.
!Vehicles with 4MATIC must not be towed
with either the front or the rear axle raised, as doing so will damage the transmission.
Refueling
Important safety notes
GWARNING
Fuel is highly flammable. If you handle fuel
incorrectly, there is a risk of fire and explo-
sion.
You must avoid fire, open flames, creating
sparks and smoking. Switch off the engine
and, if applicable, the auxiliary heating before refueling.
GWARNING
Fuel is poisonous and hazardous to health.
There is a risk of injury.
You must make sure that fuel does not come into contact with your skin, eyes or clothing
Refueling177
Driving and parking
Z
Page 277 of 438
XPressòon the steering wheel to open the
menu list.
XPress :or9 on the steering wheel to
select the Settingsmenu.
XConfirm by pressing aon the steering
wheel.
XPress :or9 to select the Instru‐ment Clustersubmenu.
XPressato confirm your selection.
XUsing :or9, select the AdditionalSpeedometer [km/h]function.
The current selection appears.
XTo activate/deactivate: pressaagain.
Restoring the factory settings
XPress òon the steering wheel to open the
menu list.
XPress :or9 on the steering wheel to
select the Settingsmenu.
XConfirm by pressing aon the steering
wheel.
XPress :or9 to select the FactorySettingssubmenu.
XPressato confirm.
The Reset All Settings?function
appears.
XPress the :or9 button to select Noor
Yes.
XPress the abutton to confirm the selec-
tion.
If you have selected and confirmed Yes
, the
multifunction display shows a confirmation
message.
For safety reasons, the Daytime Running
Lightsfunction in theLightssubmenu is only
reset when the vehicle is stationary.
AMG menu (Mercedes-AMG vehicles)
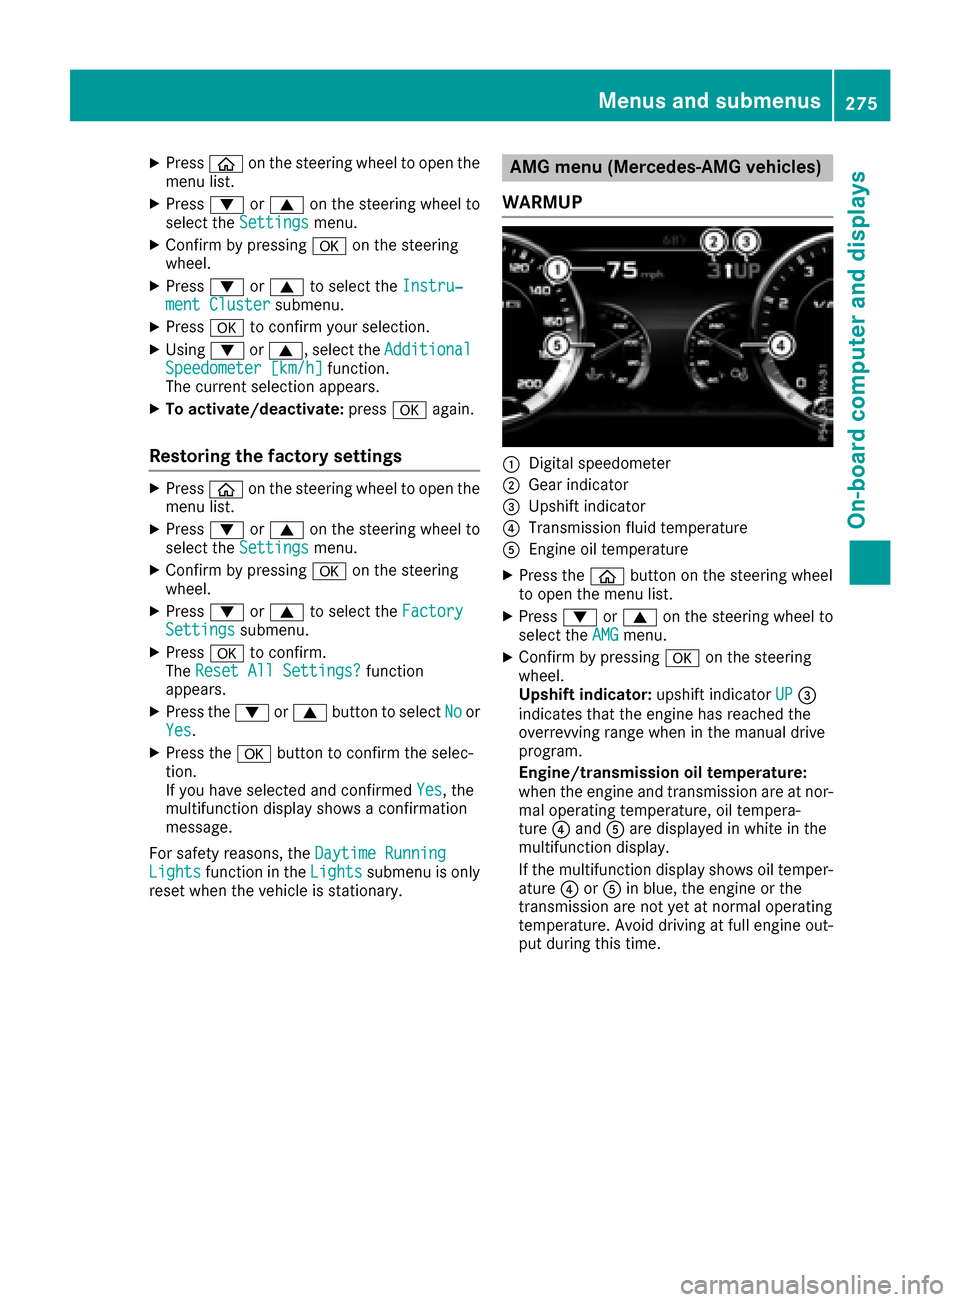
WARMUP
:Digital speedometer
;Gear indicator
=Upshift indicator
?Transmission fluid temperature
AEngine oil temperature
XPress the òbutton on the steering wheel
to open the menu list.
XPress :or9 on the steering wheel to
select the AMGmenu.
XConfirm by pressing aon the steering
wheel.
Upshift indicator: upshift indicatorUP
=
indicates that the engine has reached the
overrevving range when in the manual drive
program.
Engine/transmission oil temperature:
when the engine and transmission are at nor-
mal operating temperature, oil tempera-
ture ?and Aare displayed in white in the
multifunction display.
If the multifunction display shows oil temper-
ature ?orA in blue, the engine or the
transmission are not yet at normal operating
temperature. Avoid driving at full engine out-
put during this time.
Menus and submenus275
On-board computer and displays
Z
Page 298 of 438
Display messagesPossible causes/consequences andMSolutions
4
CheckEngineOilAtNextRefueling
The engin eoil level has dropped to th eminimum level.
A warning tone also sounds.
!Avoid lon gjourneys wit hto olittl eengin eoil. The engin ewill oth-
erwise be damaged.
XChec kth eoil level when next refueling, at th elatest (Ypage 353).
XIf necessary, add engin eoil (Ypage 355).
If th eengin eoil need stoppin gup mor eoften:
XContac t aqualified specialist workshop and hav eth eengin e
checked.
Information on approve dengin eoils can be obtained from any quali-
fie dspecialist workshop or on th eInternet at http://bevo.mercedes -
benz.com.
4
Check Engine OilLevel (Ad d 1quart)
The engin eoil level has dropped to th eminimum level.
!Avoid lon gjourneys wit hto olittl eengin eoil. The engin ewill oth-
erwise be damaged.
XChec kth eoil level when next refueling, at th elatest (Ypage 353).
XIf necessary, add engin eoil (Ypage 355).
If th eengin eoil need stoppin gup mor eoften:
XContac t aqualified specialist workshop and hav eth eengin e
checked.
Information on approve dengin eoils can be obtained from any quali-
fie dspecialist workshop or on th eInternet at http://bevo.mercedes -
benz.com.
4
Engine Oil LevelLow Sto pVehicl eTurnEngine Off
The engin eoil level is to olow. There is aris kof engin edamage.
XPull ove rand stop th evehicl esafely and switch off th eengine, pay-
ing attention to roa dand traffic conditions.
XSecur eth evehicl eagainst rollin gaway (Ypage 189).
XCheckth eengin eoil level (Ypage 353).
XIf necessary, add engin eoil (Ypage 355).
8
Fue lLevel Low
The fuel level has dropped int oth ereserv erange.
XRefue lat th eneares tgas station .
CThere is only aver ysmall amount of fuel in th efuel tank.
XRefue lat th eneares tgas station without fail .
8
Gas Cap Loose
The fuel filler cap is notclosed correctl yor th efuel system is leaking .
XCheckthat th efuel filler cap is correctl yclosed .
If th efuel filler cap is not correctl yclosed :
XCloseth efuel filler cap .
If th efuel filler cap is correctl yclosed :
XVisitaqualified specialist workshop .
296Display messages
On-board computer and displays
Page 355 of 438
!Make sure that the windshield wipers are
not folded away from the windshield. You
could otherwise damage the windshield wip-
ers or the hood.
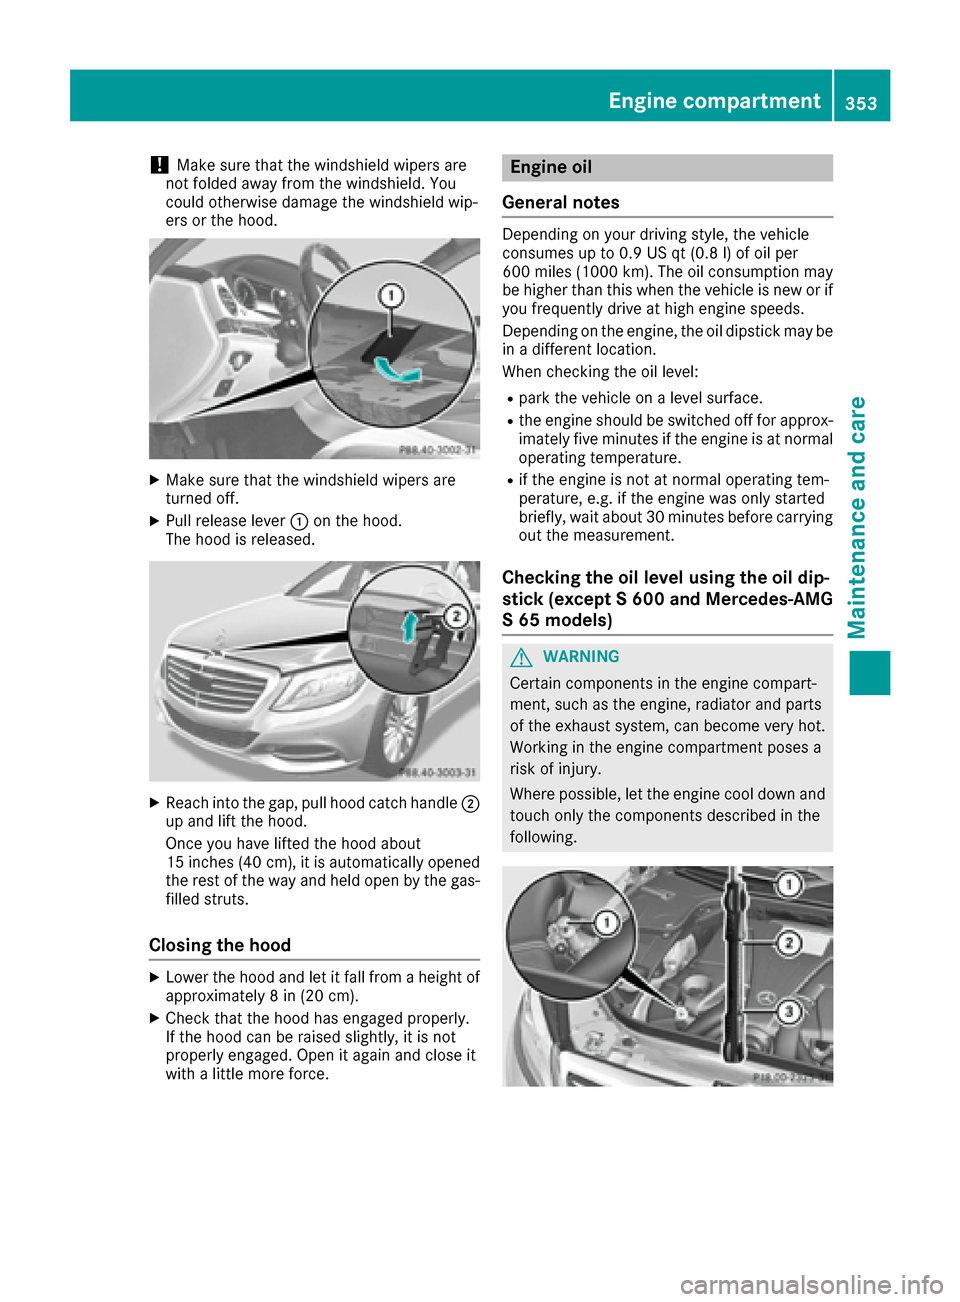
XMake sure that the windshield wipers are
turned off.
XPull release lever :on the hood.
The hood is released.
XReach into the gap, pull hood catch handle ;
up and lift the hood.
Once you have lifted the hood about
15 inches (40 cm), it is automatically opened
the rest of the way and held open by the gas-
filled struts.
Closing the hood
XLower the hood and let it fall from a height of
approximately 8 in (20 cm).
XCheck that the hood has engaged properly.
If the hood can be raised slightly, it is not
properly engaged. Open it again and close it
with a little more force.
Engine oil
General notes
Depending on your driving style, the vehicle
consumes up to 0.9 US qt (0.8 l) of oil per
600 miles (1000 km). The oil consumption may
be higher than this when the vehicle is new or if
you frequently drive at high engine speeds.
Depending on the engine, the oil dipstick may be
in a different location.
When checking the oil level:
Rpark the vehicle on a level surface.
Rthe engine should be switched off for approx-
imately five minutes if the engine is at normal
operating temperature.
Rif the engine is not at normal operating tem-
perature, e.g. if the engine was only started
briefly, wait about 30 minutes before carrying
out the measurement.
Checking the oil level using the oil dip-
stick (except S 600 and Mercedes-AMG
S 65 models)
GWARNING
Certain components in the engine compart-
ment, such as the engine, radiator and parts
of the exhaust system, can become very hot.
Working in the engine compartment poses a
risk of injury.
Where possible, let the engine cool down and touch only the components described in the
following.
Engine compartment353
Maintenance and care
Z
Page 356 of 438
Example
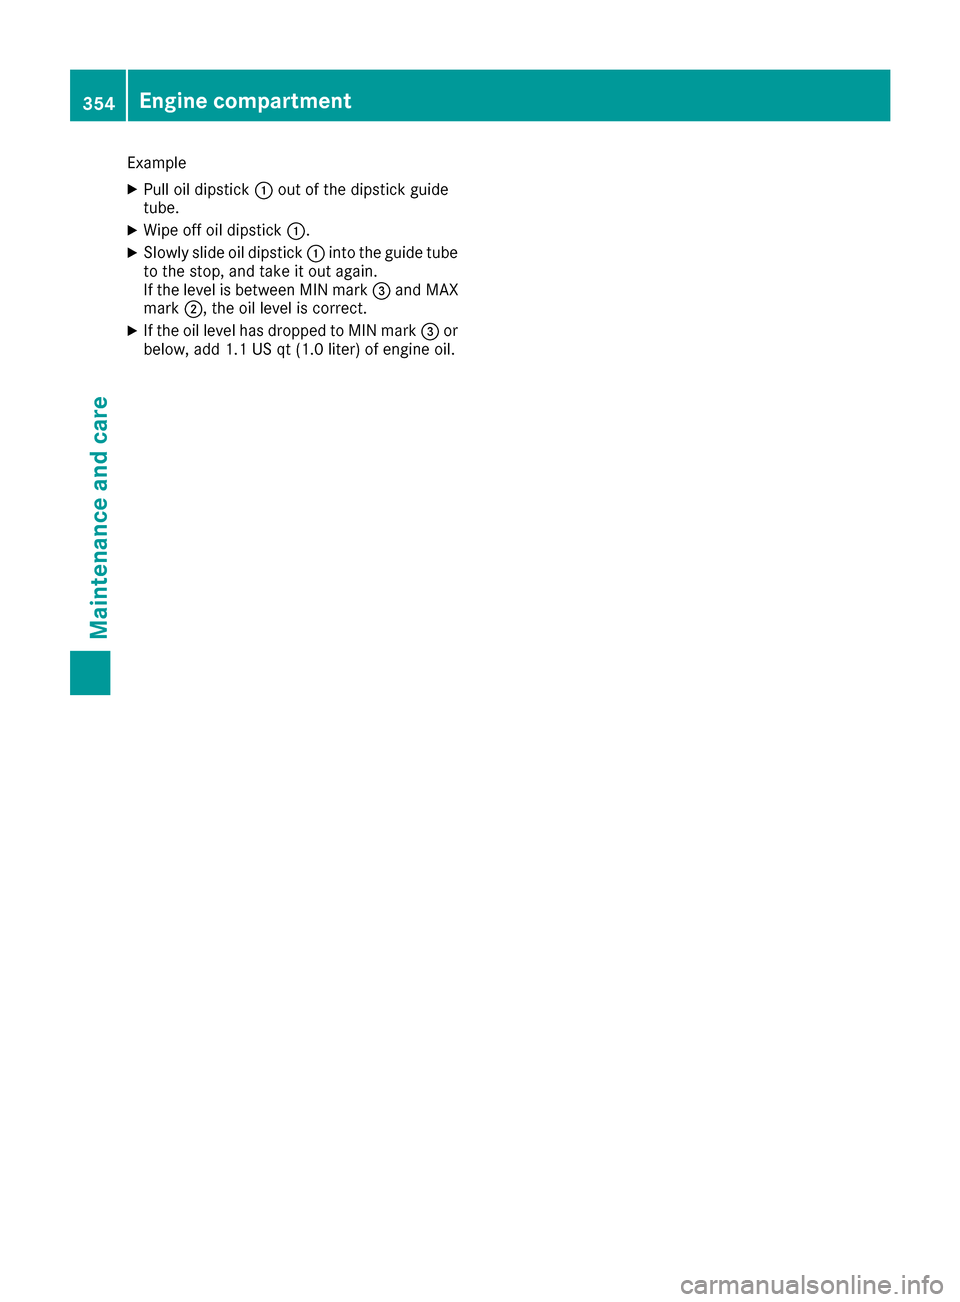
XPull oil dipstick:out of the dipstick guide
tube.
XWipe off oil dipstick :.
XSlowly slide oil dipstick :into the guide tube
to the stop, and take it out again.
If the level is between MIN mark =and MAX
mark ;, the oil level is correct.
XIf the oil level has dropped to MIN mark =or
below, add 1.1 US qt (1.0 liter) of engine oil.
354Engine compartment
Maintenance and care
Page 357 of 438
Checking the oil level using the on-board computer (S 600 and Mercedes-AMG S 65
models)
XMake sure that the SmartKey is in position2in the ignition lock.
XUse ò on the steering wheel to call up the list of menus.
XPress the :or9 button on the steering wheel to select the Servicemenu.
XConfirm by pressingaon the steering wheel.
XUse: or9 to select the Engine Oil Levelsubmenu.
XPressato confirm the selection.
The Measuring Engine Oil Level Accurate Only When Vehicle Is Levelmessage
appears in the multifunction display.
The measurement takes a few seconds. You will see one of the following messages in the multi-
function display:
Display messagesPossible causes/consequences and MSolutions
Engine Oil Level OKThe oil level is correct.
Check Engine OilLevel (Add 1 Liter)
The oil level is too low.
XAdd 1.1 US qt (1.0 liter) of engine oil.
Reduce Engine OilLevel
The engine oil level is too high.
XHave excess engine oil siphoned off.
For Engine OilLevelIgnitionMustBe On
The ignition is switched off.
XTurn the SmartKey to position2in the ignition lock.
Need More Time toCheck Engine OilLevel
The required waiting period was not observed.
XIf the engine is at normal operating temperature: repeat the meas-
urement after about five minutes.
If the engine is not at normal operating temperature, e.g. if the
engine was only started briefly: repeat the measurement after
approximately 30 minutes.
Engine Oil LevelNotMeasurablewithEngine Running
The engine is running; oil level measurement is not possible.
XSwitch off the engine.
XIf the engine is at normal operating temperature: wait about five
minutes before carrying out the measurement.
If the engine is not at normal operating temperature, e.g. if the
engine was only started briefly: wait approximately 30 minutes
before carrying out the measurement.
Adding engine oil
GWARNING
Certain components in the engine compart-
ment, such as the engine, radiator and parts
of the exhaust system, can become very hot.
Working in the engine compartment poses a
risk of injury.
Where possible, let the engine cool down and touch only the components described in the
following.
Engine compartment355
Maintenance and care
Z
Page 358 of 438
GWARNING
If engine oil comes into contact with hot com- ponents in the engine compartment, it may
ignite. There is a risk of fire and injury.
Make sure that engine oil is not spilled next to
the filler neck. Let the engine cool down and
thoroughly clean the engine oil off the com-
ponents before starting the engine.
HEnvironmental note
When adding oil, take care not to spill any. If
oil enters the soil or waterways, it is harmful to
the environment.
!Only use engine oils and oil filters that have
been approved for vehicles with a service sys-
tem. You can obtain a list of the engine oils
and oil filters tested and approved in accord- ance with the Mercedes-Benz Specifications
for Service Products at any Mercedes-Benz
Service center.
Damage to the engine or exhaust system is
caused by the following:
Rusing engine oils and oil filters that have notbeen specifically approved for the service
system
Rreplacing engine oil and oil filters after the
interval for replacement specified by the
service system has been exceeded
Rusing engine oil additives.
!Do not add too much oil. adding too much
engine oil can result in damage to the engine
or to the catalytic converter. Have excess
engine oil siphoned off.
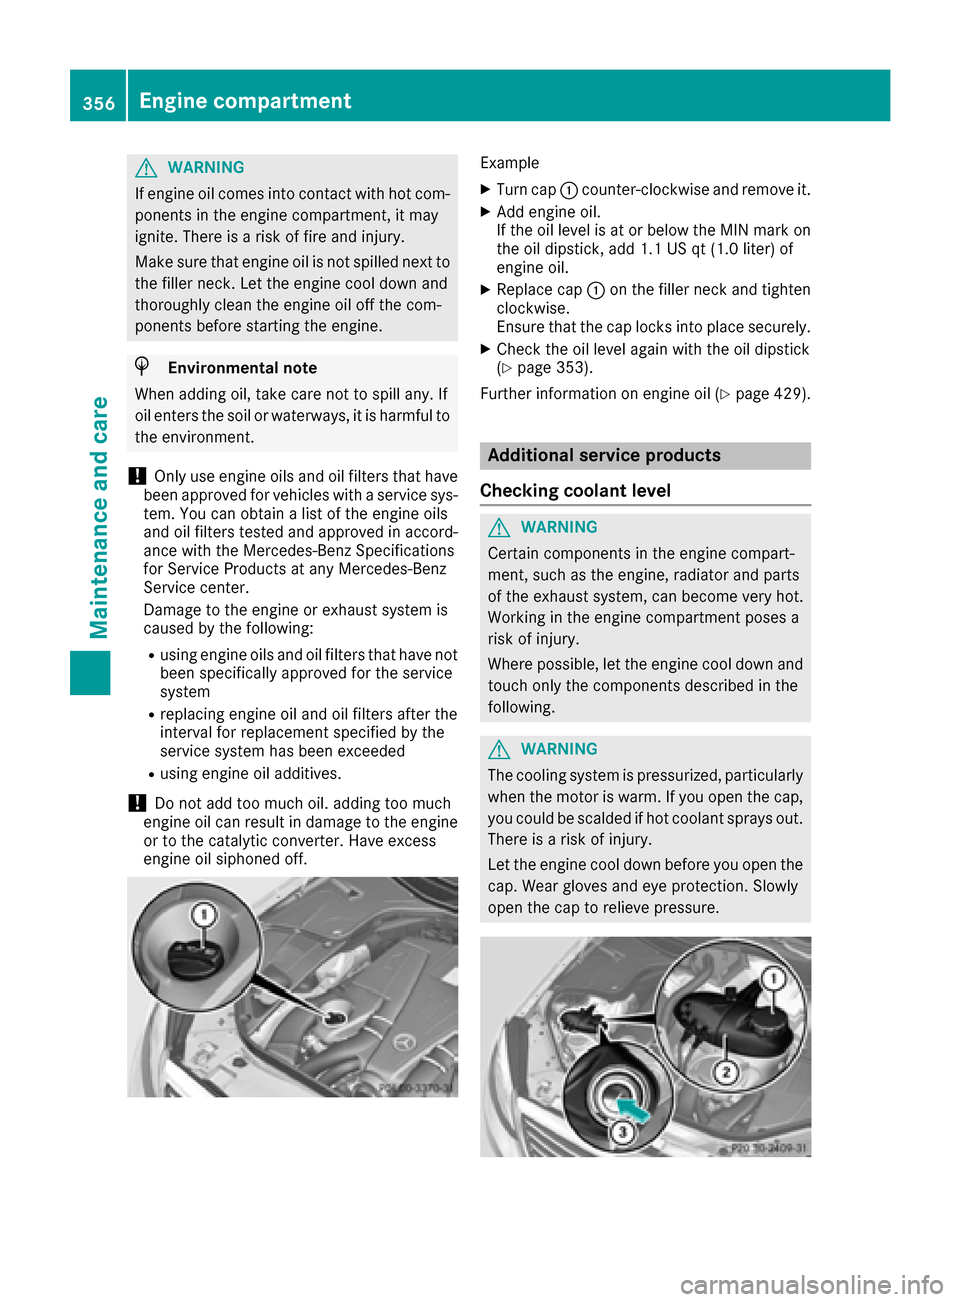
Example
XTurn cap :counter-clockwise and remove it.
XAdd engine oil.
If the oil level is at or below the MIN mark on
the oil dipstick, add 1.1 US qt (1.0 liter) of
engine oil.
XReplace cap :on the filler neck and tighten
clockwise.
Ensure that the cap locks into place securely.
XCheck the oil level again with the oil dipstick
(Ypage 353).
Further information on engine oil (
Ypage 429).
Additional service products
Checking coolant level
GWARNING
Certain components in the engine compart-
ment, such as the engine, radiator and parts
of the exhaust system, can become very hot.
Working in the engine compartment poses a
risk of injury.
Where possible, let the engine cool down and touch only the components described in the
following.
GWARNING
The cooling system is pressurized, particularly
when the motor is warm. If you open the cap,
you could be scalded if hot coolant sprays out.
There is a risk of injury.
Let the engine cool down before you open the
cap. Wear gloves and eye protection. Slowly
open the cap to relieve pressure.
356Engine compartment
Maintenance and care