2016 MERCEDES-BENZ S-Class SEDAN lights
[x] Cancel search: lightsPage 315 of 438
Display messagesPossible causes/consequences andMSolutions
Becausethere is interferenc efrom astron gsource of radi owaves, th e
ke yis no tdetecte dwhils tth eengin eis running.
A warning tone also sounds.
XPull ove rand stop th evehicl esafely as soo nas possible, payin g
attention to roa dand traffic conditions.
XSecur eth evehicl eagainst rollin gaway (Ypage 189).
XInsertth eSmartKey int oth eignition loc kand bring int oke ymode.
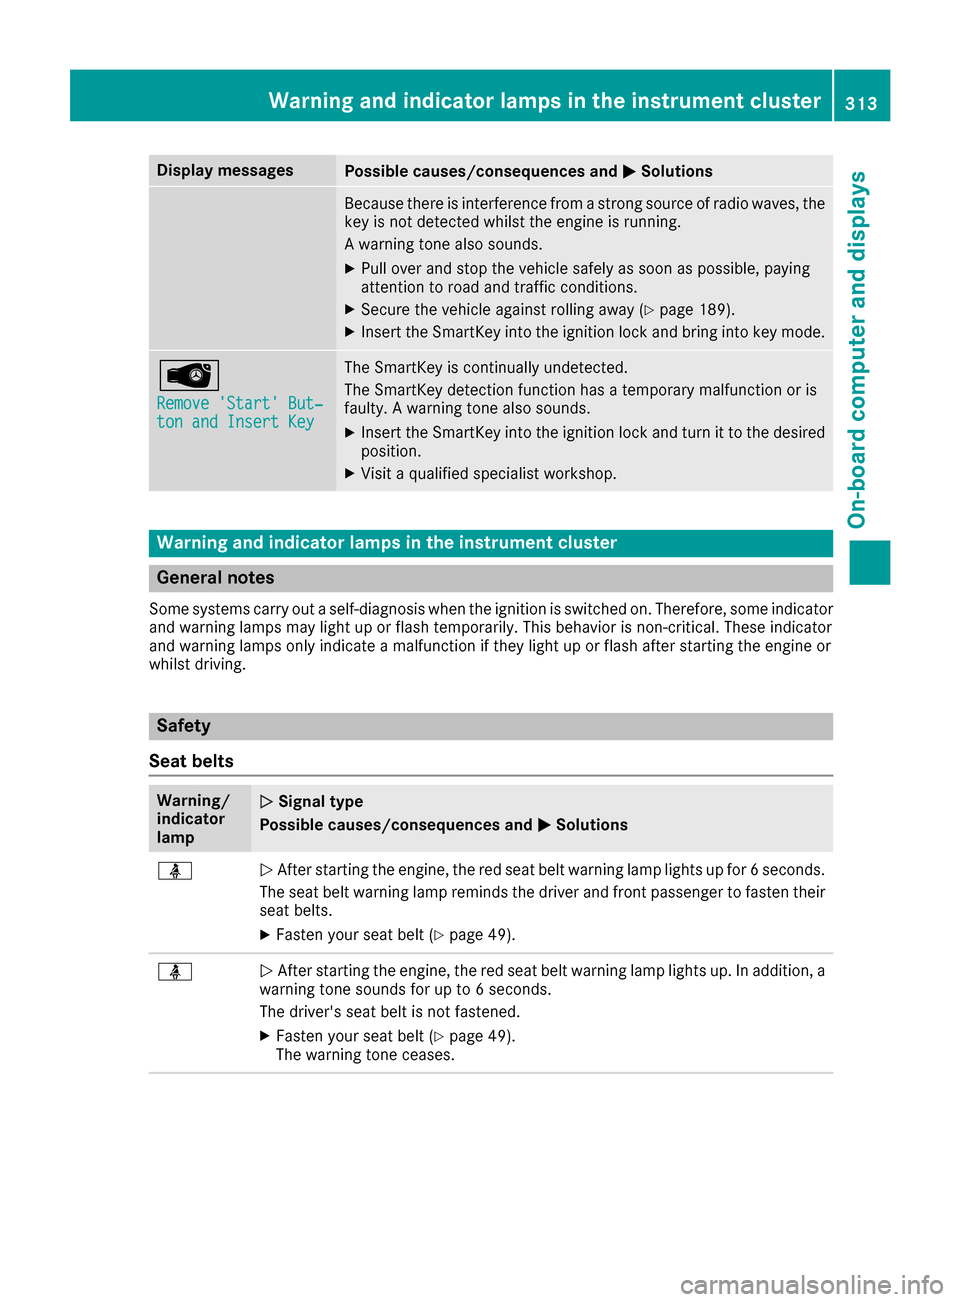
Â
Remove 'Start 'But ‐ton and Insert Key
The SmartKey is continually undetected.
The SmartKey detection function has atemporar ymalfunction or is
faulty. Awarning tone also sounds.
XInser tth eSmartKey int oth eignition loc kand tur nit to th edesire d
position .
XVisitaqualified specialist workshop .
Warning and indicat orlamps in the instrume nt cluster
General notes
Some systems carry out aself-diagnosis when th eignition is switched on .Therefore ,som eindicator
and warning lamp smay ligh tup or flas htemporarily. This behavio ris non-critical .These indicator
and warning lamp sonly indicat e amalfunction if they ligh tup or flas hafter starting th eengin eor
whils tdriving.
Safety
Seat belts
Warning/
indicator
lam pNSignal type
Possible causes/consequences and M
Solutions
üNAfte rstarting th eengine, th ered seat belt warning lamp lights up for 6seconds .
The seat belt warning lamp remind sth edriver and fron tpassenger to faste ntheir
seat belts.
XFaste nyour seat belt (Ypage 49).
üNAfte rstarting th eengine, th ered seat belt warning lamp lights up. In addition , a
warning tone sounds for up to 6seconds.
The driver's seat belt is no tfastened.
XFaste nyour seat belt (Ypage 49).
The warning tone ceases .
Warning and indicator lamps in the instrument cluster313
On-board computer and displays
Z
Page 316 of 438
Warning/
indicator
lampNSignal type
Possible causes/consequences and M
Solutions
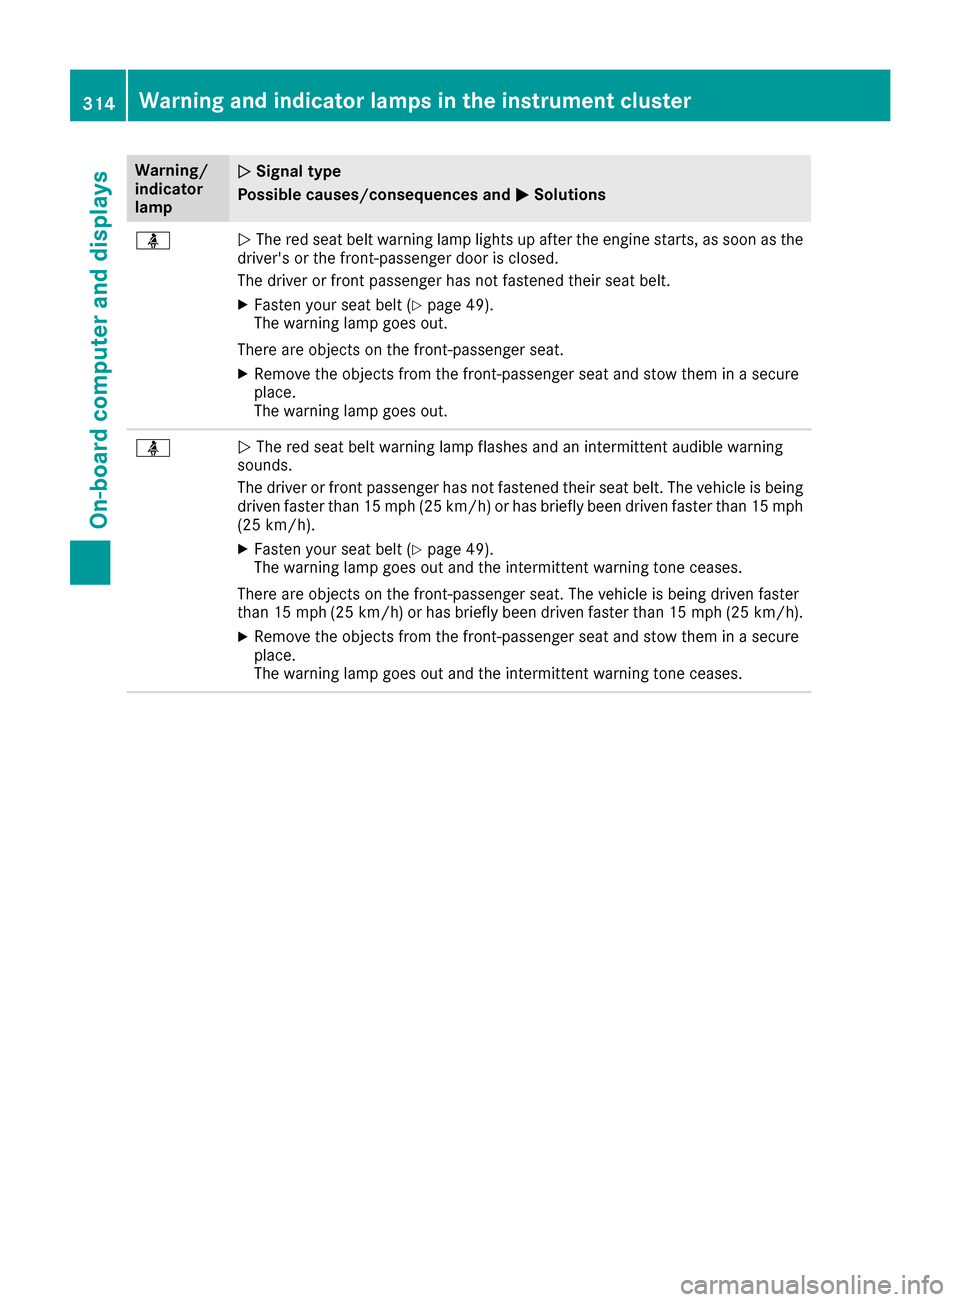
üNThe red seat belt warning lamp lights up after the engine starts, as soon as the
driver's or the front-passenger door is closed.
The driver or front passenger has not fastened their seat belt.
XFasten your seat belt (Ypage 49).
The warning lamp goes out.
There are objects on the front-passenger seat.
XRemove the objects from the front-passenger seat and stow them in a secure
place.
The warning lamp goes out.
üN The red seat belt warning lamp flashes and an intermittent audible warning
sounds.
The driver or front passenger has not fastened their seat belt. The vehicle is being driven faster than 15 mph (25 km/h) or has briefly been driven faster than 15 mph
(25 km/h).
XFasten your seat belt (Ypage 49).
The warning lamp goes out and the intermittent warning tone ceases.
There are objects on the front-passenger seat. The vehicle is being driven faster
than 15 mph (25 km/h) or has briefly been driven faster than 15 mph (25 km/h).
XRemove the objects from the front-passenger seat and stow them in a secure
place.
The warning lamp goes out and the intermittent warning tone ceases.
314Warning and indicator lamps in the instrument cluster
On-board computer and displays
Page 322 of 438

Engine
Warning/
indicator
lampNSignal type
Possible causes/consequences and M
Solutions
;NThe yellow Check Engine warning lamp lights up while the engine is running.
There may be a malfunction, for example:
Rin the engine management
Rin the fuel injection system
Rin the exhaust system
Rin the ignition system
Rin the fuel system
The emission limit values may be exceeded and the engine may be in emergency
mode.
XVisit a qualified specialist workshop immediately.
iIn some states, you must immediately visit a qualified specialist workshop as
soon as the yellow Check Engine warning lamp lights up. This is due to the legal
requirements in effect in these states. If in doubt, check whether such legal
regulations apply in the state in which you are currently driving.
8N The yellow reserve fuel warning lamp lights up while the engine is running.
The fuel level has dropped into the reserve range.
XRefuel at the nearest gas station.
8N The yellow reserve fuel warning lamp flashes while the vehicle is in motion.
In addition, the ;Check Engine warning lamp may light up.
The fuel filler cap is not closed correctly or the fuel system is leaking.
XCheck that the fuel filler cap is correctly closed.
XIf the fuel filler cap is not correctly closed: close the fuel filler cap.
XIf the fuel filler cap is closed:visit a qualified specialist workshop.
?NThe red coolant warning lamp comes on while the engine is running. The coolant
temperature gauge is at the beginning of the cold range.
The temperature sensor for the coolant temperature gage is defective.
The coolant temperature is no longer being monitored. There is a risk of engine
damage if the coolant temperature is too high.
XPull over and stop the vehicle safely and switch off the engine, paying attention
to road and traffic conditions. Do not continue driving under any circumstances.
XSecure the vehicle against rolling away (Ypage 189).
XConsult a qualified specialist workshop.
320Warning and indicator lamps in the instrument cluster
On-board computer and displays
Page 324 of 438
Warning/
indicator
lampNSignal type
Possible causes/consequences and M
Solutions
XAt coolant temperatures below 257‡(125 †), you can continue driving to the
nearest qualified specialist workshop.
XAvoid heavy loads on the engine as you do so, e.g. driving in mountainous terrain
and stop-start traffic.
Driving systems
Warning/
indicator
lampNSignal type
Possible causes/consequences and M
Solutions
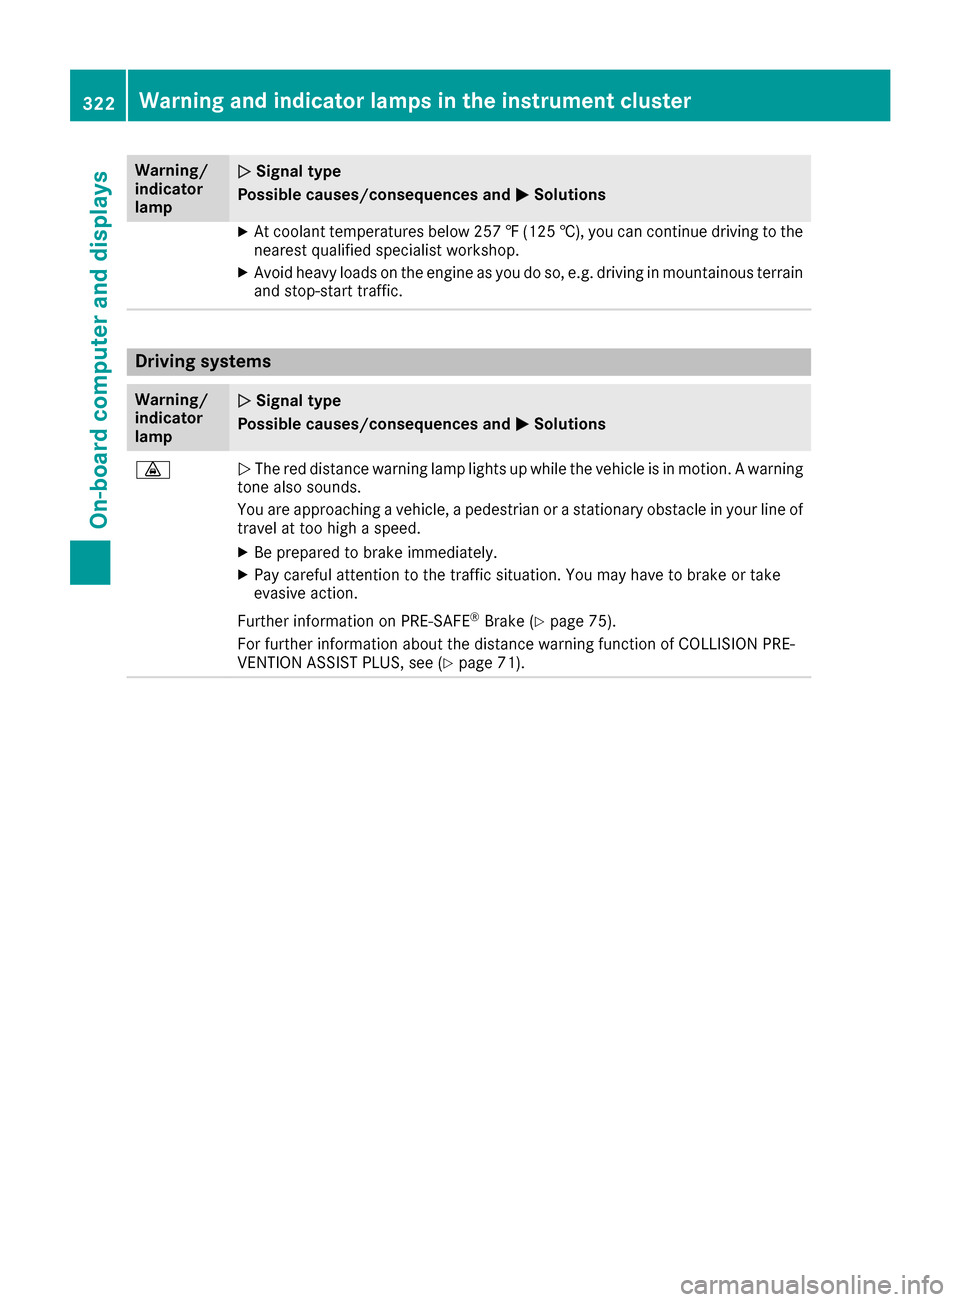
·NThe red distance warning lamp lights up while the vehicle is in motion. A warning
tone also sounds.
You are approaching a vehicle, a pedestrian or a stationary obstacle in your line of travel at too high a speed.
XBe prepared to brake immediately.
XPay careful attention to the traffic situation. You may have to brake or take
evasive action.
Further information on PRE ‑SAFE
®Brake (Ypage 75).
For further information about the distance warning function of COLLISION PRE-
VENTION ASSIST PLUS, see (
Ypage 71).
322Warning and indicator lamps in the instrument cluster
On-board computer and displays
Page 334 of 438
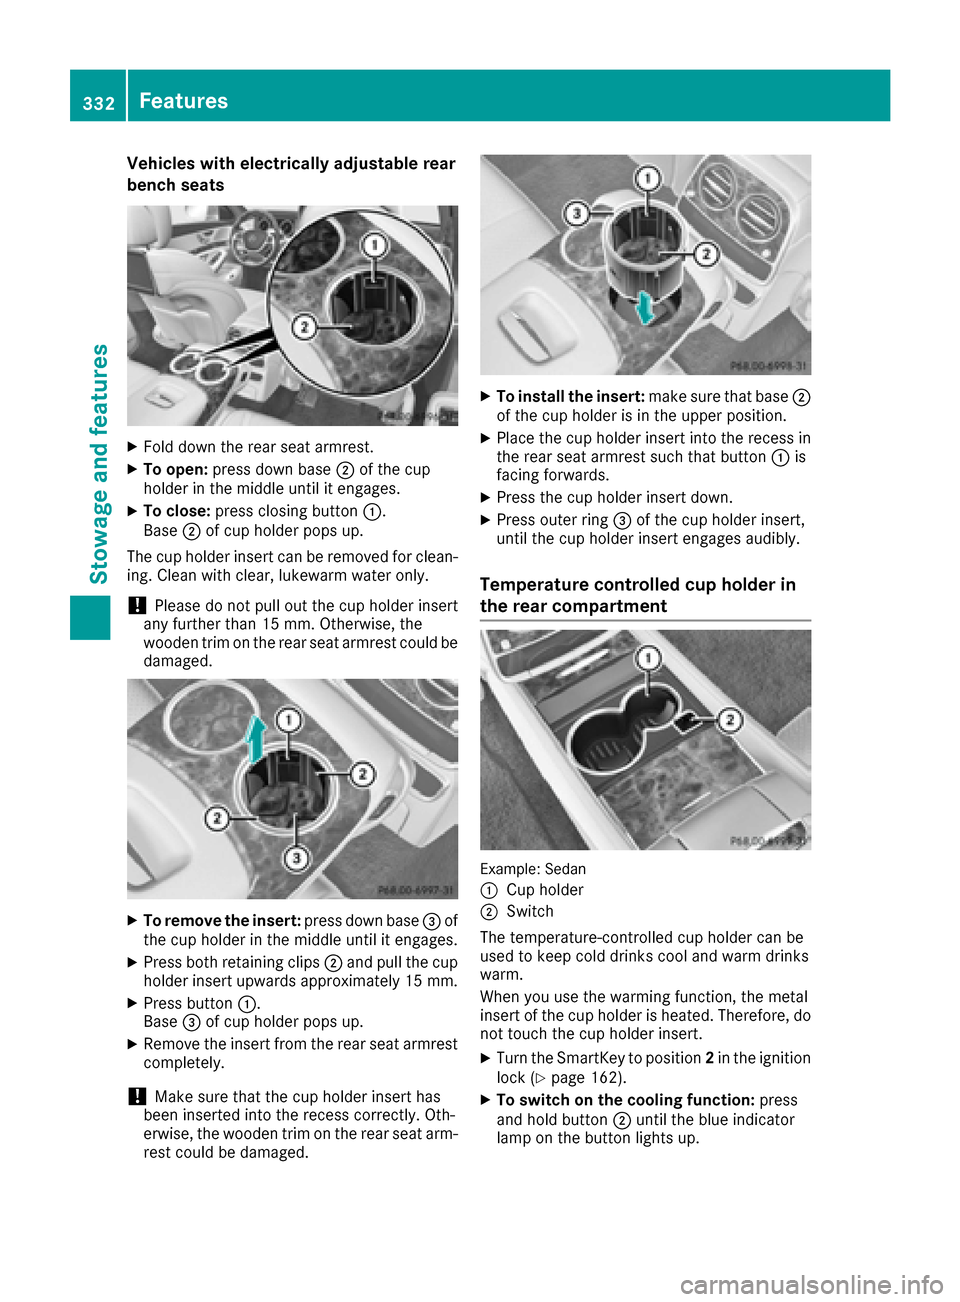
Vehicles with electrically adjustable rear
bench seats
XFold down the rear seat armrest.
XTo open:press down base ;of the cup
holder in the middle until it engages.
XTo close: press closing button :.
Base ;of cup holder pops up.
The cup holder insert can be removed for clean-
ing. Clean with clear, lukewarm water only.
!Please do not pull out the cup holder insert
any further than 15 mm. Otherwise, the
wooden trim on the rear seat armrest could be
damaged.
XTo remove the insert: press down base=of
the cup holder in the middle until it engages.
XPress both retaining clips ;and pull the cup
holder insert upwards approximately 15 mm.
XPress button :.
Base =of cup holder pops up.
XRemove the insert from the rear seat armrest
completely.
!Make sure that the cup holder insert has
been inserted into the recess correctly. Oth-
erwise, the wooden trim on the rear seat arm-
rest could be damaged.
XTo install the insert: make sure that base;
of the cup holder is in the upper position.
XPlace the cup holder insert into the recess in
the rear seat armrest such that button :is
facing forwards.
XPress the cup holder insert down.
XPress outer ring =of the cup holder insert,
until the cup holder insert engages audibly.
Temperature controlled cup holder in
the rear compartment
Example: Sedan
:
Cup holder
;Switch
The temperature-controlled cup holder can be
used to keep cold drinks cool and warm drinks
warm.
When you use the warming function, the metal
insert of the cup holder is heated. Therefore, do
not touch the cup holder insert.
XTurn the SmartKey to position 2in the ignition
lock (Ypage 162).
XTo switch on the cooling function: press
and hold button ;until the blue indicator
lamp on the button lights up.
332Features
Stowage and features
Page 335 of 438
XTo switch on the heating function:press
and hold button ;until the red indicator
lamp on the button lights up.
XTo switch off the function: press and hold
button ;until the indicator lamp on the but-
ton goes out.
The rubber mat can be removed for cleaning.
Clean with clear, lukewarm water only.
Do not use hard or sharp objects to clean the
cup holder. Use only a soft cloth to clean it.
Sun visors
Overview
GWARNING
If the mirror cover of the vanity mirror is folded
up when the vehicle is in motion, you could be
blinded by incident light. There is a risk of an
accident.
Always keep the mirror cover folded down
while driving.
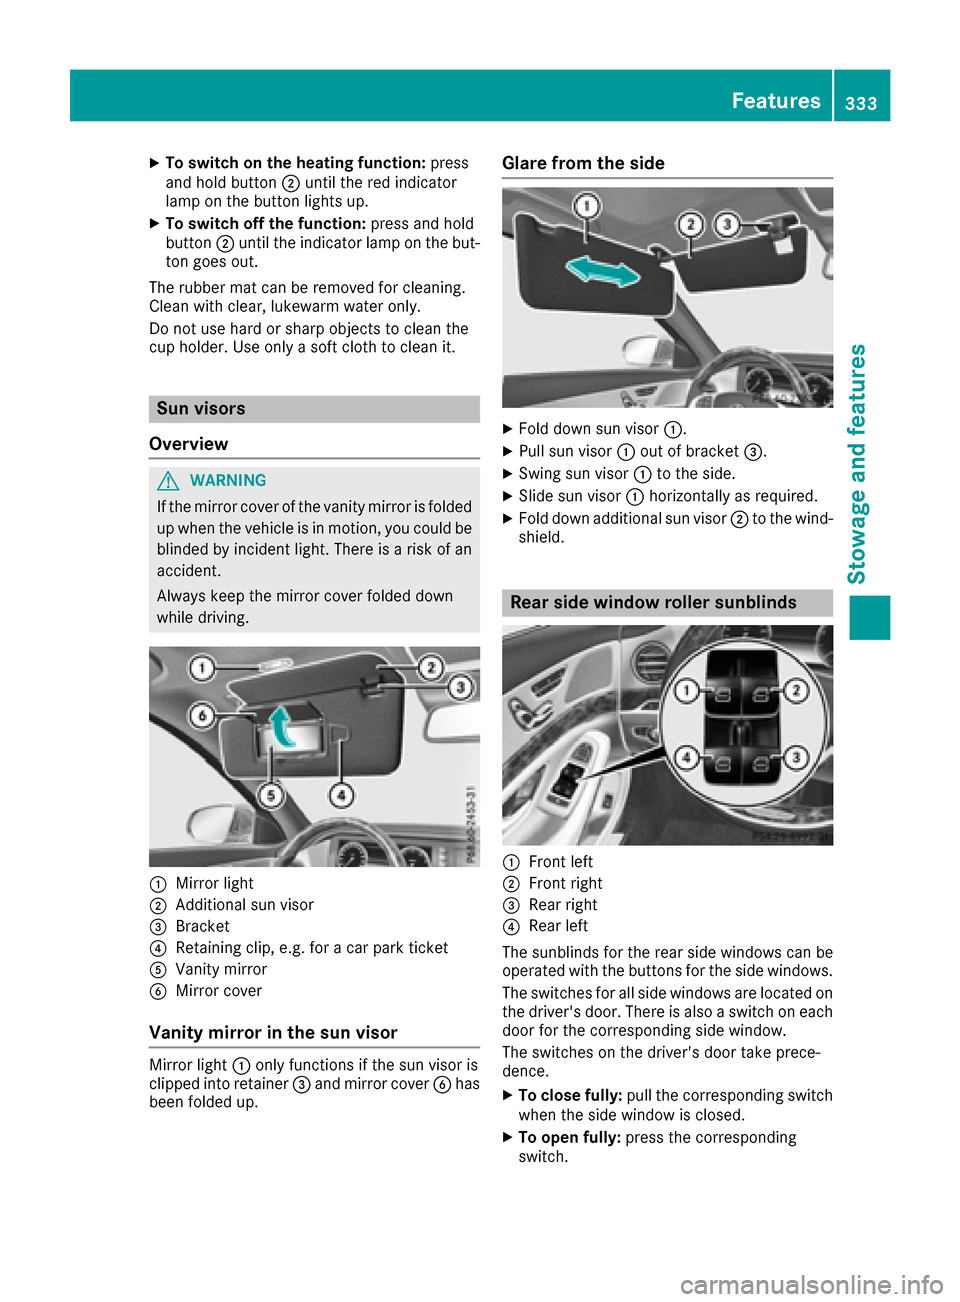
:Mirror light
;Additional sun visor
=Bracket
?Retaining clip, e.g. for a car park ticket
AVanity mirror
BMirror cover
Vanity mirror in the sun visor
Mirror light :only functions if the sun visor is
clipped into retainer =and mirror cover Bhas
been folded up.
Glare from the side
XFold down sun visor :.
XPull sun visor:out of bracket =.
XSwing sun visor :to the side.
XSlide sun visor :horizontally as required.
XFold down additional sun visor ;to the wind-
shield.
Rear side window roller sunblinds
:Front left
;Front right
=Rear right
?Rear left
The sunblinds for the rear side windows can be
operated with the buttons for the side windows.
The switches for all side windows are located on
the driver's door. There is also a switch on each
door for the corresponding side window.
The switches on the driver's door take prece-
dence.
XTo close fully: pull the corresponding switch
when the side window is closed.
XTo open fully: press the corresponding
switch.
Features333
Stowag ean d features
Z
Page 340 of 438
RUse only connector cables that are dry and
free of damage.
RWhen the ignition is off, make sure that the
115 V power socket is dry.
RHave the 115 V power socket checked or
replaced immediately at a qualified speci-
alized workshop if it is damaged or has been
pulled out of the trim.
RNever plug the connector cable into a 115 V
power socket that is damaged or has been
pulled out of the trim.
GDANGER
If you reach into the power socket or plug
inappropriate devices into the power socket,
you could receive an electric shock. There is a
risk of fatal injury.
Only connect appropriate devices to the
power socket.
!Note that work and repairs on the 115 V
power socket should only be carried out by
qualified specialist personnel.
General notes
The 115 V power socket provides an alternating
voltage of 115 V so that small electronic devices
can be connected. These devices, such as
games consoles, chargers and laptops, must not consume more than a maximum of 150 watts
altogether.
Requirements for operation of these devices:
Rthe electronic device that you connect has a
suitable connector and conforms to stand-
ards specific to the country you are in.
Rthe plug of the electronic device is plugged
correctly into 115 V power socket.
Rthe maximum wattage of the device to be
connected must not exceed 150 watts.
Rthe on-board power supply is within a permis-sible voltage range.
Rthe 12 V sockets in the center console in the
front compartment (Ypage 336) and in the
trunk are functional (Ypage 337).
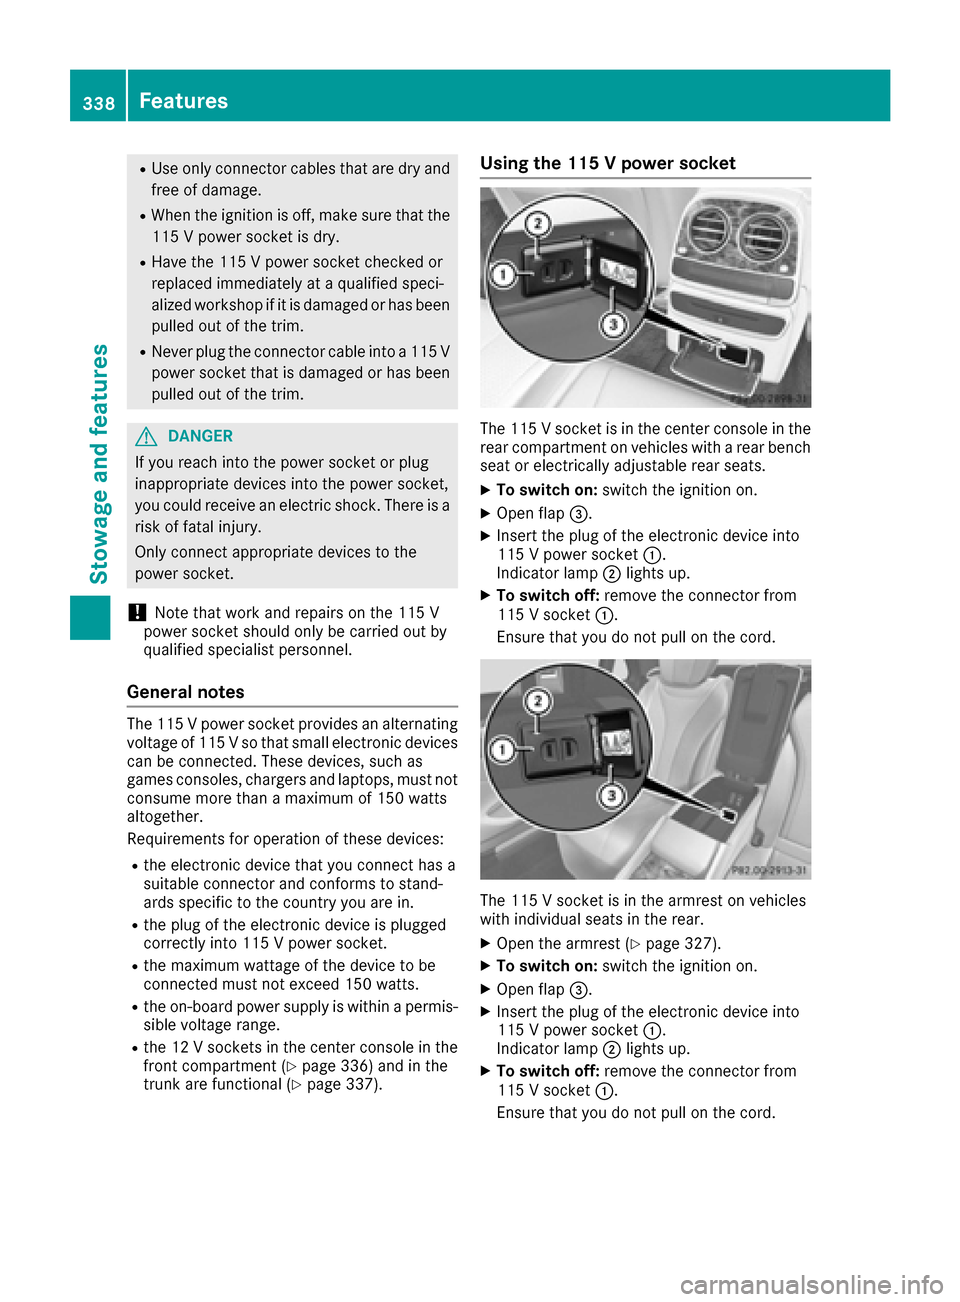
Using the 115 V power socket
The 115 V socket is in the center console in the
rear compartment on vehicles with a rear bench
seat or electrically adjustable rear seats.
XTo switch on: switch the ignition on.
XOpen flap=.
XInsert the plug of the electronic device into
115 V power socket :.
Indicator lamp ;lights up.
XTo switch off: remove the connector from
115 V socket :.
Ensure that you do not pull on the cord.
The 115 V socket is in the armrest on vehicles
with individual seats in the rear.
XOpen the armrest (Ypage 327).
XTo switch on: switch the ignition on.
XOpen flap=.
XInsert the plug of the electronic device into
115 V power socket :.
Indicator lamp ;lights up.
XTo switch off: remove the connector from
115 V socket :.
Ensure that you do not pull on the cord.
338Features
Stowage and features
Page 342 of 438
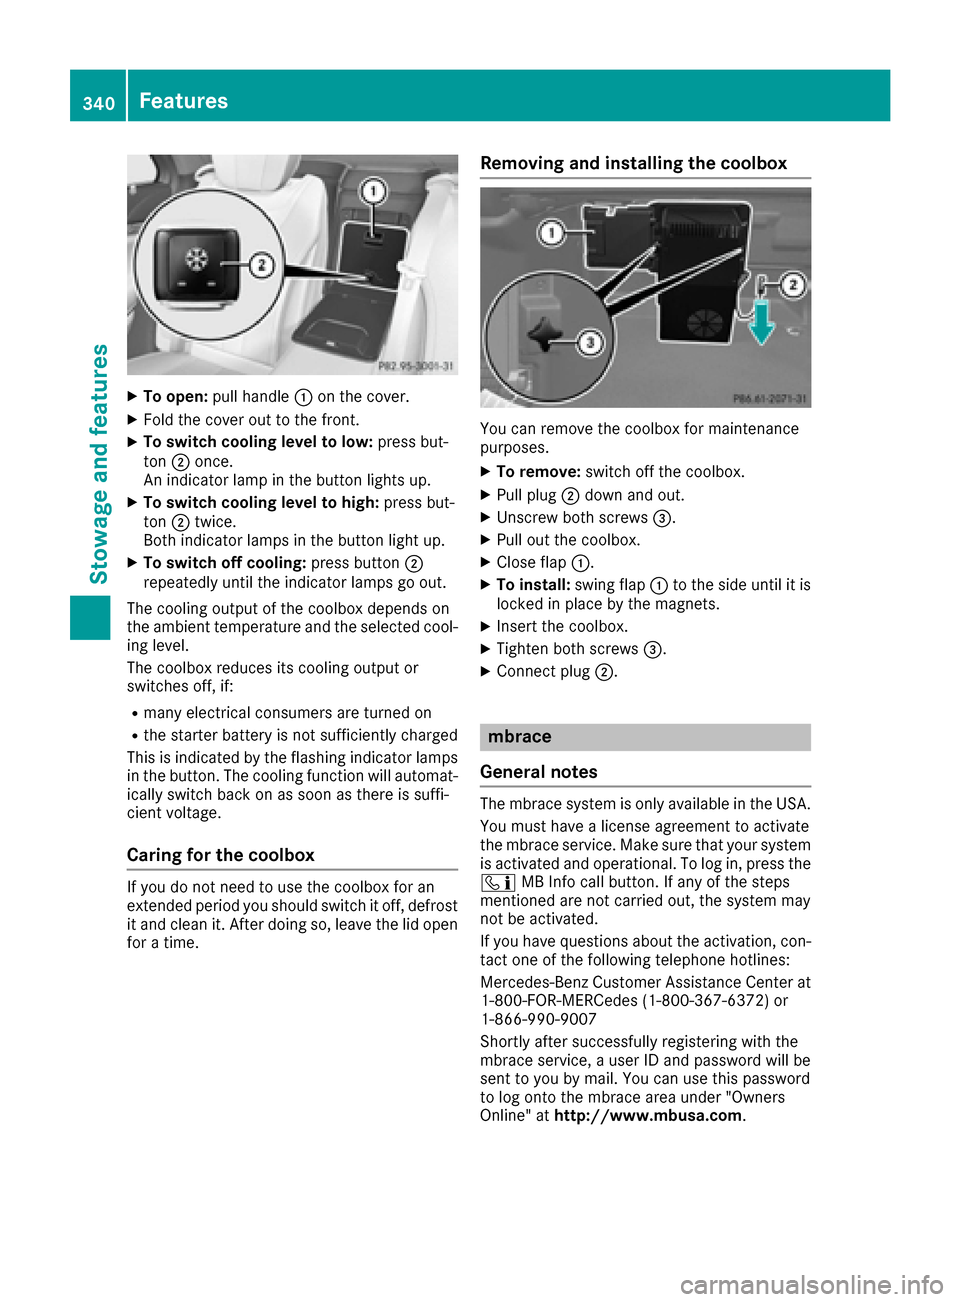
XTo open:pull handle :on the cover.
XFold the cover out to the front.
XTo switch cooling level to low: press but-
ton ;once.
An indicator lamp in the button lights up.
XTo switch cooling level to high: press but-
ton ;twice.
Both indicator lamps in the button light up.
XTo switch off cooling: press button;
repeatedly until the indicator lamps go out.
The cooling output of the coolbox depends on
the ambient temperature and the selected cool-
ing level.
The coolbox reduces its cooling output or
switches off, if:
Rmany electrical consumers are turned on
Rthe starter battery is not sufficiently charged
This is indicated by the flashing indicator lamps
in the button. The cooling function will automat- ically switch back on as soon as there is suffi-
cient voltage.
Caring for the coolbox
If you do not need to use the coolbox for an
extended period you should switch it off, defrost
it and clean it. After doing so, leave the lid open
for a time.
Removing and installing the coolbox
You can remove the coolbox for maintenance
purposes.
XTo remove: switch off the coolbox.
XPull plug;down and out.
XUnscrew both screws =.
XPull out the coolbox.
XClose flap:.
XTo install: swing flap:to the side until it is
locked in place by the magnets.
XInsert the coolbox.
XTighten both screws =.
XConnect plug;.
mbrace
General notes
The mbrace system is only available in the USA.
You must have a license agreement to activate
the mbrace service. Make sure that your system
is activated and operational. To log in, press the
ï MB Info call button. If any of the steps
mentioned are not carried out, the system may
not be activated.
If you have questions about the activation, con-
tact one of the following telephone hotlines:
Mercedes-Benz Customer Assistance Center at
1-800-FOR-MERCedes (1-800-367-6372) or
1-866-990-9007
Shortly after successfully registering with the
mbrace service, a user ID and password will be
sent to you by mail. You can use this password
to log onto the mbrace area under "Owners
Online" at http://www.mbusa.com .
340Features
Stowagean d features