2016 MERCEDES-BENZ METRIS display
[x] Cancel search: displayPage 14 of 54
OperationMenu
AUXAUX
Volume
Sound
BT AudioBT Audio
Media
Sound
TelephoneTelephone
Call lists
SystemSettings
Display off
Entry routines
Control knob
Use the control knob to navigate in the
menus.
MovementOperation
TurnSelects menus and entries
PressConfirms the selection
Buttons and their functions
In addition to the control knob, you can also
operate Audio 15 with the following buttons:
ButtonOperation
%Jumps back one menu level
When route guidance is
active: jumps to main menu
jDeletes last character
entered
When route guidance is
active: cancels route guid-
ance
9Selects the previous line in
the menu
ButtonOperation
:Selects the next line in the
menu
;Jumps one entry to the right
Jumps back to the main
menu
Shows other editing
options/menus
=Jumps one entry to the left
Jumps up one menu level
higher
Hides other editing
options/menus
iWhen route guidance is active, all other
buttons for navigation are inoperative.
Example of operation
The following example shows, step by step,
how to select and play tracks which have
been saved on an SD memory card.
Initial situation: you are listening to the
radio and the SD memory card is inserted in
the slot.
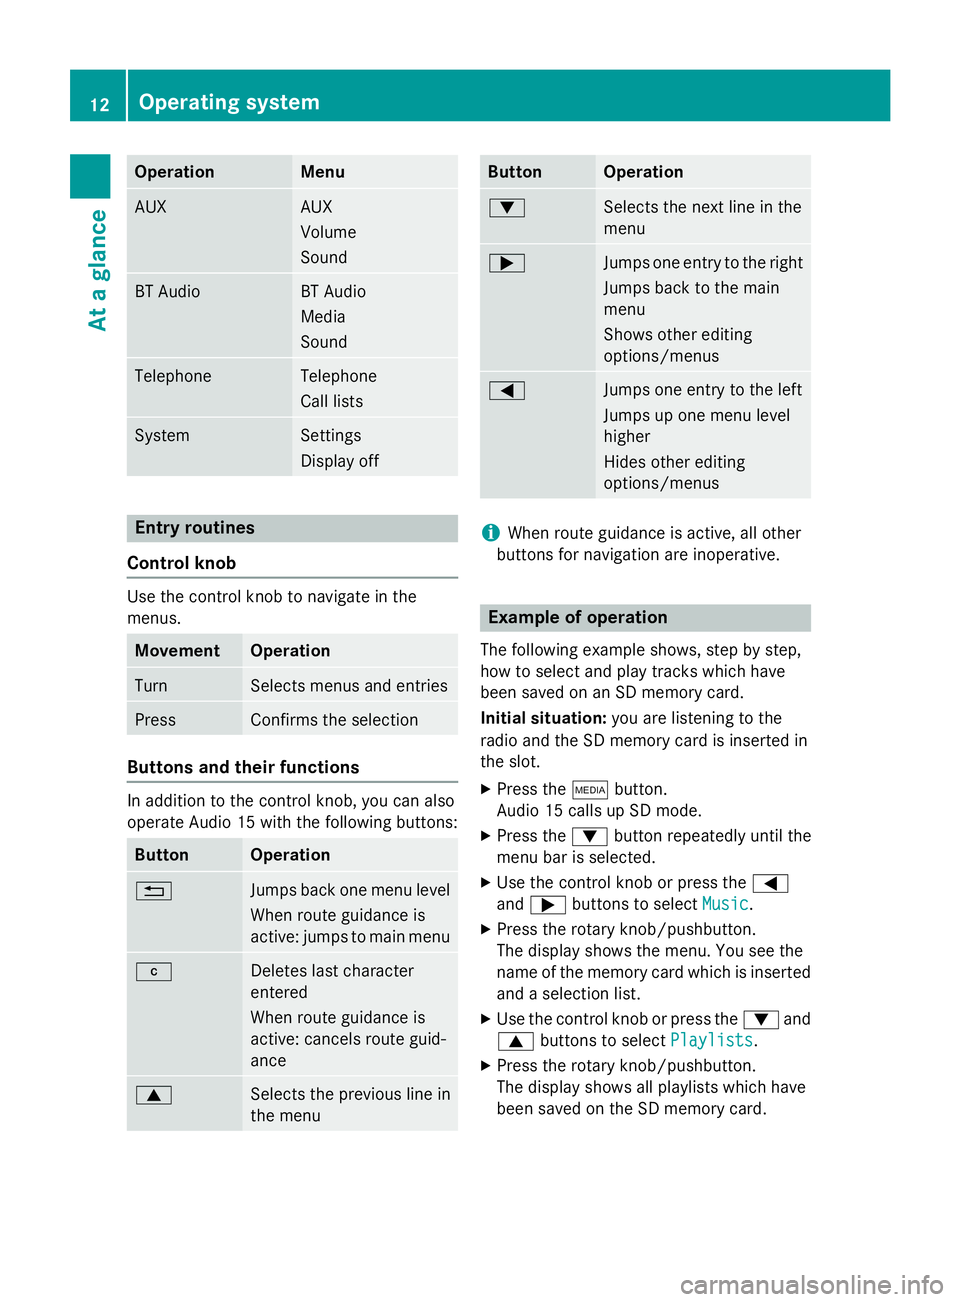
XPress the Õbutton.
Audio 15 calls up SD mode.
XPress the :button repeatedly until the
menu bar is selected.
XUse the control knob or press the =
and ; buttons to select Music
.
XPress the rotary knob/pushbutton.
The display shows the menu. You see the
name of the memory card which is inserted
and a selection list.
XUse the control knob or press the :and
9 buttons to select Playlists
.
XPress the rotary knob/pushbutton.
The display shows all playlists which have
been saved on the SD memory card.
12Operating system
At a glance
Page 15 of 54
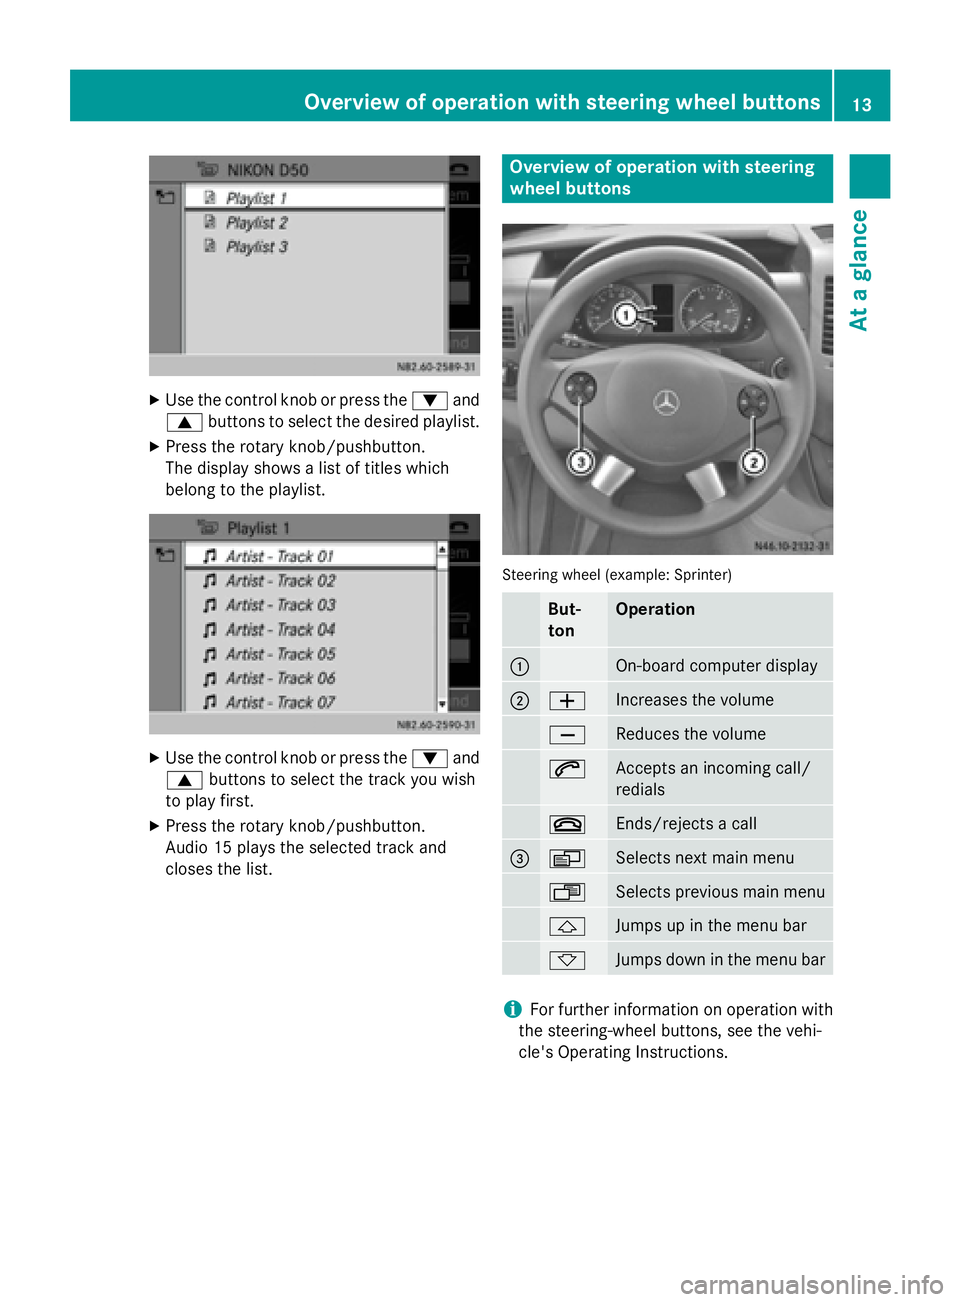
XUse the control knob or press the:and
9 buttons to select the desired playlist.
XPress the rotary knob/pushbutton.
The display shows a list of titles which
belong to the playlist.
XUse the control knob or press the :and
9 buttons to select the track you wish
to play first.
XPress the rotary knob/pushbutton.
Audio 15 plays the selected track and
closes the list.
Overview of operation with steering
wheel buttons
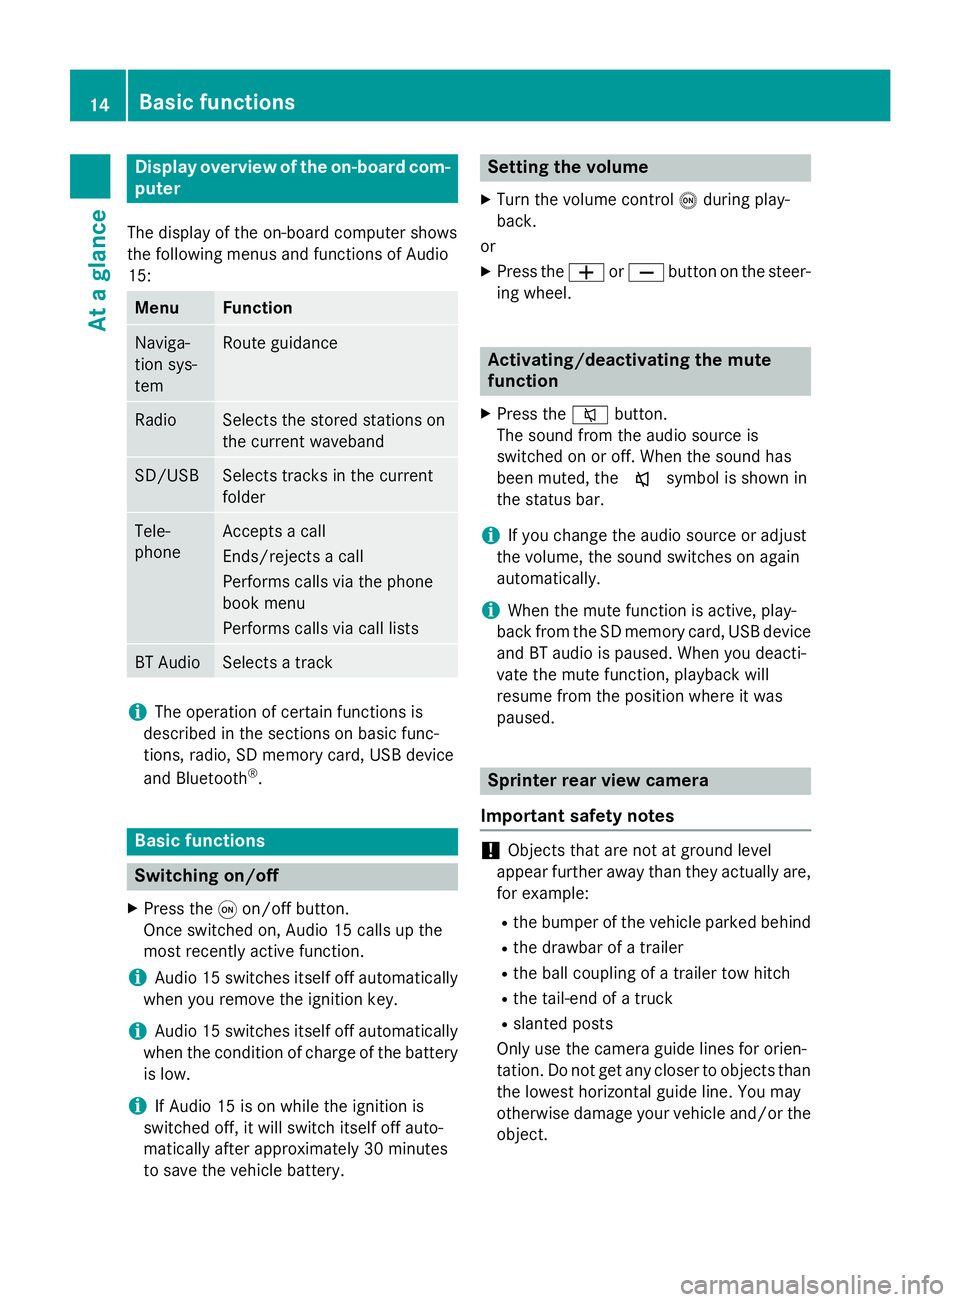
Steering wheel (example: Sprinter)
But-
tonOperation
:On-board computer display
;WIncreases the volume
XReduces the volume
6Accepts an incoming call/
redials
~Ends/rejects a call
=VSelects next main menu
USelects previous main menu
&Jumps up in the menu bar
*Jumps down in the menu bar
iFor further information on operation with
the steering-wheel buttons, see the vehi-
cle's Operating Instructions.
Overview of operation with steering wheel buttons13
At a glance
Page 16 of 54
Display overview of theon-board com -
pute r
The display of th eon-boar dcompute rshows
th efollowing menus and function sof Audio
15 :
Men uFunction
Naviga-
tion sys-
temRout eguidanc e
RadioSelects th estored station son
th ecurren twaveban d
SD/USBSelects track sin th ecurren t
folder
Tele -
phoneAccept s acall
Ends/rejects acal l
Perform scalls via th ephone
boo kmen u
Perform scalls via cal llist s
BT AudioSelects atrack
iThe operation of certain function sis
described in th esection son basi cfunc-
tions, radio, SD memor ycard, US Bdevic e
and Bluetoot h
®.
Basic functions
Switchingon/of f
XPress th eq on/off button.
Once switched on ,Audio 15 calls up th e
most recentl yactive function .
iAudio 15 switches itsel fof fautomatically
when you remov eth eignition key.
iAudio 15 switches itsel fof fautomatically
when th econdition of charg eof th ebattery
is low.
iIf Audio 15 is on whil eth eignition is
switched off, it will switch itsel fof fauto-
matically after approximately 30 minutes
to sav eth evehicle battery.
Setting th evolume
XTur nth evolume contro lo durin gplay-
back.
or
XPress th eW orX buttonon th esteer -
in g wheel.
Activating/deactivating th emute
function
XPress th e8 button.
The soun dfrom th eaudio source is
switched on or off. Whe nth esoun dhas
been muted, th ex symbol is shown in
th estatus bar .
iIf you chang eth eaudio source or adjust
th evolume ,th esoun dswitches on again
automatically.
iWhe nth emut efunction is active ,play-
bac kfrom th eSD memor ycard, US Bdevic e
and BT audio is paused. Whe nyou deacti -
vat eth emut efunction ,playback will
resume from th eposition wher eit was
paused.
Sprinter rear view camer a
Important safet ynotes
!Objects that are no tat groun dlevel
appear further away than they actually are ,
fo rexample:
Rth ebumper of th evehicle parke dbehin d
Rthedrawbar of atrailer
Rth eball couplin gof atrailer to whitch
Rthetail-en dof atruck
Rslante dposts
Only use th ecamera guid elines fo rorien -
tation .Do no tget any close rto objects than
th elowest horizonta lguid eline. You may
otherwise damage your vehicle and/o rth e
object.
14Basic functions
At a glance
Page 17 of 54
The rear view camera is only an aid. It cannot
replace your own awareness of the immedi-
ate surroundings. You are responsible for
safe maneuvering, parking and pulling away.
When maneuvering and parking, make sure
that there are no persons, animals or objects
in the maneuvering area.
The rear view camera may show obstacles in
perspectival distortion, incorrectly or not at
all. The rear view camera cannot display all
objects located very near and/or under the
rear bumper. It does not warn you of a colli-
sion, persons or objects.
The area behind the vehicle is displayed in a
mirrored fashion, as in the rear-view mirror or
the exterior mirrors.
The rear view camera covers the immediate
surroundings of the vehicle and assists you,
for example, when parking.
Under the following circumstances, the rear
view camera will not function, or will function
in a limited manner:
Rthere is very heavy rain, snow or fog
Rat night or when the vehicle is in very dark
places
Rif you are parked somewhere very dark
Rthe surrounding area is illuminated with flu-
orescent light. The display may flicker.
Rif there is a sudden change in temperature,
e.g. when driving into a heated garage in
winter
Rif the ambient temperature is very high
Rif the camera lens is dirty or obstructed
Rif the rear of the vehicle is damaged. In this
case, have the camera position and setting
checked at a qualified specialist workshop
Rear view camera operation
The image from the rear view camera is
shown in the display when reverse gear is
engaged if:
Ryour vehicle is equipped with a rear view
camera
Rthe ignition is switched on Guide lines in the display (depending on the
vehicle's equipment) help you with backing
up.
Static guide lines
Depending on the vehicle's equipment, the
rear view camera image displays static guide
lines. These guide lines assist you with back-
ing up.
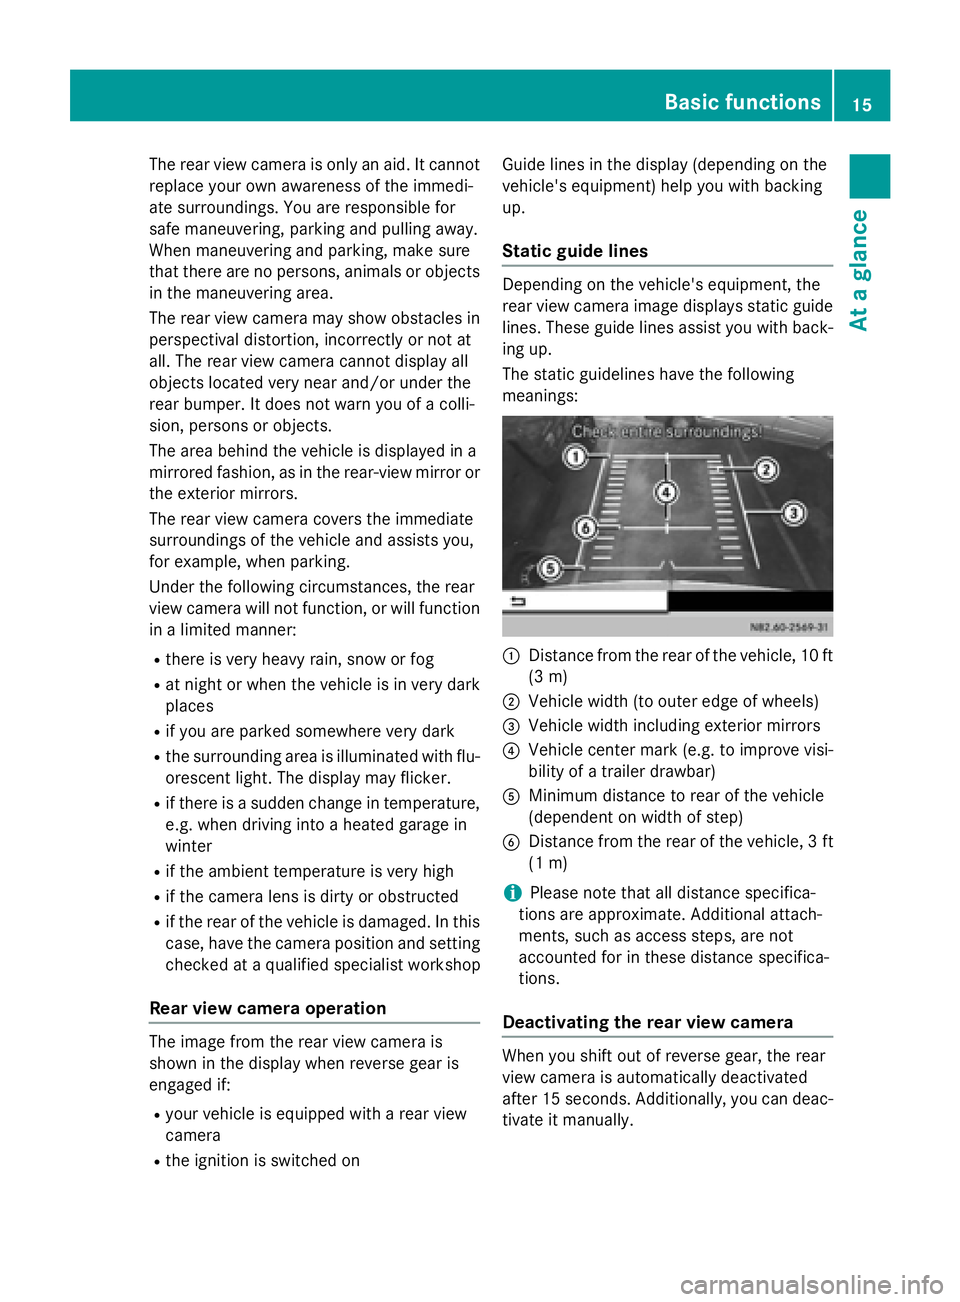
The static guidelines have the following
meanings:
:Distance from the rear of the vehicle, 10 ft
(3 m)
;Vehicle width (to outer edge of wheels)
=Vehicle width including exterior mirrors
?Vehicle center mark (e.g. to improve visi-
bility of a trailer drawbar)
AMinimum distance to rear of the vehicle
(dependent on width of step)
BDistance from the rear of the vehicle, 3 ft
(1 m)
iPlease note that all distance specifica-
tions are approximate. Additional attach-
ments, such as access steps, are not
accounted for in these distance specifica-
tions.
Deactivating the rear view camera
When you shift out of reverse gear, the rear
view camera is automatically deactivated
after 15 seconds. Additionally, you can deac-
tivate it manually.
Basic functions15
At a glance
Page 18 of 54
XPress theØ,$, Õ,%,ior
% button.
or
XSelect %in the menu bar.
The display shows the previous view.
Activating the rear view camera image
when driving forwards
This function is available for the Sprinter.
iWhen driving forwards, the display shows
no guide lines.
XPress the ibutton for longer than two
seconds.
The display shows the rear view camera
image.
or
XPress the ibutton.
XPress the :button repeatedly until the
menu bar is selected.
XSelect Rear View Camera.
The display shows the rear view camera
image without guide lines.
Vito rear view camera
Rear view camera operation
The image from the rear view camera is
shown in the display when reverse gear is
engaged if:
Ryour vehicle is equipped with a rear view
camera
Rthe ignition is switched on
Guide lines in the display (depending on the
vehicle's equipment) help you with backing
up.
When the function is activated, the display
automatically switches back to the previously
selected display if:
Ryou select transmission position P
Rdrive forwards slightly
Deactivating the rear view camera
When you shift out of reverse gear, the rear
view camera is automatically deactivated
after 15 seconds. Additionally, you can deac-
tivate it manually.
XPress theØ,$,Õ,%,ior
% button.
or
XSelect %in the menu bar.
The display shows the previous view.
If the vehicle is equipped with Active Parking
Assist: the rear view camera is available dur-
ing the entire automatic parking procedure
after the reverse gear has been engaged for
the first time.
Information in the vehicle's Operating
Instructions
You can find further information about the
rear view camera in the vehicle's Operating
Instructions.
16Basic functions
At a glance
Page 19 of 54
Display settings.................................. .18
Sound settings .................................... 19
Bluetoot h
®settings ............................ 20
Syste mlanguage ................................ .25
Resetting to factory settings .............26
17
System settings
Page 20 of 54

Display settings
Setting thebrightness
XPress th ei button.
XSelectSettings.
XSelec tDispla y.
XSelectBrightnes s.
The display shows th ebrightness wit hcur -
ren tlevel :and previous level ;.
XSetth ebrightness to th edesire dlevel.
XPress th erotary knob/pushbutton.
The ne wsetting is saved.
XPress th e% button.
XTo exit syste msettings :press th e$
or Õ button.
Setting th edisplay design
XPress th ei button.
XSelectSettings.
XSelec tDispla y.
XSelectDay Mod e,Night Mod eorAuto‐
matic.
The #dot indicates th edisplay design
selected.
iWhe nth eAutomaticsetting is selected,
Audio 15 (optionally) evaluates th eread-
ings from th eautomatic vehicle ligh tsensor
and automatically switches th edisplay
designs. On vehicles without ligh tsensors,
Audio 15 switches over to th eon-boar d
compute rdependin gon th eligh tswitch
setting and dimmin gsetting .
XPress th e% button.
XTo exit syste msettings :press th e$
or Õ button.
Setting th etime forma t
i
The time is set via th eon-boar dcomputer,
see th evehicle' sOperatin gInstructions.
On vehicles wit h atachograph, th etime
mus tbe set on th etachograph.
XPress th ei button.
XSelectSettings.
XSelec tTim eFormat.
18Display settings
System settings
Page 21 of 54

XSet the desired time format:
RHH:MM (24 hrs): 24-h format, e.g.
13:15
RHH:MM (AM/PM): 12-h format, e.g.
1:15 pm
The #dot indicates the selected time for-
mat.
XPress the %button.
XTo exit system settings : press the$
or Õ button.
Switching the display on/off
XPress the ibutton.
XSelect Display Off.
The display is switched off. Audio 15 func-
tions remain available. The selected audio
source remains audible.
XTo switch on the display again: press the
control knob.
iAlternatively, you can call up a different
function (e.g. radio).
Sound settings
Calling up sound settings
You can make individual tone settings for the
following audio sources:
RRadio
RSD/USB
RAUX
RBluetooth®audio
XSelect the audio source for which you wish to set the sound.
XPress the :button repeatedly until the
menu bar is selected.
XSelect Sound.
The display shows the current sound set-
tings.
Sound settings19
System settings