2016 MERCEDES-BENZ GLS SUV lights
[x] Cancel search: lightsPage 176 of 397
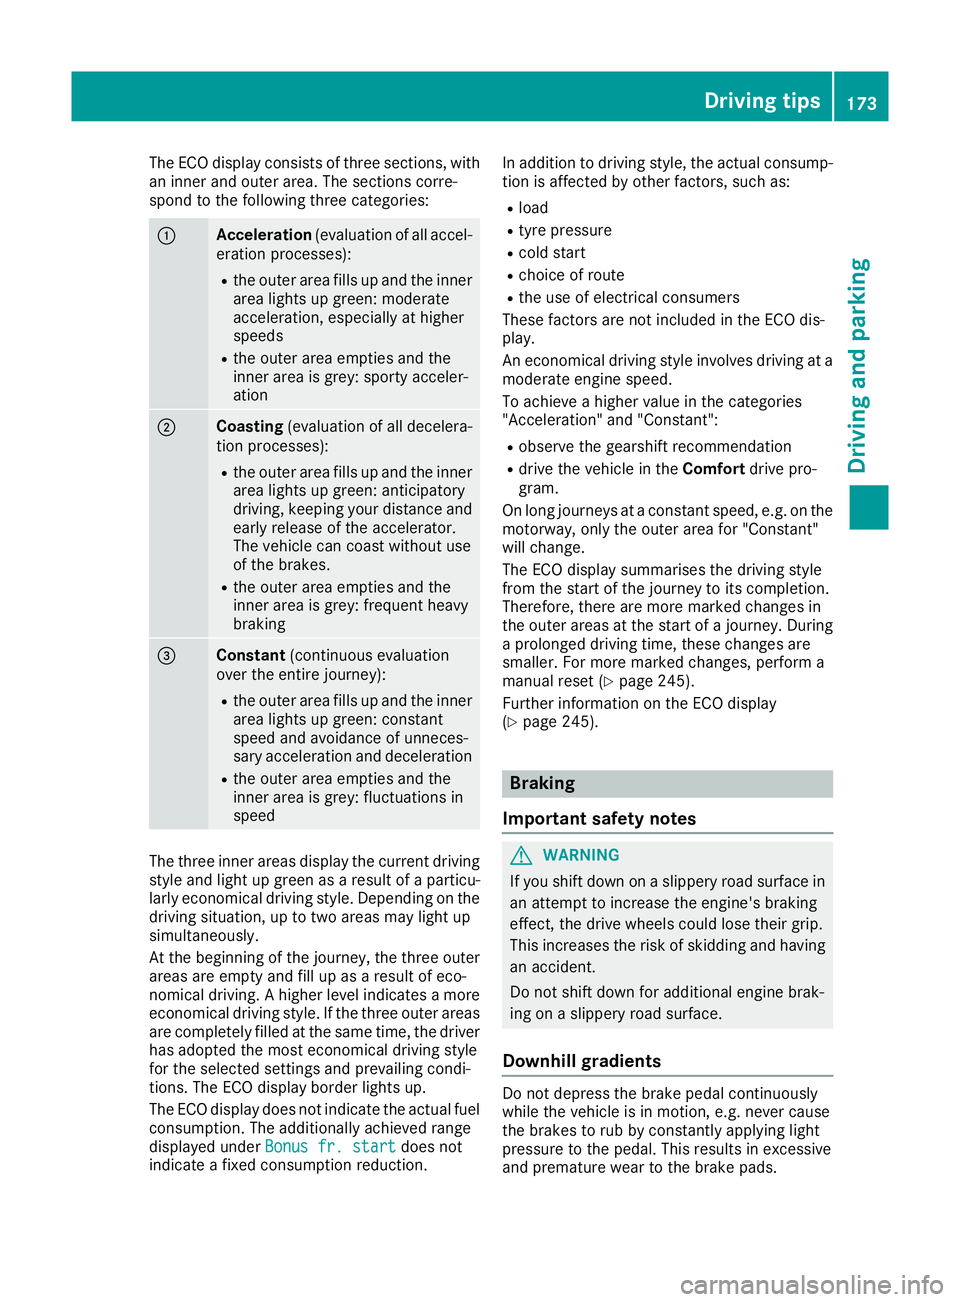
The ECO display consists of three sections, with
an inner and outer area. The sections corre-
spond to the following three categories: :
Acceleration
(evaluation of all accel-
eration processes):
R the outer area fills up and the inner
area lights up green: moderate
acceleration, especially at higher
speeds
R the outer area empties and the
inner area is grey: sporty acceler-
ation ;
Coasting
(evaluation of all decelera-
tion processes):
R the outer area fills up and the inner
area lights up green: anticipatory
driving, keeping your distance and
early release of the accelerator.
The vehicle can coast without use
of the brakes.
R the outer area empties and the
inner area is grey: frequent heavy
braking =
Constant
(continuous evaluation
over the entire journey):
R the outer area fills up and the inner
area lights up green: constant
speed and avoidance of unneces-
sary acceleration and deceleration
R the outer area empties and the
inner area is grey: fluctuations in
speed The three inner areas display the current driving
style and light up green as a result of a particu-
larly economical driving style. Depending on the driving situation, up to two areas may light up
simultaneously.
At the beginning of the journey, the three outer
areas are empty and fill up as a result of eco-
nomical driving. A higher level indicates a more
economical driving style. If the three outer areas
are completely filled at the same time, the driver
has adopted the most economical driving style
for the selected settings and prevailing condi-
tions. The ECO display border lights up.
The ECO display does not indicate the actual fuel consumption. The additionally achieved range
displayed under Bonus fr. start
Bonus fr. start does not
indicate a fixed consumption reduction. In addition to driving style, the actual consump-
tion is affected by other factors, such as:
R load
R tyre pressure
R cold start
R choice of route
R the use of electrical consumers
These factors are not included in the ECO dis-
play.
An economical driving style involves driving at a moderate engine speed.
To achieve a higher value in the categories
"Acceleration" and "Constant":
R observe the gearshift recommendation
R drive the vehicle in the Comfortdrive pro-
gram.
On long journeys at a constant speed, e.g. on the
motorway, only the outer area for "Constant"
will change.
The ECO display summarises the driving style
from the start of the journey to its completion.
Therefore, there are more marked changes in
the outer areas at the start of a journey. During a prolonged driving time, these changes are
smaller. For more marked changes, perform a
manual reset (Y page 245).
Further information on the ECO display
(Y page 245). Braking
Important safety notes G
WARNING
If you shift down on a slippery road surface in an attempt to increase the engine's braking
effect, the drive wheels could lose their grip.
This increases the risk of skidding and having
an accident.
Do not shift down for additional engine brak-
ing on a slippery road surface.
Downhill gradients Do not depress the brake pedal continuously
while the vehicle is in motion, e.g. never cause
the brakes to rub by constantly applying light
pressure to the pedal. This results in excessive
and premature wear to the brake pads. Driving tips
173Driving and parking Z
Page 181 of 397
R
Do not stray from marked routes or paths.
R Observe the notes on off-road fording
(Y page 175).
i Information about retrofitting special all-ter-
rain tyres is available from any qualified spe-
cialist workshop.
i Do not use the HOLD function when driving
off-road, on steep uphill or downhill gradients or on slippery or loose surfaces. The HOLD
function cannot hold the vehicle on such sur- faces.
Checklist before off-road driving X
Engine oil level: check the engine oil and top
it up if necessary.
When driving on steep gradients, the oil level must be sufficiently high to ensure a correct
oil supply in the vehicle.
X AdBlue ®
tank (BlueTEC vehicles): check the
level and top up if necessary (Y page 166).
X Tyre-change tool kit: check that the jack is
working and make sure that the wheel
wrench, a robust tow cable and a folding
spade are in the vehicle.
X Wheels and tyres: check the tyre tread
depth and tyre pressure.
X Check for damage and remove any foreign
objects, e.g. small stones, from the wheels/
tyres.
X Replace any missing valve caps.
X Replace dented or damaged wheels.
X Wheels: dented or bent wheels can lead to a
loss of tyre pressure and damage to the tyre
bead. Before driving off-road, check the
wheels and replace them if necessary.
Checklist after off-road driving !
If you detect damage to the vehicle after
driving off-road, have the vehicle checked
immediately at a qualified specialist work-
shop.
Driving over rough terrain places greater
demands on your vehicle than driving on normal
roads. After driving off-road, check the vehicle.
This allows you to detect damage promptly and reduce the risk of an accident to yourself and
other road users.
X If the Off-road orOff-road Plus drive pro-
gram is selected: select the Individual,Sport,
Comfort orSlippery drive program
(Y page 155).
X Deactivate the LOW RANGE offroad gear
(Y page 230).
X Deactivate DSR (Y page 227).
X Lower the vehicle level again to a level suita-
ble to the road conditions, e.g. to the normal
level.
X Clean the headlamps and rear lights and
check for damage.
X Clean the front and rear licence plates.
X Clean the wheels and tyres with a water jet
and remove any foreign objects.
X Clean the wheels, wheel arches and the vehi-
cle underside with a water jet; check for any
foreign objects and damage.
X Check whether twigs or other parts of plants
have become trapped. These increase the risk
of fire and can damage fuel pipes, brake
hoses or the rubber bellows of the axle joints
and propeller shafts.
X After the trip, examine without fail the entire
undercarriage, wheels, tyres, brakes, body-
work structure, steering, chassis and exhaust
system for damage.
X After driving for extended periods across
sand, mud, gravel, water or in similarly dirty
conditions, have the brake discs, wheels,
brake pads/linings and axle joints checked
and cleaned.
X If you detect strong vibrations after driving
off-road, check for foreign objects in the
wheels and drive train and remove them if
necessary. Foreign objects can disturb the
balance and cause vibrations.
Driving on sand Observe the following rules when driving on
sand:
R Select the Offroaddrive program (vehicles
without Off-Road Engineering package)
(Y page 228).
R Select the Offroaddrive program (vehicles
with Off-Road Engineering package)
(Y page 229).
R Select a higher vehicle level.
R Avoid high engine speeds.
R Use the left-hand steering wheel gearshift
paddle to shift to a lower gear appropriate to
the terrain. 178
Driving
tipsDriving an d parking
Page 197 of 397

If you press the
%ora button on the
multifunction steering wheel, the message will
disappear. Once normal level has been reached,
all indicator lamps =go out.
The vehicle automatically selects normal level if
you:
R drive at speeds above 115 km/h or
R drive at speeds between 100 km/h and
115 km/h for approximately 20 seconds
The vehicle is lowered to low level if you are
travelling at higher speeds.
Normal level Setting the vehicle to normal level
X Start the engine.
X Press selector wheel :.
Selector wheel :extends.
X To lower the vehicle: turn selector wheel :
anti-clockwise ?.
The vehicle is lowered.
If one or more indicator lamps =are on:
X Turn selector wheel :anti-clockwise ?
until all indicator lamps =that are lit start to
flash.
The vehicle is lowered to normal level. As
soon as the next lowest level is reached, the
indicator lamp stops flashing and goes out.
Offroad levels General notes
Only select an offroad level if this is appropriate for road conditions. Otherwise, fuel consump-
tion may increase and handling performance
may be affected. You can select the following:
R Offroad level 1 at speeds up to 100 km/h
R Offroad level 2 at speeds up to 65 km/h
R Offroad level 3 at speeds up to 20 km/h
If you select an offroad level when driving at too
high a speed, the Please reduce speed Please reduce speed mes-
sage appears in the multifunction display.
Offroad level 3 is only suitable for driving on
extremely difficult off-road terrain under partic- ularly rough conditions.
R Adjust your driving style to the altered han-
dling characteristics.
R Do not drive faster than 20 km/h. Indicator lamps
=for the desired offroad level
flash:
R the lower indicator lamp flashes, offroad
level 1 is selected
R the lower and centre indicator lamps flash,
offroad level 2 is selected
R all three indicator lamps flash, offroad level 3
is selected
The vehicle is being adjusted to the offroad level
selected. As soon as an offroad level is reached,
the corresponding indicator lamp stops flashing and lights up constantly.
Raising the vehicle
Setting the vehicle level using the selector
wheel
X To raise the vehicle: turn selector wheel :
clockwise ;.
The vehicle is raised to offroad level 1 by
30 mm compared to the normal level.
During the adjustment, the Vehicle rising Vehicle rising
message, for example, appears in the multifunc-
tion display. 194
Driving systemsDriving and parking
Page 202 of 397
If this vehicle is not driven in a safe manner, it
can lead to an accident, to the vehicle over-
turning as well as serious or even fatal inju-
ries.
R In the event of an accident with the vehicle
overturning, passengers who are not wearing
their seat belt are considerably more likely to die than passengers wearing their seat belt.
You and all vehicle occupants should always
wear your seat belts.
General notes
Only select raised level if this is appropriate for
the road conditions. Otherwise, fuel consump-
tion may increase and handling may be affected.
Make changes to the vehicle level while the
vehicle is in motion. This enables the vehicle to
adjust to the new level as quickly as possible.
The vehicle level may change visibly if you park
the vehicle and the outside temperature
changes. If the temperature drops, the vehicle
level lowers; with an increase in temperature,
the vehicle level rises.
If you unlock the vehicle or open a door, the
vehicle begins to compensate for load discrep-
ancies while still parked. However, for signifi-
cant level changes, e.g. after the vehicle has
been stationary for a long period, the engine
must be running. For safety reasons, the vehicle is only lowered when the doors are closed. Low-
ering is interrupted if a door is opened; it con-
tinues once the door has been closed.
Vehicles with no trailer coupled: below a
speed of 60 km/h, you can choose between the
normal and raised vehicle level. Select the nor-
mal vehicle level for normal road conditions and
the raised vehicle level when using snow chains or if the road conditions are very poor. Your
selection remains stored even if you remove the
key from the ignition lock. If you try to select
raised level at a speed above 60 km/h, the
Please
Please reduce reducespeed
speedmessage appears in the
multifunction display.
Vehicles with a trailer coupled: below a speed
of 30 km/h, you can choose between the nor-
mal and raised vehicle level. Setting the raised vehicle level X
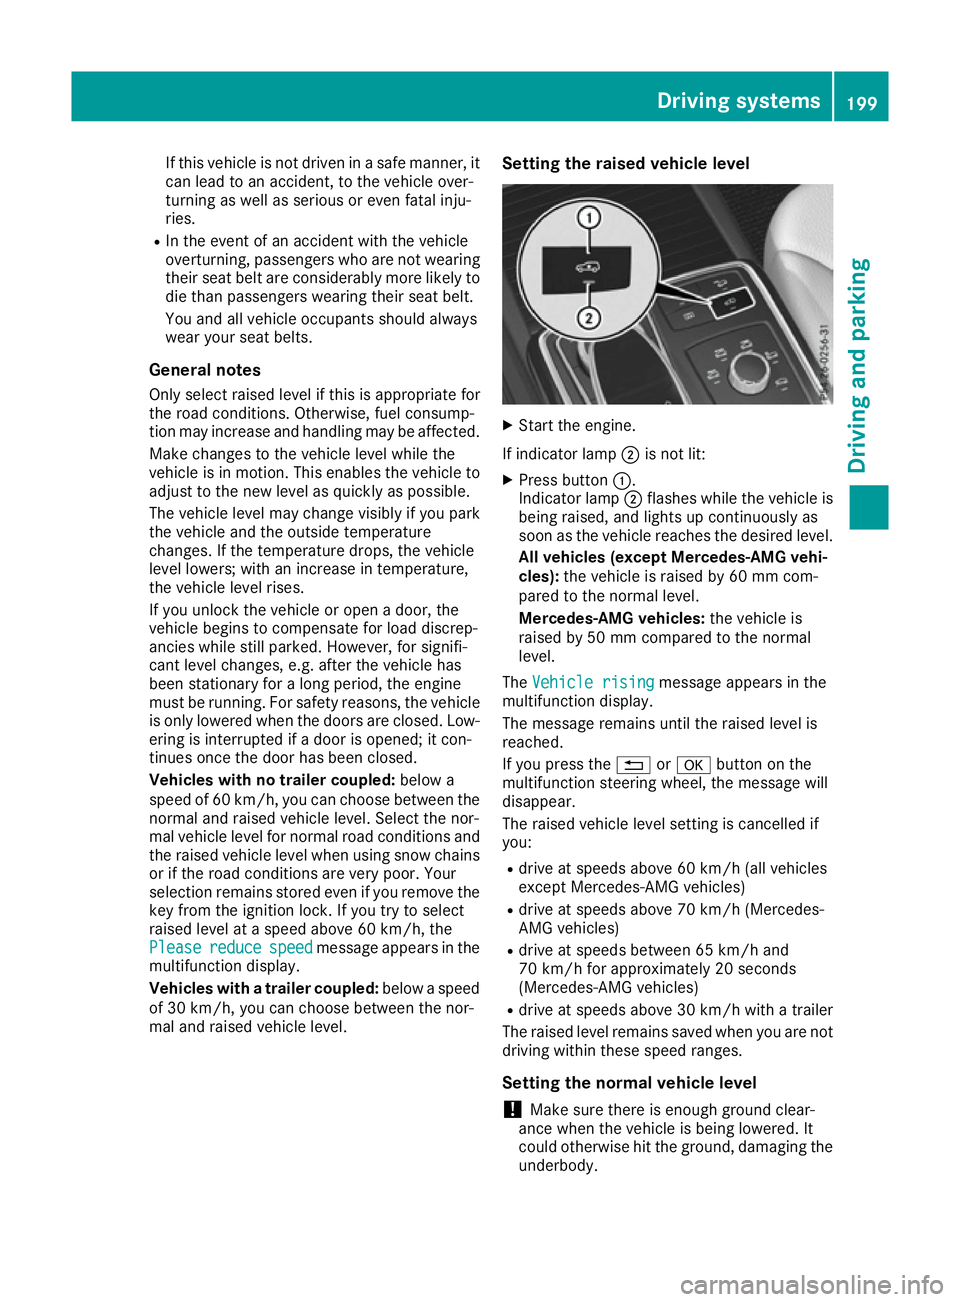
Start the engine.
If indicator lamp ;is not lit:
X Press button :.
Indicator lamp ;flashes while the vehicle is
being raised, and lights up continuously as
soon as the vehicle reaches the desired level.
All vehicles (except Mercedes-AMG vehi-
cles): the vehicle is raised by 60 mm com-
pared to the normal level.
Mercedes-AMG vehicles: the vehicle is
raised by 50 mm compared to the normal
level.
The Vehicle rising Vehicle rising message appears in the
multifunction display.
The message remains until the raised level is
reached.
If you press the %ora button on the
multifunction steering wheel, the message will
disappear.
The raised vehicle level setting is cancelled if
you:
R drive at speeds above 60 km/h (all vehicles
except Mercedes-AMG vehicles)
R drive at speeds above 70 km/h (Mercedes-
AMG vehicles)
R drive at speeds between 65 km/h and
70 km/h for approximately 20 seconds
(Mercedes-AMG vehicles)
R drive at speeds above 30 km/h with a trailer
The raised level remains saved when you are not driving within these speed ranges.
Setting the normal vehicle level
! Make sure there is enough ground clear-
ance when the vehicle is being lowered. It
could otherwise hit the ground, damaging the
underbody. Driving systems
199Driving and parking Z
Page 203 of 397
X
Start the engine.
If indicator lamp ;is lit:
X Press button :.
Indicator lamp ;flashes while the vehicle is
being lowered, and goes out as soon as the
desired vehicle level is reached.
Vehicles with no trailer coupled: the vehi-
cle is adjusted to the height of the selected
drive program (Y page 155).
Vehicles with a trailer coupled: the vehicle
is adjusted to normal level regardless of the
drive program selected (Y page 155). The
vehicle remains at normal level, even if you
change drive programs.
During the adjustment, the Lowering
Lowering mes-
sage appears in the multifunction display.
If you press the %ora button on the
multifunction steering wheel, the message will
disappear. AMG RIDE CONTROL
General notes The electronically controlled damping system
works continuously. This improves driving
safety and ride comfort.
The damping is tuned individually to each wheel
and depends on:
R your driving style, e.g. sporty
R the road surface condition, e.g. bumps
R your individual selection of Sport, Sport + or
Comfort
The suspension setting can be adjusted using
the corresponding button in the centre console
or the DYNAMIC SELECT controller
(Y page 155).
If the ignition is switched off for less than four
hours, the previously selected drive program is
activated when the engine is next started. If the
ignition is switched off for more than four hours, Comfort mode is activated when the engine is
next started. Sport mode The firmer setting of the suspension tuning in
Sport mode ensures even better contact with
the road. Select this mode when employing a
sporty driving style, e.g. on winding country
roads.
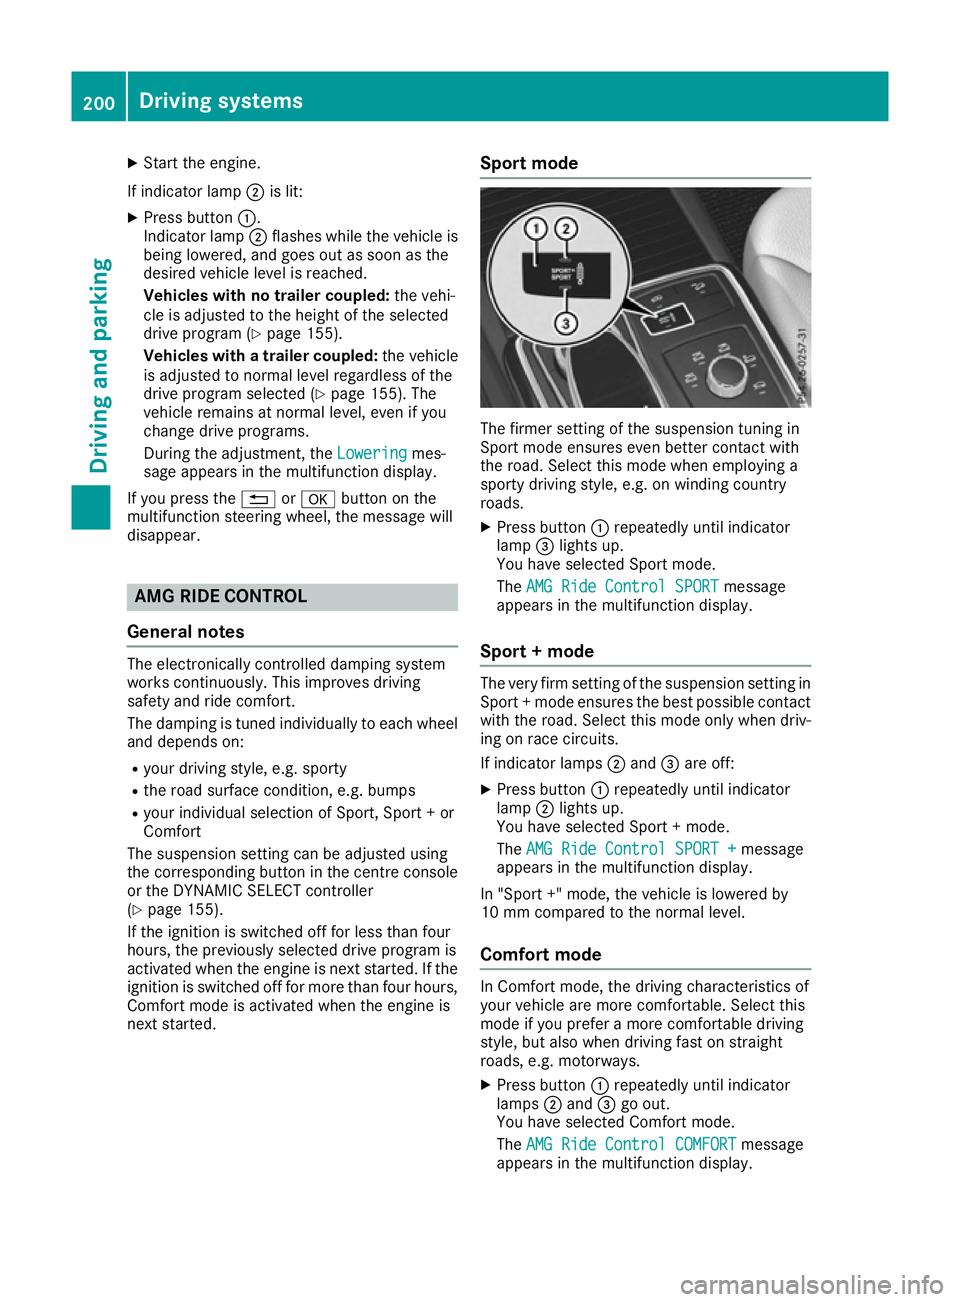
X Press button :repeatedly until indicator
lamp =lights up.
You have selected Sport mode.
The AMG Ride Control SPORT AMG Ride Control SPORT message
appears in the multifunction display.
Sport + mode The very firm setting of the suspension setting in
Sport + mode ensures the best possible contact
with the road. Select this mode only when driv-
ing on race circuits.
If indicator lamps ;and =are off:
X Press button :repeatedly until indicator
lamp ;lights up.
You have selected Sport + mode.
The AMG Ride Control SPORT + AMG Ride Control SPORT + message
appears in the multifunction display.
In "Sport +" mode, the vehicle is lowered by
10 mm compared to the normal level.
Comfort mode In Comfort mode, the driving characteristics of
your vehicle are more comfortable. Select this
mode if you prefer a more comfortable driving
style, but also when driving fast on straight
roads, e.g. motorways.
X Press button :repeatedly until indicator
lamps ;and =go out.
You have selected Comfort mode.
The AMG Ride Control COMFORT AMG Ride Control COMFORT message
appears in the multifunction display. 200
Driving systemsDriving and parking
Page 206 of 397
This indicates that you have now reached the
minimum distance.
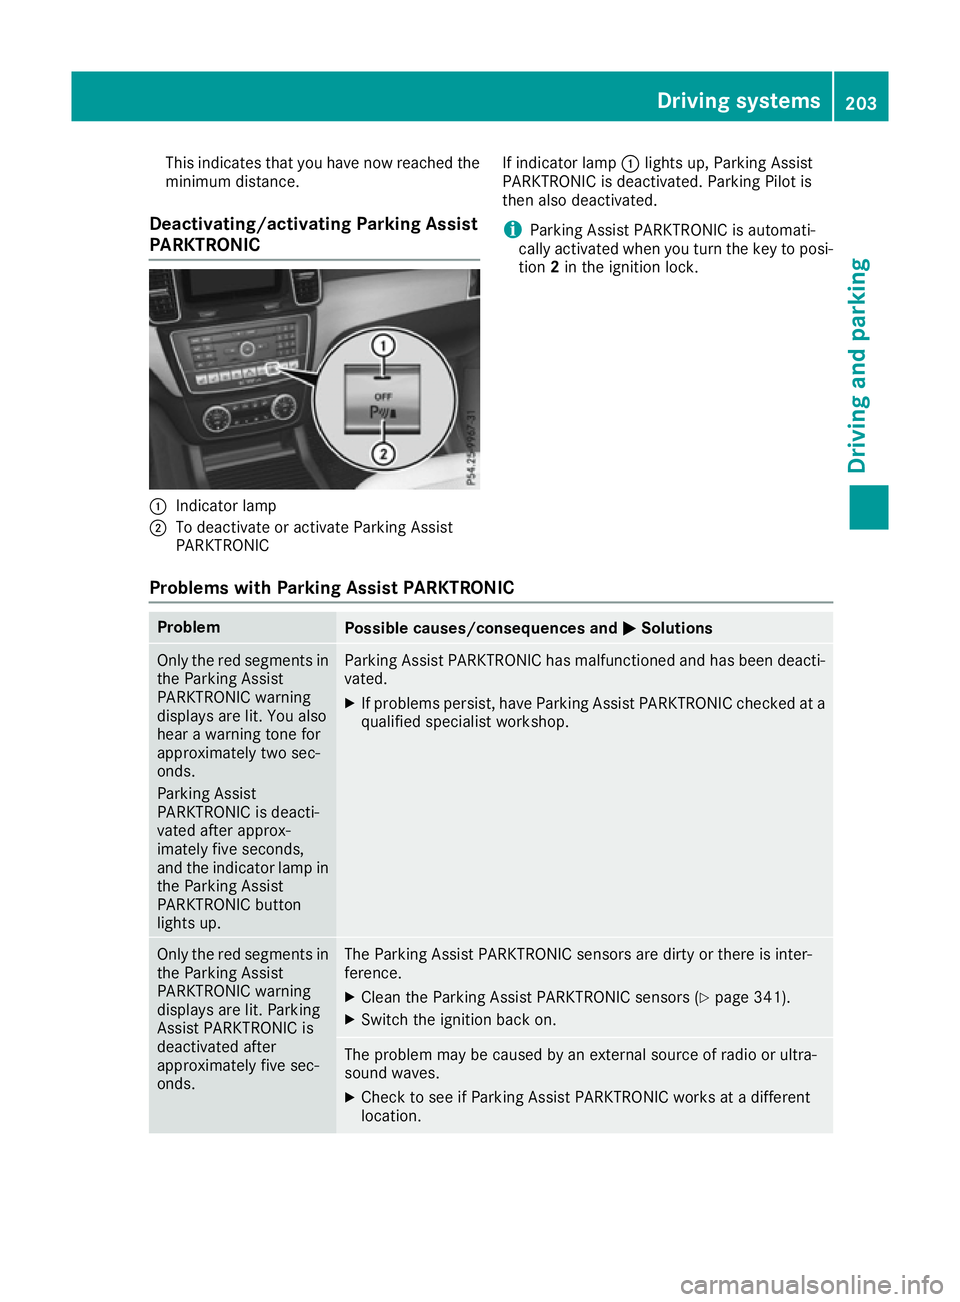
Deactivating/activating Parking Assist
PARKTRONIC :
Indicator lamp
; To deactivate or activate Parking Assist
PARKTRONIC If indicator lamp
:lights up, Parking Assist
PARKTRONIC is deactivated. Parking Pilot is
then also deactivated.
i Parking Assist PARKTRONIC is automati-
cally activated when you turn the key to posi- tion 2in the ignition lock.
Problems with Parking Assist PARKTRONIC Problem
Possible causes/consequences and
M MSolutions Only the red segments in
the Parking Assist
PARKTRONIC warning
displays are lit. You also
hear a warning tone for
approximately two sec-
onds.
Parking Assist
PARKTRONIC is deacti-
vated after approx-
imately five seconds,
and the indicator lamp in
the Parking Assist
PARKTRONIC button
lights up. Parking Assist PARKTRONIC has malfunctioned and has been deacti-
vated.
X If problems persist, have Parking Assist PARKTRONIC checked at a
qualified specialist workshop. Only the red segments in
the Parking Assist
PARKTRONIC warning
displays are lit. Parking
Assist PARKTRONIC is
deactivated after
approximately five sec-
onds. The Parking Assist PARKTRONIC sensors are dirty or there is inter-
ference.
X Clean the Parking Assist PARKTRONIC sensors (Y page 341).
X Switch the ignition back on. The problem may be caused by an external source of radio or ultra-
sound waves.
X Check to see if Parking Assist PARKTRONIC works at a different
location. Driving systems
203Driving and parking Z
Page 210 of 397
X
Shift the transmission to position Dor R.
The Start Parking Pilot? Yes: OK No:
Start Parking Pilot? Yes: OK No:
% message appears in the multifunction
display.
X To cancel the procedure:press the %
button on the multifunction steering wheel or pull away.
or
X To exit a parking space using Parking
Pilot: press the abutton on the multi-
function steering wheel.
The Parking Pilot active Accelerate
Parking Pilot active Accelerate
and brake Observe surroundings
and brake Observe surroundings mes-
sage appears in the multifunction display.
X Release the multifunction steering wheel.
X Pull away, being ready to brake at all times. Do
not exceed a maximum speed of approx-
imately 10 km/h when exiting a parking
space. Otherwise, Parking Pilot will be can-
celled.
X Shift the transmission to position Dor Ras
required or according to the message while
the vehicle is stationary.
Parking Pilot immediately steers in the other
direction. The Parking Pilot active
Parking Pilot active
Accelerate and brake Observe sur‐
Accelerate and brake Observe sur‐
roundings
roundings message appears in the multi-
function display.
i You will achieve the best results by waiting
for the steering procedure to complete before
pulling away.
If you reverse after activation, the steering
wheel is moved to the straight-ahead posi-
tion.
X Drive forwards and reverse as prompted by
the Parking Assist PARKTRONIC warning dis-
plays, several times if necessary.
Once you have exited the parking space com-
pletely, the steering wheel is moved to the
straight-ahead position. You hear a tone and the
Parking
Parking Pilot Pilotended
endedmessage appears in the
multifunction display. You will then have to steer
and merge into traffic on your own. Parking
Assist PARKTRONIC is still available. You can
take over the steering before the vehicle has
exited the parking space completely. This is
useful, for example, when you recognise that it
is already possible to pull out of the parking
space. Cancelling Parking Pilot X
Stop the movement of the multifunction
steering wheel or steer yourself.
Parking Pilot is immediately cancelled. The
Parking Pilot cancelled Parking Pilot cancelled message
appears in the multifunction display.
or X Press the Parking Assist PARKTRONIC button
(Y page 203).
Parking Assist PARKTRONIC is switched off
and Parking Pilot is immediately cancelled.
The Parking Pilot cancelled Parking Pilot cancelled message
appears in the multifunction display.
Parking Pilot is cancelled automatically if: R the electric parking brake is applied
R transmission position Pis selected
R parking using Parking Pilot is no longer pos-
sible
R you are driving faster than 10 km/h
R a wheel spins and ESP ®
intervenes or fails.
The ÷ warning lamp lights up in the instru-
ment cluster
A warning tone sounds. The parking symbol dis-
appears and the multifunction display shows the
Parking Pilot cancelled Parking Pilot cancelled message.
When Parking Pilot is cancelled, you must steer and brake again yourself.
If a system malfunction occurs, the vehicle is
braked to a standstill. To drive on, depress the
accelerator pedal again. Reversing camera
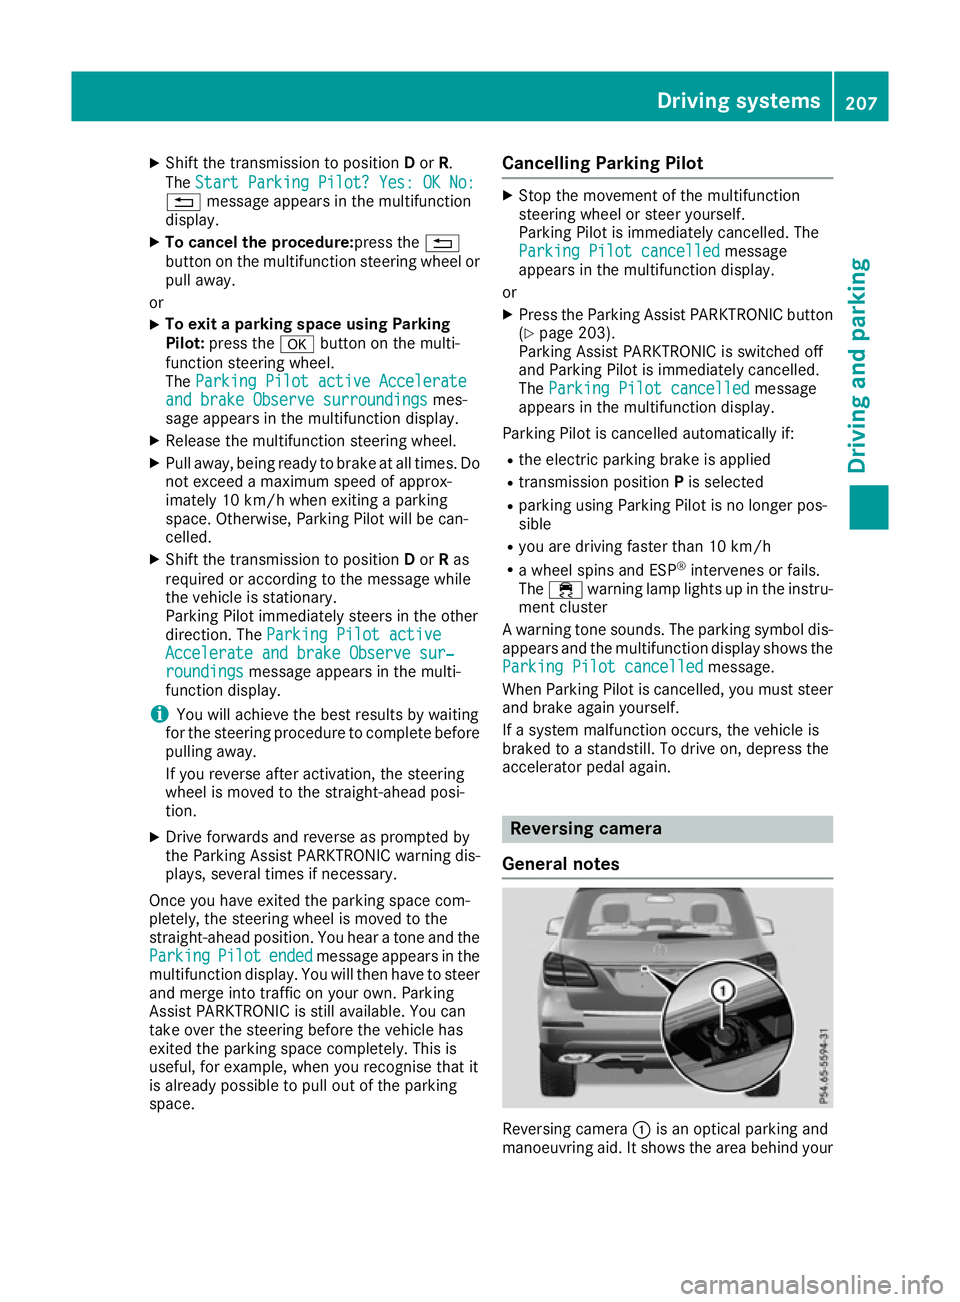
General notes Reversing camera
:is an optical parking and
manoeuvring aid. It shows the area behind your Driving systems
207Driving and parking Z
Page 223 of 397
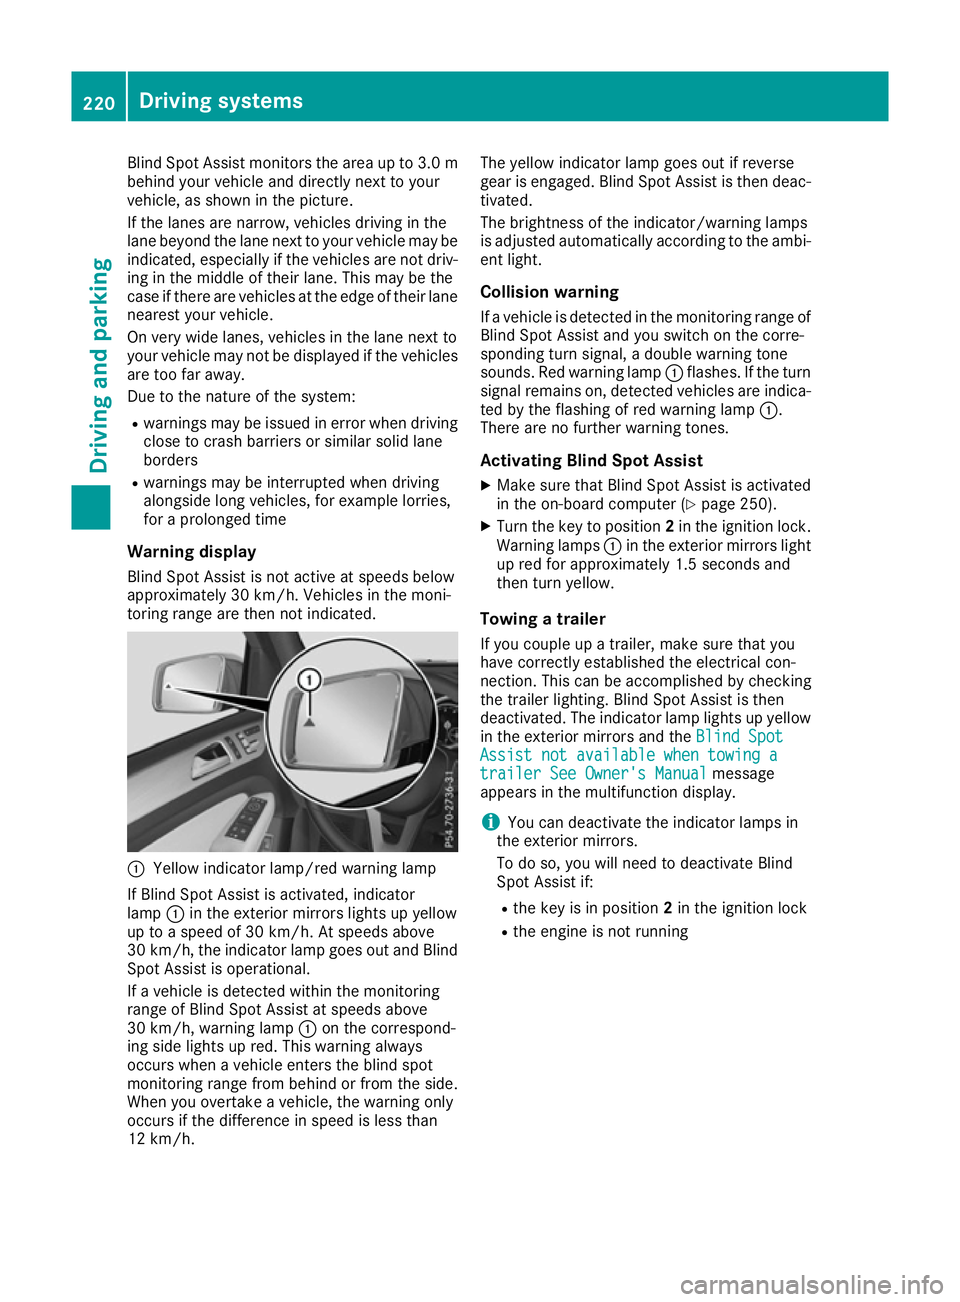
Blind Spot Assist monitors the area up to 3.0 m
behind your vehicle and directly next to your
vehicle, as shown in the picture.
If the lanes are narrow, vehicles driving in the
lane beyond the lane next to your vehicle may be
indicated, especially if the vehicles are not driv-
ing in the middle of their lane. This may be the
case if there are vehicles at the edge of their lane nearest your vehicle.
On very wide lanes, vehicles in the lane next to
your vehicle may not be displayed if the vehicles
are too far away.
Due to the nature of the system:
R warnings may be issued in error when driving
close to crash barriers or similar solid lane
borders
R warnings may be interrupted when driving
alongside long vehicles, for example lorries,
for a prolonged time
Warning display Blind Spot Assist is not active at speeds below
approximately 30 km/h. Vehicles in the moni-
toring range are then not indicated. :
Yellow indicator lamp/red warning lamp
If Blind Spot Assist is activated, indicator
lamp :in the exterior mirrors lights up yellow
up to a speed of 30 km/h. At speeds above
30 km/h, the indicator lamp goes out and Blind
Spot Assist is operational.
If a vehicle is detected within the monitoring
range of Blind Spot Assist at speeds above
30 km/h, warning lamp :on the correspond-
ing side lights up red. This warning always
occurs when a vehicle enters the blind spot
monitoring range from behind or from the side.
When you overtake a vehicle, the warning only
occurs if the difference in speed is less than
12 km/h. The yellow indicator lamp goes out if reverse
gear is engaged. Blind Spot Assist is then deac-
tivated.
The brightness of the indicator/warning lamps
is adjusted automatically according to the ambi-
ent light.
Collision warning
If a vehicle is detected in the monitoring range of
Blind Spot Assist and you switch on the corre-
sponding turn signal, a double warning tone
sounds. Red warning lamp :flashes. If the turn
signal remains on, detected vehicles are indica-
ted by the flashing of red warning lamp :.
There are no further warning tones.
Activating Blind Spot Assist
X Make sure that Blind Spot Assist is activated
in the on-board computer (Y page 250).
X Turn the key to position 2in the ignition lock.
Warning lamps :in the exterior mirrors light
up red for approximately 1.5 seconds and
then turn yellow.
Towing a trailer
If you couple up a trailer, make sure that you
have correctly established the electrical con-
nection. This can be accomplished by checking
the trailer lighting. Blind Spot Assist is then
deactivated. The indicator lamp lights up yellow
in the exterior mirrors and the Blind Spot Blind Spot
Assist not available when towing a
Assist not available when towing a
trailer See Owner's Manual
trailer See Owner's Manual message
appears in the multifunction display.
i You can deactivate the indicator lamps in
the exterior mirrors.
To do so, you will need to deactivate Blind
Spot Assist if:
R the key is in position 2in the ignition lock
R the engine is not running 220
Driving systemsDriving and parking