2016 MERCEDES-BENZ GLS SUV check engine
[x] Cancel search: check enginePage 72 of 397

ABS (Anti-lock Braking System)
General notes ABS regulates brake pressure in such a way that
the wheels do not lock when you brake. This
allows you to continue steering the vehicle when braking.
The ! ABS warning lamp in the instrument
cluster lights up when the ignition is switched
on. It goes out when the engine is running.
ABS works from a speed of about 8 km/h,
regardless of road-surface conditions. ABS
works on slippery surfaces, even when you only
brake gently.
Important safety notes i
Observe the "Important safety notes" sec-
tion (Y page 68). G
WARNING
If ABS is faulty, the wheels could lock when
braking. The steerability and braking charac-
teristics may be severely impaired. Addition-
ally, further driving safety systems are deac-
tivated. There is an increased danger of skid- ding and accidents.
Drive on carefully. Have ABS checked imme-
diately at a qualified specialist workshop.
If ABS is malfunctioning, other systems, includ-
ing driving safety systems, will also become
inoperative. Observe the information on the ABS warning lamp (Y page 293) and display mes-
sages which may be shown in the instrument
cluster (Y page 259).
Braking X
If ABS intervenes: continue to depress the
brake pedal with force until the braking sit-
uation is over.
X To make a full brake application: depress
the brake pedal with full force.
If ABS intervenes when braking, you will feel a
pulsing in the brake pedal.
The pulsating brake pedal can be an indication
of hazardous road conditions; this serves as a
reminder to take extra care while driving. Off-road ABS An ABS system specifically suited to off-road
terrain is activated automatically once an off-
road program is activated:
R Vehicles without the Off-Road Engineering
package (Y page 228)
R Vehicles with the Off-Road Engineering pack-
age (Y page 229)
At speeds below 30 km/h the front wheels lock cyclically during braking. The digging-in effect
achieved in the process reduces the stopping
distance when driving off-road. This limits steer- ing capability. BAS (Brake Assist System)
General notes BAS operates in emergency braking situations.
If you depress the brake pedal quickly, BAS
automatically boosts the braking force, thus
shortening the stopping distance.
Important safety notes i
Observe the "Important safety notes" sec-
tion (Y page 68). G
WARNING
If BAS is malfunctioning, the braking distance
in an emergency braking situation is
increased. There is a risk of accident.
In an emergency braking situation, depress
the brake pedal with full force. ABS prevents
the wheels from locking.
Braking X
Keep the brake pedal depressed firmly until
the emergency braking situation is over.
ABS prevents the wheels from locking.
The brakes will function as usual once you
release the brake pedal. BAS is deactivated. Driving safety systems
69Safety Z
Page 76 of 397

Important safety notes
G
WARNING
If ESP ®
is malfunctioning, ESP ®
is unable to
stabilise the vehicle. In addition, other driving
safety systems are switched off. This increa-
ses the risk of skidding and an accident.
Drive on carefully. Have ESP ®
checked at a
qualified specialist workshop.
! Only operate the vehicle for a maximum of
ten seconds on a brake dynamometer. Switch off the ignition.
Application of the brakes by ESP ®
may oth-
erwise destroy the brake system.
! A function or performance test should only
be carried out on a twin-axle dynamometer.
Before you operate the vehicle on such a
dynamometer, please consult a qualified
workshop. You could otherwise damage the
drive train or the brake system.
When ESP ®
is deactivated, the åESP®
OFF
warning lamp lights up continuously.
If the ÷ warning lamp and the åwarning
lamp are lit continuously, ESP ®
is not available
due to a malfunction.
Observe the information on warning lamps
(Y page 295) and display messages which may
be shown in the instrument cluster
(Y page 259).
i Only use wheels with the recommended tyre
sizes. Only then will ESP ®
function properly.
Characteristics of ESP ®General notes
If the ÷ ESP warning lamp goes out before
beginning the journey, ESP ®
is automatically
active.
If ESP ®
intervenes, the ÷ESP®
warning lamp
flashes in the instrument cluster.
If ESP ®
intervenes:
X Do not deactivate ESP ®
under any circum-
stances.
X When pulling away, only depress the acceler-
ator pedal as far as is necessary.
X Adapt your driving style to suit the prevailing
road and weather conditions. ECO start/stop function
The ECO start/stop function switches the
engine off automatically if the vehicle stops
moving. When pulling away again, the engine
starts automatically. ESP ®
remains in its previ-
ously selected status, e.g. if ESP ®
was deacti-
vated before the engine was automatically
switched off.
Deactivating/activating ESP ® Important safety notes
i Observe the "Important safety notes" sec-
tion (Y page 68).
You can select between the following ESP ®
sta-
tuses:
R ESP ®
is activated
R ESP ®
is deactivated G
WARNING
If you deactivate ESP ®
, ESP ®
no longer sta-
bilises the vehicle. There is an increased risk
of skidding and an accident.
Only deactivate ESP ®
in the situations descri-
bed in the following.
In the following situations, it may be better to
deactivate ESP ®
:
R when snow chains are used
R in deep snow
R on sand or gravel
Spinning the wheels results in a cutting action,
which enhances traction.
i Activate ESP ®
as soon as the situations
described above no longer apply. ESP ®
will
otherwise not stabilise the vehicle if the vehi-
cle starts to skid or a wheel starts to spin. Driving safety systems
73Safety Z
Page 85 of 397

If you do not open the vehicle within approx-
imately 40 seconds of unlocking:
R the vehicle locks again
R protection against theft is reactivated
X To lock centrally: press the&button.
The key centrally locks and unlocks the follow-
ing components:
R the doors
R the tailgate
R the fuel filler flap
During unlocking, the turn signals flash once.
During locking, they flash three times.
You can also set an audible signal to confirm
that the vehicle has been locked. The audible
signal can be activated or deactivated using the on-board computer (Y page 253).
Only when all the components have been locked is the visual or audible locking confirmation
issued.
If activated in the multimedia system, the loca-
tor lighting also lights up in the dark (see sepa-
rate operating instructions).
X To open the tailgate automatically from
outside the vehicle:
press and hold theF
button until the tailgate opens.
Vehicles with KEYLESS-GO: X To close the tailgate automatically from
outside the vehicle: if the key is located in
the immediate vicinity of the vehicle, press
the F button on the key.
When the tailgate closes, you can then
release the button. KEYLESS-GO
General notes Bear in mind that the engine can be started by
any of the vehicle occupants if there is a KEY-
LESS-GO key in the vehicle (Y page 150).
Locking and unlocking centrally You can start, lock or unlock the vehicle using
KEYLESS-GO. To do this, you need to carry the
key with you. You can combine the KEYLESS-GO functions with the functions of a conventional
key. Unlock the vehicle by using KEYLESS-GO, for instance, and lock it using the
&button
on the key.
The driver's door and the door at which the han- dle is used must both be closed. The key must be
outside the vehicle. When locking or unlocking
with KEYLESS-GO, the distance between the key and the corresponding door handle must not be greater than 1 m.
KEYLESS-GO checks whether a valid key is in
the vehicle by periodically establishing a radio
connection between the vehicle and the key.
This happens:
R during engine start
R during driving
R when the external door handles are touched
R during convenience closing X
To unlock the vehicle: touch the inner sur-
face of the door handle.
X To lock the vehicle: touch sensor surface :
or ;.
Make sure that you do not touch the inner
surface of the door handle.
X Convenience closing feature: touch
recessed sensor surface ;for an extended
period.
Further information on the convenience closing
feature (Y page 95).
If you pull on the handle of the tailgate, only the luggage compartment of the vehicle is
unlocked.
Deactivating and activating If you do not intend to use a key for an extended
period of time, you can deactivate the KEYLESS-
GO function of the key. The key will then use very
little power, thereby conserving battery power.
For the purposes of activation or deactivation,
the vehicle does not have to be nearby. 82
KeyOpening and closing
Page 86 of 397
X
To deactivate: press the&button on the
key twice in rapid succession.
The battery check lamp of the key flashes
twice briefly and lights up once, then KEY-
LESS-GO is deactivated (Y page 84).
X To activate: press any button on the key.
or X Insert the key into the ignition lock.
KEYLESS-GO and all its associated features
are available again. KEYLESS-GO start function
General notes Bear in mind that the engine can be started by
any of the vehicle occupants if there is a key in
the vehicle (Y page 150). Changing the settings of the locking
system
You can change the settings of the locking sys-
tem. This means that only the driver's door and
the fuel filler flap are unlocked when the vehicle is unlocked. This is useful if you frequently travel
alone.
X To change the setting: press and hold down
the % and& buttons simultaneously
for about six seconds until the battery indica-
tor lamp flashes twice (Y page 84).
If the setting of the locking system is changed
within the signal range of the vehicle, pressing
the & or% button:
R locks or
R unlocks the vehicle
The key now functions as follows:
X To unlock: press the%button once.
X To unlock centrally: press the%button
twice.
X To lock centrally: press the&button. The KEYLESS-GO function is changed as fol-
lows:
X
To unlock the driver's door: touch the inner
surface of the door handle on the driver's
door.
X To unlock centrally: touch the inner surface
of the door handle on the front-passenger
door or the rear door.
X To lock centrally: touch the outer sensor
surface on one of the door handles
(Y page 82).
X To restore the factory settings: press and
hold down the %and& buttons simul-
taneously for approximately six seconds until the battery check lamp flashes twice
(Y page 84). Emergency key element
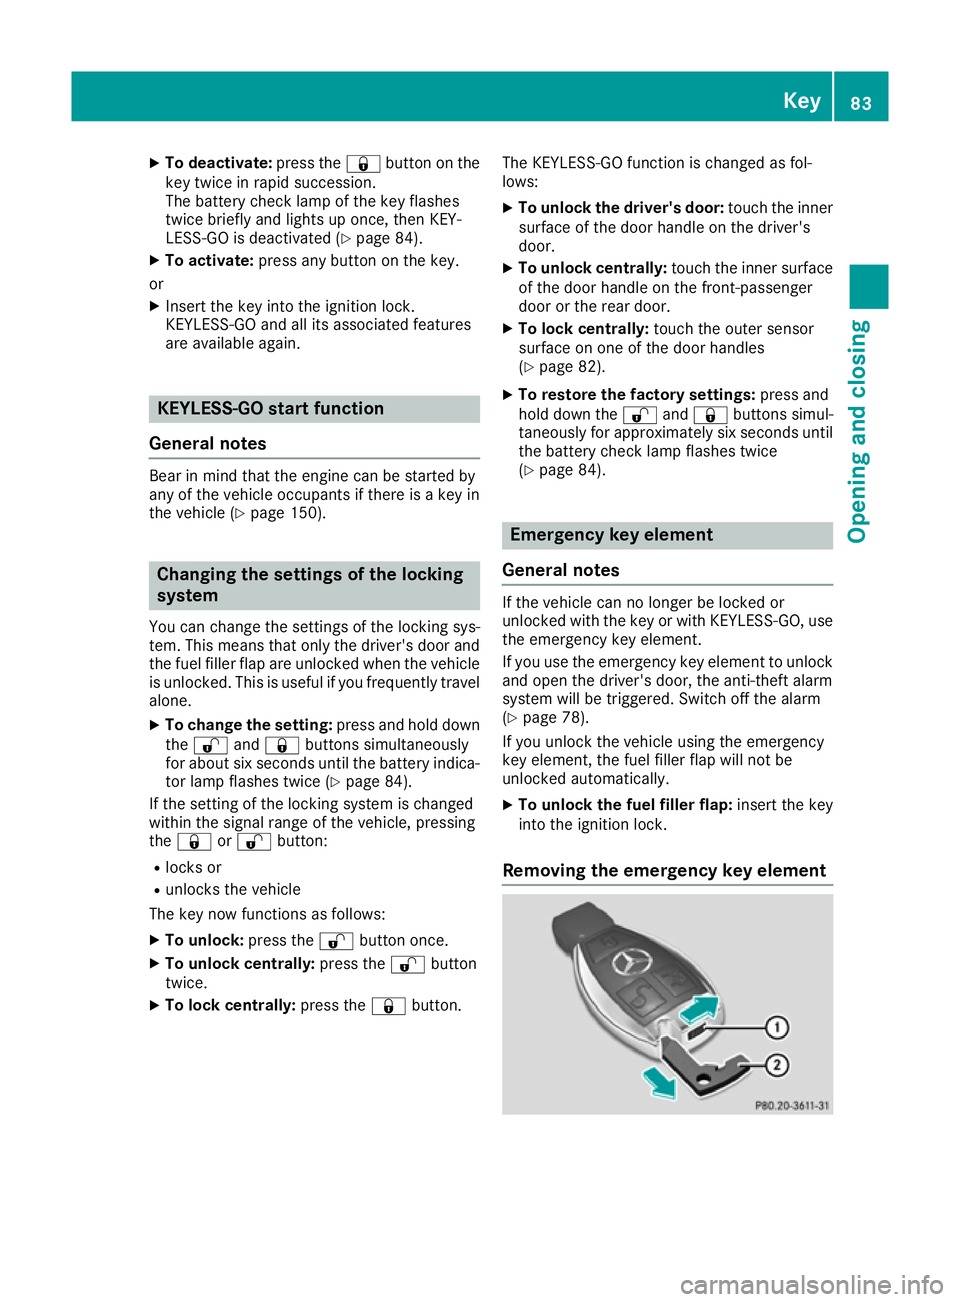
General notes If the vehicle can no longer be locked or
unlocked with the key or with KEYLESS-GO, use
the emergency key element.
If you use the emergency key element to unlock
and open the driver's door, the anti-theft alarm
system will be triggered. Switch off the alarm
(Y page 78).
If you unlock the vehicle using the emergency
key element, the fuel filler flap will not be
unlocked automatically.
X To unlock the fuel filler flap: insert the key
into the ignition lock.
Removing the emergency key element Key
83Opening and closing Z
Page 89 of 397
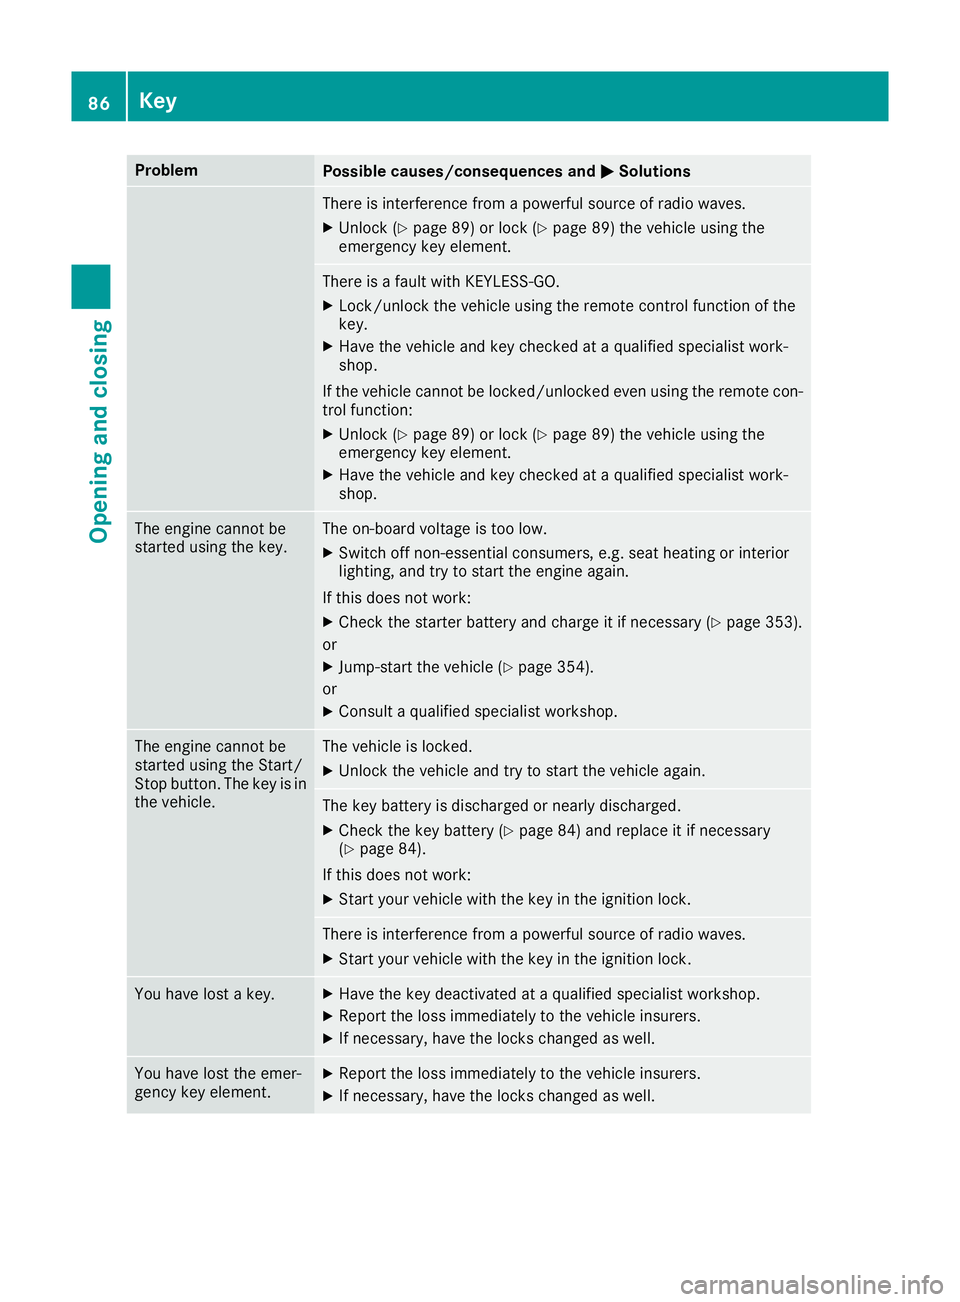
Problem
Possible causes/consequences and
M
MSolutions There is interference from a powerful source of radio waves.
X Unlock (Y page 89) or lock (Y page 89) the vehicle using the
emergency key element. There is a fault with KEYLESS-GO.
X Lock/unlock the vehicle using the remote control function of the
key.
X Have the vehicle and key checked at a qualified specialist work-
shop.
If the vehicle cannot be locked/unlocked even using the remote con-
trol function:
X Unlock (Y page 89) or lock (Y page 89) the vehicle using the
emergency key element.
X Have the vehicle and key checked at a qualified specialist work-
shop. The engine cannot be
started using the key. The on-board voltage is too low.
X Switch off non-essential consumers, e.g. seat heating or interior
lighting, and try to start the engine again.
If this does not work:
X Check the starter battery and charge it if necessary (Y page 353).
or X Jump-start the vehicle (Y page 354).
or X Consult a qualified specialist workshop. The engine cannot be
started using the Start/
Stop button. The key is in
the vehicle. The vehicle is locked.
X Unlock the vehicle and try to start the vehicle again. The key battery is discharged or nearly discharged.
X Check the key battery (Y page 84) and replace it if necessary
(Y page 84).
If this does not work: X Start your vehicle with the key in the ignition lock. There is interference from a powerful source of radio waves.
X Start your vehicle with the key in the ignition lock. You have lost a key. X
Have the key deactivated at a qualified specialist workshop.
X Report the loss immediately to the vehicle insurers.
X If necessary, have the locks changed as well. You have lost the emer-
gency key element. X
Report the loss immediately to the vehicle insurers.
X If necessary, have the locks changed as well. 86
KeyOpening and closing
Page 133 of 397
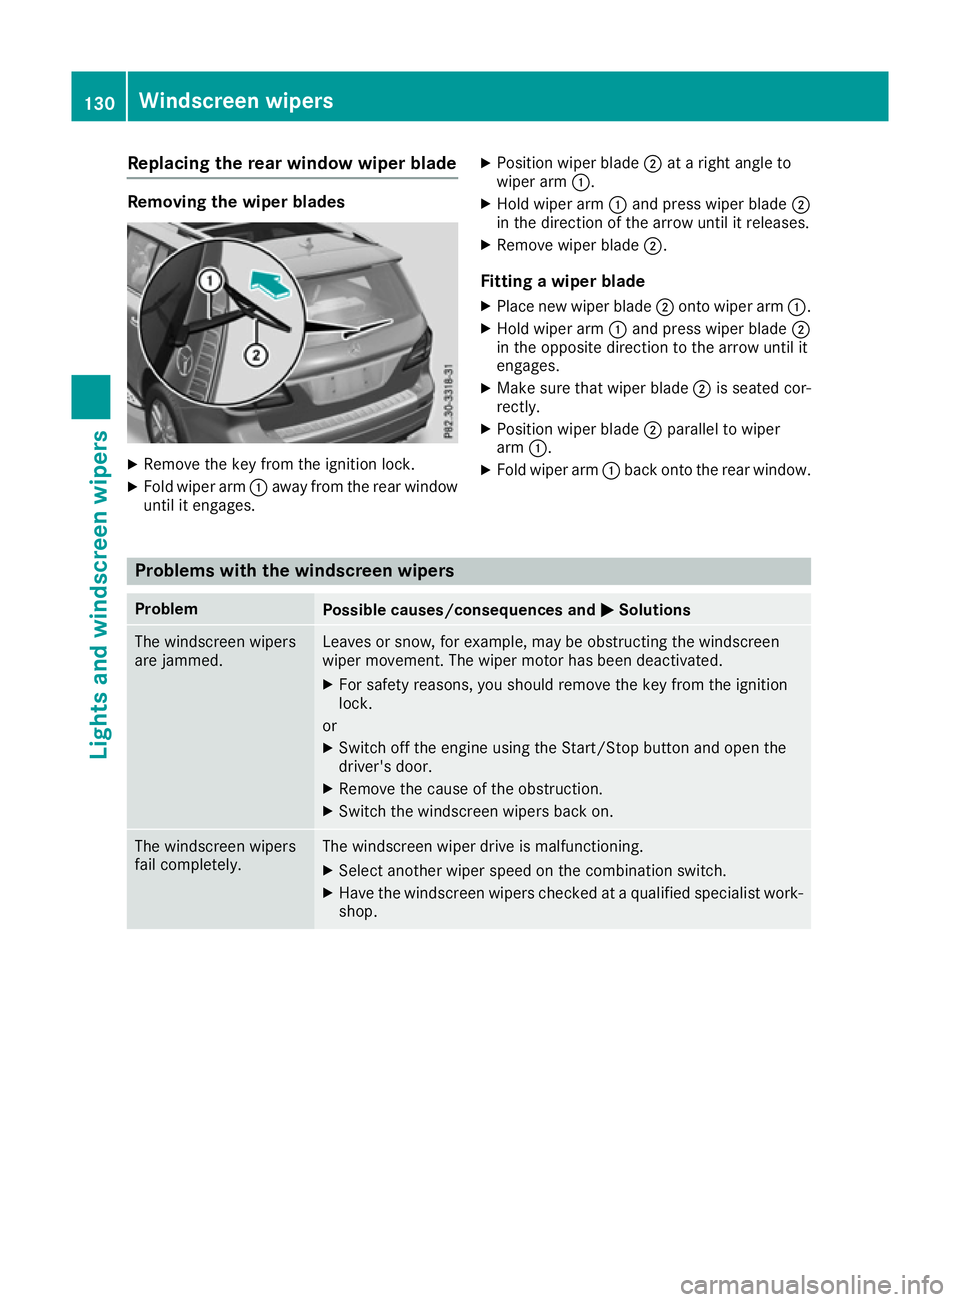
Replacing the rear window wiper blade
Removing the wiper blades
X
Remove the key from the ignition lock.
X Fold wiper arm :away from the rear window
until it engages. X
Position wiper blade ;at a right angle to
wiper arm :.
X Hold wiper arm :and press wiper blade ;
in the direction of the arrow until it releases.
X Remove wiper blade ;.
Fitting a wiper blade
X Place new wiper blade ;onto wiper arm :.
X Hold wiper arm :and press wiper blade ;
in the opposite direction to the arrow until it
engages.
X Make sure that wiper blade ;is seated cor-
rectly.
X Position wiper blade ;parallel to wiper
arm :.
X Fold wiper arm :back onto the rear window. Problems with the windscreen wipers
Problem
Possible causes/consequences and
M
MSolutions The windscreen wipers
are jammed. Leaves or snow, for example, may be obstructing the windscreen
wiper movement. The wiper motor has been deactivated.
X For safety reasons, you should remove the key from the ignition
lock.
or X Switch off the engine using the Start/Stop button and open the
driver's door.
X Remove the cause of the obstruction.
X Switch the windscreen wipers back on. The windscreen wipers
fail completely. The windscreen wiper drive is malfunctioning.
X Select another wiper speed on the combination switch.
X Have the windscreen wipers checked at a qualified specialist work-
shop. 130
Windscreen wipersLights and windscreen wipers
Page 145 of 397
The remote control has a range of approximately
300 metres. This range is reduced by:
R sources of radio interference
R solid objects between the remote control and
the vehicle
R the remote control being in an unfavourable
position in relation to the vehicle
R transmitting from an enclosed space
If the remote control battery is low, the battery
symbol on the left of the display is shown as
empty. Replace the remote control battery and
observe the important safety notes when doing so (Y page 143).
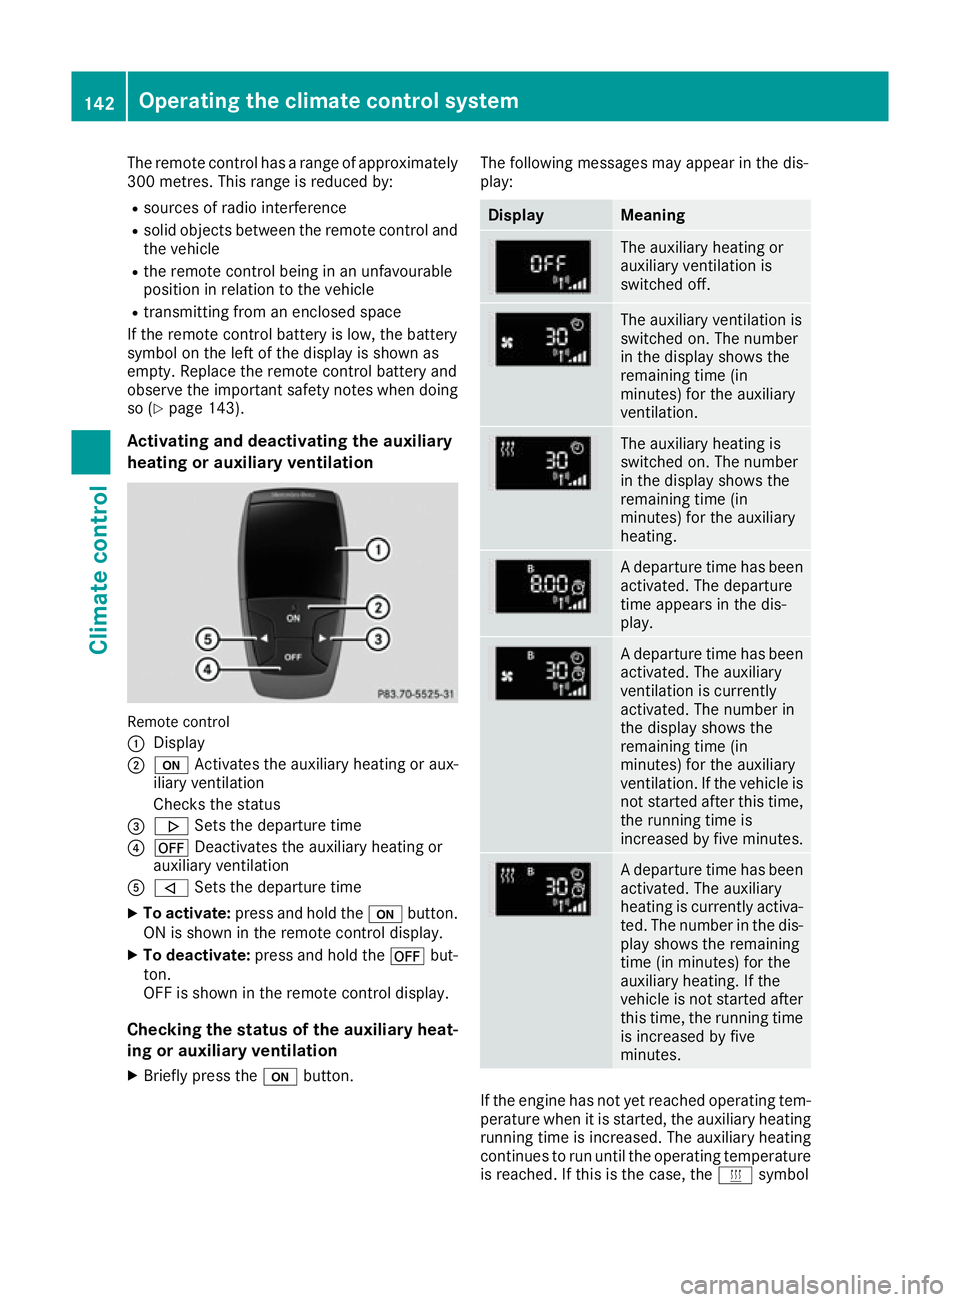
Activating and deactivating the auxiliary
heating or auxiliary ventilation Remote control
:
Display
; u Activates the auxiliary heating or aux-
iliary ventilation
Checks the status
= . Sets the departure time
? ^ Deactivates the auxiliary heating or
auxiliary ventilation
A , Sets the departure time
X To activate: press and hold the ubutton.
ON is shown in the remote control display.
X To deactivate: press and hold the ^but-
ton.
OFF is shown in the remote control display.
Checking the status of the auxiliary heat-
ing or auxiliary ventilation
X Briefly press the ubutton. The following messages may appear in the dis-
play: Display Meaning
The auxiliary heating or
auxiliary ventilation is
switched off.
The auxiliary ventilation is
switched on. The number
in the display shows the
remaining time (in
minutes) for the auxiliary
ventilation.
The auxiliary heating is
switched on. The number
in the display shows the
remaining time (in
minutes) for the auxiliary
heating.
A departure time has been
activated. The departure
time appears in the dis-
play. A departure time has been
activated. The auxiliary
ventilation is currently
activated. The number in
the display shows the
remaining time (in
minutes) for the auxiliary
ventilation. If the vehicle is
not started after this time, the running time is
increased by five minutes. A departure time has been
activated. The auxiliary
heating is currently activa-
ted. The number in the dis- play shows the remaining
time (in minutes) for the
auxiliary heating. If the
vehicle is not started after
this time, the running time is increased by five
minutes. If the engine has not yet reached operating tem-
perature when it is started, the auxiliary heating running time is increased. The auxiliary heating
continues to run until the operating temperature
is reached. If this is the case, the ysymbol 142
Operating the climate control systemClimate control
Page 147 of 397
X
Insert new battery =with the lettering facing
upwards.
X Slide battery cover ;in the opposite direc-
tion to the arrow on the remote control until it engages.
Problems with the auxiliary heating/ventilation Problem
Possible causes/consequences and
M
MSolutions FAIL¨ The signal transmission between the transmitter and the vehicle is
faulty.
X
Change your position in relation to the vehicle, moving closer if
necessary. FAIL The auxiliary heating/ventilation cannot be switched on or has
switched itself off.
The starter battery is not sufficiently charged.
X Charge the starter battery. The fuel tank content is below the reserve fuel level.
X Refuel at the nearest filling station. The auxiliary heating/ventilation is malfunctioning.
X Have the auxiliary heating/ventilation checked at a qualified spe-
cialist workshop. Adjusting the air vents
Important safety notes
G
WARNING
Very hot or very cold air can flow from the air vents. This could result in burns or frostbite in the immediate vicinity of the air vents. There
is a risk of injury.
Make sure that all vehicle occupants always
maintain a sufficient distance to the air out-
lets. If necessary, redirect the airflow to
another area of the vehicle interior.
In order to ensure the direct flow of fresh air
through the air vents into the vehicle interior,
please observe the following notes:
R keep the air inlet grille on the bonnet and in
the engine compartment on the front-
passenger side free of blockages, such as ice,
snow or leaves.
R never cover the vents or ventilation grilles in
the vehicle interior i
For virtually draught-free ventilation, adjust
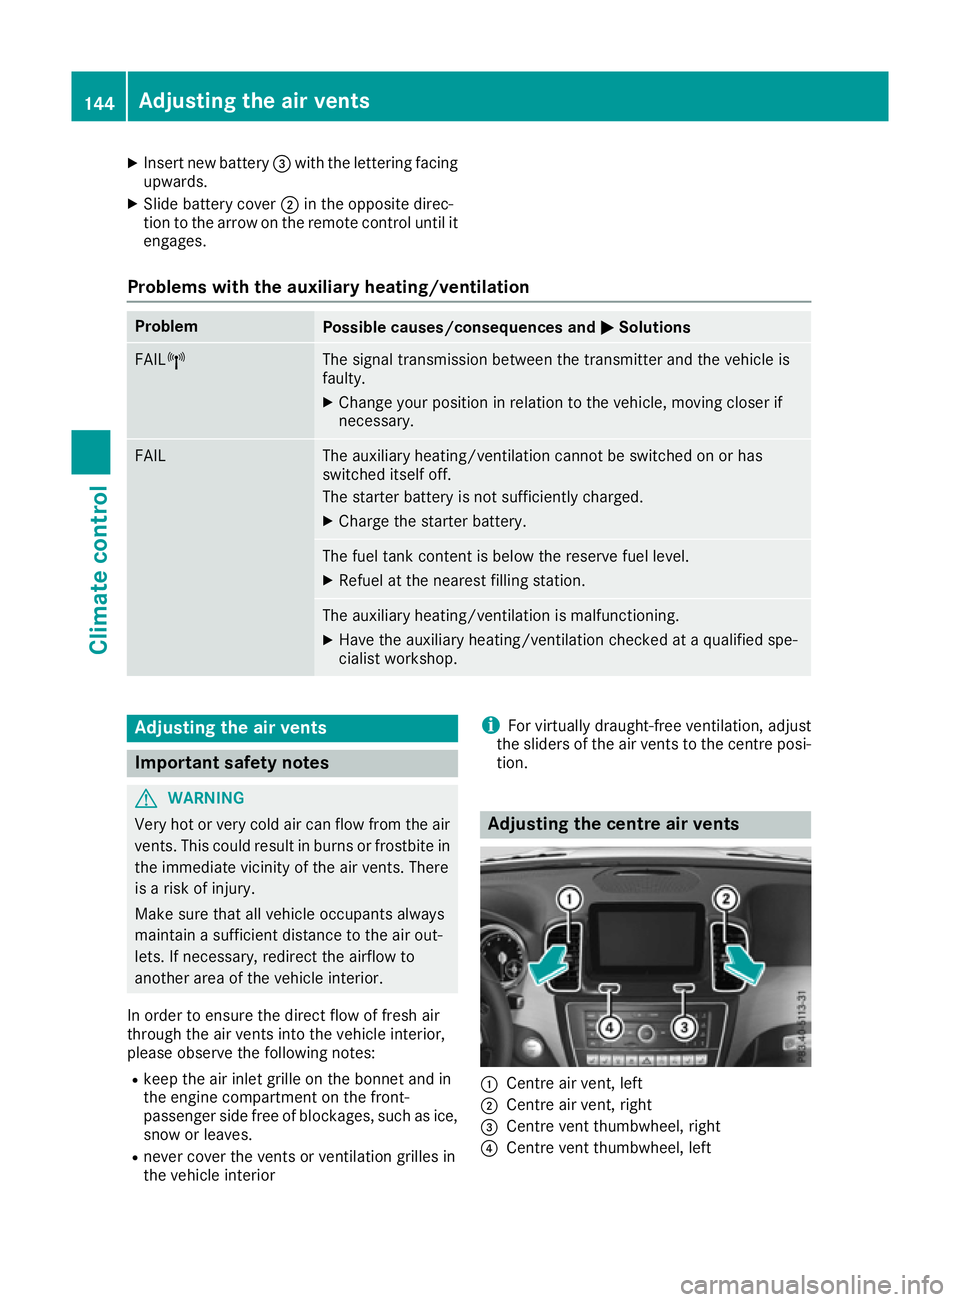
the sliders of the air vents to the centre posi- tion. Adjusting the centre air vents
:
Centre air vent, left
; Centre air vent, right
= Centre vent thumbwheel, right
? Centre vent thumbwheel, left 144
Adjusting the air ventsClimate control