2016 MERCEDES-BENZ GLC-Class reset
[x] Cancel search: resetPage 248 of 418

You can reset the values of the following func-
tions:
RTrip odometer
R"From Start" trip computer
R"From Reset" trip computer
RECO display
If you reset the values in the ECO display, the
values in the "From Start" trip computer are
also reset. If you reset the values in the "From
Start" trip computer, the values in the ECO
display are also reset.
Navigation system menu
Displaying navigation instructions
In the Navimenu, the multifunction display
shows navigation instructions.
Additional information on navigation can be
found in the separate Audio 20 or COMAND
operating instructions.
XSwitch on Audio 20 or COMAND, see the
separate operating instructions.
XPress the òbutton on the steering
wheel to open the menu list.
XPress :or9 on the steering wheel
to select the Navi
menu.
XConfirm by pressing aon the steering
wheel.
Route guidance not active
:Direction of travel
;Current road
Route guidance active
No change of direction announced
:Distance to the next destination
;Estimated arrival time
=Distance to the next change of direction
?Current road
Change of direction announced with a
lane recommendation
:Road into which the change of direction
leads
;Distance to the change of direction
=Change-of-direction symbol
?Recommended lane and new lane during a
change of direction (white)
APossible lane
BLane not recommended (dark gray)
On multilane roads, new lane recommenda-
tions can be displayed for the next change of
direction if the digital map supports this data.
During the change of direction, new lanes
may be added.
246Menus and submenus
On-board computer and displays
Page 250 of 418

No route could be calculated to the selec-
ted destination.
RO
You have reached the destination or an
intermediate destination.
Radio menu
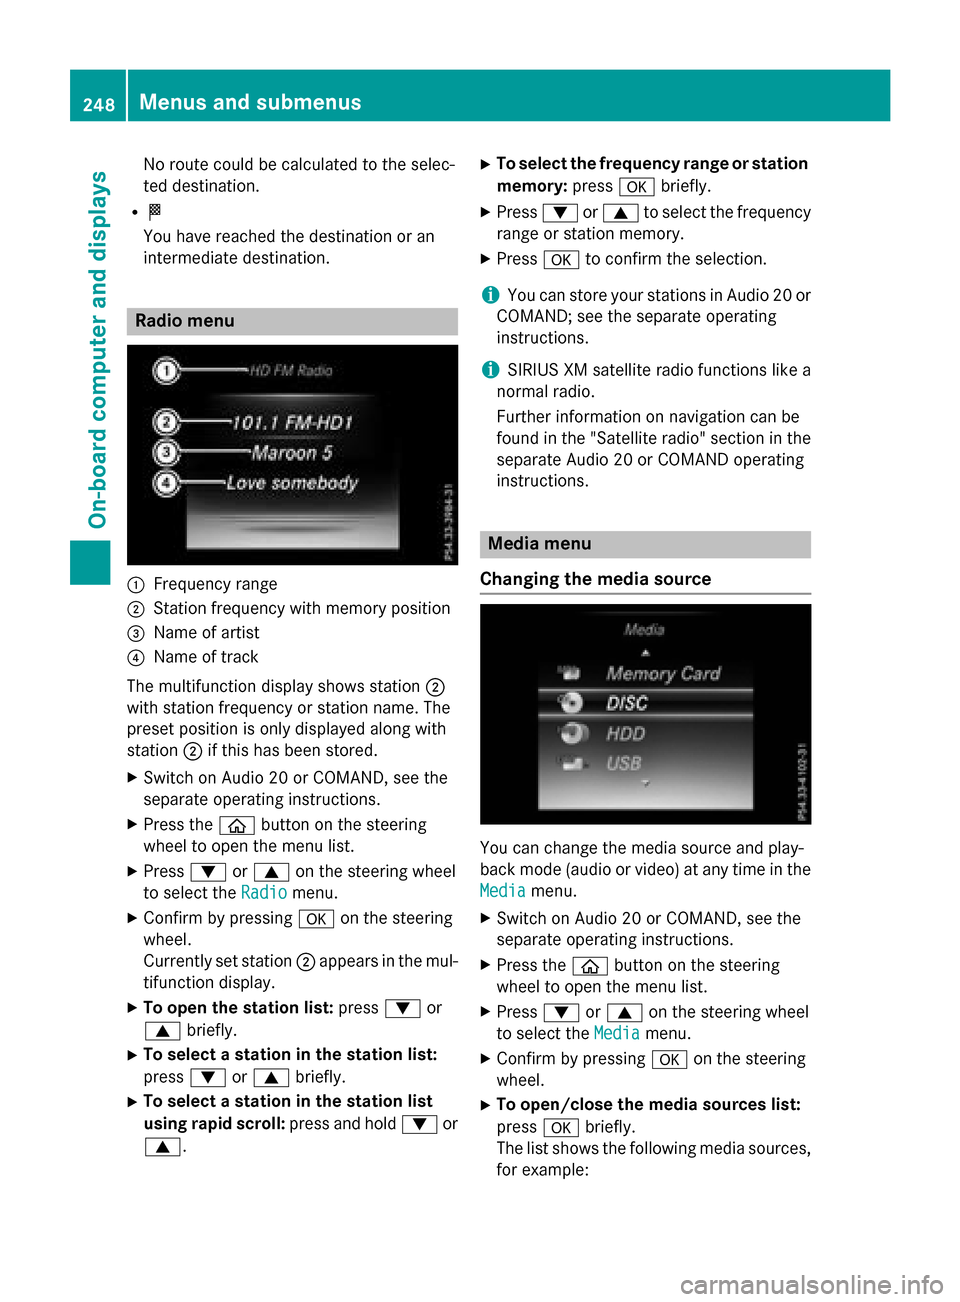
:Frequency range
;Station frequency with memory position
=Name of artist
?Name of track
The multifunction display shows station ;
with station frequency or station name. The
preset position is only displayed along with
station ;if this has been stored.
XSwitch on Audio 20 or COMAND, see the
separate operating instructions.
XPress the òbutton on the steering
wheel to open the menu list.
XPress :or9 on the steering wheel
to select the Radio
menu.
XConfirm by pressing aon the steering
wheel.
Currently set station ;appears in the mul-
tifunction display.
XTo open the station list: press:or
9 briefly.
XTo select a station in the station list:
press :or9 briefly.
XTo select a station in the station list
using rapid scroll: press and hold:or
9.
XTo select the frequency range or station memory: pressabriefly.
XPress :or9 to select the frequency
range or station memory.
XPress ato confirm the selection.
iYou can store your stations in Audio 20 or
COMAND; see the separate operating
instructions.
iSIRIUS XM satellite radio functions like a
normal radio.
Further information on navigation can be
found in the "Satellite radio" section in the
separate Audio 20 or COMAND operating
instructions.
Media menu
Changing the media source
You can change the media source and play-
back mode (audio or video) at any time in the
Media
menu.
XSwitch on Audio 20 or COMAND, see the
separate operating instructions.
XPress the òbutton on the steering
wheel to open the menu list.
XPress :or9 on the steering wheel
to select the Media
menu.
XConfirm by pressing aon the steering
wheel.
XTo open/close the media sources list:
press abriefly.
The list shows the following media sources,
for example:
248Menus and submenus
On-board computer and displays
Page 256 of 418

XConfirmbypressing aon the steering
wheel.
XUse : or9 to select the DriveAs‐
sistsubmenu.
XPressato confirm.
XPress :or9 to select Lane Keep‐
ing Assist.
XPressato confirm.
The current selection, Standard
orAdap‐
tive, appears.
XTo change the setting: pressaagain.
For further information about Lane Keeping
Assist, see (
Ypage 220).
For further information about Active Lane
Keepin g Assist, see (
Ypage 225).
Head-up display submenu
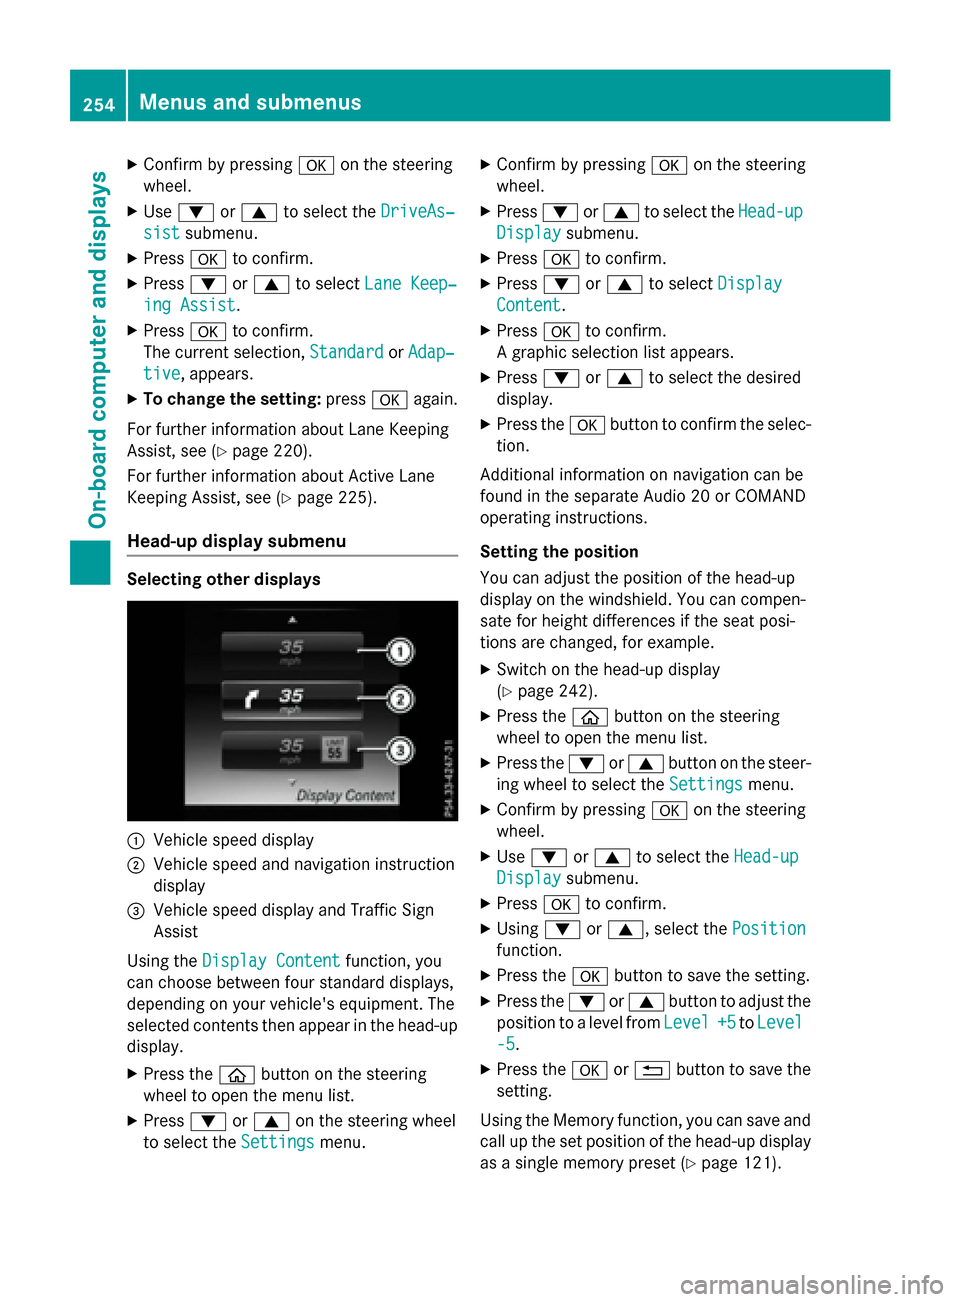
Selecting other displays
:Vehicle speed display
;Vehiclespeed and navigation instruction
disp lay
=Vehicle speed display and Traffic Sign
Assist
Using the Display Content
function, you
can choose between four standard displays,
depe nding on your vehicle's equipment. The
selected contents then appear inthe head-up
disp lay.
XPress the òbutton on the steering
wheel to open the menu list.
XPress :or9 on the steering wheel
to select the Settings
menu.
XConfirmbypressing aon the steering
wheel.
XPress :or9 to select the Head-up
Displaysubmenu.
XPressato confirm.
XPress :or9 to select Display
Content.
XPressato confirm.
A graphic selection listappears.
XPress :or9 to select the desired
display.
XPress the abutton to confirm the selec-
tion.
Ad ditional information on navigation can be
found inthe separate Aud io20 or COMAND
operating instructions.
Setting the positi on
You can adjust the position of the head-up
display on the windshield. You can compen-
sate for height differences ifthe seat posi-
tions are changed, for example.
XSwit ch on the head-up display
(
Ypage 242).
XPress the òbutton on the steering
wheel to open the menu list.
XPress the :or9 button on the steer-
ing wheel to select the Settings
menu.
XConfirmbypressing aon the steering
wheel.
XUse : or9 to select the Head-up
Displaysubmenu.
XPressato confirm.
XUsing :or9, select the Position
function.
XPress theabutton to save the setting.
XPress the :or9 button to adjust the
position to a level from Level
+5toLevel
-5.
XPress the aor% button to save the
setting.
Using the Memory function, you can save and
call up the set position of the head-up display
as a single memory preset (
Ypage 121).
254Menus and submenus
On-board computer and displays
Page 258 of 418

the speed digitally. The unit in the additional
speedometer is always inverse to the speed-
ometer unit.
XPress theòbutton on the steering
wheel to open the menu list.
XPress :or9 on the steering wheel
to select the Settings
menu.
XConfirm by pressing aon the steering
wheel.
XPress :or9 to select the Instru‐
ment Clustersubmenu.
XPressato confirm.
XUsing :or9, select the Addi‐
tional Speedometer [km/h]function.
The current selection appears.
XTo activate/deactivate: press thea
button again.
Restoring the factory settings
XPress the òbutton on the steering
wheel to open the menu list.
XPress the :or9 button on the steer-
ing wheel to select the Settings
menu.
XConfirm by pressingaon the steering
wheel.
XUse : or9 to select the Factory
Settingssubmenu.
XPressato confirm.
The Reset All Settings?
function
appears.
XPress :or9 to select NoorYes.
XPress ato confirm the selection.
If you have selected Yes
, the multifunction
display shows a confirmation message.
For safety reasons, the Daytime Running
Lightsfunction in theLightssubmenu is
only reset when the vehicle is stationary.
256Menus and submenus
On-board computer and displays
Page 345 of 418

Displaying service messages
XSwitchon th eignition .
XUseò on thesteerin gwhee lto cal lup
th elist of menus.
XPress 9or: on thesteerin gwhee l
to selec tth eServic e
menuand confirm
wit ha.
XPress 9or: on thesteerin gwhee l
to selec tth eASSYST PLU S
submenuand
confirm wit ha.
The servic edue dat eappears in th emulti-
function display.
Information about Service
Resetting th eASSYS TPLUS service
interva ldisplay
!If th eASSYST PLU Sservic einterval dis -
play has been inadvertentl yreset ,this set -
ting can be correcte dat aqualified special-
ist workshop .
Hav eservic ewor kcarrie dout as described
in th eMaintenance Booklet .Thi smay oth-
erwise lead to increase dwear and damage
to th emajor assemblies or th evehicle.
A qualified specialis tworkshop ,e.g. an
authorized Mercedes-Ben zCenter, will reset
th eASSYST PLU Sservic einterval display
after th eservic ewor khas been carrie dout .
You can also obtain further information on
maintenance work, fo rexample.
Specia lservice requirement s
The specifiedmaintenance interval take sonly
th enormal operation of th evehicle into
account. Under arduous operatin gcondition s
or increase dload on th evehicle, mainte -
nance wor kmus tbe carrie dout more fre-
quently, fo rexample:
Rregular city drivin gwit hfrequent intermedi-
at estops
Rif th evehicle is primarily used to trave l
short distances
Ruse in mountainous terrain or on poo rroad
surfaces
Rif th eengin eis ofte nlef tidlin gfo rlon gperi-
ods
Under these or similar conditions, have, fo r
example, th eair filter, engin eoil and oil filte r
replaced or changed more frequently. Under
arduous operatin gconditions, th etires mus t
be checke dmore often. Further information
can be obtained at aqualified specialist work-
shop, e.g. an authorized Mercedes-Ben zCen -
ter.
Drivin gabroad
An extensive Mercedes-Ben zServic enetwor k
is also available in other countries. You can
obtain further information from any author -
ized Mercedes-Ben zCenter.
Car e
General notes
HEnvironmental not e
Dispose of empty packagin gand cleanin g
cloths in an environmentally responsible man -
ner.
!Fo rcleanin gyour vehicle, do no tuse any
of th efollowing :
Rdry, rough or har dcloths
Rabrasiv ecleanin gagents
Rsolvents
Rcleanin gagents containin gsolvents
Do no tscrub .
Do no ttouch th esurfaces or protective
films wit hhar dobjects ,e.g. arin gor ic e
scraper. You could otherwise scratch or
damage th esurfaces and protective film.
!Do no tpar kth evehicle fo ran extended
period straight after cleanin git,particularly
after havin gcleaned th ewheels wit hwhee l
cleaner. Wheel cleaners could caus e
increase dcorrosion of th ebrake discs and
brake pads/linings. Fo rthis reason ,you
Care343
Maintenance and care
Z
Page 371 of 418

XRemove thetowin geye from th eleft-han d
stowage well under th ecargo compartmen t
floor (
Ypage 355).
XPress th emar kon cover :inward sand
remove .
XScrew in th etowin geye clockwise as far as
it will go and tighten it .
Removingth etowing eye
XUnscrew and remove th etowin geye.
XAttac hcover :to th ebumper and press
until it engages.
XPut th etowin geye bac kinto th evehicl e
tool kit.
Towing a vehicle wit hbot haxles on
th egroun d
The automatic transmission automatically
shiftsto position Pwhen you open th edriver's
or front-passenger doo ror when you remove
th eSmartKey from th eignition lock. In order
to ensur ethat th eautomatic transmission
stays in position Nwhen towin gth evehicle,
you mus tobserv eth efollowin gpoints :
XMakesur ethat th evehicl eis stationary.
XTurn th eSmartKey to position 2in th eigni-
tion lock.
XDepress and hold th ebrak epedal .
XShift th eautomatic transmission to posi-
tion N.
XLeav eth eSmartKey in position 2in th e
ignition lock.
XReleas eth ebrak epedal .
XReleas eth eelectric parkin gbrake.
XSwitc hon th ehazard warnin glamp s
(
Ypage 127).
In order to signal achang eof direction when
towin gth evehicl ewit hth ehazard warnin g
lamp sswitched on ,use th ecombination
switch as usual. In this case, only th eindica-
to rlamp sfor th edirection of travel flash. Afte
rresetting th ecombination switch ,th e
hazard warnin glamp start sflashin gagain .
Transporting th e vehicle
4MATIC vehicles/vehicles wit hauto-
mati ctransmission
!Whe nth evehicl eis loade dfor transport,
th efron tand rear axles mus tbe stationary
and on th esam etransportation vehicle.
Positionin gove rth econnection poin tof th e
transpor tvehicl eis no tpermitted. The drive
train may otherwise be damaged.
All vehicles
!You may only secure th evehicl eby th e
wheels, no tby part sof th evehicl esuc has
axl eor steerin gcomponents. Otherwise ,
th evehicl ecould be damaged.
The towin geye or trailer to whitch can be
used to pull th evehicl eonto atrailer or trans -
porte rif you wish to transpor tit.
XTurn th eSmartKey to position 2in th eigni-
tion lock.
XShift th eautomatic transmission to posi-
tion N.
As soon as th evehicle ha sbeen loaded:
XPreven tth evehicl efrom rollin gaway by
applyin gth eelectric parkin gbrake.
XShift th eautomatic transmission to posi-
tion P.
Towing and tow-starting369
Breakdown assistance
Z
Page 381 of 418

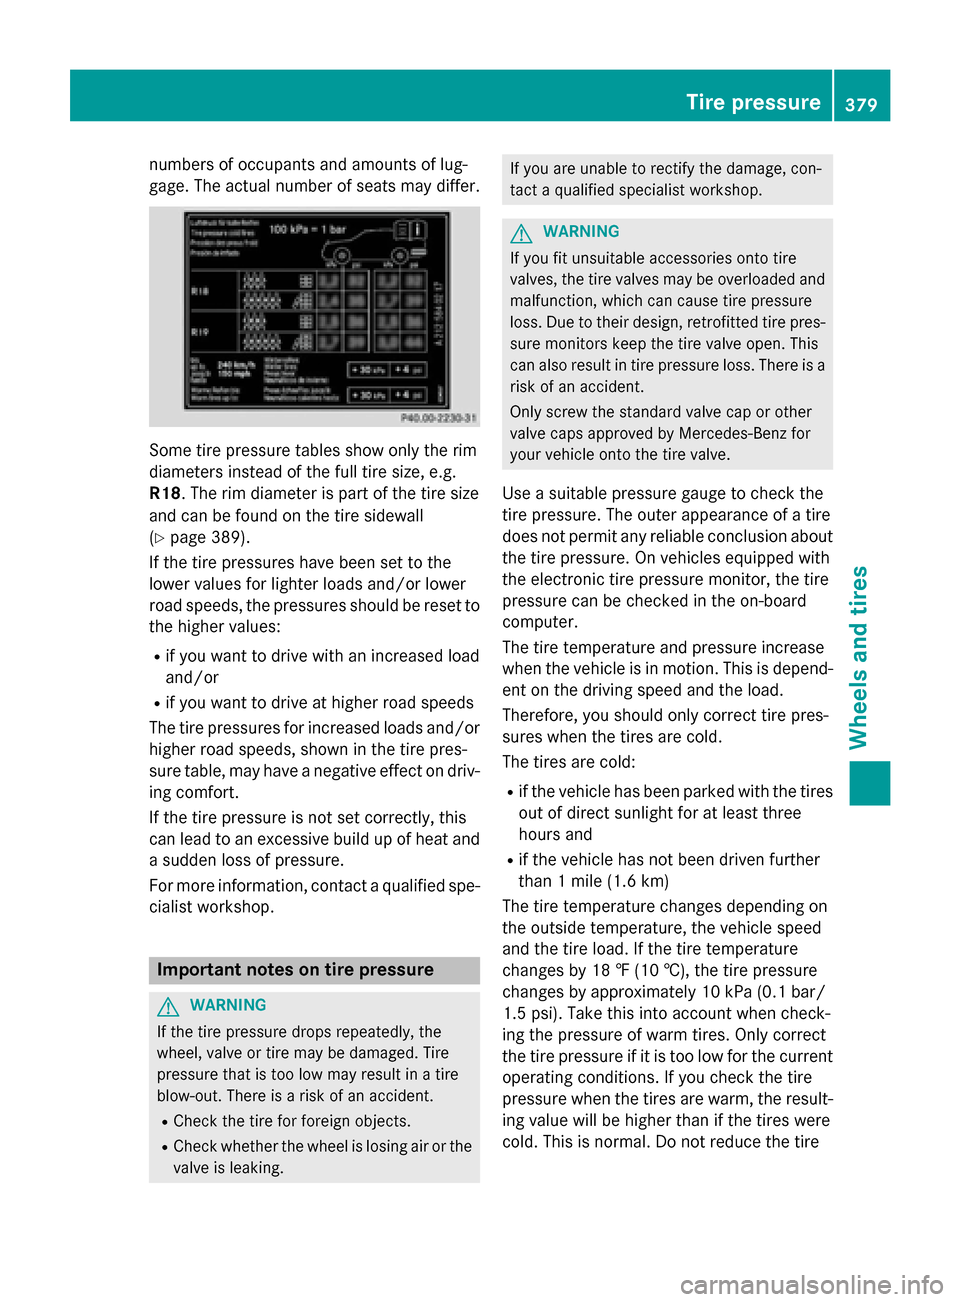
numbers of occupants and amounts of lug-
gage. The actual number of seats may differ.
Some tire pressure tables show only the rim
diameters instead of the full tire size, e.g.
R18. The rim diameter is part of the tire size
and can be found on the tire sidewall
(
Ypage 389).
If the tire pressures have been set to the
lower values for lighter loads and/or lower
road speeds, the pressures should be reset to the higher values:
Rif you want to drive with an increased load
and/or
Rif you want to drive at higher road speeds
The tire pressures for increased loads and/or
higher road speeds, shown in the tire pres-
sure table, may have a negative effect on driv- ing comfort.
If the tire pressure is not set correctly, this
can lead to an excessive build up of heat and
a sudden loss of pressure.
For more information, contact a qualified spe-
cialist workshop.
Important notes on tire pressure
GWARNING
If the tire pressure drops repeatedly, the
wheel, valve or tire may be damaged. Tire
pressure that is too low may result in a tire
blow-out. There is a risk of an accident.
RCheck the tire for foreign objects.
RCheck whether the wheel is losing air or the valve is leaking.
If you are unable to rectify the damage, con-
tact a qualified specialist workshop.
GWARNING
If you fit unsuitable accessories onto tire
valves, the tire valves may be overloaded and
malfunction, which can cause tire pressure
loss. Due to their design, retrofitted tire pres- sure monitors keep the tire valve open. This
can also result in tire pressure loss. There is a
risk of an accident.
Only screw the standard valve cap or other
valve caps approved by Mercedes-Benz for
your vehicle onto the tire valve.
Use a suitable pressure gauge to check the
tire pressure. The outer appearance of a tire
does not permit any reliable conclusion about
the tire pressure. On vehicles equipped with
the electronic tire pressure monitor, the tire
pressure can be checked in the on-board
computer.
The tire temperature and pressure increase
when the vehicle is in motion. This is depend-
ent on the driving speed and the load.
Therefore, you should only correct tire pres-
sures when the tires are cold.
The tires are cold:
Rif the vehicle has been parked with the tires
out of direct sunlight for at least three
hours and
Rif the vehicle has not been driven further
than 1 mile (1.6 km)
The tire temperature changes depending on
the outside temperature, the vehicle speed
and the tire load. If the tire tempera ture
cha
nges by 18 ‡ (10 †), the tire pressure
changes by approximately 10 kPa (0.1 bar/
1.5 psi). Take this into account when check-
ing the pressure of warm tires. Only correct
the tire pressure if it is too low for the current
operating conditions. If you check the tire
pressure when the tires are warm, the result-
ing value will be higher than if the tires were
cold. This is normal. Do not reduce the tire
Tire pressure379
Wheels and tires
Z