2016 MERCEDES-BENZ GLC-Class stop start
[x] Cancel search: stop startPage 86 of 222
XSelectPersonal Routes.
Previously recorded routes are displayed.
XTo select a route, turn and press the con-
troller.
The map appears with a menu. The recor-
ded route is shown on the map in blue.
XTo calculate a route: selectStart.
XTo change the name and symbol: select
Edit
.
XSelect Change NameorEdit Icon.
XCharacter entry (Ypage 31).
XSelect a symbol.
Route guidance
General notes
COMAND calculates the route to the destina-
tion without taking account of the following,
for example:
Rtraffic lights
Rstop and yield signs
Rparking or stopping restrictions
Rroad narrowing
Rtemporary traffic rules and regulations
The navigation system can give differing driv-
ing recommendations if the actual street/
traffic situation does not correspond with the
digital map's data. For example, if the road
layout or the direction of a one-way street has
been changed.
For this reason, you must always observe
road and traffic rules and regulations during
your journey. Road and traffic rules and reg-
ulations always have priority over system
driving recommendations.
Route guidance begins once a route has been
calculated (
Ypage 69).
COMAND guides you to your destination by
means of navigation announcements in the
form of audible navigation announcements
and route guidance displays.
The route guidance displays can be seen if
navigation mode is switched on. If you do not follow the navigation announce-
ments or if you leave the calculated route,
COMAND automatically calculates a new
route to the destination.
If the digital map contains the corresponding
information, the following applies:
Rduring route guidance, COMAND tries to
a
void roads with restricted access. Those
roads, for example, that are closed to
through-traffic.
Rroads that have time restrictions (e.g.
closed on Sundays and public holidays) are considered for route guidance on days
when they are open. For this purpose, the
relevant times must be correctly stored in
the database.
Change of direction
Overview
Changes of direction have three phases:
RPreparation phase
RAnnouncement phase
RChange-of-direction phase
Changes in direction are also shown in the
multifunction display of the instrument clus-
ter (see the vehicle Operator's Manual).
Preparation phase
COMAND prepares you for the upcoming
change of direction, e.g. with the announce-
ment "Prepare to turn right". You see the full- screen map.
84Route guidance
Navigation
Page 88 of 222
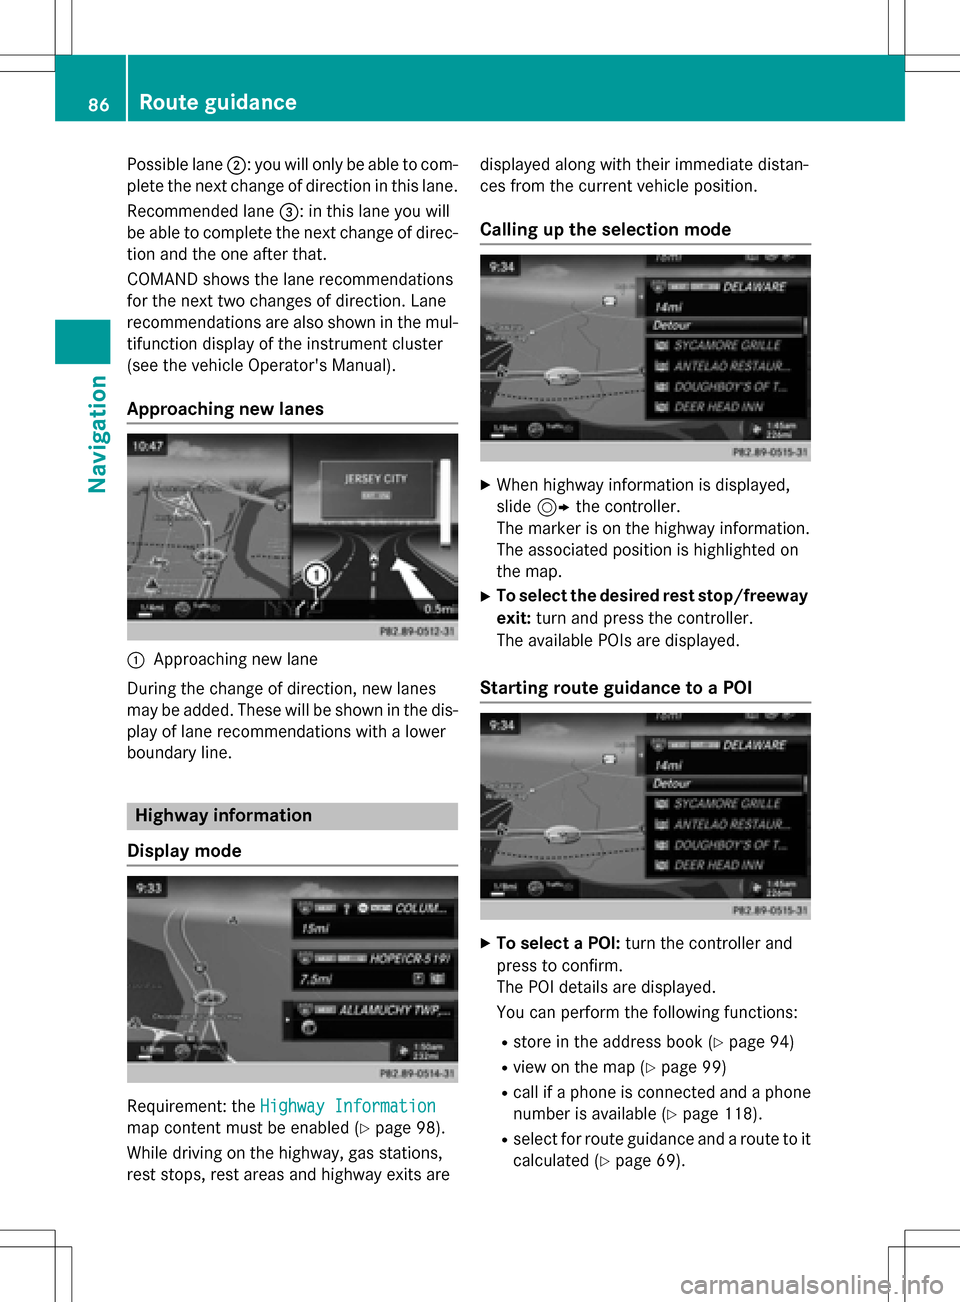
Possible lane;: you will only be able to com-
plete the next change of direction in this lane.
Recommended lane =: in this lane you will
be able to complete the next change of direc-
tion and the one after that.
COMAND shows the lane recommendations
for the next two changes of direction. Lane
recommendations are also shown in the mul- tifunction display of the instrument cluster
(see the vehicle Operator's Manual).
Approaching new lanes
:Approaching new lane
During the change of direction, new lanes
may be added. These will be shown in the dis-
play of lane recommendations with a lower
boundary line.
Highway information
Display mode
Requirement: the Highway Information
map content must be enabled (Ypage 98).
While driving on the highway, gas stations,
rest stops, rest areas and highway exits are displayed along with their immediate distan-
ces from the current vehicle position.
Calling up the selection mode
XWhen highway information is displayed,
slide
9 the controller.
The marker is on the highway information.
The associated position is highlighted on
the map.
XTo select the desired rest stop/freeway
exit: turn and press the controller.
The available POIs are displayed.
Starting route guidance to a POI
XTo select a POI: turn the controller and
press to confirm.
The POI details are displayed.
You can perform the following functions:
Rstore in the address book (Ypage 94)
Rview on the map (Ypage 99)
Rcall if a phone is connected and a phone
number is available (
Ypage 118).
Rselect for route guidance and a route to it
calculated (
Ypage 69).
86Route guidance
Navigation
Page 108 of 222
Problems with the navigation system
ProblemPossible causes/consequences andMSolutions
COMAND does not
resume route guidance
after the journey has
been interrupted.Route guidance is canceled if you interrupt the journey for more
than two hours.
"Interrupting the journey" refers to stopping the vehicle.
"Continuing route guidance" refers to switching COMAND back on
and driving on.
XContinue route guidance manually (Ypage 88).
ProblemPossible causes/consequences andMSolutions
COMAND is unable to
determine the vehicle's
position.COMAND has to redetermine the position of the vehicle if the
vehicle has been transported.
Example:
RAfter transporting the vehicle by ferry
RAfter transporting the vehicle by motorail
XStart the vehicle and pull away.
COMAND determines the vehicle's position. Depending on the
driving situation, this may take some time.
Route guidance may be restricted during the determination of
the vehicle's position.
When positioning is complete, route guidance is resumed with
navigation announcements and route guidance displays.
ProblemPossible causes/consequences andMSolutions
TheNavigation
UnavailablePlease
refer to the Oper‐
ator's Manual.mes-
sage appears.
COMAND has an integrated hard drive on which the digital map is
stored.
To protect the integrated hard drive against damage, COMAND
deactivates it at very high and low temperatures. The navigation
system will then be temporarily unavailable.
XLet the vehicle and COMAND heat up or cool down to a normal
temperature.
XTo hide the message: switch COMAND off and then on again.
106Problems with the navigation system
Navigation
Page 123 of 222
Rejecting:
XTo select=Reject: turn and press the
controller.
or
XPress ~on the multifunction steering
wheel.
The behavior after the call is rejected
depends on your mobile phone and mobile
phone network provider.
Option 1: The originally active call is con-
tinued and the incoming call is rejected.
Option 2: The originally active call is ended
and the incoming call is accepted.
Option 3: Both calls are ended.
Ending an active call
XTo select =in the telephone menu: turn
and press the controller.
or
XPress ~on the multifunction steering
wheel.
The active call is ended.
Mobile phone voice recognition
You can start or end voice recognition on your mobile phone with this function. Further infor-
mation on the voice recognition service; see
the manufacturer's operating instructions.
To start the mobile phone voice recogni-
tion:
XConnect the mobile phone to COMAND
(
Ypage 112).
XPress and hold the óbutton on the mul-
tifunction steering wheel for more than one second.
You can now use the mobile phone voice
recognition.
To end the mobile phone voice recogni-
tion:
XPress ñon the multifunction steering
wheel.
The mobile phone voice recognition is stop-
ped.
Phone book
Introduction
The telephone book displays the contacts
from the address book which have a phone
number.
The mobile phone's telephone book is auto-
matically displayed in COMAND after connec-
tion (default setting). You can deactivate
automatic calling up (
Ypage 130).
In the telephone book, you can:
RCreate new contacts (Ypage 123)
RAdd information to contacts (Ypage 123)
RSearch for contacts (Ypage 122)
RStore contacts (Ypage 124)
RDelete contacts (Ypage 124)
Further information on importing contacts
(
Ypage 130).
When you import, save, edit or add contacts,
they will be permanently saved in COMAND.
These contacts will remain there even when
you connect COMAND to a different mobile
phone. You can view these contacts even
without a mobile phone.
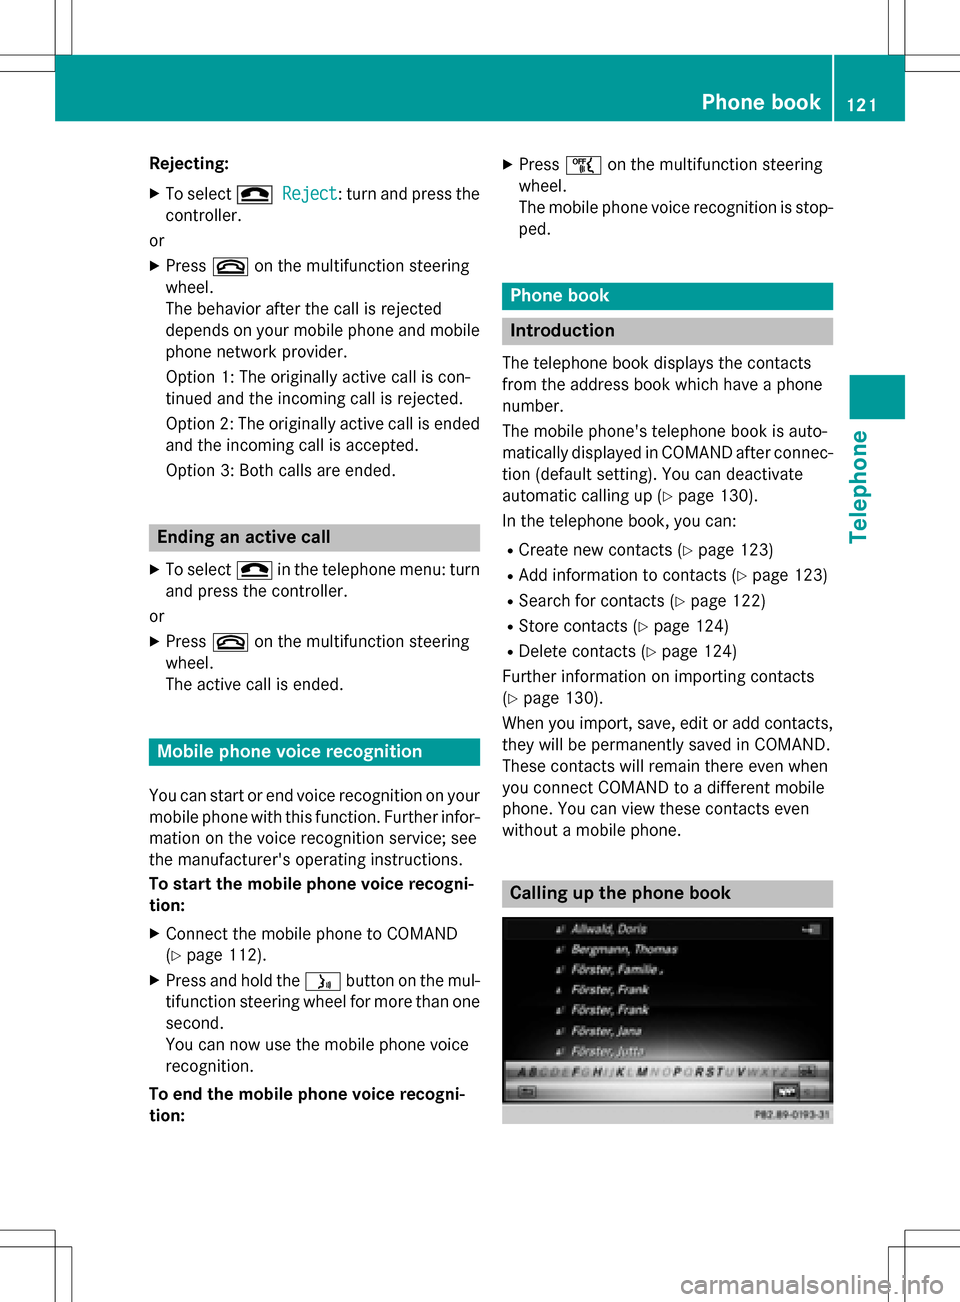
Calling up the phone book
Phone book121
Telephone
Z
Page 195 of 222
iIf the mobile phone that is connected only
supports two Bluetooth®profiles at the
same time, COMAND functions may
behave as follows:
Rwhen connecting to the Internet, play-
back is stopped on the Bluetooth®audio
device.
Rwhen starting playback on the Blue-
tooth®audio device, the Internet con-
nection is ended.
Searching for and authorizing a Blue-
tooth®audio device
Switching to Bluetooth®audio mode
XTo call up the media menu: press the Õ
button.
The last media source you have set is dis-
played.
XTo display the main function bar: slide 5
the controller.
XTo select Media: turn and press the con-
troller.
XTo select Bluetooth Audio: turn and
press the controller.
A menu appears.
If you see the No Bluetooth Audio
Device Connectedmessage, you will
need to authorize the Bluetooth®audio
device first.
XTo select Optionsin the Bluetooth audio
menu: slide 6the controller and press to
confirm.
XTo select Bluetooth Audio Devices:
press the controller.
A new menu appears.
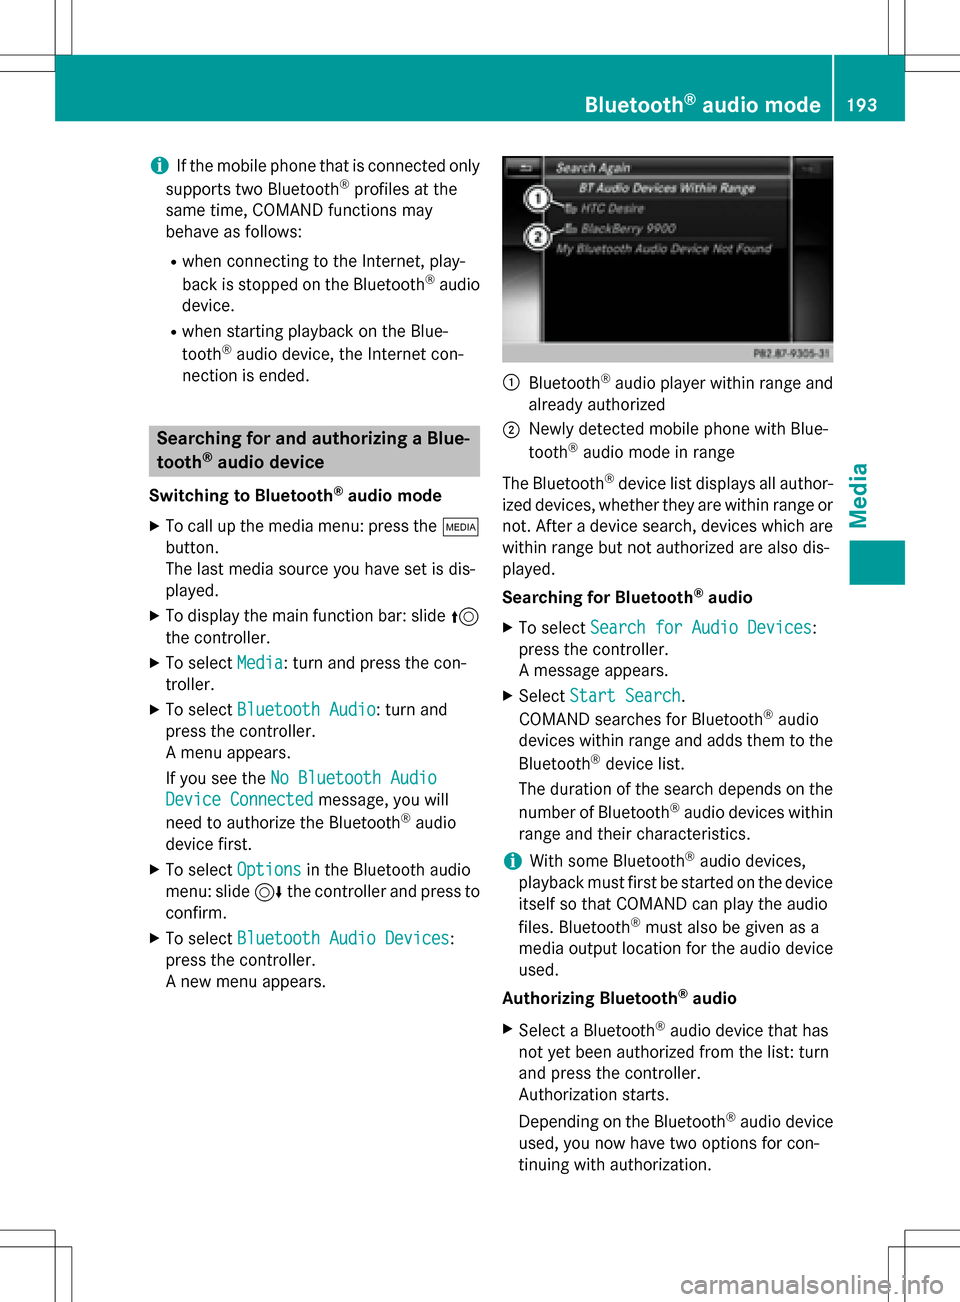
:Bluetooth®audio player within range and
already authorized
;Newly detected mobile phone with Blue-
tooth®audio mode in range
The Bluetooth
®device list displays all author-
ized devices, whether they are within range or not. After a device search, devices which are
within range but not authorized are also dis-
played.
Searching for Bluetooth
®audio
XTo select Search for Audio Devices:
press the controller.
A message appears.
XSelect Start Search.
COMAND searches for Bluetooth®audio
devices within range and adds them to the
Bluetooth
®device list.
The duration of the search depends on the
number of Bluetooth
®audio devices within
range and their characteristics.
iWith some Bluetooth®audio devices,
playback must first be started on the device
itself so that COMAND can play the audio
files. Bluetooth
®must also be given as a
media output location for the audio device
used.
Authorizing Bluetooth
®audio
XSelect a Bluetooth®audio device that has
not yet been authorized from the list: turn
and press the controller.
Authorization starts.
Depending on the Bluetooth
®audio device
used, you now have two options for con-
tinuing with authorization.
Bluetooth®audio mode193
Media
Z
Page 197 of 222
If theNo Bluetooth Audio Device Con‐
nectedmessage appears, you have two
options to reconnect the Bluetooth®audio
device.
Option 1:
XIn the Connect Devicebasic display:
press the controller.
If COMAND can locate the Bluetooth
®
audio device, it will be connected and will
start playing.
Option 2:
XTo select Options: slide6and press the
controller.
XTo select Bluetooth Audio Devices:
press the controller.
XTo select a Bluetooth®audio device: turn
and press the controller.
If the Bluetooth
®audio device has been
authorized, playback starts.
Bluetooth®audio device and simulta-
neous search for mobile phones
i
When searching for a mobile phone or a
new Bluetooth®audio device, the connec-
tion to an already activated Bluetooth®
audio device is stopped.
In the Bluetooth
®audio basic display , you will
see the No
BluetoothAudioDeviceCon‐
nectedmessage, and the Connect Device
menu item cannot be selected.
Displaying details
XTo select a Bluetooth®audio device from
the Bluetooth®device list: turn the control-
ler.
XTo select the symbol to the right of the
Bluetooth®audio device: slide 9the
controller.
XTo select Details: turn and press the con-
troller.
The following information concerning the
selected mobile phone is shown:
RBluetooth®name
RBluetooth®address
RAvailability status (shown after an
update)
RAuthorization status
XTo close the detailed display: press the
% button.
De-authorizing (deregistering) a Blue-
tooth®audio device
XTo select a Bluetooth®audio device from
the Bluetooth®device list: turn the control-
ler.
XTo select the symbol to the right of the
Bluetooth®audio device: slide 9and
press the controller.
XTo select Deauthorize: press the control-
ler.
A prompt appears asking whether you
really wish to deauthorize this device.
XTo select YesorNo: turn and press the con-
troller.
If you select Yes
, the device is deleted from
the Bluetooth®device list.
If you select No
the process is canceled.
iBefore re-authorizing the Bluetooth®
audio device, you should also delete the
device name MB Bluetooth
from your
Bluetooth®audio device's Bluetooth®list
(see the Bluetooth®audio device's operat-
ing instructions).
Bluetooth®audio mode195
Media
Z
Page 198 of 222
Switching to Bluetooth®audio mode
Basic display
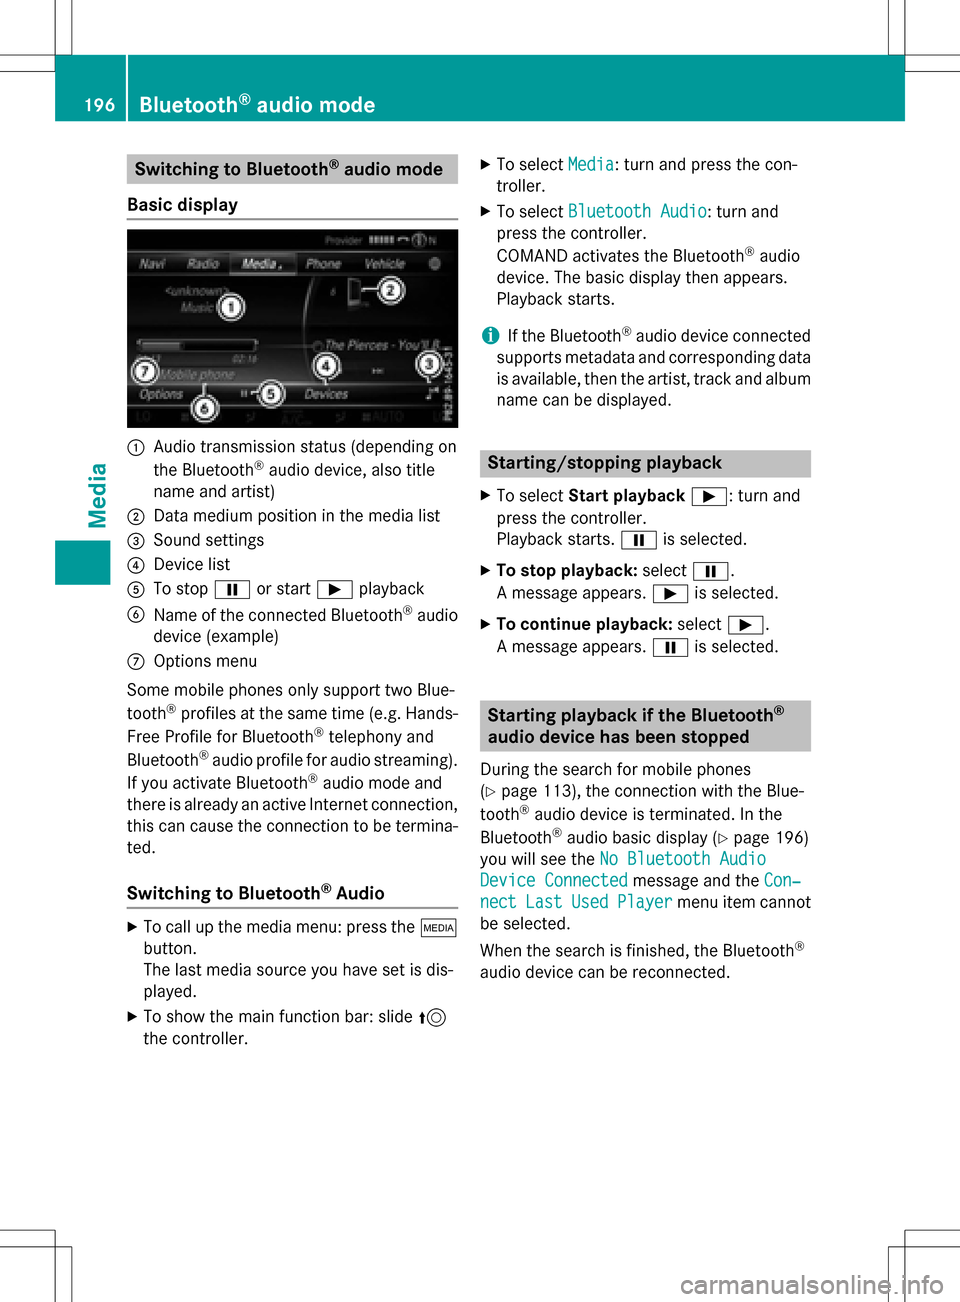
:Audio transmission status (depending on
the Bluetooth®audio device, also title
name and artist)
;Data medium position in the media list
=Sound settings
?Device list
ATo stop Ëor start Ìplayback
BName of the connected Bluetooth®audio
device (example)
COptions menu
Some mobile phones only support two Blue-
tooth
®profiles at the same time (e.g. Hands-
Free Profile for Bluetooth®telephony and
Bluetooth®audio profile for audio streaming).
If you activate Bluetooth®audio mode and
there is already an active Internet connection, this can cause the connection to be termina-
ted.
Switching to Bluetooth®Audio
XTo call up the media menu: press the Õ
button.
The last media source you have set is dis-
played.
XTo show the main function bar: slide 5
the controller.
XTo select Media: turn and press the con-
troller.
XTo select Bluetooth Audio: turn and
press the controller.
COMAND activates the Bluetooth
®audio
device. The basic display then appears.
Playback starts.
iIf the Bluetooth®audio device connected
supports metadata and corresponding data
is available, then the artist, track and album
name can be displayed.
Starting/stopping playback
XTo select Start playback Ì: turn and
press the controller.
Playback starts. Ëis selected.
XTo stop playback: selectË.
A message appears. Ìis selected.
XTo continue playback: selectÌ.
A message appears. Ëis selected.
Starting playback if the Bluetooth®
audio device has been stopped
During the search for mobile phones
(
Ypage 113), the connection with the Blue-
tooth®audio device is terminated. In the
Bluetooth®audio basic display (Ypage 196)
you will see the No Bluetooth Audio
Device Connectedmessage and the Con‐
nectLastUsedPlayermenu item cannot
be selected.
When the search is finished, the Bluetooth
®
audio device can be reconnected.
196Bluetooth®audio mode
Media
Page 206 of 222
Operating the video menu
XTo show: in full-screen video mode, slide
6the controller.
XTo hide: slide 5the controller.
XTo select the next or previous scene: turn
the controller clockwise/counter-clock-
wise.
XTo fast forward or rewind: slide 9or
8 and hold the controller until the
desired position has been reached.
XTo hide the video menu: slide 5the con-
troller.
XTo show the menu bars for the DVD basic
display: press the controller.
The video menu is hidden and the DVD
basic menu appears.
DVD functions
Showing/hiding the DVD functions
XTo show DVD functions: in full-screen
video mode, press the controller.
The DVD functions menu is shown.
XTo hide: in DVD functions select %: turn
and press the controller
XTo show the DVD basic display: select
ò from the DVD functions: turn and
press the controller.
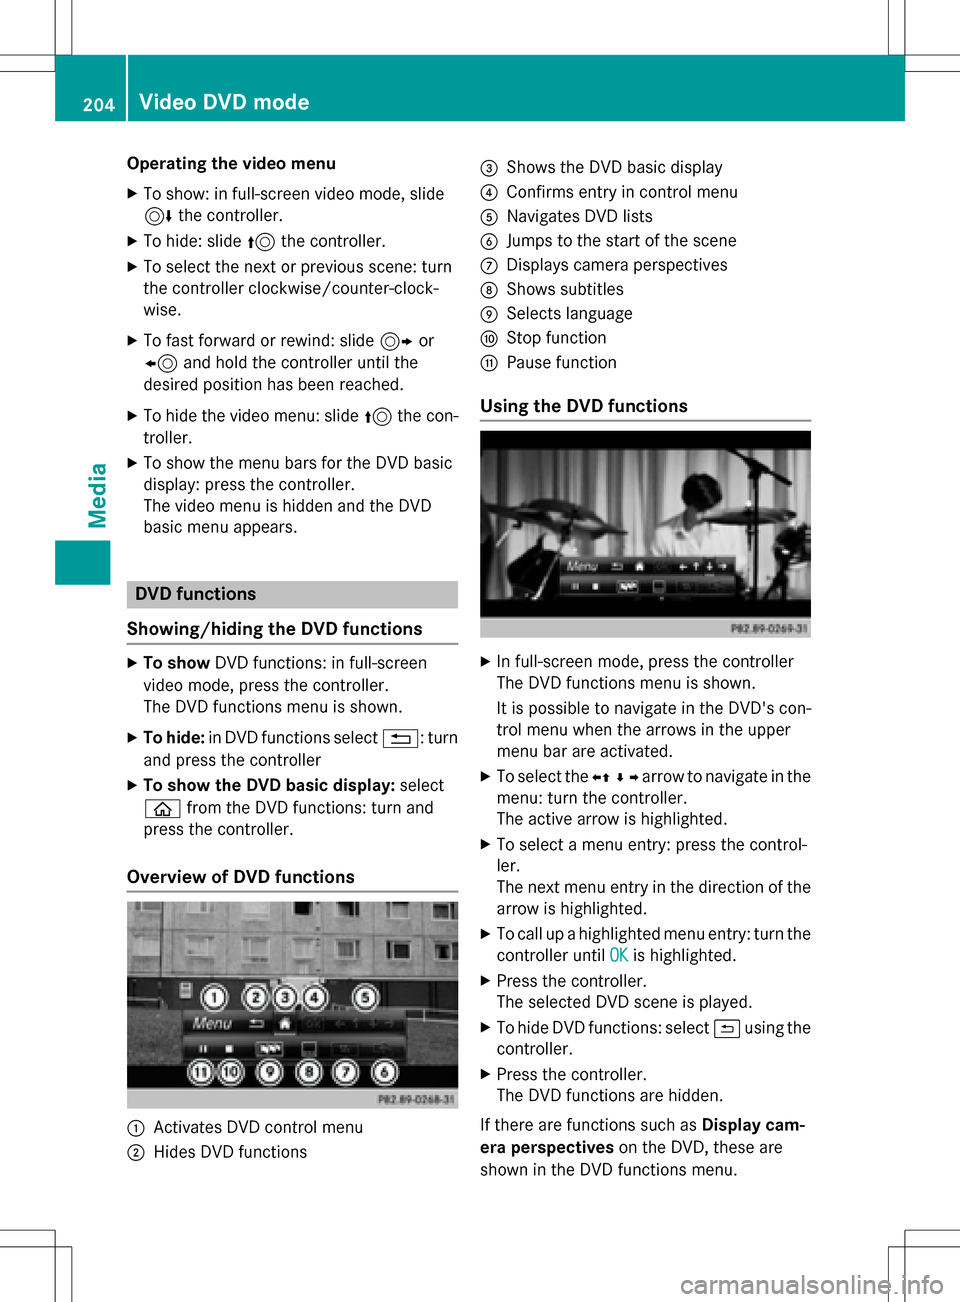
Overview of DVD functions
:Activates DVD control menu
;Hides DVD functions
=Shows the DVD basic display
?Confirms entry in control menu
ANavigates DVD lists
BJumps to the start of the scene
CDisplays camera perspectives
DShows subtitles
ESelects language
FStop function
GPause function
Using the DVD functions
XIn full-screen mode, press the controller
The DVD functions menu is shown.
It is possible to navigate in the DVD's con-
trol menu when the arrows in the upper
menu bar are activated.
XTo select the XZ¬Yarrow to navigate in the
menu: turn the controller.
The active arrow is highlighted.
XTo select a menu entry: press the control-
ler.
The next menu entry in the direction of the arrow is highlighted.
XTo call up a highlighted menu entry: turn the
controller until OK
is highlighted.
XPress the controller.
The selected DVD scene is played.
XTo hide DVD functions: select &using the
controller.
XPress the controller.
The DVD functions are hidden.
If there are functions such as Display cam-
era perspectives on the DVD, these are
shown in the DVD functions menu.
204Video DVD mode
Media