2016 MERCEDES-BENZ GLC-Class display
[x] Cancel search: displayPage 173 of 222
channels and categories offered by the pro-
vider.
Satellite radio mode may be temporarily
unavailable or interrupted for a variety of rea-
sons. These include environmental or topo-
graphical conditions as well as other factors
beyond the control of Mercedes-Benz USA,
LLC. This means operation may not be possi-
ble in certain areas.
These include:
Rtunnels
Rparking garages
Rlocations inside or next to buildings
Rlocations in the vicinity of other structures
SIRIUS XM Satellite Radio offers more than
140 digital-quality radio channels providing
100% commercial-free music, sports, news
and entertainment.
SIRIUS XM Satellite Radio employs a fleet of
high-performance satellites to broadcast
around the clock throughout the USA and
Canada.
The satellite radio program is available for a
monthly fee. Details are available from the
SIRIUS XM Service Center and at
http://www.siriusxm.com (USA) or
http://www.siriusxm.ca (Canada).
Your new Mercedes-Benz vehicle comes with
SIRIUS XM Satellite Radio pre-installed at the factory. This service is free for a six-month
trial period. About a month before the trial
period ends, information will be provided on
how to extend this subscription. An acoustic
signal sounds and a message is shown,
describing how the subscription can be
extended.
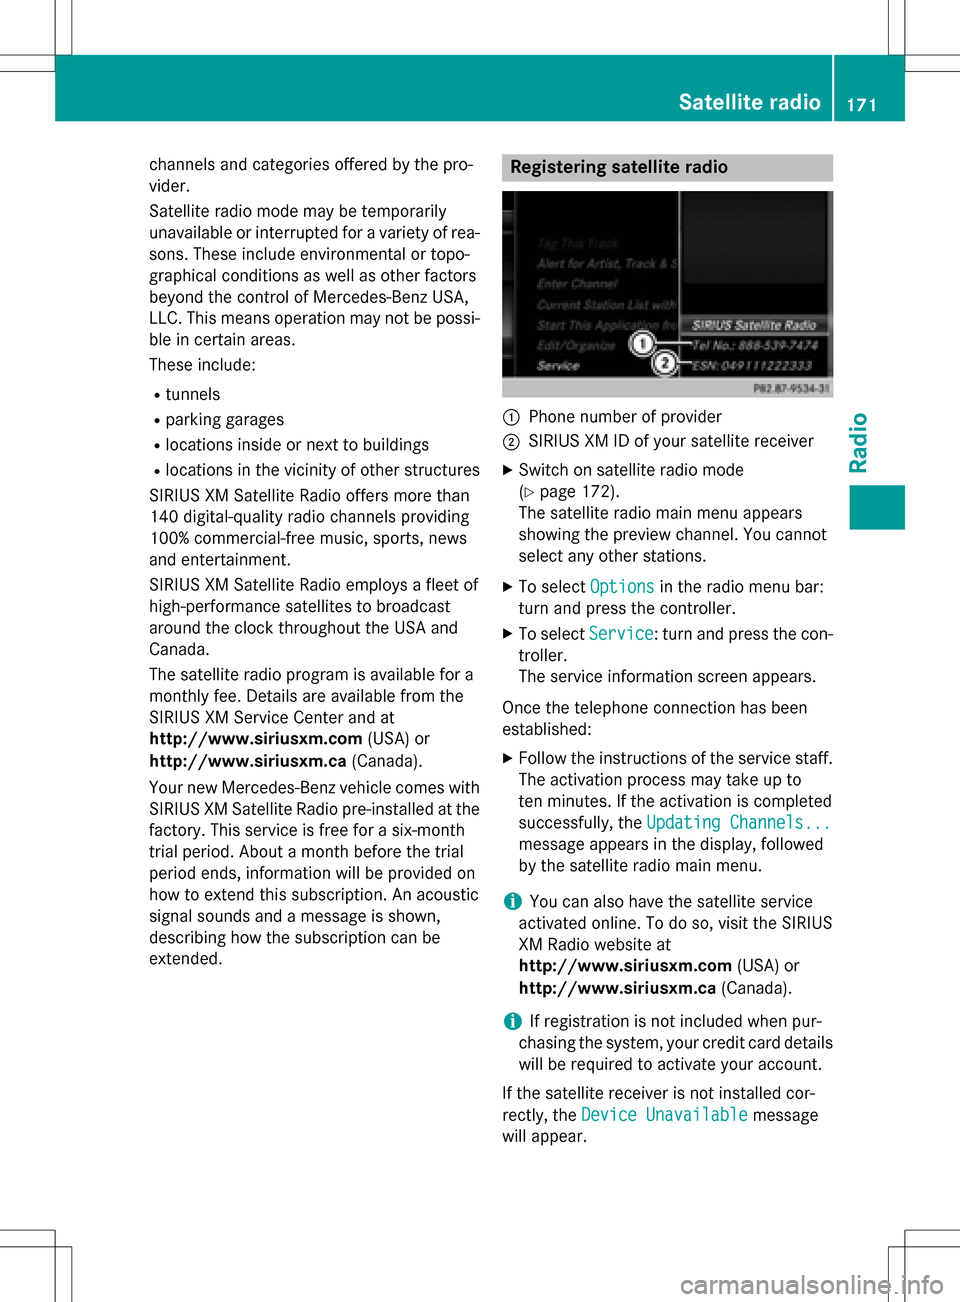
Registering satellite radio
:Phone number of provider
;SIRIUS XM ID of your satellite receiver
XSwitch on satellite radio mode
(
Ypage 172).
The satellite radio main menu appears
showing the preview channel. You cannot
select any other stations.
XTo select Optionsin the radio menu bar:
turn and press the controller.
XTo select Service: turn and press the con-
troller.
The service information screen appears.
Once the telephone connection has been
established:
XFollow the instructions of the service staff.
The activation process may take up to
ten minutes. If the activation is completed
successfully, the Updating Channels...
message appears in the display, followed
by the satellite radio main menu.
iYou can also have the satellite service
activated online. To do so, visit the SIRIUS
XM Radio website at
http://www.siriusxm.com (USA) or
http://www.siriusxm.ca (Canada).
iIf registration is not included when pur-
chasing the system, your credit card details
will be required to activate your account.
If the satellite receiver is not installed cor-
rectly, the Device Unavailable
message
will appear.
Satellite radio171
Radio
Page 174 of 222
Switching to satellite radio
XTo show the main function bar: slide5
the controller.
XTo select Radio: turn and press the con-
troller.
The radio display appears. You will hear the
last station played on the last waveband
selected.
XTo select Radioin radio mode: slide 5
and press the controller.
The menu with the available radio modes
appears.
XTo select Sat Radio: turn and press the
controller.
The No Service
message appears if there is
no signal.
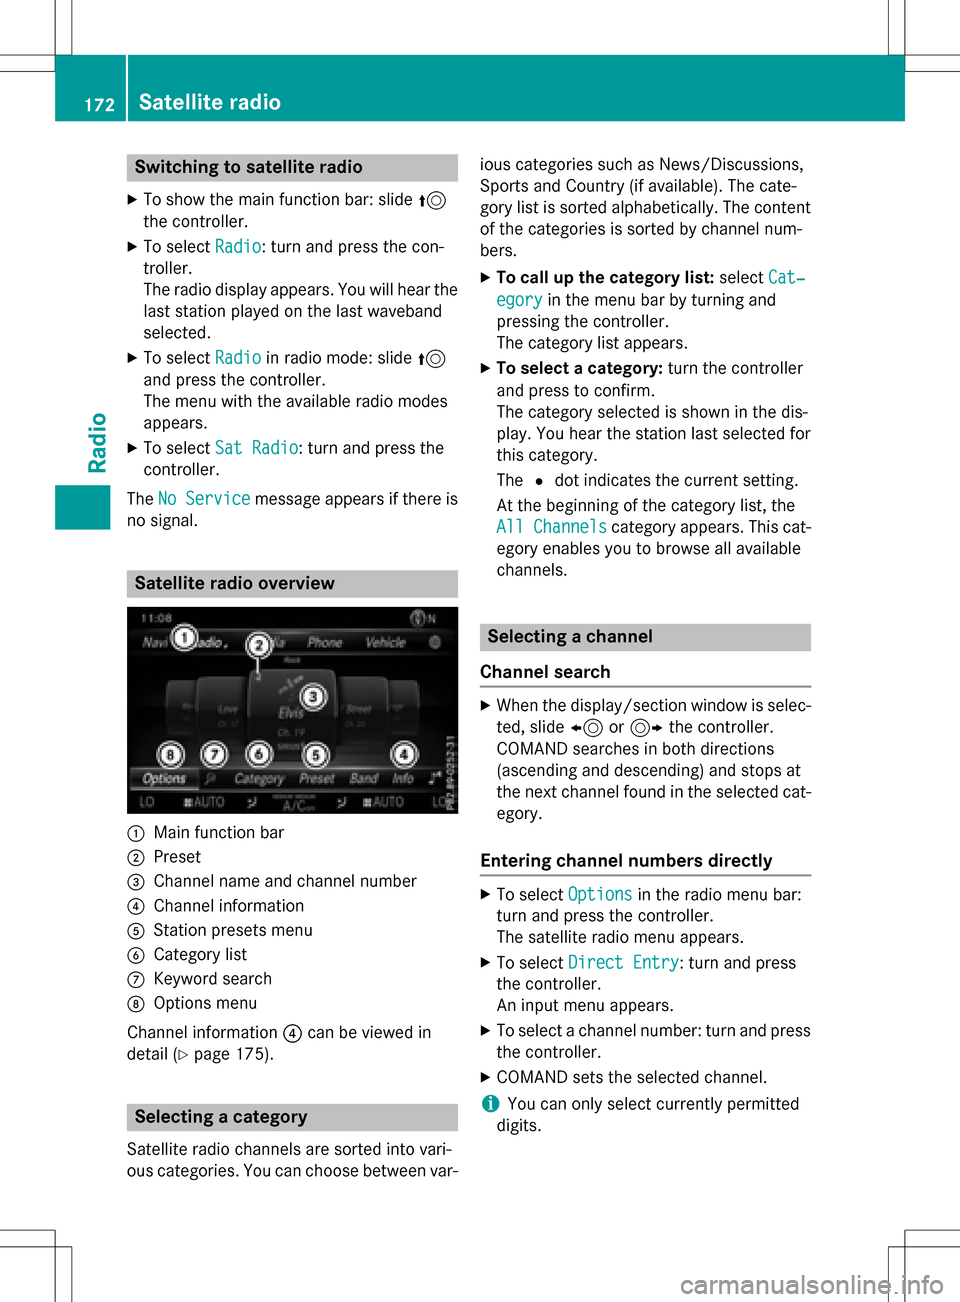
Satellite radio overview
:Main function bar
;Preset
=Channel name and channel number
?Channel information
AStation presets menu
BCategory list
CKeyword search
DOptions menu
Channel information ?can be viewed in
detail (
Ypage 175).
Selecting a category
Satellite radio channels are sorted into vari-
ous categories. You can choose between var- ious categories such as News/Discussions,
Sports and Country (if available). The cate-
gory list is sorted alphabetically. The content
of the categories is sorted by channel num-
bers.
XTo call up the category list:
selectCat‐
egoryin the menu bar by turning and
pressing the controller.
The category list appears.
XTo select a category: turn the controller
and press to confirm.
The category selected is shown in the dis-
play. You hear the station last selected for
this category.
The #dot indicates the current setting.
At the beginning of the category list, the
All Channels
category appears. This cat-
egory enables you to browse all available
channels.
Selecting a channel
Channel search
XWhen the display/section window is selec-
ted, slide 8or9 the controller.
COMAND searches in both directions
(ascending and descending) and stops at
the next channel found in the selected cat-
egory.
Entering channel numbers directly
XTo select Optionsin the radio menu bar:
turn and press the controller.
The satellite radio menu appears.
XTo select Direct Entry: turn and press
the controller.
An input menu appears.
XTo select a channel number: turn and press
the controller.
XCOMAND sets the selected channel.
iYou can only select currently permitted
digits.
172Satellite radio
Radio
Page 175 of 222
Selecting a channel via the satellite
radio station list
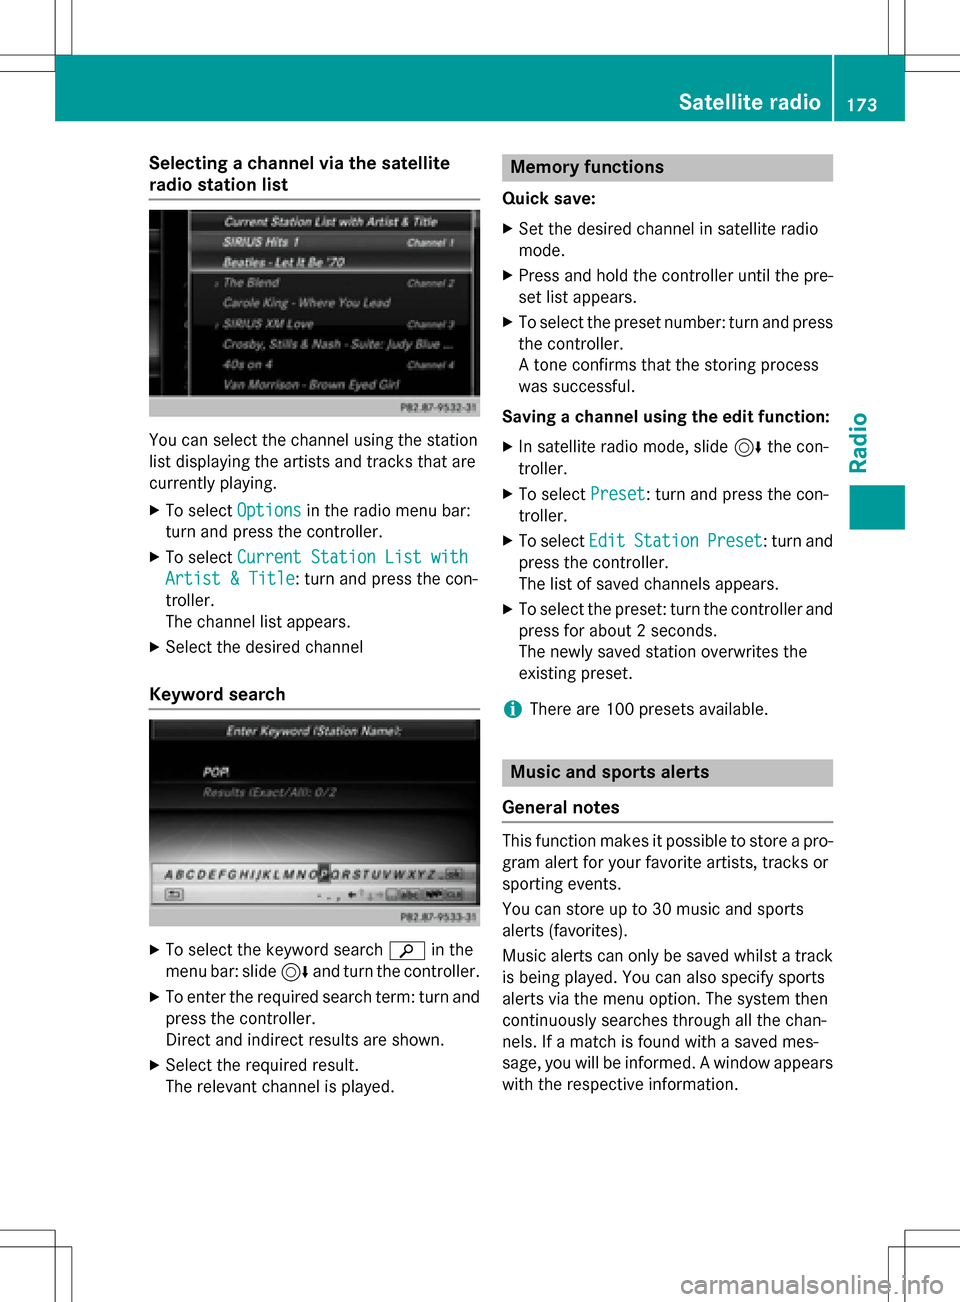
You can select the channel using the station
list displaying the artists and tracks that are
currently playing.
XTo selectOptionsin the radio menu bar:
turn and press the controller.
XTo select Current Station List with
Artist & Title: turn and press the con-
troller.
The channel list appears.
XSelect the desired channel
Keyword search
XTo select the keyword search èin the
menu bar: slide 6and turn the controller.
XTo enter the required search term: turn and
press the controller.
Direct and indirect results are shown.
XSelect the required result.
The relevant channel is played.
Memory functions
Quick save:
XSet the desired channel in satellite radio
mode.
XPress and hold the controller until the pre-
set list appears.
XTo select the preset number: turn and press
the controller.
A tone confirms that the storing process
was successful.
Saving a channel using the edit function:
XIn satellite radio mode, slide 6the con-
troller.
XTo select Preset: turn and press the con-
troller.
XTo select EditStationPreset: turn and
press the controller.
The list of saved channels appears.
XTo select the preset: turn the controller and
press for about 2 seconds.
The newly saved station overwrites the
existing preset.
iThere are 100 presets available.
Music and sports alerts
General notes
This function makes it possible to store a pro-
gram alert for your favorite artists, tracks or
sporting events.
You can store up to 30 music and sports
alerts (favorites).
Music alerts can only be saved whilst a track
is being played. You can also specify sports
alerts via the menu option. The system then
continuously searches through all the chan-
nels. If a match is found with a saved mes-
sage, you will be informed. A window appears
with the respective information.
Satellite radio173
Radio
Page 177 of 222
Displaying information
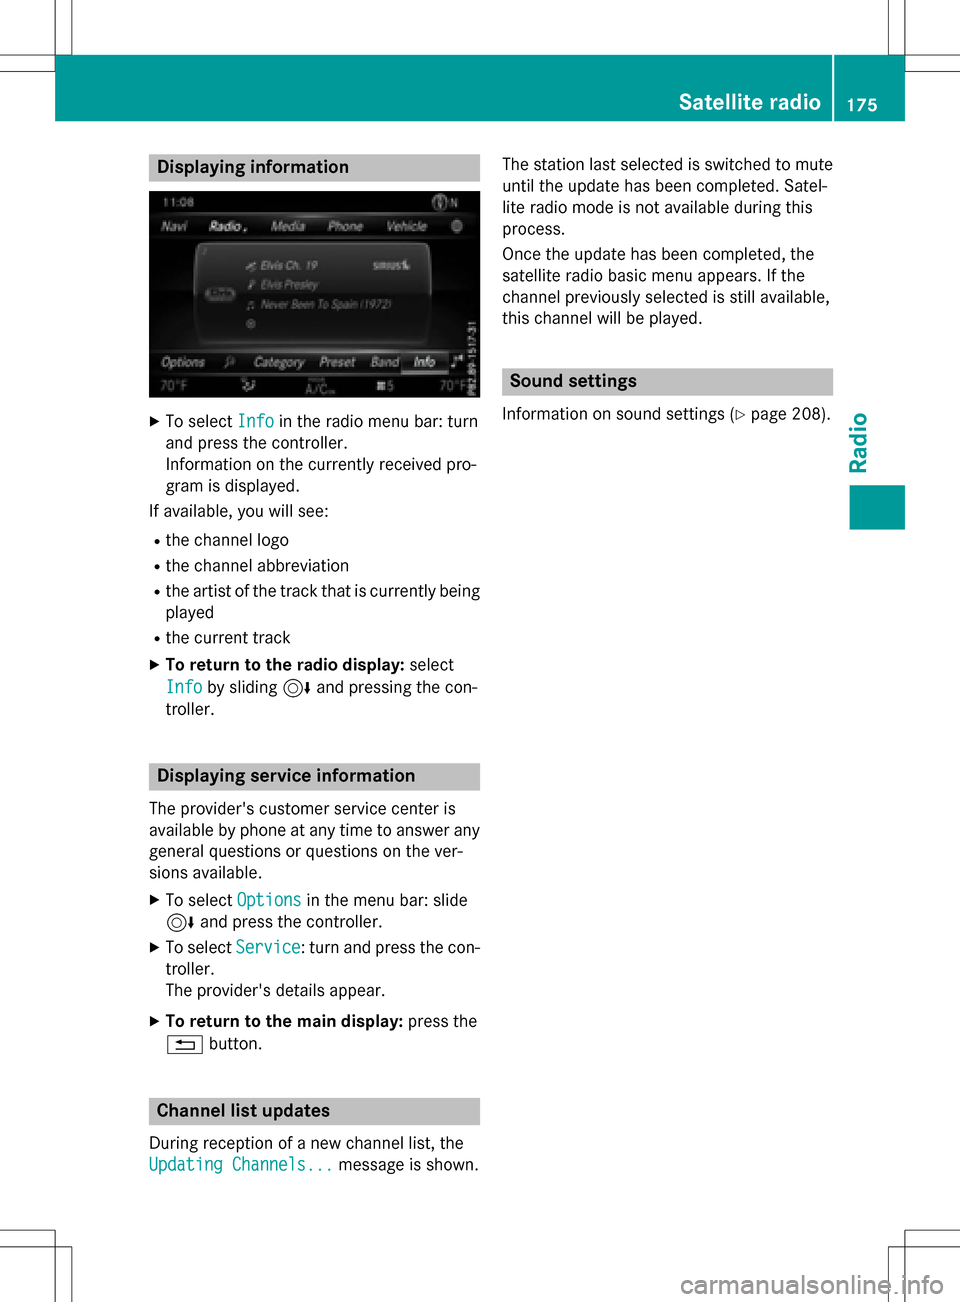
XTo selectInf oin th eradio men ubar :turn
and press th econtroller .
Information on th ecurrentl yreceived pro -
gram is displayed .
If available ,you will see :
Rthechannel log o
Rthechannel abbreviation
Rth eartist of th etrack that is currentl ybein g
played
Rth ecurren ttrack
XTo return to th eradi odisplay :selec t
Inf o
by slidin g6 and pressing th econ-
troller.
Displaying service information
The provider' scustomer servic ecenter is
available by phone at any time to answer any
genera lquestion sor question son th ever -
sions available .
XTo selectOption sin themen ubar :slid e
6 and press th econtroller .
XTo selectServic e:turn and press th econ-
troller.
The provider' sdetails appear.
XTo return to th emain display :press th e
% button.
Channel list update s
Duringreception of ane wchannel list ,th e
Updating Channels...
message is shown .The station last selecte
dis switched to mut e
until th eupdat ehas been completed. Satel-
lit eradio mode is no tavailable durin gthis
process.
Once th eupdat ehas been completed, th e
satellit eradio basi cmen uappears .If th e
channel previously selecte dis still available ,
this channel will be played .
Sound settings
Information on soundsetting s (Ypage 208).
Satellite radio175
Radio
Page 180 of 222
Your COMANDequipment
i
These operatin ginstruction sdescribe all
th estandar dan doptional equipmen tof
your COMAN Dsystem, as available at th e
time of going to print .Country-specifi cdif -
ference sare possible. Bear in min dthat
your vehicle may no tfeature all function s
described here. Thi salso applies to safety-
relevant systems an dfunctions.
iRead th einformation on qualified special-
ist workshop sin th evehicle Operator's
Manual.
Activating medi amode
General notes
There are severa lways to activat emedia
source susin gCOMAND.
The relevant section sof th eOperator's Man -
ual describe th esimples tway to activat e a
media source .Thi ssection describes all
option sfo ractivatin gmedia sources. If you
wish to play external media sources, th e
default display mus talready be turned on .
The followin gexternal media source scan be
used :
RApple®devices (e.g. iPhon e®)
RUSBdevices (e.g. US Bstick, MP3 player)
RCD
RDV Dvideo
RSD memor ycards
Rvia devices connecte dby Bluetoot h®
Button activation
XTo callup th emedia menu: press th eÕ
button.
The last media source you hav eset is dis -
played.
XPress th eÕ buttonagain .
The men uappears wit hth eavailable media
sources.
XTo selec tth emedia source :turn th econ-
trolle ran dpress to confirm .
Dependin gon th evehicle equipment, th e
followin gmedia source swill be available :
RDisc
RMemory Card
RMediaRegister
RMedi aInterfac e 1
RMediaInterfac e 2
RBluetoothAudi o
If playable music files are found ,they will be
playe dby COMAND.
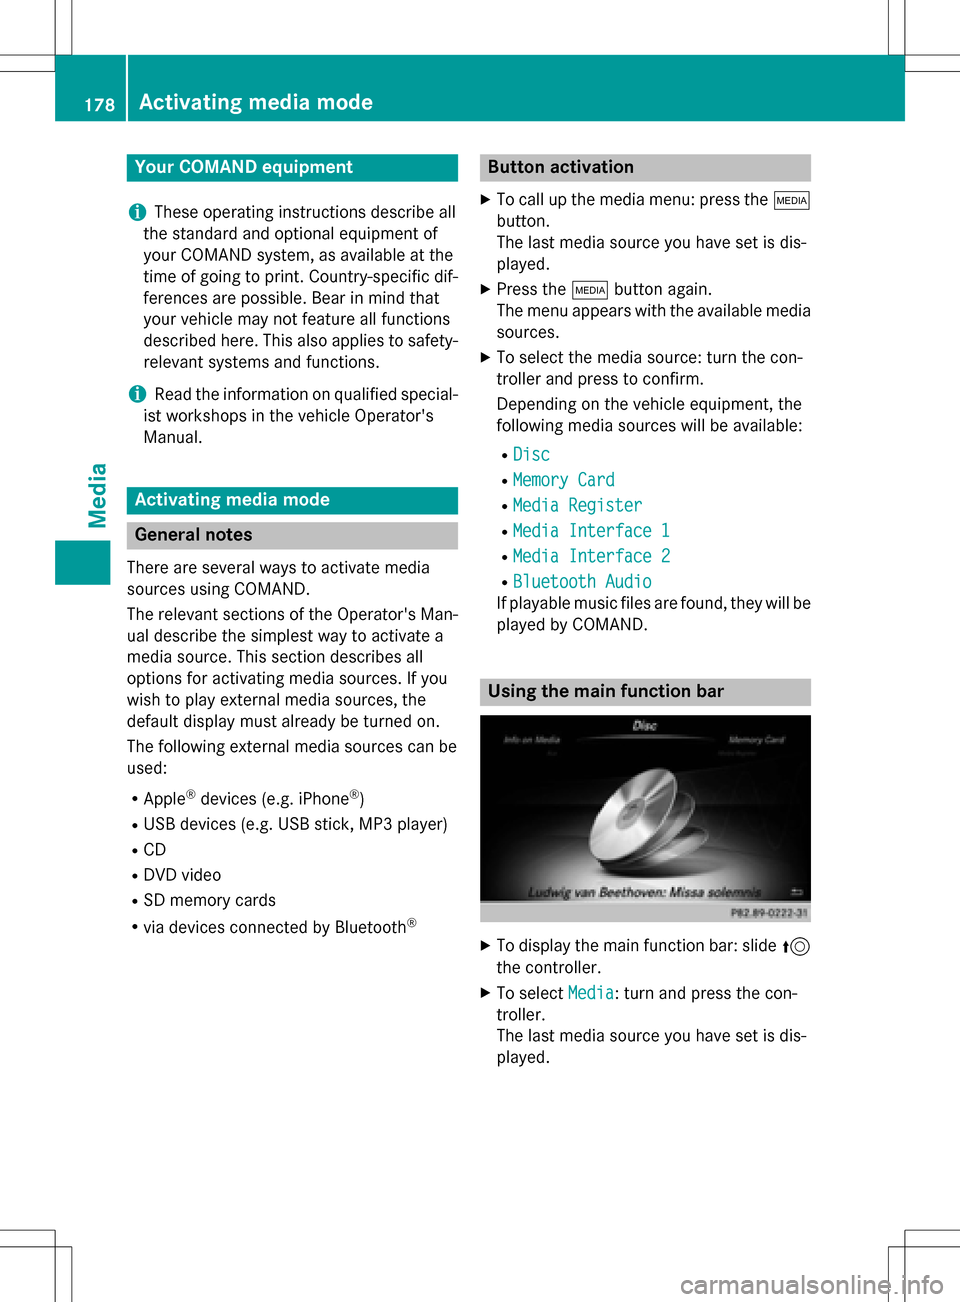
Usin gth emain function ba r
XTo display themain function bar :slid e5
th econtroller .
XTo selectMedi a:turn an dpress th econ-
troller.
The last media source you hav eset is dis -
played.
178Activating media mode
Media
Page 181 of 222
XTo selectMediain media mode: slide 5
and press the controller.
The menu appears with the available media
sources.
XTo select the media source: turn the con-
troller and press to confirm.
If the media source contains music or video
files, these will be played. The correspond-
ing basic menu will be shown.
Using the device list
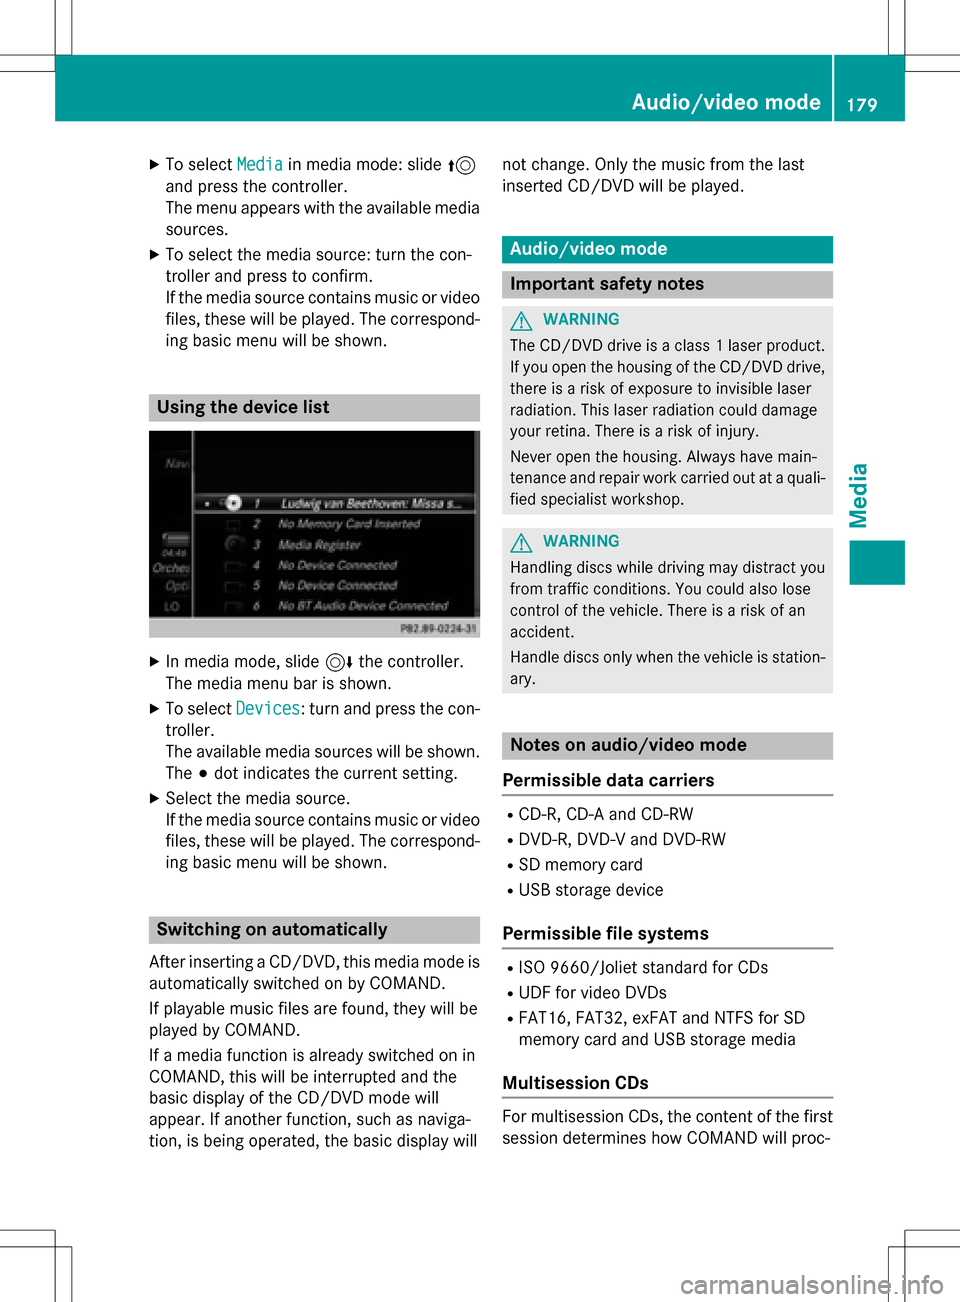
XIn media mode, slide 6the controller.
The media menu bar is shown.
XTo select Devices: turn and press the con-
troller.
The available media sources will be shown.
The #dot indicates the current setting.
XSelect the media source.
If the media source contains music or video
files, these will be played. The correspond-
ing basic menu will be shown.
Switching on automatically
After inserting a CD/DVD, this media mode is
automatically switched on by COMAND.
If playable music files are found, they will be
played by COMAND.
If a media function is already switched on in
COMAND, this will be interrupted and the
basic display of the CD/DVD mode will
appear. If another function, such as naviga-
tion, is being operated, the basic display will not change. Only the music from the last
inserted CD/DVD will be played.
Audio/video mode
Important safety notes
GWARNING
The CD/DVD drive is a class 1 laser product.
If you open the housing of the CD/DVD drive,
there is a risk of exposure to invisible laser
radiation. This laser radiation could damage
your retina. There is a risk of injury.
Never open the housing. Always have main-
tenance and repair work carried out at a quali- fied specialist workshop.
GWARNING
Handling discs while driving may distract you from traffic conditions. You could also lose
control of the vehicle. There is a risk of an
accident.
Handle discs only when the vehicle is station-
ary.
Notes on audio/video mode
Permissible data carriers
RCD-R, CD-A and CD-RW
RDVD-R, DVD-V and DVD-RW
RSD memory card
RUSB storage device
Permissible file systems
RISO 9660/Joliet standard for CDs
RUDF for video DVDs
RFAT16, FAT32, exFAT and NTFS for SD
memory card and USB storage media
Multisession CDs
For multisession CDs, the content of the first
session determines how COMAND will proc-
Audio/video mode179
Media
Z
Page 183 of 222
Selecting an active partition
XTo selectOptionsin the media menu bar:
turn and press the controller.
XSelect Select Active Partition.
Notes on copyright
Audio/video files that you create or repro-
duce yourself for playback are generally sub-
ject to copyright protection.
In many countries, reproductions, even for
private use, are not permitted without the
prior consent of the copyright holder.
Make sure that you know about the applicable
copyright regulations and that you comply
with these.
Notes on CDs/DVDs
!COMAND is designed to play discs that
comply with the EN 60908 standard. There-
fore, you can only use discs with a maxi-
mum thickness of 1.3 mm.
If you insert thicker discs, e.g. those that
contain data on both sides (DVD on one
side and audio data on the other), they can-
not be ejected and can damage the device.
Only use round discs with a diameter of
12 cm. Do not use discs with a diameter of
8 cm, even with an adapter.
Discs with copy protection are not compati-
ble with the audio CD standard and therefore
may not be able to be played by COMAND.
Playback problems may occur when playing
copied discs.
There may be playback problems if you play
CDs that you have copied yourself with a stor-
age capacity of more than 700 MB.
iCOMAND is able to play back audio CDs in
multichannel audio format.
Inserting and removing a disc from
the single CD/DVD drive
Before inserting or removing a CD/DVD,
ensure that the cup holder is empty.
XTo insert: press theþbutton on the
single drive.
If there is a disc already inserted, it will be
ejected.
XInsert a disc into the disc slot with the prin-
ted side facing upwards.
The drive closes and the disc is played.
If the CD/DVD is operated in Media mode,
the corresponding basic menu will be
shown. If the CD/DVD is started using
another application (e.g. navigation), the
display will not change.
iThe drive may not be able to play discs
with copy protection.
XTo remove: press theþbutton.
The drive ejects the disc.
XRemove the ejected disc from the slot.
If you do not take the disc out of the slot, it
is drawn in again automatically after a short
while.
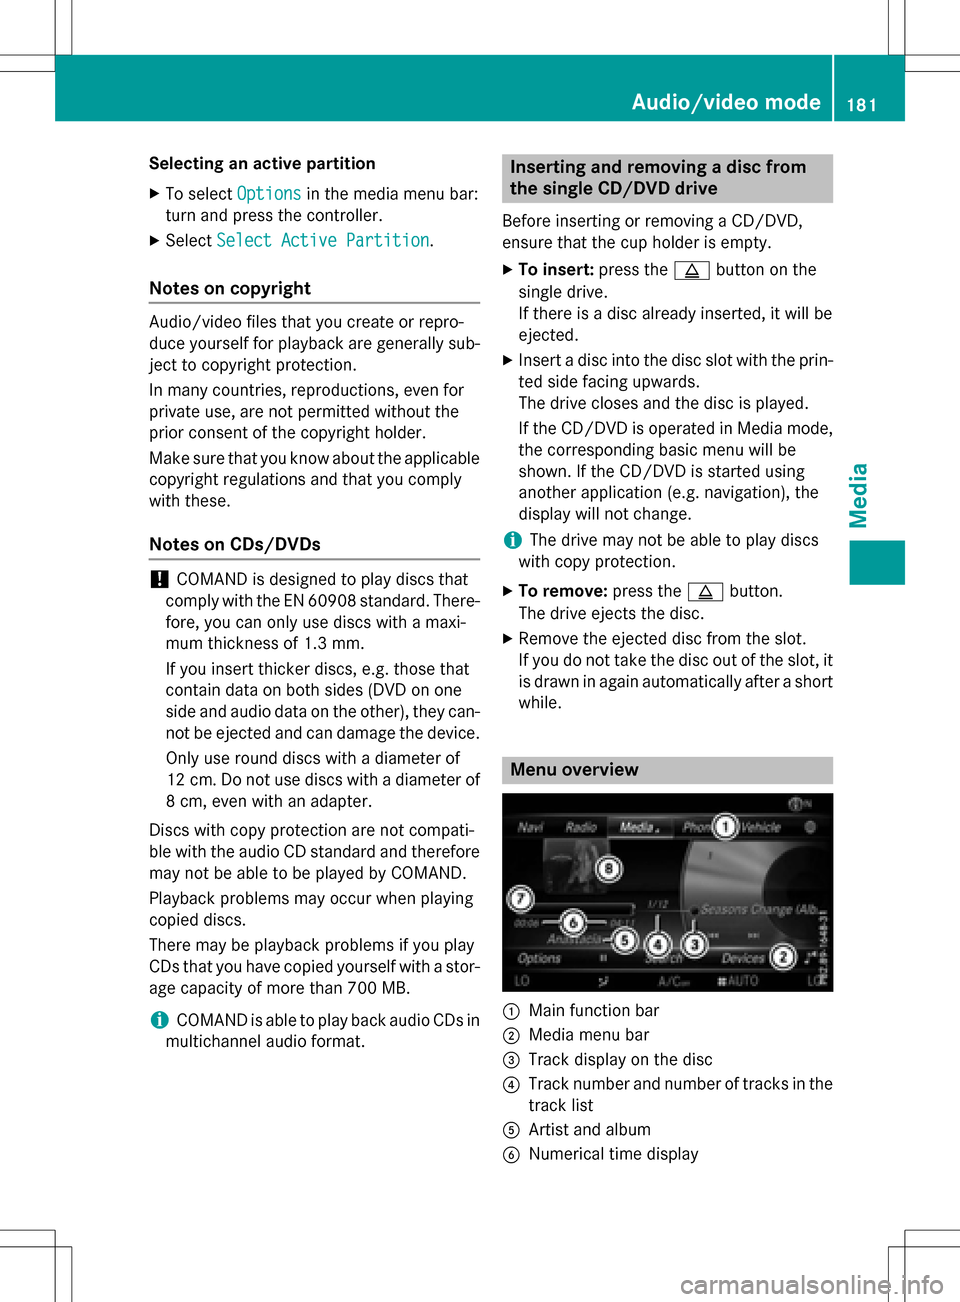
Menu overview
:Main function bar
;Media menu bar
=Track display on the disc
?Track number and number of tracks in the
track list
AArtist and album
BNumerical time display
Audio/video mode181
Media
Z
Page 184 of 222
CGraphic time display
DCover view (if available)
Inserting and ejecting an SD memory
card
Important safety notes
GWAR NING
SD memory car dsare small parts. They can be
swallo wed and cause asphyxiation. This
poses an increased risk of injury or even fatal injury.
Keep SDmemory car dsout of the reach of
ch ildr en. Ifan SD memory card is swallowed,
seek immediate medical attention.
!If you are no longer using the SD memory
card, you should remove it and take it out of
the vehicle. High temperatures can dam-
age the card.
COMAND supports SD memory cards
(Secure Digital), SDHC memory cards
(Secure DigitalHigh Capacity), and SDXC
memory cards ( SecureDigital e Xtended
Capacity.
Inserting an SD memory card
XInsert the SD memory card into the SD card
slot until it engages. The side with the con- tacts must face downwards.
If the memory card has been selected as a
media source, the medium is played and
the files are loaded in the background. If
there are no supported audio/video files,
you will see a message to this effect.
XSelect the media source (Ypage 178).
Ejecting an SD memory card
XPress the memory card.
The memory card is ejected.
XRemove the memory card.
Connecting USB devices
There are two USB ports in the stowage space
under the armrest.
XConnect the USB device to the USB port.
If the corresponding media display is visi-
ble, the medium is played and the files are
loaded in the background. If there are no
supported audio/video files, you will see a
message to this effect.
iMP3 players must support Media Transfer
Protocol (MTP).
Activating media mode
Switching on automatically
After inserting a CD/DVD, this media mode is
automatically switched on by COMAND.
If playable music files are found, they will be
played by COMAND.
If a media function is already switched on in
COMAND, this will be interrupted and the
basic display of the CD/DVD mode will
appear. If another function, such as naviga-
tion, is being operated, the basic display will
not change. Only the music from the last
inserted CD/DVD will be played.
Depending on the vehicle equipment, the
default display must already be turned on
when using with USB devices or SD memory
cards.
XInsert the CDs/DVDs (Ypage 181)
or
XInsert an SD memory card: (Ypage 182)
or
XConnect a USB device: (Ypage 182)
COMAND loads the medium inserted and
starts to play it automatically.
Further options for switching on
RUsing the main function bar: (Ypage 178)
RUsing the device list: (Ypage 179)
RUsing the Õbutton: (Ypage 178)
182Audio/video mode
Media