2016 MERCEDES-BENZ GL warning
[x] Cancel search: warningPage 401 of 462
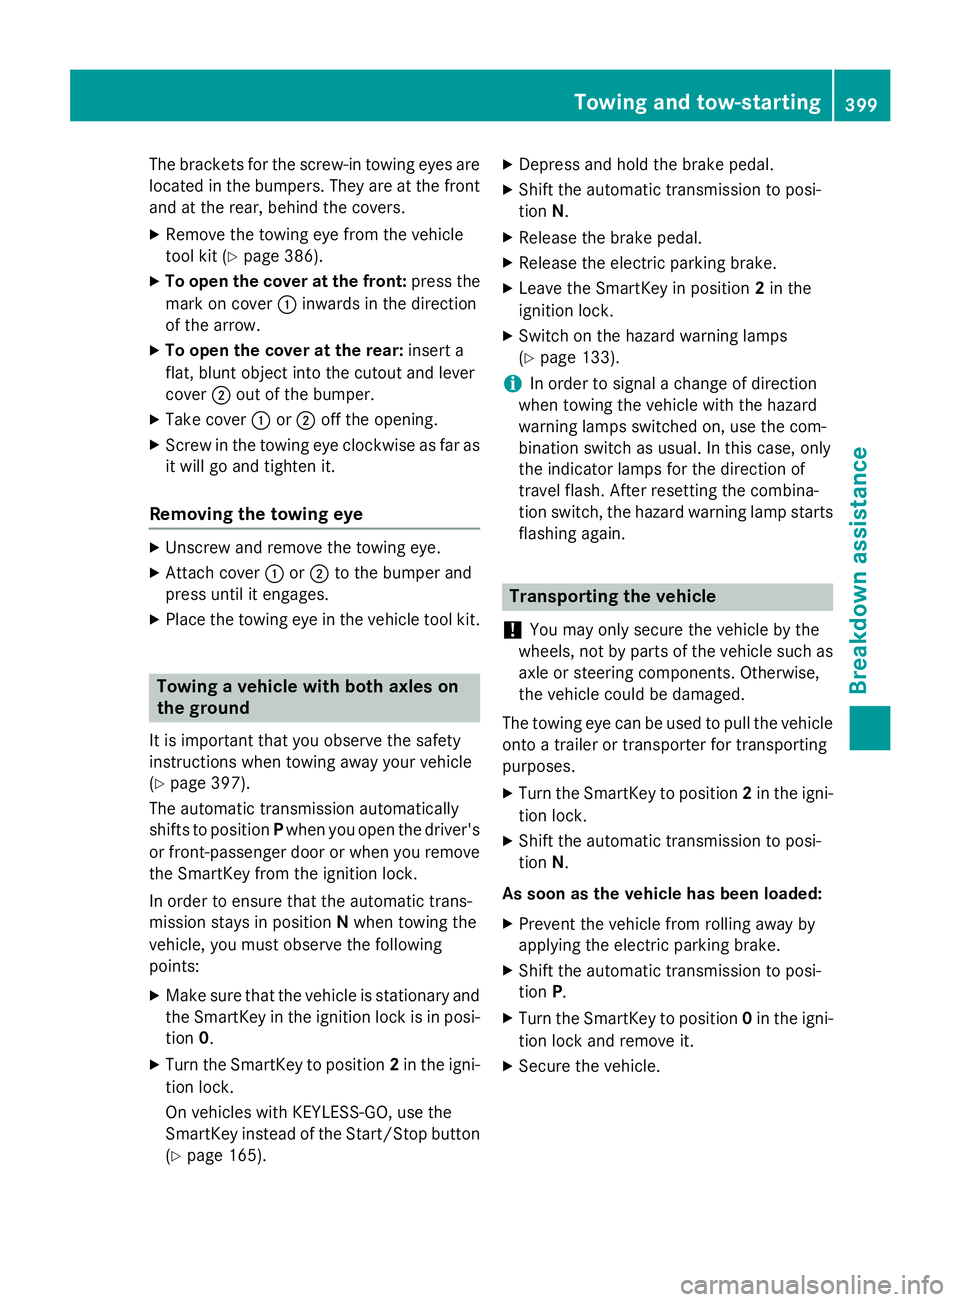
The brackets for the screw-in towing eyes are
located in the bumpers. They are at the front
and at the rear, behind the covers. X
Remove the towing eye from the vehicle
tool kit ( Y
page 386).X
To open the cover at the front: press the
mark on cover �C inwards in the direction
of the arrow. X
To open the cover at the rear: insert a
flat, blunt object into the cutout and lever
cover �D out of the bumper.X
Take cover �C or �D off the opening.X
Screw in the towing eye clockwise as far as
it will go and tighten it.
Removing the towing eye X
Unscrew and remove the towing eye. X
Attach cover �C or �D to the bumper and
press until it engages. X
Place the towing eye in the vehicle tool kit.
Towing a vehicle with both axles on
the ground
It is important that you observe the safety
instructions when towing away your vehicle
( Y
page 397).
The automatic transmission automatically
shifts to position P when you open the driver's
or front-passenger door or when you remove
the SmartKey from the ignition lock.
In order to ensure that the automatic trans-
mission stays in position N when towing the
vehicle, you must observe the following
points: X
Make sure that the vehicle is stationary and
the SmartKey in the ignition lock is in posi-
tion 0 .X
Turn the SmartKey to position 2 in the igni-
tion lock.
On vehicles with KEYLESS-GO, use the
SmartKey instead of the Start/Stop button
( Y
page 165). X
Depress and hold the brake pedal. X
Shift the automatic transmission to posi-
tion N . X
Release the brake pedal. X
Release the electric parking brake. X
Leave the SmartKey in position 2 in the
ignition lock. X
Switch on the hazard warning lamps
( Y
page 133).
i In order to signal a change of direction
when towing the vehicle with the hazard
warning lamps switched on, use the com-
bination switch as usual. In this case, only
the indicator lamps for the direction of
travel flash. After resetting the combina-
tion switch, the hazard warning lamp starts
flashing again.
Transporting the vehicle
! You may only secure the vehicle by the
wheels, not by parts of the vehicle such as
axle or steering components. Otherwise,
the vehicle could be damaged.
The towing eye can be used to pull the vehicle
onto a trailer or transporter for transporting
purposes. X
Turn the SmartKey to position 2 in the igni-
tion lock. X
Shift the automatic transmission to posi-
tion N .
As soon as the vehicle has been loaded: X
Prevent the vehicle from rolling away by
applying the electric parking brake. X
Shift the automatic transmission to posi-
tion P . X
Turn the SmartKey to position 0 in the igni-
tion lock and remove it. X
Secure the vehicle.Towing and tow-starting 399
Breakdown assistance Z
Page 403 of 462
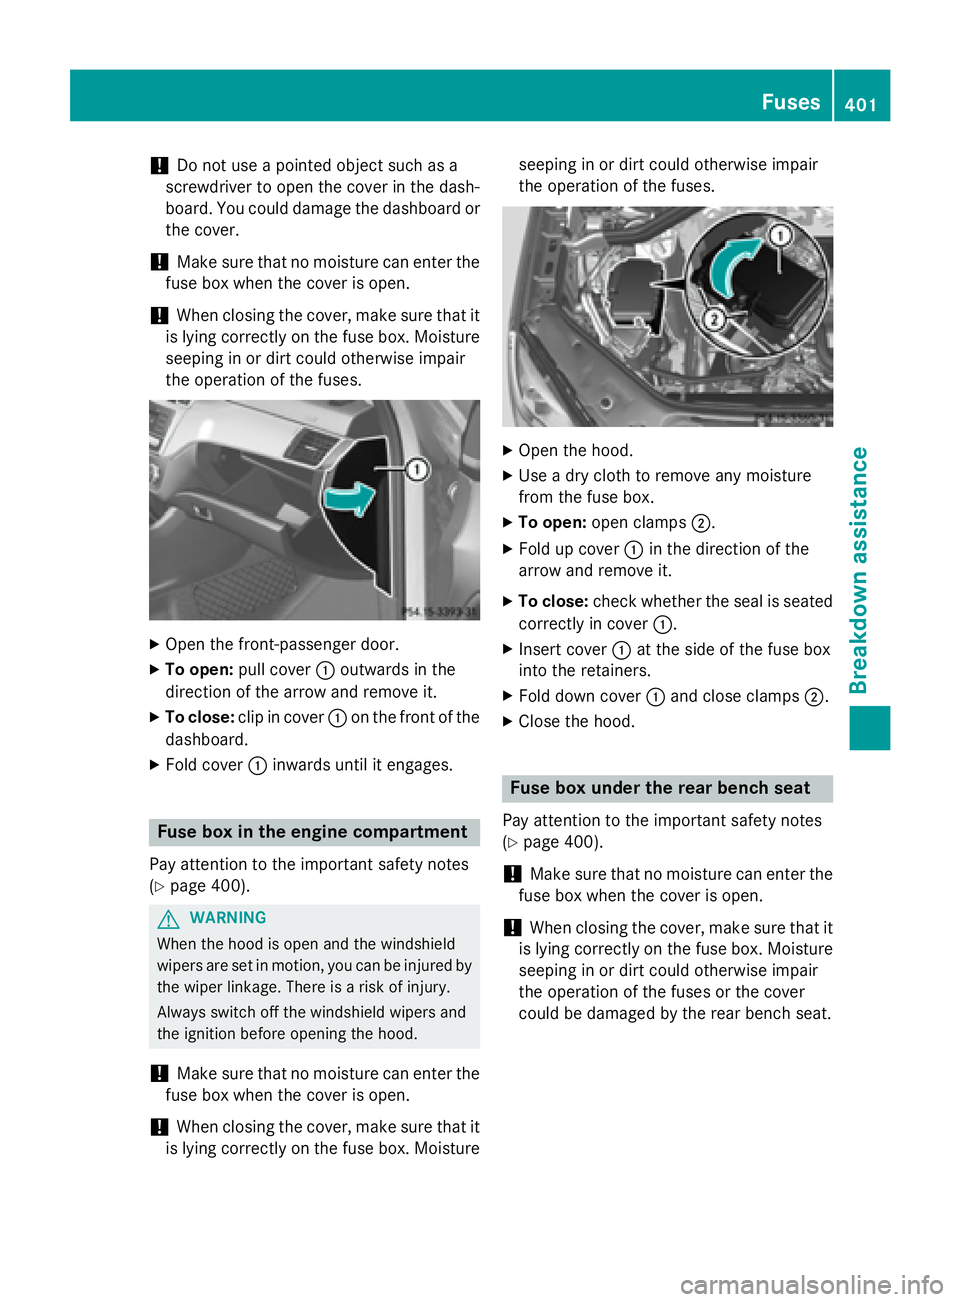
! Do not use a pointed object such as a
screwdriver to open the cover in the dash-
board. You could damage the dashboard or
the cover.
! Make sure that no moisture can enter the
fuse box when the cover is open.
! When closing the cover, make sure that it
is lying correctly on the fuse box. Moisture
seeping in or dirt could otherwise impair
the operation of the fuses.
X
Open the front-passenger door. X
To open: pull cover �C outwards in the
direction of the arrow and remove it. X
To close: clip in cover �C on the front of the
dashboard. X
Fold cover �C inwards until it engages.
Fuse box in the engine compartment
Pay attention to the important safety notes
( Y
page 400).
G WARNING
When the hood is open and the windshield
wipers are set in motion, you can be injured by
the wiper linkage. There is a risk of injury.
Always switch off the windshield wipers and
the ignition before opening the hood.
! Make sure that no moisture can enter the
fuse box when the cover is open.
! When closing the cover, make sure that it
is lying correctly on the fuse box. Moisture seeping in or dirt could otherwise impair
the operation of the fuses. X
Open the hood. X
Use a dry cloth to remove any moisture
from the fuse box. X
To open: open clamps �D .X
Fold up cover �C in the direction of the
arrow and remove it. X
To close: check whether the seal is seated
correctly in cover �C . X
Insert cover �C at the side of the fuse box
into the retainers. X
Fold down cover �C and close clamps �D .X
Close the hood.
Fuse box under the rear bench seat
Pay attention to the important safety notes
( Y
page 400).
! Make sure that no moisture can enter the
fuse box when the cover is open.
! When closing the cover, make sure that it
is lying correctly on the fuse box. Moisture
seeping in or dirt could otherwise impair
the operation of the fuses or the cover
could be damaged by the rear bench seat. Fuses 401
Breakdown assistance Z
Page 406 of 462
Useful information
i This Operator's Manual describes all
models and all standard and optional equip-
ment of your vehicle available at the time of
publication of the Operator's Manual.
Country-specific differences are possible.
Please note that your vehicle may not be
equipped with all features described. This
also applies to safety-related systems and
functions.
i Read the information on qualified special-
ist workshops ( Y
page 29).
Important safety notes
G WARNING
If wheels and tires of the wrong size are used,
the wheel brakes or suspension components
may be damaged. There is a risk of an acci-
dent.
Always replace wheels and tires with those
that fulfill the specifications of the original
part.
When replacing wheels, make sure to use the
correct: R
designation R
model
When replacing tires, make sure to use the
correct: R
designation R
manufacturer R
model
G WARNING
A flat tire severely impairs the driving, steer-
ing and braking characteristics of the vehicle.
There is a risk of accident.
Tires without run-flat characteristics: R
do not drive with a flat tire. R
immediately replace the flat tire with your
emergency spare wheel or spare wheel, or
consult a qualified specialist workshop. Tires with run-flat characteristics: R
pay attention to the information and warn-
ing notices on MOExtended tires (tires with
run-flat characteristics).
Accessories that are not approved for your
vehicle by Mercedes-Benz or that are not
being used correctly can impair operating
safety.
Before purchasing and using non-approved
accessories, visit a qualified specialist work-
shop and inquire about: R
suitability R
legal stipulations R
factory recommendations
Information on the sizes and types of wheels
and tires for your vehicle can be found under
"Wheel/tire combinations" ( Y
page 432).
Tire pressure information can be found: R
on the vehicle's Tire and Loading Informa-
tion placard on the B-pillar R
on the tire pressure label on the fuel filler
flap R
in the "Tire pressure" section
Operation
Information on driving
Check the tire pressure when the vehicle is
heavily laden and adjust prior to a trip.
While driving, pay attention to vibrations,
noises and unusual handling characteristics,
e.g. pulling to one side. This may indicate that
the wheels or tires are damaged. If you sus-
pect that a tire is defective, reduce your
speed immediately. Stop the vehicle as soon
as possible to check the wheels and tires for
damage. Hidden tire damage could also be
causing the unusual handling characteristics.
If you find no signs of damage, have the tires
and wheels checked at a qualified specialist
workshop.
When parking your vehicle, make sure that
the tires do not get deformed by the curb or404
Operation
Wheels and tires
Page 407 of 462
other obstacles. If it is necessary to drive over
curbs, speed humps or similar elevations, try
to do so slowly and at an obtuse angle. Oth-
erwise, the tires, particularly the sidewalls,
may be damaged.
Regular checking of wheels and tires
G WARNING
Damaged tires can cause tire inflation pres-
sure loss. As a result, you could lose control of
your vehicle. There is a risk of accident.
Check the tires regularly for signs of damage
and replace any damaged tires immediately.
Regularly check the wheels and tires of your
vehicle for damage at least once a month, as
well as after driving off-road or on rough
roads. Damaged wheels can cause a loss of
tire pressure. Pay particular attention to dam-
age such as: R
cuts in the tires R
punctures R
tears in the tires R
bulges on tires R
deformation or severe corrosion on wheels
Regularly check the tire tread depth and the
condition of the tread across the whole width
of the tire ( Y
page 405). If necessary, turn the
front wheels to full lock in order to inspect the
inner side of the tire surface.
All wheels must have a valve cap to protect
the valve against dirt and moisture. Do not
mount anything onto the valve other than the
standard valve cap or other valve caps
approved by Mercedes-Benz for your vehicle.
Do not use any other valve caps or systems,
e.g. tire pressure monitoring systems.
Regularly check the pressure of all the tires
particularly prior to long trips. Adjust the tire
pressure as necessary ( Y
page 408).
Observe the notes on the emergency spare
wheel ( Y
page 438). The service life of tires depends, among other
things, on the following factors: R
Driving style R
Tire pressure R
Distance covered
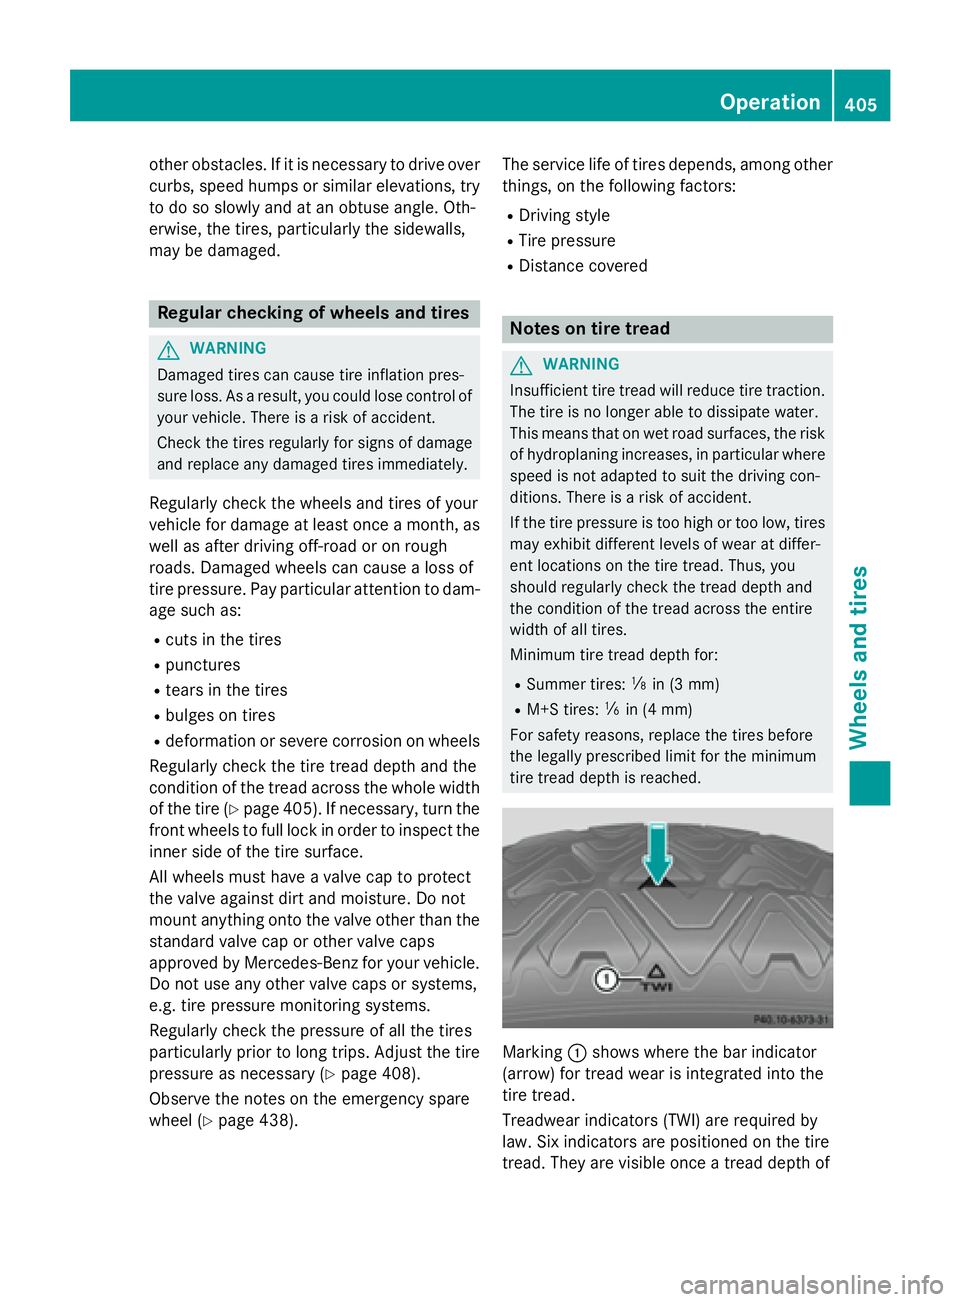
Notes on tire tread
G WARNING
Insufficient tire tread will reduce tire traction.
The tire is no longer able to dissipate water.
This means that on wet road surfaces, the risk
of hydroplaning increases, in particular where
speed is not adapted to suit the driving con-
ditions. There is a risk of accident.
If the tire pressure is too high or too low, tires
may exhibit different levels of wear at differ-
ent locations on the tire tread. Thus, you
should regularly check the tread depth and
the condition of the tread across the entire
width of all tires.
Minimum tire tread depth for: R
Summer tires: �
Page 409 of 462
Only winter tires bearing the �M snowflake
symbol in addition to the M+S marking pro-
vide the best possible grip in wintry road con-
ditions. Only these tires will allow driving
safety systems such as ABS and ESP ®
to
function optimally in winter. These tires have
been developed specifically for driving in
snow.
Use M+S tires of the same make and tread on
all wheels to maintain safe handling charac-
teristics.
Always observe the maximum permissible
speed specified for the M+S tires you have
mounted.
Once the winter tires are mounted: X
Check the tire pressures ( Y
page 411).X
Restart the tire pressure monitor
( Y
page 412). X
Vehicles for Canada: restart the tire pres-
sure loss warning system ( Y
page 412).
Information about driving with an emergency
spare wheel ( Y
page 438).
Snow chains
G WARNING
If snow chains are installed to the front
wheels, they may drag against the vehicle
body or chassis components. This could
cause damage to the vehicle or the tires.
There is a risk of an accident.
To avoid hazardous situations: R
never install snow chains to the front
wheels R
always install snow chains in pairs to the
rear wheels.
! You must drive at raised vehicle level
(height 1) if snow chains have been instal-
led. The vehicle may otherwise be dam-
aged.
! Vehicles with Adaptive Damping Sys-
tem (ADS): do not use the sports mode if you have installed snow chains. The vehicle
may otherwise be damaged.
! On some tire sizes there is not enough
space for snow chains. To avoid damage to
the vehicle or tires, observe the "Wheel and
tire combinations" section under "Tires and
wheels".
For safety reasons, Mercedes-Benz recom-
mends that you only use snow chains that
have been specially approved for your vehicle
by Mercedes-Benz, or are of a corresponding
standard of quality. For more information,
please contact a qualified specialist work-
shop.
If you intend to mount snow chains, please
bear the following points in mind: R
Only use snow chains when driving on
roads completely covered by snow.
Remove the snow chains as soon as possi-
ble when you come to a road that is not
snow-covered. R
Do not exceed the maximum permissible
speed of 30 mph (50 km/h). R
Local regulations may restrict the use of
snow chains. Observe the appropriate reg-
ulations if you wish to mount snow chains. R
Snow chains may not be mounted on all
wheel/tire combinations. Permissible
wheel-tire combinations ( Y
page 432).
You may wish to deactivate ESP ®
when pull-
ing away with snow chains installed
( Y
page 74). You can thereby allow the wheels
to spin in a controlled manner, achieving an
increased driving force (cutting action).
Information about driving with an emergency
spare wheel ( Y
page 438).Winter operation 407
Wheels and tires Z
Page 410 of 462
Tire pressure
Tire pressure specifications
Important safety notes
G WARNING
Underinflated or overinflated tires pose the
following risks: R
the tires may burst, especially as the load
and vehicle speed increase. R
the tires may wear excessively and/or
unevenly, which may greatly impair tire
traction. R
the driving characteristics, as well as steer-
ing and braking, may be greatly impaired.
There is a risk of an accident.
Follow recommended tire inflation pressures
and check the pressure of all the tires includ-
ing the spare wheel: R
monthly, at least R
if the load changes R
before beginning a long journey R
under different operating conditions, e.g.
off-road driving
If necessary, correct the tire pressure.
i The specifications on the sample Tire and
Loading Information placard and tire pres-
sure tables are examples. Tire pressure
specifications are vehicle-specific and may
deviate from the data shown here. The tire
pressure specifications that are valid for
your vehicle can be found on the Tire and
Loading Information placard and tire pres-
sure table on the vehicle.
General notes
The recommended tire pressures for the tires
mounted at the factory can be found on the
labels described here.
Operation with an emergency spare
wheel: information on operation with an
emergency spare wheel can be found in the general notes in the "Emergency spare wheel"
section ( Y
page 438).
Operation with a trailer: the applicable
value for the rear tires is the maximum tire
pressure value stated in the table inside the
fuel filler flap.
Further information on tire pressures can be
obtained at a qualified specialist workshop.
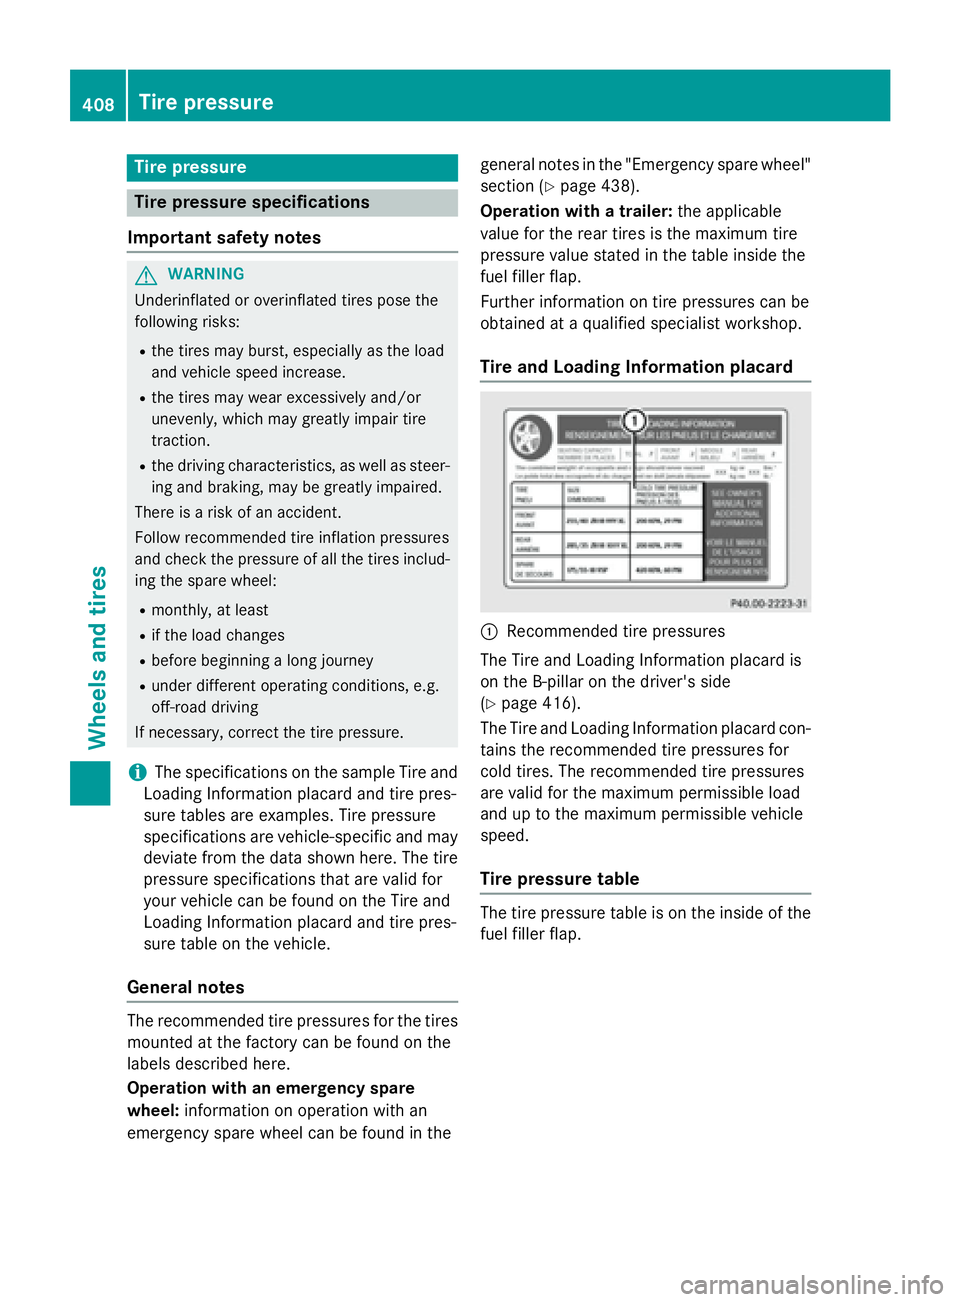
Tire and Loading Information placard
�C
Recommended tire pressures
The Tire and Loading Information placard is
on the B-pillar on the driver's side
( Y
page 416).
The Tire and Loading Information placard con-
tains the recommended tire pressures for
cold tires. The recommended tire pressures
are valid for the maximum permissible load
and up to the maximum permissible vehicle
speed.
Tire pressure table
The tire pressure table is on the inside of the
fuel filler flap.408
Tire pressure
Wheels and tires
Page 411 of 462
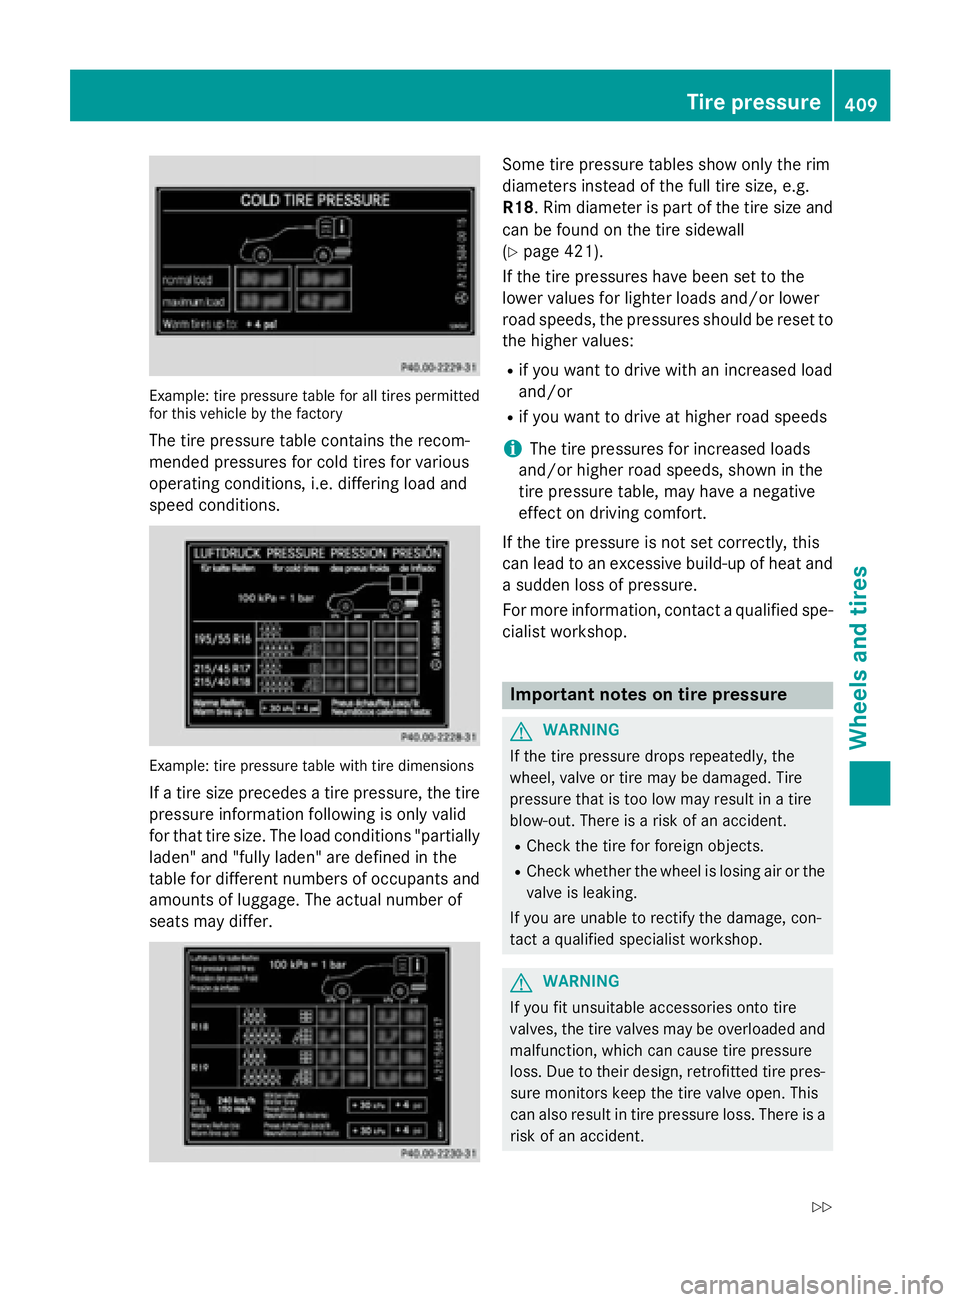
Example: tire pressure table for all tires permitted
for this vehicle by the factory
The tire pressure table contains the recom-
mended pressures for cold tires for various
operating conditions, i.e. differing load and
speed conditions.
Example: tire pressure table with tire dimensions
If a tire size precedes a tire pressure, the tire
pressure information following is only valid
for that tire size. The load conditions "partially
laden" and "fully laden" are defined in the
table for different numbers of occupants and
amounts of luggage. The actual number of
seats may differ. Some tire pressure tables show only the rim
diameters instead of the full tire size, e.g.
R18 . Rim diameter is part of the tire size and
can be found on the tire sidewall
( Y
page 421).
If the tire pressures have been set to the
lower values for lighter loads and/or lower
road speeds, the pressures should be reset to
the higher values: R
if you want to drive with an increased load
and/or R
if you want to drive at higher road speeds
i The tire pressures for increased loads
and/or higher road speeds, shown in the
tire pressure table, may have a negative
effect on driving comfort.
If the tire pressure is not set correctly, this
can lead to an excessive build-up of heat and
a sudden loss of pressure.
For more information, contact a qualified spe-
cialist workshop.
Important notes on tire pressure
G WARNING
If the tire pressure drops repeatedly, the
wheel, valve or tire may be damaged. Tire
pressure that is too low may result in a tire
blow-out. There is a risk of an accident. R
Check the tire for foreign objects. R
Check whether the wheel is losing air or the
valve is leaking.
If you are unable to rectify the damage, con-
tact a qualified specialist workshop.
G WARNING
If you fit unsuitable accessories onto tire
valves, the tire valves may be overloaded and
malfunction, which can cause tire pressure
loss. Due to their design, retrofitted tire pres-
sure monitors keep the tire valve open. This
can also result in tire pressure loss. There is a
risk of an accident. Tire pressure 409
Wheels and tires Z
Page 412 of 462
Only screw the standard valve cap or other
valve caps approved by Mercedes-Benz for
your vehicle onto the tire valve.
Use a suitable pressure gage to check the tire
pressure. The outer appearance of a tire does
not permit any reliable conclusion about the
tire pressure. On vehicles equipped with the
electronic tire pressure monitor, the tire pres-
sure can be checked in the on-board com-
puter.
The tire temperature and pressure increase
when the vehicle is in motion. This is depend-
ent on the driving speed and the load.
Therefore, you should only correct tire pres-
sures when the tires are cold.
The tires are cold: R
if the vehicle has been parked with the tires
out of direct sunlight for at least three
hours and R
if the vehicle has not been driven further
than 1 mile (1.6 km)
The tire temperature changes depending on
the outside temperature, the vehicle speed
and the tire load. If the tire temperature
changes by 18 ‡ (10 †), the tire pressure
changes by approximately 10 kPa (0.1 bar/
1.5 psi). Take this into account when check-
ing the pressure of warm tires. Only correct
the tire pressure if it is too low for the current
operating conditions. If you check the tire
pressure when the tires are warm, the result-
ing value will be higher than if the tires were
cold. This is normal. Do not reduce the tire
pressure to the value specified for cold tires.
The tire pressure would otherwise be too low.
Observe the recommended tire pressures for
cold tires: R
on the Tire and Loading Information placard
on the B-pillar on the driver's side R
in the tire pressure table on the inside of the
fuel filler flap R
printed in yellow on the rim of the emer-
gency/collapsible spare wheel (depending
on vehicle equipment) Underinflated or overinflated tires
Underinflated tires
G WARNING
Tires with pressure that is too low can over-
heat and burst as a consequence. In addition,
they also suffer from excessive and/or irreg-
ular wear, which can severely impair the brak-
ing properties and the driving characteristics.
There is a risk of an accident.
Avoid tire pressures that are too low in all the
tires, including the spare wheel.
Underinflated tires may: R
overheat, leading to tire defects R
adversely affect handling R
wear excessively and/or unevenly R
have an adverse effect on fuel consumption
Overinflated tires
G WARNING
Tires with excessively high pressure can burst
because they are damaged more easily by
road debris, potholes etc. In addition, they
also suffer from irregular wear, which can
severely impair the braking properties and the
driving characteristics. There is a risk of an
accident.
Avoid tire pressures that are too high in all the
tires, including the spare wheel.
Overinflated tires may: R
increase the braking distance R
adversely affect handling R
wear excessively and/or unevenly R
have an adverse effect on ride comfort R
be more susceptible to damage410
Tire pressure
Wheels and tires