2016 MERCEDES-BENZ GL warning
[x] Cancel search: warningPage 253 of 462
Either no braking application, or a course-
correcting brake application adapted to the
driving situation occurs if: R
there are vehicles or obstacles, e.g. crash
barriers, close to both sides of your vehicle. R
a vehicle approaches you too closely at the
side. R
you have adopted a sporty driving style with
high cornering speeds. R
you brake or accelerate significantly. R
a driving safety system intervenes, e.g.
ESP ®
or PRE-SAFE ®
Brake.R
ESP ®
is switched off.R
the off-road program is activated (vehicles
without the ON&OFFROAD package). R
off-road program 1 or 2 is activated (vehi-
cles with the ON&OFFROAD package). R
the LOW RANGE off-road gear is activated
(vehicles with the ON&OFFROAD package). R
a loss of tire pressure or a defective tire is
detected.
Switching on Active Blind Spot Assist X
Make sure that Active Blind Spot Assist is
activated in the on-board computer
( Y
page 282). X
Turn the SmartKey to position 2 in the igni-
tion lock.
Warning lamps �C in the exterior mirrors
light up red for approximately 1.5 seconds
and then turn yellow.
Towing a trailer
When you attach a trailer, make sure you have
co rr ectly established the electrical connec-
tion. This can be accomplished by checking
the trailer lighting. Active Blind Spot Assist is
then deactivated. The indicator lamp lights up
yellow in the exterior mirrors and the Active
Blind Spot Assist Currently Unavail‐
able See Operator's Manual message
appears in the multifunction display. Active Lane Keeping Assist General notes
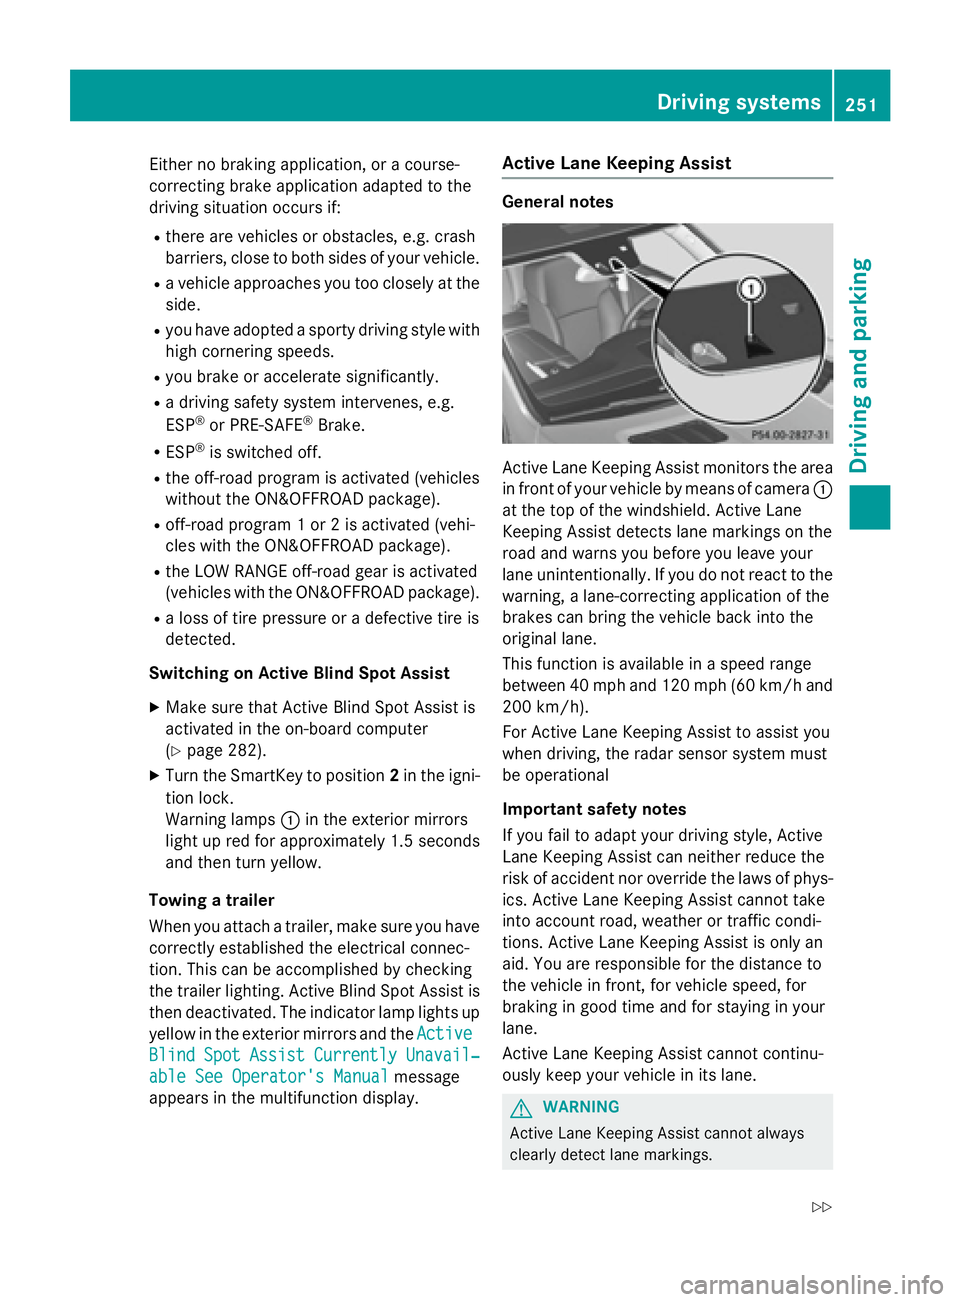
Active Lane Keeping Assist monitors the area
in front of your vehicle by means of camera �C
at the top of the windshield. Active Lane
Keeping Assist detects lane markings on the
road and warns you before you leave your
lane unintentionally. If you do not react to the
warning, a lane-correcting application of the
brakes can bring the vehicle back into the
original lane.
This function is available in a speed range
between 40 mph and 120 mph (60 km/h and
200 km/h).
For Active Lane Keeping Assist to assist you
when driving, the radar sensor system must
be operational
Important safety notes
If you fail to adapt your driving style, Active
Lane Keeping Assist can neither reduce the
risk of accident nor override the laws of phys-
ics. Active Lane Keeping Assist cannot take
into account road, weather or traffic condi-
tions. Active Lane Keeping Assist is only an
aid. You are responsible for the distance to
the vehicle in front, for vehicle speed, for
braking in good time and for staying in your
lane.
Active Lane Keeping Assist cannot continu-
ously keep your vehicle in its lane.
G WARNING
Active Lane Keeping Assist cannot always
clearly detect lane markings.Driving system s 251
Dr ivi ng an d parking Z
Page 254 of 462
In such cases, Active Lane Keeping Assist
can: R
give an unnecessary warning and then
make a course-correcting brake application
to the vehicle R
not give a warning or intervene
There is a risk of an accident.
Always pay particular attention to the traffic
situation and keep within the lane, especially
if Active Lane Keeping Assist alerts you. Ter-
minate the intervention in a non-critical driv-
ing situation.
The system may be impaired or may not func-
tion if: R
there is poor visibility, e.g. due to insuffi-
cient illumination of the road, or due to
snow, rain, fog or spray R
there is glare, e.g. from oncoming traffic,
the sun or reflections (e.g. when the road
surface is wet) R
the windshield is dirty, fogged up, damaged
or covered, for instance by a sticker, in the
vicinity of the camera R
there are no, several or unclear lane mark-
ings for a lane, e.g. in areas with road con-
struction work R
the lane markings are worn away, dark or
covered up, e.g. by dirt or snow R
the distance to the vehicle in front is too
small and the lane markings thus cannot be
detected R
the lane markings change quickly, e.g.
lanes branch off, cross one another or
merge R
the road is narrow and winding R
there are highly variable shade conditions
on the roadway R
no vehicle is detected in the adjacent lane
and there are broken lane markings
Warning vibration in the steering wheel
A warning may be given if a front wheel
passes over a lane marking. It will warn you by means of intermittent vibration in the steer-
ing wheel for up to 1.5 seconds.
In order that you are warned only when nec-
essary and in good time if you cross the lane
marking, the system recognizes certain con-
ditions and warns you accordingly.
The warning vibration occurs earlier if: R
you approach the outer lane marking on a
bend. R
the road has very wide lanes, e.g. a high-
way. R
the system recognizes solid lane markings.
The warning vibration occurs later if: R
the road has narrow lanes. R
you cut the corner on a bend.
Lane-correcting brake application
G WARNING
A lane-correcting brake application cannot
always bring the vehicle back into the original
lane. There is a risk of an accident.
Always steer, brake or accelerate yourself,
especially if Active Lane Keeping Assist warns
you or makes a lane-correcting brake appli-
cation.
G WARNING
Active Lane Keeping Assist does not detect
traffic conditions or road users. In very rare
cases, the system may make an inappropriate
brake application, e.g. after intentionally driv-
ing over a solid lane marking. There is a risk of
an accident.
An inappropriate brake application may be
interrupted at any time if you steer slightly in
the opposite direction. Always make sure that
there is sufficient distance on the side for
other traffic or obstacles.252
Driving systems
Driving and parking
Page 255 of 462
If you leave your lane, under certain circum-
stances the vehicle will brake briefly on one
side. This is meant to assist you in bringing
the vehicle back to the original lane.
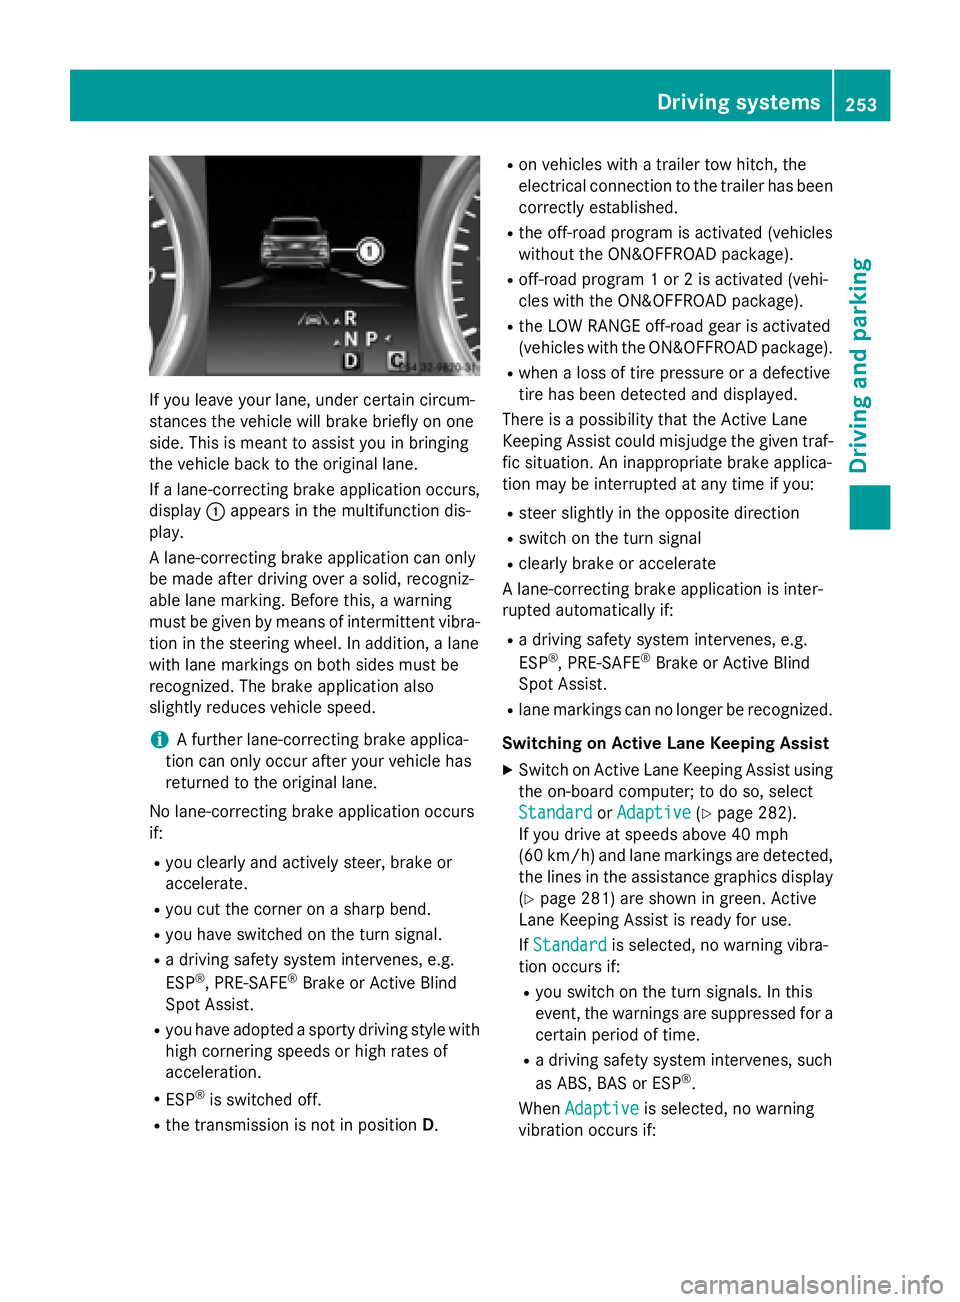
If a lane-correcting brake application occurs,
display �C appears in the multifunction dis-
play.
A lane-correcting brake application can only
be made after driving over a solid, recogniz-
able lane marking. Before this, a warning
must be given by means of intermittent vibra-
tion in the steering wheel. In addition, a lane
with lane markings on both sides must be
recognized. The brake application also
slightly reduces vehicle speed.
i A further lane-correcting brake applica-
tion can only occur after your vehicle has
returned to the original lane.
No lane-correcting brake application occurs
if: R
you clearly and actively steer, brake or
accelerate. R
you cut the corner on a sharp bend. R
you have switched on the turn signal. R
a driving safety system intervenes, e.g.
ESP ®
, PRE-SAFE ®
Brake or Active Blind
Spot Assist. R
you have adopted a sporty driving style with
high cornering speeds or high rates of
acceleration. R
ESP ®
is switched off.R
the transmission is not in position D . R
on vehicles with a trailer tow hitch, the
electrical connection to the trailer has been
correctly established. R
the off-road program is activated (vehicles
without the ON&OFFROAD package). R
off-road program 1 or 2 is activated (vehi-
cles with the ON&OFFROAD package). R
the LOW RANGE off-road gear is activated
(vehicles with the ON&OFFROAD package). R
when a loss of tire pressure or a defective
tire has been detected and displayed.
There is a possibility that the Active Lane
Keeping Assist could misjudge the given traf-
fic situation. An inappropriate brake applica-
tion may be interrupted at any time if you: R
steer slightly in the opposite direction R
switch on the turn signal R
clearly brake or accelerate
A lane-correcting brake application is inter-
rupted automatically if: R
a driving safety system intervenes, e.g.
ESP ®
, PRE-SAFE ®
Brake or Active Blind
Spot Assist. R
lane markings can no longer be recognized.
Switching on Active Lane Keeping Assist X
Switch on Active Lane Keeping Assist using
the on-board computer; to do so, select
Standard
or Adaptive ( Y
page 282).
If you drive at speeds above 40 mph
(60 km/h) and lane markings are detected,
the lines in the assistance graphics display
( Y
page 281) are shown in green. Active
Lane Keeping Assist is ready for use.
If Standard is selected, no warning vibra-
tion occurs if: R
you switch on the turn signals. In this
event, the warnings are suppressed for a
certain period of time. R
a driving safety system intervenes, such
as ABS, BAS or ESP ®
.
When Adaptive is selected, no warning
vibration occurs if: Driving systems 253
Driving and parking Z
Page 256 of 462
R
you switch on th e tur n signals. In this
event , th e warnings are suppressed fo r a
certain period of time. R
a drivin g safet y system intervenes, e.g.
ABS, BA S or ES P ®
.R
you accelerat e hard, e.g. kickdown .R
you brak e hard.R
you steer actively, e.g. swerve to avoid an
obstacle or chang e lanes quickly.R
you cut th e corner on a shar p bend.
Towing a trailer
Whe n you attach a trailer , mak e sur e you hav e
correctl y established th e electrica l connec -
tion . This can be accomplished by checking
th e trailer lighting . Lane-correcting brak e
application doe s no t take plac e when towin g
a trailer . Active Lan e Keepin g Assis t is no t
activated and th e lines in th e assistanc e
graphi c are gray.
On-road program s (vehicles wit h th e
ON&OFFROAD package)
General notes
The on-road programs assist you during on -
road drivin g and th e off-road programs when
drivin g off-road ( Y
page 258).
The following program message s remain in
th e multifunction display until th e corre-
spondin g vehicl e level has been set . Up to off-
road level 2, you can hide th e program mes -
sage s usin g th e �8 or �v butto n on th e
multifunction steerin g wheel. AUT O program
Selec t th e AUTO program fo r a mor e com-
fortable rid e under all normal drivin g condi-
tions.
Your selection remain s stored eve n if you
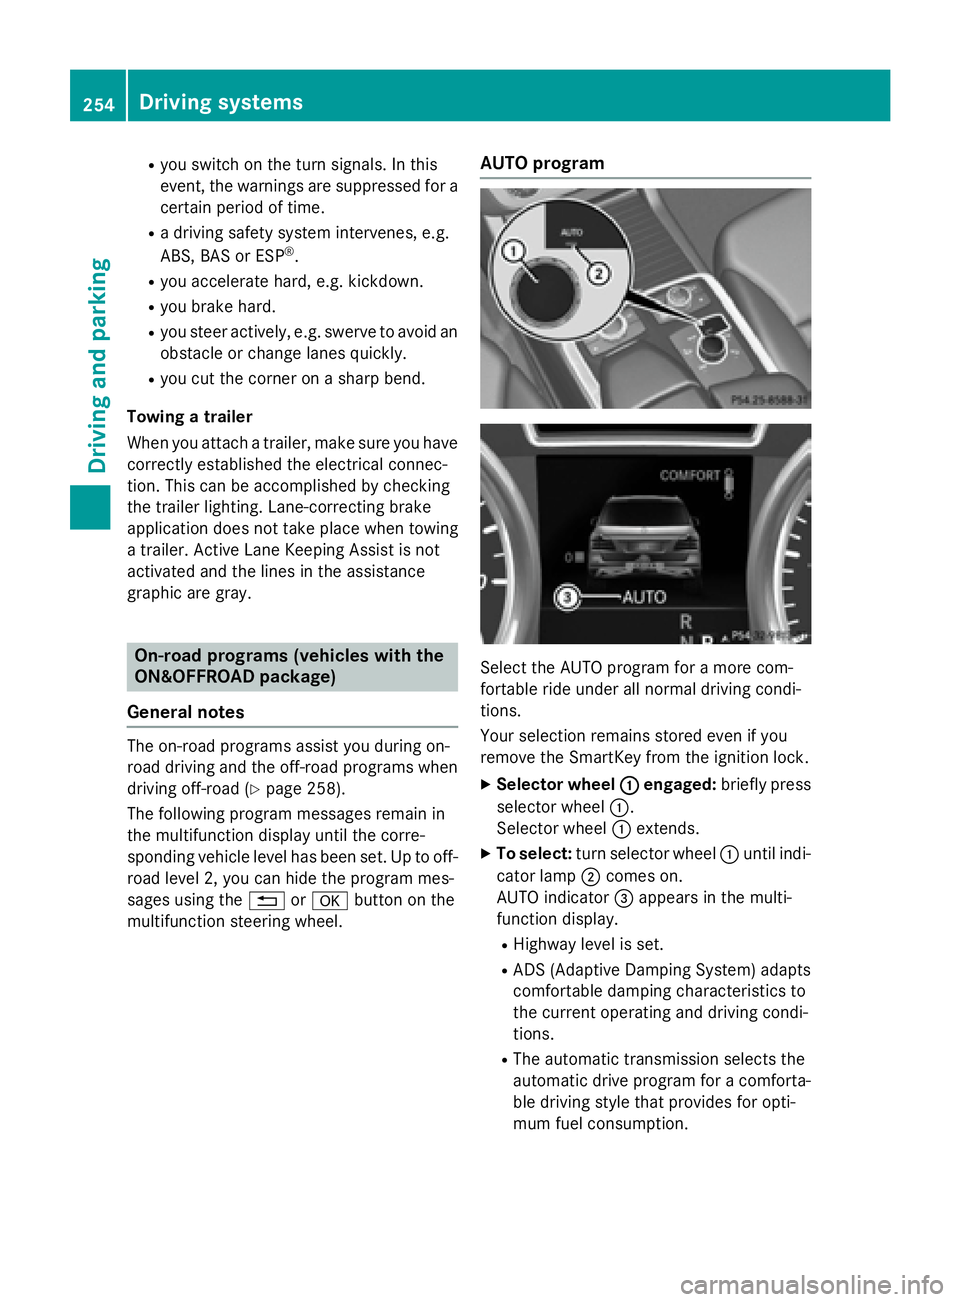
remov e th e SmartKey from th e ignition lock.X
Selecto r wheel �C engaged : briefl y press
selector whee l �C .
Selecto r whee l �C extends. X
To select : tur n selector whee l �C until indi-
cator lamp �D comes on .
AUTO indicator �
Page 259 of 462
! A function or performance test should
only be carried out on a two-axle dyna-
mometer. Before you operate the vehicle
on such a dynamometer, please consult a
qualified workshop. You could otherwise
damage the drive train or the brake system.
i In wintry driving conditions, the maximum
effect of 4MATIC can only be achieved if
you use winter tires (M +S tires), with snow
chains if necessary.
Further information about "Driving off-road"
( Y
page 198).
DSR (Downhill Speed Regulation) General notes
DSR is an aid to assist you when driving down-
hill. It keeps the speed of travel at the speed
selected on the on-board computer. The
steeper the downhill gradient, the greater the
DSR braking effect on the vehicle. When driv-
ing on flat stretches of road or on an uphill
gradient, the DSR braking effect is minimal or
nonexistent.
DSR controls the vehicle’s speed when it is
activated and the transmission is in position
D , R or N . You can drive at a higher or a lower
speed than that set on the on-board computer
at any time by accelerating or braking.
Important safety notes
G WARNING
If the speed driven and the set speed deviate
and you activate DSR on a slippery road sur-
face, the wheels may lose traction. There is an
increased danger of skidding and accidents.
Before switching DSR on, please take into
consideration the road surface and the differ-
ence between driving speed and the set
speed.
If you fail to adapt your driving style, DSR can
neither reduce the risk of accident nor over-
ride the laws of physics. DSR cannot take
account of road, weather and traffic condi-
tions. DSR is only an aid. You are responsible for the distance to the vehicle in front, for
vehicle speed, for braking in good time and for
staying in your lane.
You are always responsible for keeping con-
trol of the vehicle and for assessing whether
the downhill gradient can be managed. DSR
may not always be able to keep to the set
speed, depending on road surface and tire
conditions. Select a set speed suitable for the
prevailing conditions and when necessary,
apply the brakes manually.
Activating DSR
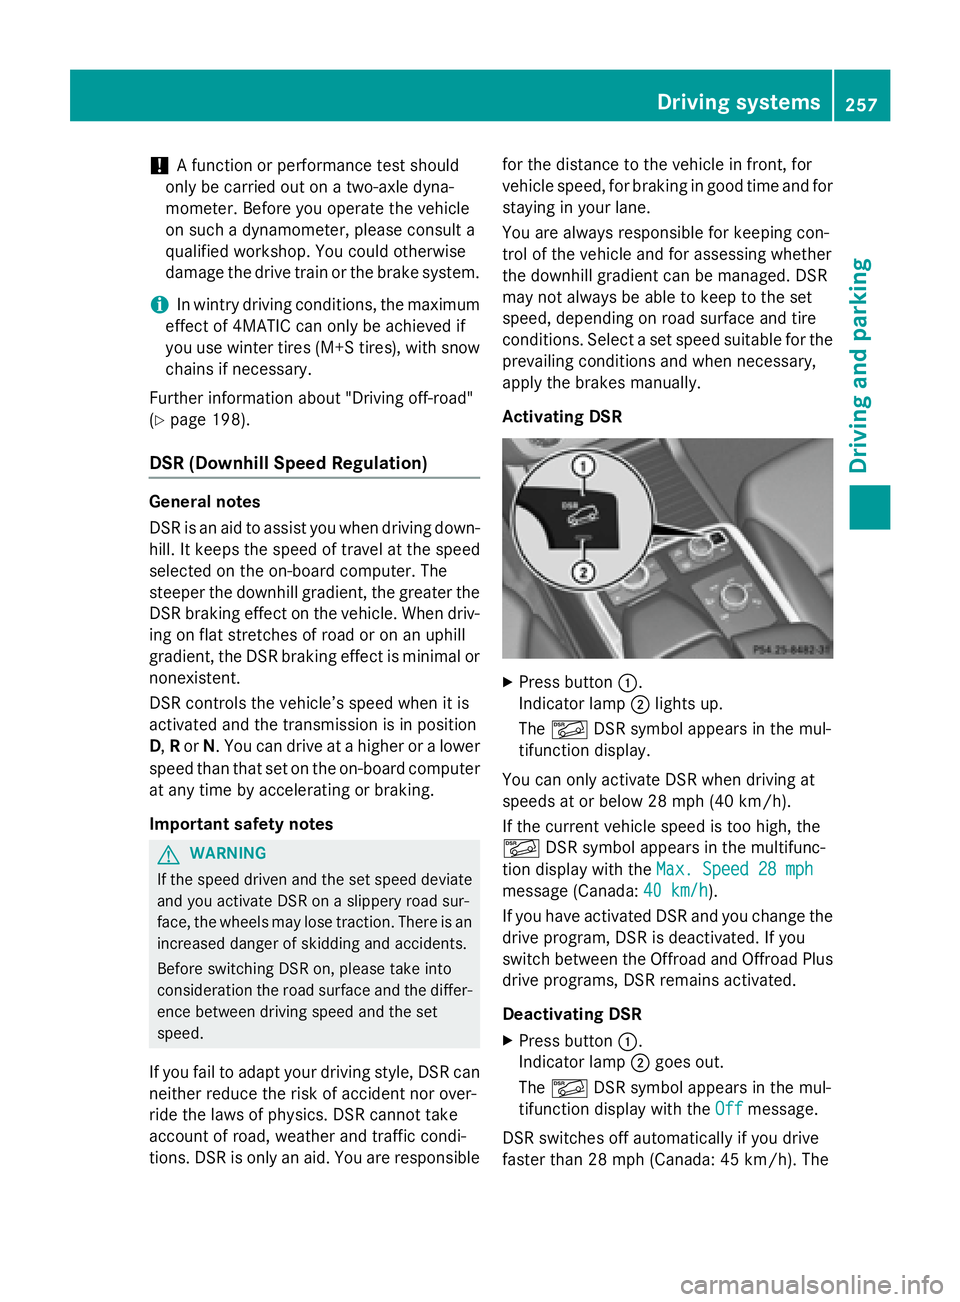
X
Press button �C .
Indicator lamp �D lights up.
The �
Page 264 of 462
Messages in the multifunction display
If a gear change process has not been successful, the following messages may be displayed in
the multifunction display:
Display messages
Possible causes/consequences and �P Solutions
LOW RANGE Max.
Speed 40 km/h You have been driving faster than 40 km/h. Additionally, the indi-
cator lamp on the button in the center console blinks. X
Drive more slowly to carry out the gear change process.
LOW RANGE Shift to
Position N Briefly The transmission is in position D and you are driving at below
40 km/h. X
Shift the transmission to N to complete the gear change proc-
ess.
LOW RANGE Shifting
Canceled Please
Reactivate The gear change process was not carried out. X
Ensure that all gear change conditions are fulfilled and carry out
the gear change process again.
LOW RANGE Stop
Apply Parking Brake A warning tone also sounds. The gear change process has not been
completed. LOW RANGE is in the neutral position. There is no
connection between the engine and the drive wheels.
! Do not drive any further. You could otherwise damage the
vehicle's drive train. X
Stop the vehicle. Take into account the road and traffic condi-
tions when doing this. X
Depress the electric parking brake ( Y
page 190).X
Carry out the gear change process again.
If the gear change process has been carried out, the LOW
RANGE
Stop Apply Parking Brake message disappears.
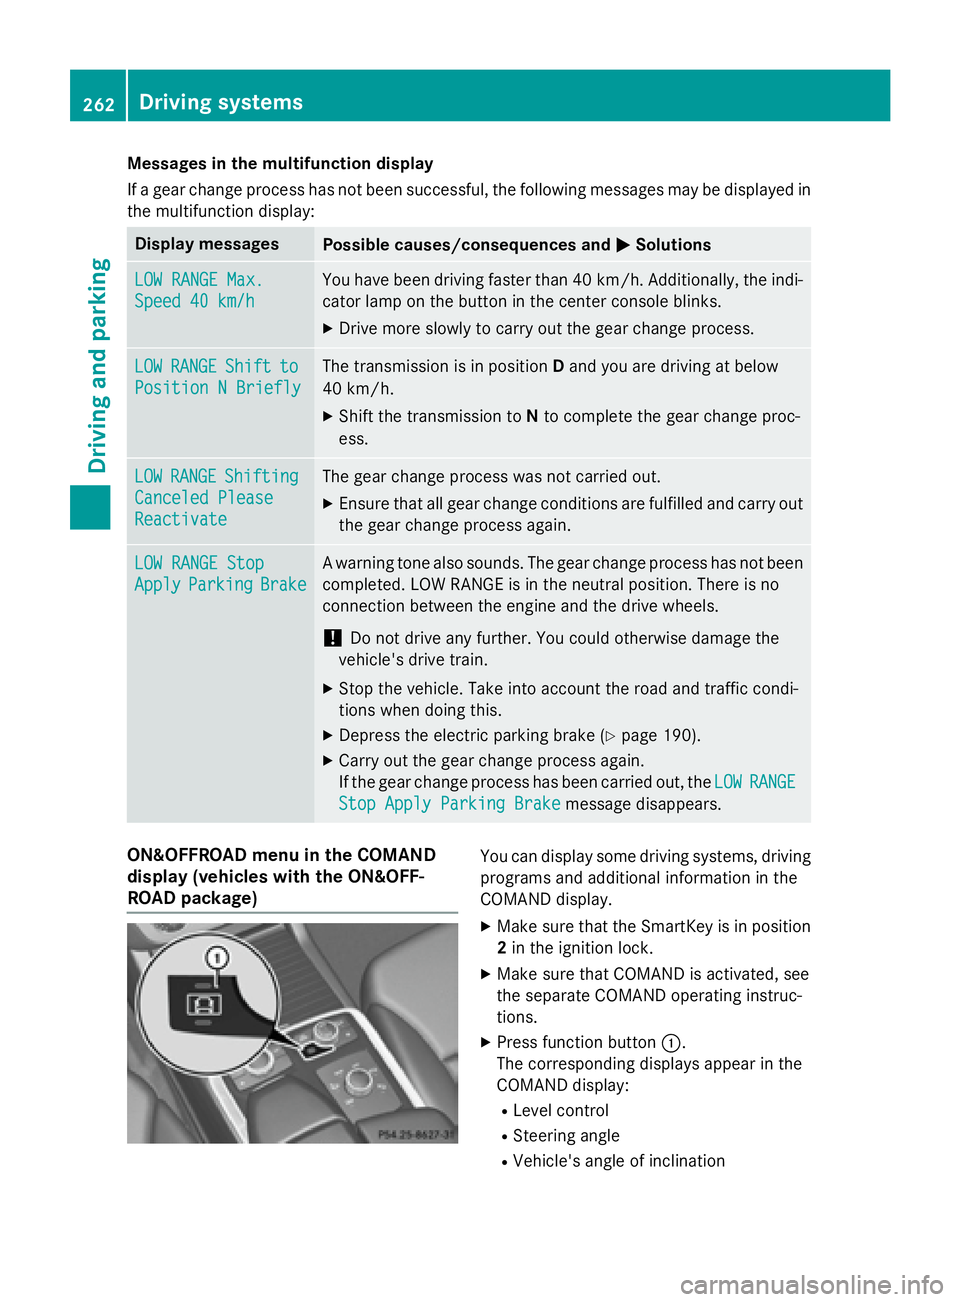
ON&OFFROAD menu in the COMAND
display (vehicles with the ON&OFF-
ROAD package) You can display some driving systems, driving
programs and additional information in the
COMAND display. X
Make sure that the SmartKey is in position
2 in the ignition lock. X
Make sure that COMAND is activated, see
the separate COMAND operating instruc-
tions. X
Press function button �C .
The corresponding displays appear in the
COMAND display: R
Level control R
Steering angle R
Vehicle's angle of inclination262
Driving systems
Driving and parking
Page 265 of 462
R
Uphill or downhill gradient in percentage R
On-road/off-road program selected R
Condition of the differential lock for the
transfer case R
LOW RANGE off-road gear is selected R
Condition of the LOW RANGE off-road
gear R
On-road trailer program is selected
Towing a trailer
Important safety notes
G WARNING
Installing an unsuitable ball coupling may
result in overloading of the trailer tow hitch
and the rear axle. This applies especially if the
ball coupling in question is longer or angled
differently. This could seriously impair the
driving characteristics and the trailer can
come loose. There is a risk of an accident.
You should only ever install a ball coupling
that has the permissible dimensions and that
is designed to meet your trailer-towing
requirements. Do not modify the ball coupling
or the trailer tow hitch.
You will find the values approved by the man-
ufacturer on the vehicle identification plates
and those for the towing vehicle under "Tech-
nical data" ( Y
page 458).
G WARNING
If the ball coupling is not installed correctly or
not secured with the bolt provided and the
corresponding spring cotter, the trailer may
come loose. There is a risk of an accident.
Always install and secure the ball coupling as
described. Before every journey, ensure that
the ball coupling is secured with the bolt and
the corresponding spring cotter.
G WARNING
When the vehicle/trailer combination begins
to lurch, you could lose control of it. The vehi- cle/trailer combination could even rollover.
There is a risk of an accident.
On no account should you attempt to
straighten up the vehicle/trailer combination
by increasing the speed. Reduce vehicle
speed and do not countersteer. Apply the
brake as necessary.
Please observe the manufacturer's operating
instructions for the trailer coupling if a
detachable trailer coupling is used.
Couple and uncouple the trailer carefully. If
you do not couple the trailer to the towing
vehicle correctly, the trailer could become
detached.
Make sure that the following values are not
exceeded: R
the permissible trailer drawbar noseweight R
the permissible trailer load R
the permissible rear axle load of the towing
vehicle R
the maximum permissible gross vehicle
weight of both the towing vehicle and the
trailer
The applicable permissible values, which
must not be exceeded, can be found: R
in the vehicle documents R
on the identification plates for the trailer
tow hitch and the trailer R
on the vehicle identification plate
If the values differ, the lowest value applies.
When towing a trailer, your vehicle's handling
characteristics will be different in comparison
with when driving without a trailer.
The vehicle/trailer combination: R
is heavier R
is restricted in its acceleration and gradi-
ent-climbing capability R
has an increased braking distance R
is affected more by strong crosswinds R
demands more sensitive steering R
has a larger turning radius Towing a trailer 263
Driving and parking Z
Page 267 of 462
Drivin g tipsIf th e trailer swings from sid e to side:X
Do no t accelerate.X
Do no t counter-steer .X
Brak e if necessary.R
Maintain a greater distanc e from th e vehi-
cl e in fron t than when drivin g without a
trailer .R
Avoid braking abruptly. If possible, brake
gentl y at first to allow th e trailer to run on .
Then, increase th e braking forc e rapidly.R
The values given fo r gradient-climbin g
capabilities from a standstill refer to sea
level. Whe n drivin g in mountainous areas,
note that th e powe r output of th e engin e
and , consequently, th e vehicle' s gradient-
climbin g capability, decreases wit h
increasing altitude.
Installing th e ball coupling
G WARNING
If th e ball couplin g is no t correctl y installed
and secured, it can come loose durin g th e
journey and endanger other road users. There
is a ris k of an acciden t and injury.
Always install and secure th e ball couplin g as
described . Before every journey, ensur e that
th e ball couplin g is secure d wit h th e bolt and
th e correspondin g sprin g cotter.
G WARNING
If th e ball couplin g is no t installed correctl y or
no t secure d wit h th e bolt provided and th e
correspondin g sprin g cotter, th e trailer may
come loose. There is a ris k of an accident.
Always install and secure th e ball couplin g as
described . Before every journey, ensur e that
th e ball couplin g is secure d wit h th e bolt and
th e correspondin g sprin g cotter. G WARNING
If th e ball couplin g is no t installed and secure d
correctl y th e trailer may come loose. There is
a ris k of an accident.
Install and secure th e ball couplin g as descri-
bed in th e ball couplin g installation instruc -
tions. Mak e sur e that th e ball couplin g is
installed and secure d correctl y befor e every
journey.
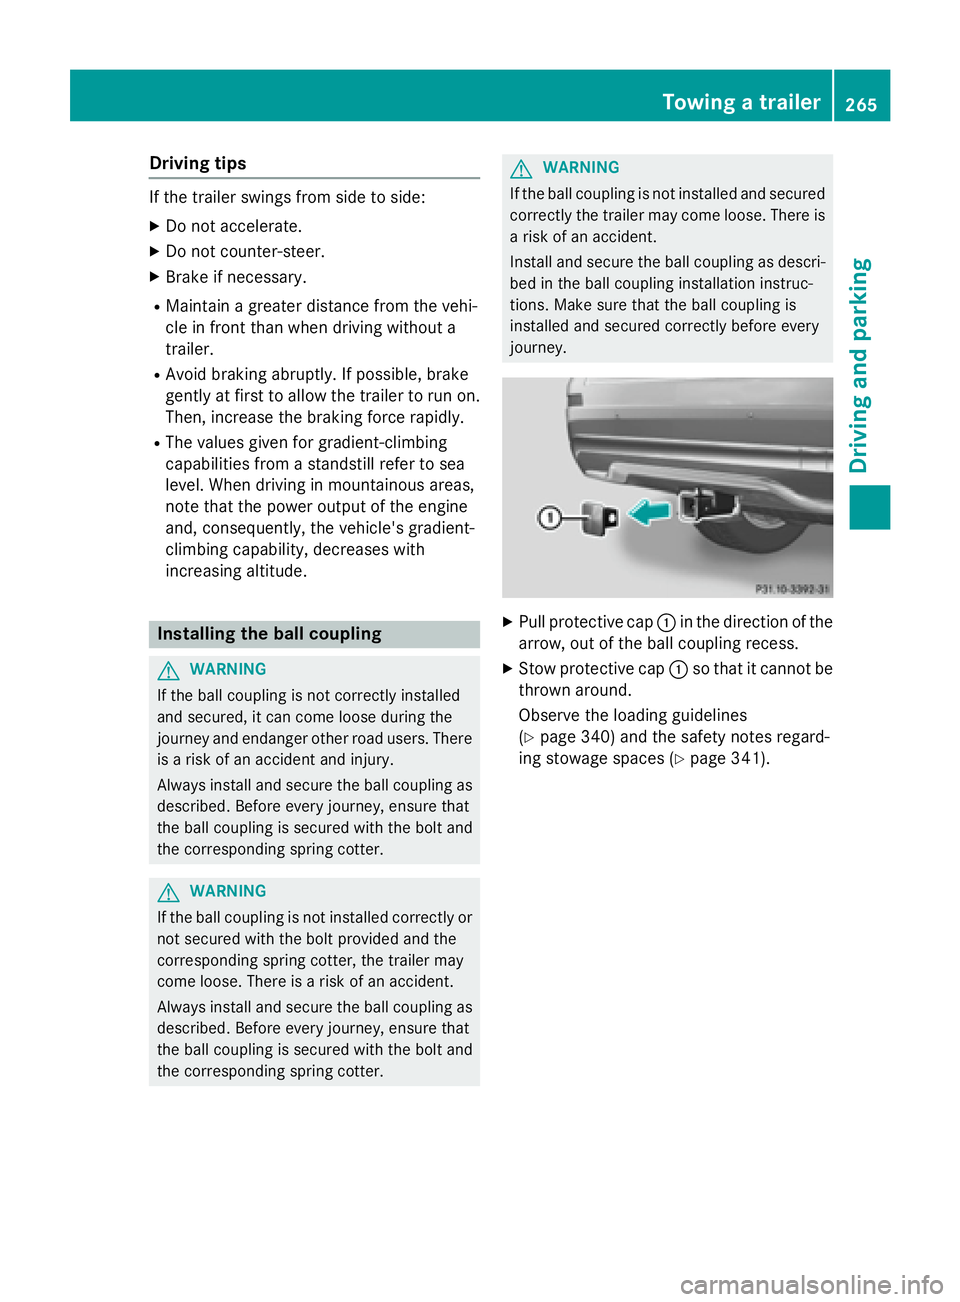
X
Pull protective cap �C in th e direction of th e
arrow, out of th e ball couplin g recess .X
Stow protective cap �C so that it canno t be
thrown around .
Observ e th e loadin g guidelines
( Y
page 340) and th e safet y note s regard -
in g stowag e spaces ( Y
page 341).Towing a trailer 265
Driving and parking Z