2016 MERCEDES-BENZ GL-Class automatic transmission
[x] Cancel search: automatic transmissionPage 13 of 246

State/provinceSelecting .......................................... 70
Station presets (radio)
Deleting marked stations ............... 168
Stop function
Video DVD .....................................2 02
Storing stations
Radio ............................................. 168
Switching between summer time
and standard time ............................... 42
Switching on media mode
Using the Media button ................. 178
Via the device list .......................... 179
Via the main function bar ............... 179
Via the number keypad .................. 179
System settings
Bluetooth
®....................................... 48
Date ................................................. 41
Importing/exporting data ................ 49
Language ......................................... 48
Text reader speed ............................ 44
Time ................................................. 41
Time zone ........................................ 41
Voice Control System ...................... 44
T
Telephone
Accepting a call (COMAND) ........... 119
Adding a call .................................. 121
Adjusting the volume for calls .......... 31
Authorizing a mobile phone (con-
necting) ......................................... 116
Call lists ......................................... 135
Call waiting .................................... 122
Calls with several participants ....... 121
Conference calls ............................ 122
Connecting a mobile phone (gen-
eral information) ............................ 114
De-authorizing (disconnecting) a
mobile phone ................................. 118
Deleting a speed dial preset .......... 137
Deleting messages ........................ 145
Displaying Bluetooth
®connection
details ............................................ 118
Downloading messages manually .. 140
E-mail ............................................. 138
E-mail requirements ....................... 138 E-mail settings ............................... 138
Ending an active call ...................... 123
Entering a number ......................... 119
Entering phone numbers ................ 119
Establishing the connection from
the mobile phone ........................... 117
Function restrictions ...................... 113
Functions available during a call .... 120
General notes ................................ 112
Incoming call during an existing
call ................................................. 122
Making a call ................................. 119
Message conditions ....................... 138
Message settings ........................... 138
Operating options .......................... 113
Phone book .................................... 123
Reading messages ......................... 140
Reception and transmission vol-
ume ............................................... 118
Reconnecting a mobile phone
automatically ................................. 117
Rejecting a call (COMAND) ............ 119
Safety notes .................................. 112
Sending DTMF tones ...................... 121
Setting up a speed dial .................. 137
Switching between calls (call wait-
ing) ................................................ 121
Switching between mobile
phones ........................................... 117
Switching the microphone on/of
f..1 21
Telephone menu overview ....... ...... 113
Text message condi
tions ...............1 38
Text message settings ................... 138
Text messages (SMS) .................... 138
Toggling ......................................... 121
Using the telephone ....................... 119
Writing e-mails ............................... 142
Writing text messages ................... 142
Telephone number
Entering ......................................... 119
Text messages (SMS)
Calling the sender .......................... 144
Calling up the settings menu ......... 138
Configuring the text messages
displayed ....................................... 139
Deleting ......................................... 145
Displaying details ........................... 141
Downloading manually ................... 140
Index11
Page 60 of 246

XTo selectReset: turn and press the con-
troller.
XTo select a seat: slide 1the controller.
XTo reset: press the controller.
A prompt appears.
XTo select YesorNo: turn and press the con-
troller.
If you select No
the process is canceled.
After selecting Yes
all seat adjustments are
reset to the default values (factory setting).
360° camera
General notes
The 360° camera surveys the vehicle sur-
roundings and assists you, for example when
parking or at exits with reduced visibility.
The 360° camera is only an aid. It is not a
replacement for your attention to your imme-
diate surroundings. You are always responsi-
ble for safe maneuvering and parking. Make
sure that no persons or animals are in the
maneuvering range.
Further information on the 360°camera can
be found in the vehicle Operator's Manual.
Displaying the 360° camera image
The 360° camera image can be displayed if:
Ryour vehicle is equipped with a 360° cam-
era
Rthe 360° Camerafunction is activated;
(see the vehicle Operator's Manual)
XPress the Øbutton on the COMAND
control panel.
or
XPress Vehiclein the main function bar.
The vehicle menu is displayed.
XSelect 360° Camera.
The 360° camera image appears in split-
screen mode. You will see the previous view on the display
if, when the function is switched on:
Ryou turn the SmartKey to position
1in the
ignition lock
Ryou select transmission position P
Rwhen you are driving at moderate speeds
Switching the display off manually
XTo select &: slide 6and press the con-
troller.
Switching the display on automatically
XYou can automatically switch the 360 cam-
era display using reverse gear
(
Ypage 58).
Switching the 360° camera auto-
matic mode on/off
This function activates the 360° camera
when reverse gear is engaged.
XPress the Øbutton on the COMAND
control panel.
or
XPress Vehiclein the main function bar.
The vehicle menu is displayed.
XTo switch to the menu bar: slide6the
controller.
XTo select System Settings: turn and
press the controller.
XTo select 360°Camera: turn and press the
controller.
The 360° Camera
menu appears.
XSelect Activation by R gear.
The function is switched on Oor off ª,
depending on the previous status.
Opening the camera cover for clean-
ing
XTo select OpenCameraCoverin the 360°
camera menu: turn the controller and press
to confirm.
The Please
Wait...message appears for
approximately three seconds.
58360° camera
Vehicle functions
Page 61 of 246

The camera cover opens.
The camera cover closes automatically if:
Rthe ignition is switched off
Rthe vehicle exceeds a moderate speed
Rear view camera
General notes
The rear view camera covers the immediate
surroundings of the vehicle and assists you
when parking.
The rear view camera is only an aid. It is not a
replacement for your attention to your imme-
diate surroundings. You are always responsi- ble for safe maneuvering and parking. When
maneuvering or parking, make sure that there
are no persons, animals or objects in the area in which you are maneuvering.
You can find further information about the
rear view camera in the vehicle Operator's
Manual.
Switching the rear view camera auto-
matic mode on/off
This function activates the rear view camera
when reverse gear is engaged.
XPress the Øbutton on the COMAND
control panel.
or
XPress Vehiclein the main function bar.
The vehicle menu is displayed.
XSlide 6the controller.
XTo select System Settings: turn and
press the controller.
XSelect Rear View Camera.
The Rear View Camera
menu appears.
XSelect Activation by R gear.
The function is switched on Oor off ª,
depending on the previous status.
When you start the vehicle and engage
reverse gear, the area behind the vehicle is
shown with guide lines in the display. You can find further information about the rear
view camera in the vehicle Operator's Man-
ual.
Opening the camera cover for clean-
ing
XTo select
Open Camera Coverin the rear
view camera menu: turn and press the con-
troller.
The Please
Wait...message appears for
approximately three seconds.
The camera cover opens.
The camera cover closes automatically if:
Rthe ignition is switched off
Rthe vehicle pulls away
DYNAMIC SELECT
General notes
Press DYNAMIC SELECTto configure the fol-
lowing settings and adjustment values for the
Individual
drive program:
RDrive system
RSuspension
RSteering
RClimate control
RECO start/stop function
iIn a few countries, the ECO start/stop
function is deactivated at the factory due to the available fuel grade. In this case, the
ECO start/stop function is not available
regardless of the display in the COMAND
display.
For Mercedes-AMG GLE 63 vehicles, press
DYNAMIC SELECT
to configure the following
settings and adjustment values for the Indi‐
vidualdrive program:
RDrive system
RSuspension
RTransmission
DYNAMIC SELECT59
Vehicle functions
Z
Page 63 of 246

You can choose from the following settings
for the ECO start/stop function:
ONSwitches the ECO
start/stop function
on
UnlitSwitches the ECO
start/stop function
off
Setting options (Mercedes-AMG GLE
vehicles)
You can choose from the following settings
for the drive:
RRace
CComfort
SSport
S+Sport +
You can make the following settings for the
suspension:
CComfort
SSport
S+Sport +
You can choose from the following settings
for the transmission:
DAutomatic
Mmanually
You can find further information on the indi-
vidual drive program in the vehicle Operator's
Manual.
DYNAMIC SELECT61
Vehicle functions
Z
Page 192 of 246

iIf available, the album list and covers are
shown.
iThere is a database for iPod®and for each
of the other media sources (CD, USB, SD
card). During the search the relevant data-
base is accessed depending on the active
media source.
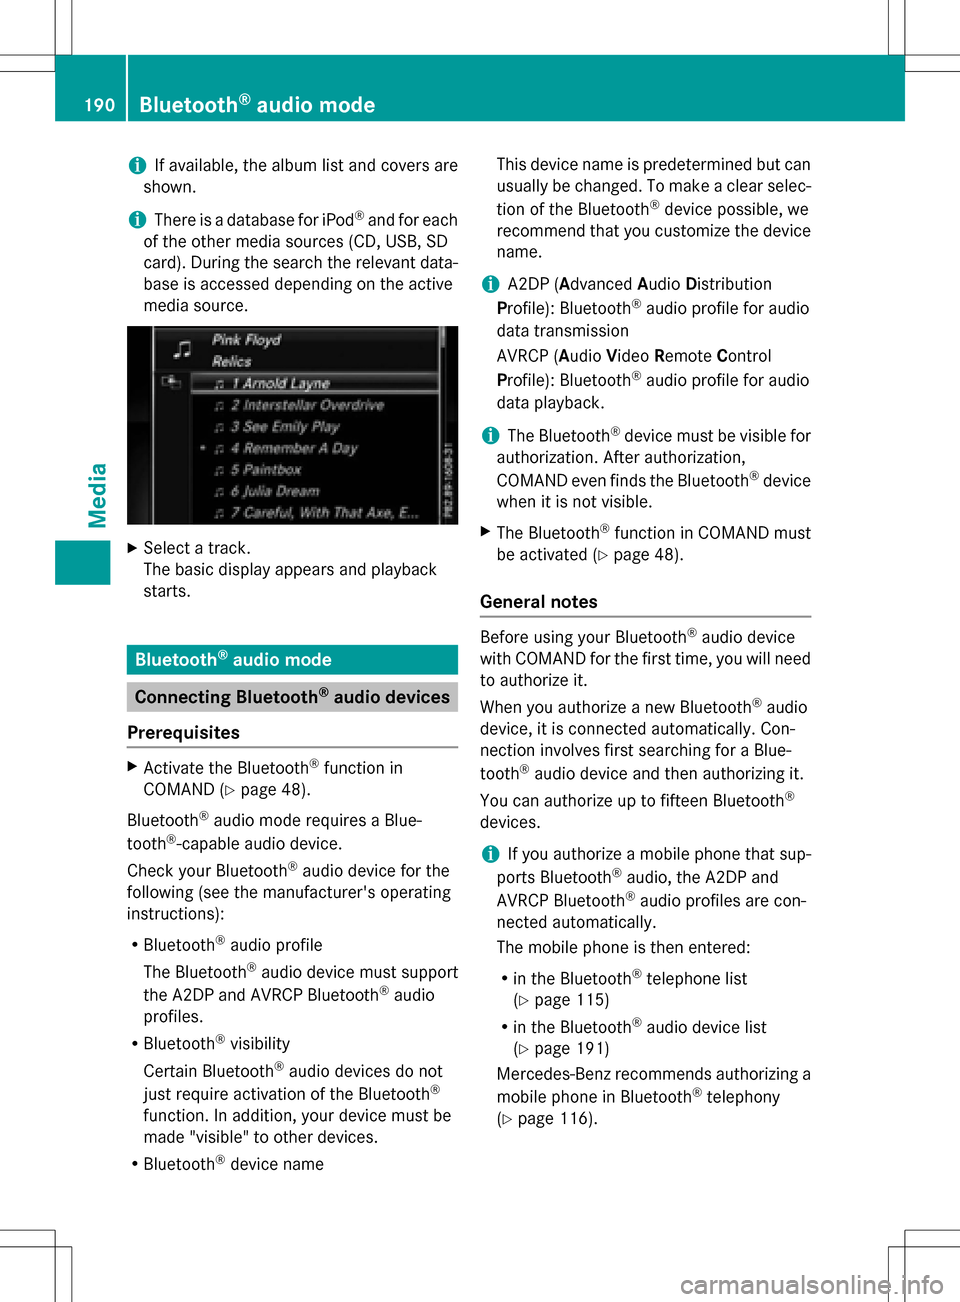
XSelect a track.
The basic display appears and playback
starts.
Bluetooth®audio mode
Connecting Bluetooth®audio devices
Prerequisites
XActivate the Bluetooth®function in
COMAND (
Ypage 48).
Bluetooth
®audio mode requires a Blue-
tooth®-capable audio device.
Check your Bluetooth
®audio device for the
following (see the manufacturer's operating
instructions):
RBluetooth®audio profile
The Bluetooth
®audio device must support
the A2DP and AVRCP Bluetooth®audio
profiles.
RBluetooth®visibility
Certain Bluetooth
®audio devices do not
just require activation of the Bluetooth®
function. In addition, your device must be
made "visible" to other devices.
RBluetooth®device name This device name is predetermined but can
usually be changed. To make a clear selec-
tion of the Bluetooth
®device possible, we
recommend that you customize the device
name.
iA2DP (A dvanced Audio Distribution
Profile): Bluetooth®audio profile for audio
data transmission
AVRCP (A udioVideo Remote Control
Profile): Bluetooth
®audio profile for audio
data playback.
iThe Bluetooth®device must be visible for
authorization. After authorization,
COMAND even finds the Bluetooth
®device
when it is not visible.
XThe Bluetooth®function in COMAND must
be activated (
Ypage 48).
General notes
Before using your Bluetooth®audio device
with COMAND for the first time, you will need
to authorize it.
When you authorize a new Bluetooth
®audio
device, it is connected automatically. Con-
nection involves first searching for a Blue-
tooth
®audio device and then authorizing it.
You can authorize up to fifteen Bluetooth
®
devices.
iIf you authorize a mobile phone that sup-
ports Bluetooth®audio, the A2DP and
AVRCP Bluetooth®audio profiles are con-
nected automatically.
The mobile phone is then entered:
Rin the Bluetooth®telephone list
(
Ypage 115)
Rin the Bluetooth®audio device list
(
Ypage 191)
Mercedes-Benz recommends authorizing a
mobile phone in Bluetooth
®telephony
(
Ypage 116).
190Bluetooth®audio mode
Media