2016 MERCEDES-BENZ G-CLASS SUV mirror
[x] Cancel search: mirrorPage 74 of 261
even suffer burn-like injuries. There is
arisk of
injury.
Therefore, do not switch on the seat heating
repeatedly.
The red indicator lamps in the button indicate
the heating level you have selected.
X Make sure that the key is in position 1or2
in the ignition lock.
i If the batter
yvoltage is too low, the seat
heating may switch off.
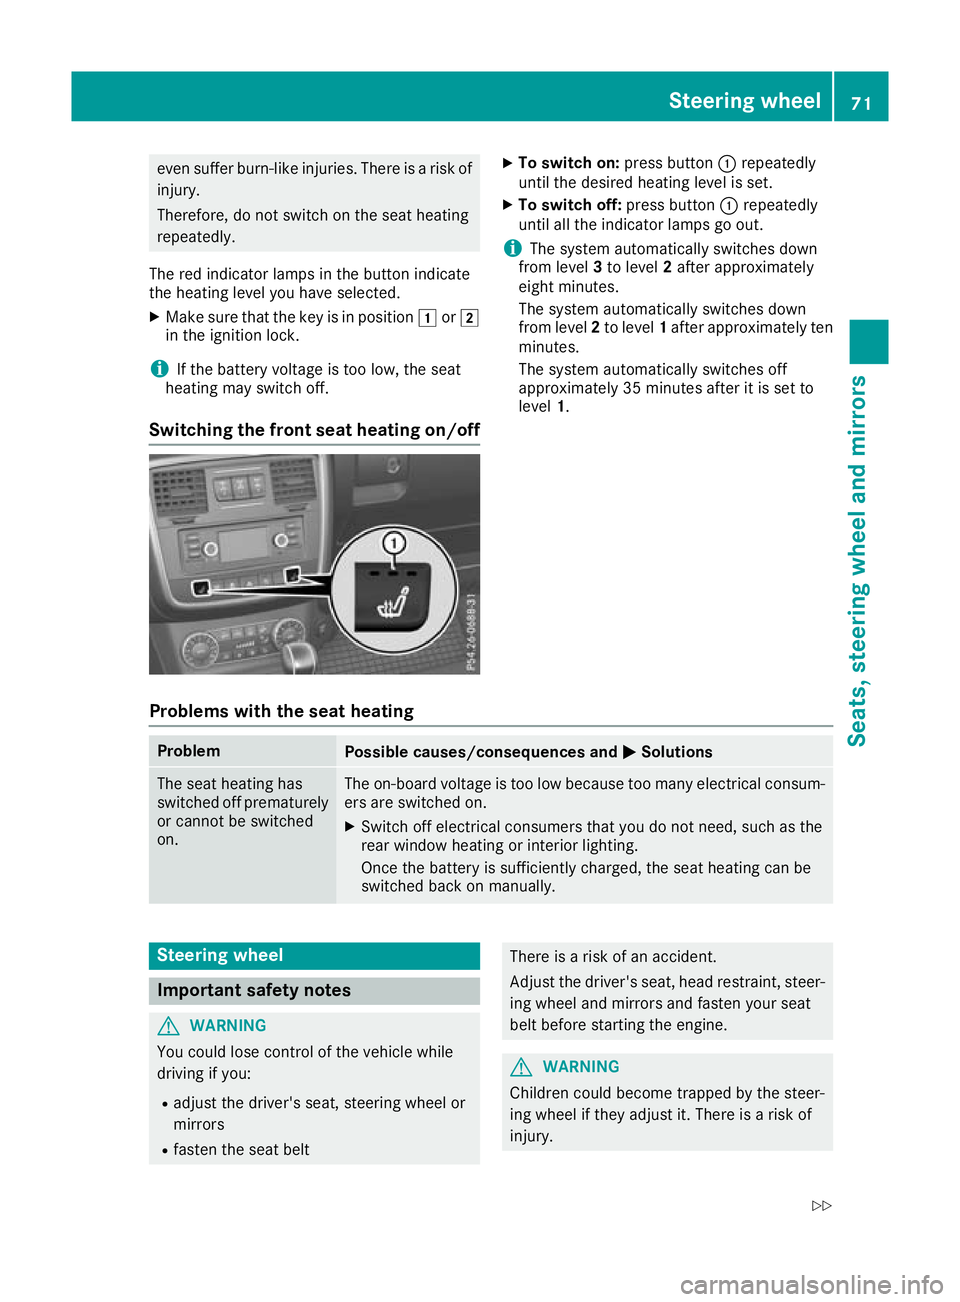
Switching the front seat heating on/off X
To switch on: press button:repeatedly
until th edesir ed heating level is set.
X To switc hoff:press button :repeatedly
unti lallthe indicator lamps go out.
i The system automaticall
yswitches down
from level 3to level 2afte rapproximately
eight minutes.
The system automaticall yswitches down
from level 2to level 1afte rapp roximatel yten
minutes.
The system automaticall yswitches off
approximatel y35minutes afte ritisset to
level 1.
Problems wit hthe seat heating Problem
Possible causes/consequences and
M MSolutions The seat heating has
switched off prematurely
or cannot be switched
on. The on-board voltage is too low because too many electrical consum-
ers are switched on.
X Switch off electrical consumers that you do not need, such as the
rear window heating or interior lighting.
Once the battery is sufficiently charged, the seat heating can be
switched back on manually. Steering wheel
Important safety notes
G
WARNING
You could lose control of the vehicle while
driving if you:
R adjust the driver's seat, steering wheel or
mirrors
R faste nthe seat belt There is
arisk of an accident.
Adjust the driver's seat, head restraint, steer- ing wheel and mirrors and fasten your seat
belt before starting the engine. G
WARNING
Children could becom etrappe dbythe steer-
ing whee lifthey adjust it. There is arisk of
injury. Steering wheel
71Seats,steering wheela nd mirrors
Z
Page 75 of 261
When leaving the vehicle, alway
stake the key
with you and lock the vehicle. Never leave
children unattended in the vehicle.
The electrically adjustable steerin gwheel can
still be adjusted when there is no key in the igni-
tion lock. Adjust
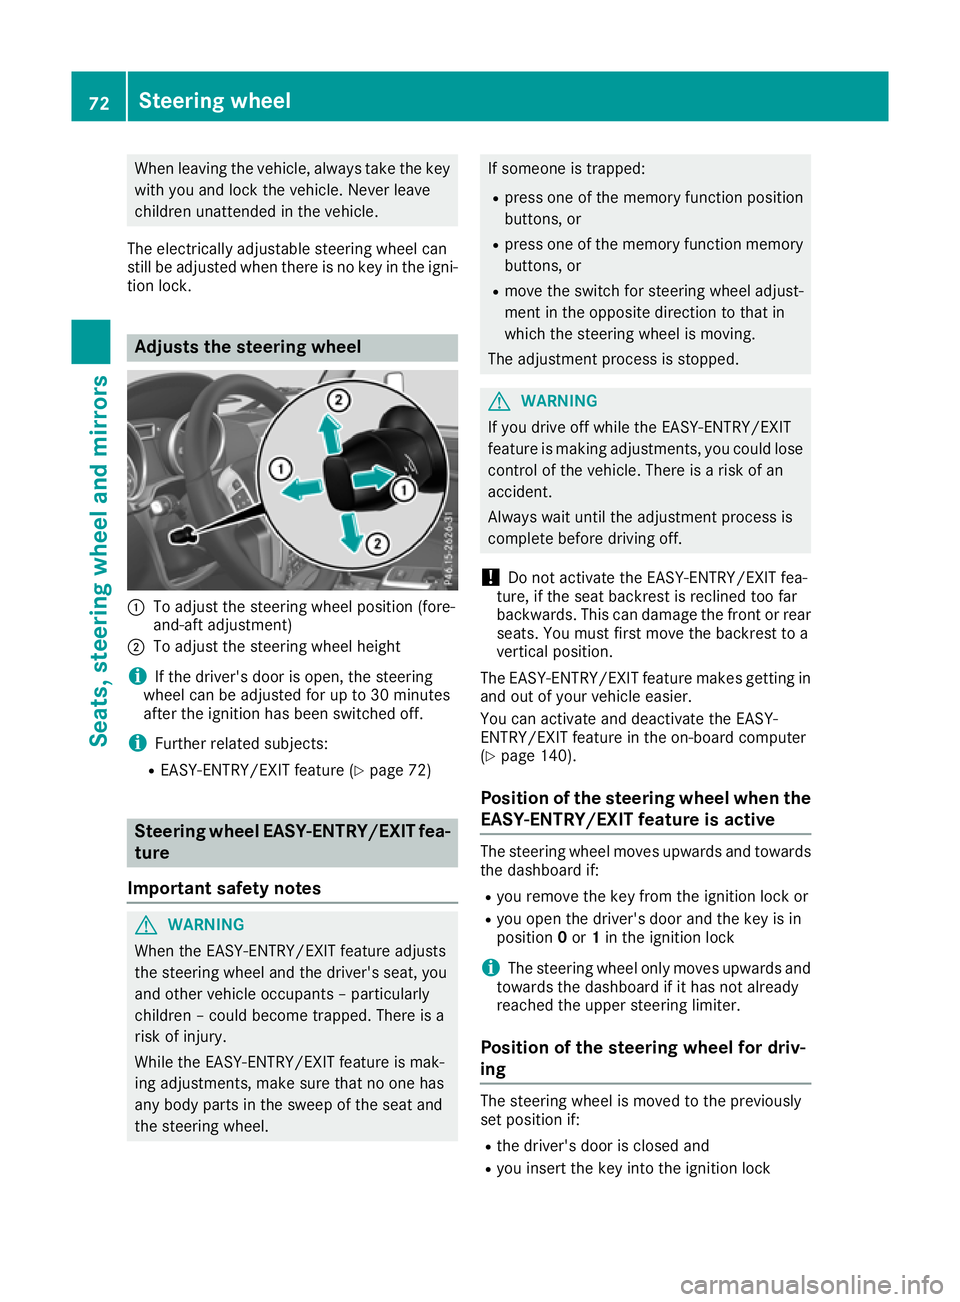
sthe steering wheel :
To adjust the steeri ngwheel position (fore-
and-aft adjustment)
; To adjust the steerin gwheel height
i If the driver's door is open, the steering
wheel can be adjusted for up to 30 minutes
after the ignition has been switched off.
i Further related subjects:
R EASY-ENTRY/EXIT feature (Y page 72)Steering wheel EASY-ENTRY/EXIT fea-
ture
Important safety notes G
WARNING
When the EASY-ENTRY/EXIT feature adjusts
the steering wheel and the driver's seat, you
and other vehicle occup ants –p articularly
children –couldb ecome trapped. There is a
risk of injury.
Whil ethe EASY-ENTRY/EXIT feature is mak-
ing adjustments, make sure that no one has
any body parts in the swee pofthe seat and
the steering wheel. If someone is trapped:
R press one of the memory function position
buttons, or
R press one of the memory function memory
buttons, or
R move the switch for steering wheel adjust-
ment in the opposite direction to that in
which the steering wheel is moving.
The adjustment process is stopped. G
WARNING
If you drive off while the EASY-ENTRY/EXIT
feature is making adjustments, you coul dlose
control of the vehicle. There is arisk of an
accident.
Always waitu ntil the adjustment process is
complete before driving off.
! Do not activate the EASY-ENTRY/EXIT fea-
ture, if the seat backrest is recline dtoo far
backwards. This can damage the front or rear seats. You must first move the backrest to a
vertical position.
The EASY-ENTRY/EXIT feature makes getting in
and out of yourv ehicleeasier.
You can activate and deactivate the EASY-
ENTRY/EXIT feature in the on-board computer
(Y page1 40).
Position of the steering wheel whent he
EASY-ENTRY/EXIT feature is active The steering wheel moves upwards and towards
the dashboard if:
R you remov ethe key from the ignition lock or
R you open the driver's door and the key is in
position 0or 1in the ignition lock
i The steerin
gwheel only moves upwards and
towards the dashboard if it has not already
reached the upper steerin glimiter.
Position of the steering wheel for driv-
ing The steerin
gwheel is moved to the previously
set position if:
R the driver's door is closed and
R you insert the key into the ignition lock 72
Steering wheelSeats, steering wheel and mirrors
Page 76 of 261
The last position of the steerin
gcolumn is stored
when you switch off the ignition. Mirrors
Rear-view mirror
G
WARNING
Electrolyte may escape if the glass in an auto- matic anti-dazzle mirro rbreaks. The electro-
lyte is harmfu land causes irritation. It must
not come into contact with yours kin, eyes,
respiratory organs or clothing or be swal-
lowed. There is arisk of injury.
If you come into contact with the electrolyte,
observe the following:
R Rinse off the electrolyte from yours kin
immediatel ywith water.
R Immediately rinse the electrolyte out of
youre yest horoughly with clea nwater.
R If the electrolyte is swallowed,i mmediately
rinse yourm outh out thoroughly.Don ot
induce vomiting.
R If electrolyte comes into contact with your
skin or hairoriss wallowed,seek medical
attention immediately.
R Immediately change out of clothing which
has come into contact with electrolyte.
R If an allergic reactio noccurs, seek medical
attention immediately.
X Adjust the rear-view mirror in such away that
you have agood view of road and traffic con-
ditions behind you.
The rear-view mirror automatically goes into
anti-dazzle mode if:
R the ignitio nisswitched on
R incident light from headlamps strikes the sen-
sor in the rear-view mirror
The rear-view mirror does not go into anti-dazzle
mode if reverse gearise ngaged or if the interior
lighting is switched on. Exterior mi
rrors
Adjusting th eexterio rmirror smanually X
Adjust th eexterio rmirrors in such awaythat
yo uc an get agoodo verview of roa dand traf-
fic conditions. Mirrors
73Seats, steering wheel and mirrors Z
Page 210 of 261
could sli
porbef lung around and thereby
strike vehicle occupants. In addition, cup
holders, ope nstowag espaces and mobile
phone brackets may not always be able to
hol dthe objects place dinthem in the event of
an accident. There is ariskofi njury, particu-
larly in the event of sharp braking or sudden
changes of direction.
R Alway sstow objects in such awaythat they
cannot be tosse dabout in these or similar
situations.
R Alway smake sure that objects do not proj-
ect from stowag espaces, luggage nets or
stowag enets.
R Ensure that closable stowag espaces are
shu tbefore beginning your journey.
R Alway sstow and secure heavy, hard, poin-
ted, sharp-edged, fragil eoroutsize objects
in the loa dcompartment. G
WARNING
The cup holder cannot secure adrinks con-
tainer in place during ajourney .Ifyou use a
cup holder during ajourney ,the drinks con-
tainer coul dbeflung around and liquid could
be spilt. Vehicle occupants coul dcome into
contact with the liquid and, in particular, be
scalded by hot liquid.Y ou couldbedistracted
from the traffic situation and lose control of
the vehicle. There is arisk of an accident and
injury.
Only use the cup holder when the vehicl eis
stationary. Only place containers of asuitable
size in the cup holder. Seal the container, in
particular when it contains hot liquid.
! Only use the cup holders for containers of
the right size and which have lids. The drinks
coul dotherwise spill.
Observe the loading guidelines (Y page198). Cu
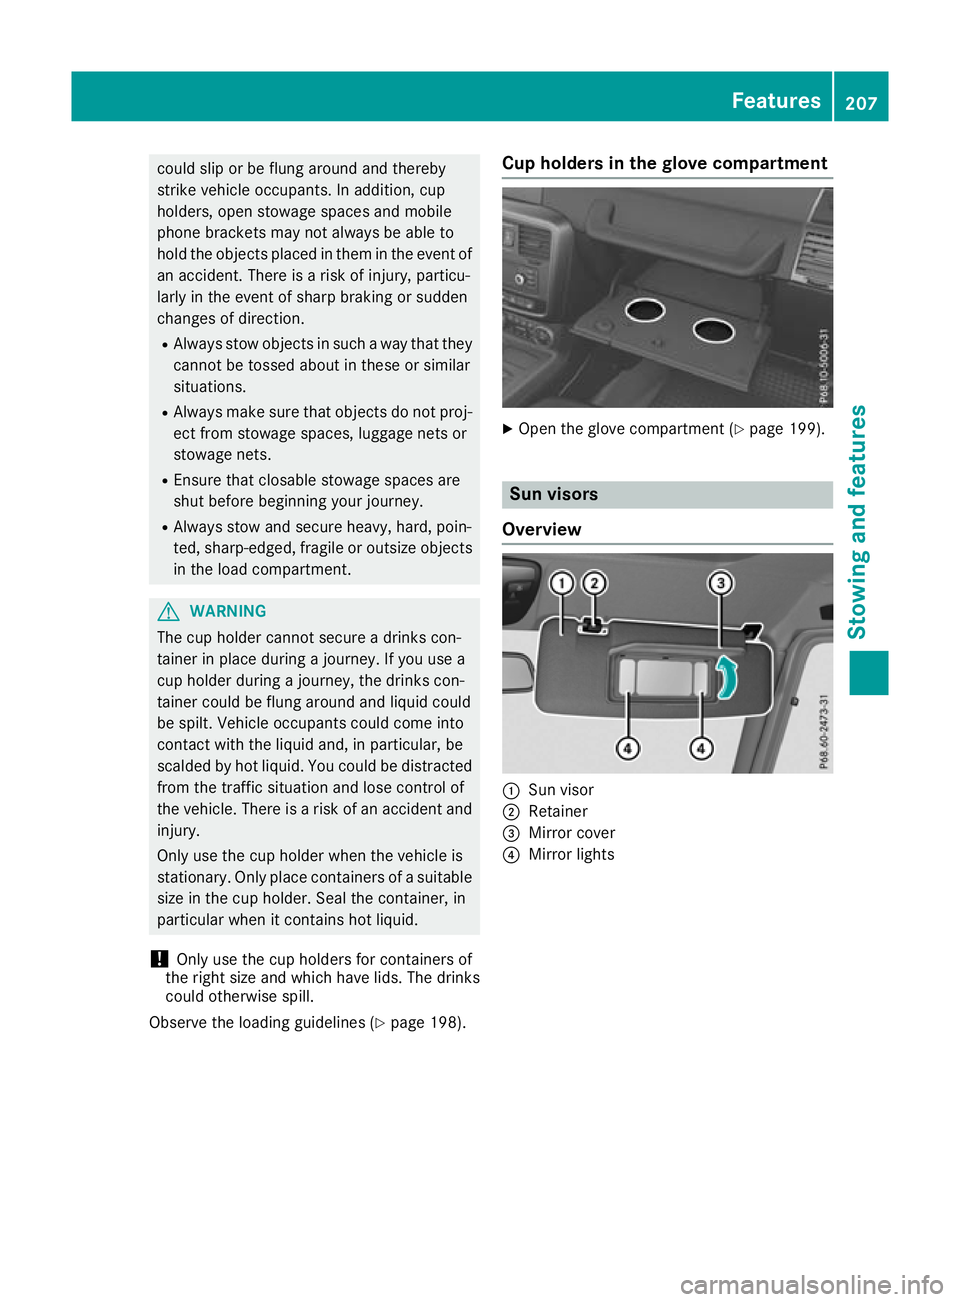
ph olders in th eglove compartment X
Ope nthe glove compartment (Y page 199). Sun visors
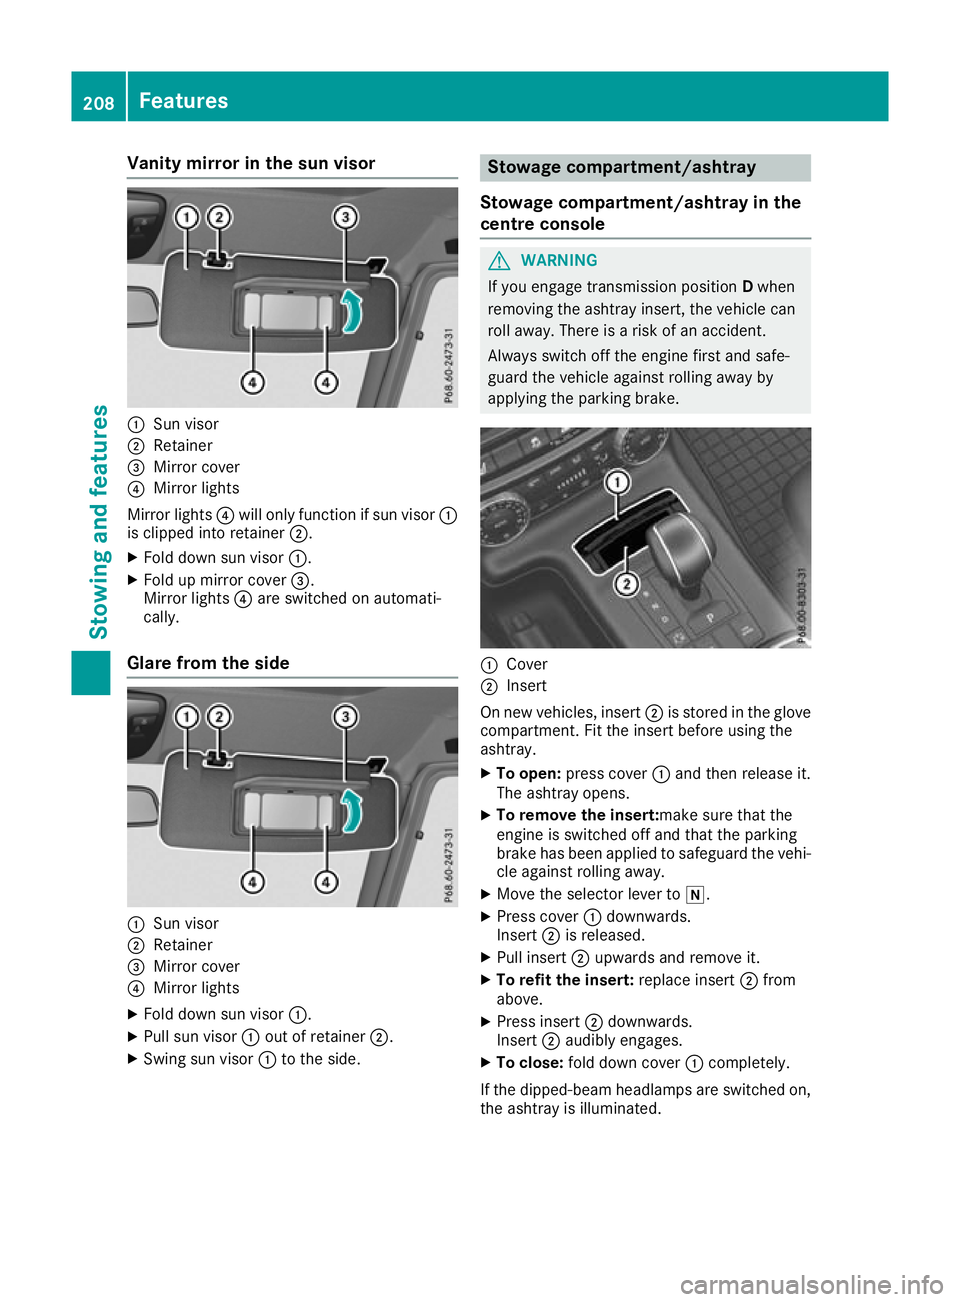
Overview :
Sun visor
; Retainer
= Mirror cover
? Mirror lights Features
207Stowing and features Z
Page 211 of 261
Vanity mirro
rint he sun visor :
Sun visor
; Retainer
= Mirror cover
? Mirror lights
Mirror lights ?will only function if su nvisor :
is clippe dinto retainer ;.
X Fol dd owns un visor :.
X Fol dupm irror cover =.
Mirror lights ?are switched on automati-
cally.
Glare from the side :
Sun visor
; Retainer
= Mirror cover
? Mirror lights
X Fol dd owns un visor :.
X Pull su nvisor :outofr etainer ;.
X Swing su nvisor :to the side. Stowag
ecompartment/ashtray
Stowage compartment/ashtray in the
centre console G
WARNING
If you engage transmission position Dwhen
removing the ashtray insert, the vehicle can
roll away. There is arisk of an accident.
Always switch off the engine first and safe-
guard the vehicl eagainst rolling awayby
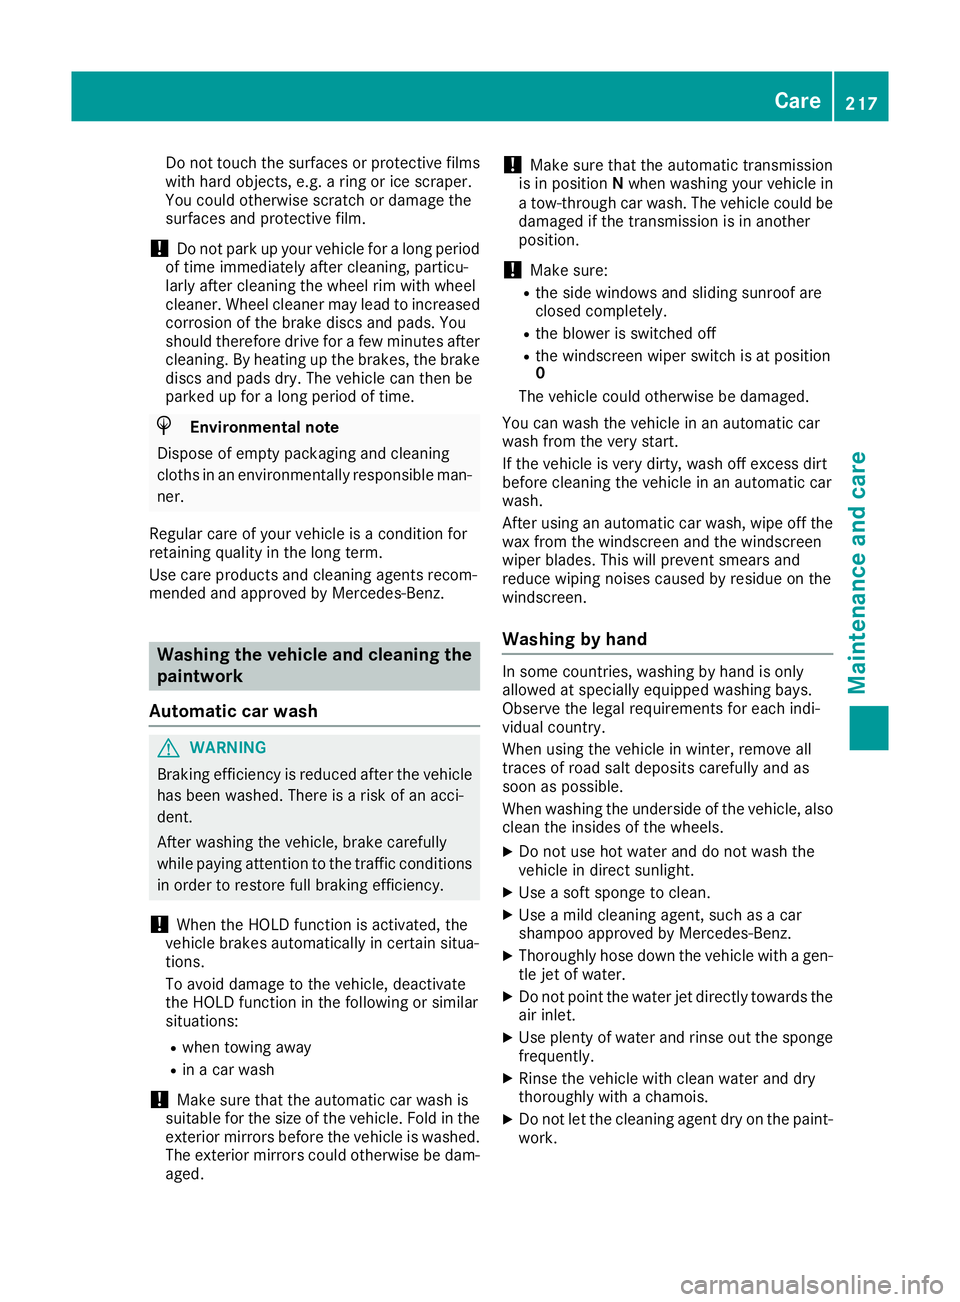
applying the parking brake. :
Cover
; Insert
On new vehicles, insert ;is stored in the glove
compartment. Fi tthe insert before usin gthe
ashtray.
X To open: press cover :and then release it.
The ashtray opens.
X To remove th einsert:ma ke sure that the
engin eisswitched off and that th eparking
brak ehas been applied to safeguard th evehi-
cle against rolling away.
X Mov ethe selector leve rtoi.
X Press cover :downwards.
Insert ;is released.
X Pull insert ;upward sand remove it.
X To refit th einsert: replace insert ;from
above.
X Press insert ;downwards.
Insert ;audibly engages.
X To close: fold down cover :completely.
If th edipped-beam headlamps are switched on,
th ea shtray is illuminated. 208
Featu
resStowing and features
Page 220 of 261
Do not touch the surfaces or protective films
with hard objects ,e.g.ar ingori ce scraper.
Yo uc ould otherwis escratch or damage the
surfaces and protective film.
! Do not park up your vehicl
efor alon gp eriod
of time immediatel yafter cleaning, particu-
larly after cleaning the whee lrim with wheel
cleaner. Whee lcleane rmaylead to increased
corrosion of the brake discs and pads .You
shoul dtherefore drive for afew minute safter
cleaning. By heating up the brakes ,the brake
discs and pads dry .The vehicl ecan the nbe
parked up for alon gp eriodoft ime. H
Environmental note
Dispose of empty packaging an dcleaning
cloths in an environmentally responsible man- ner.
Regular car eofyour vehicle is acondition for
retainin gqualit yint helongterm.
Use car eproduct sand cleaning agents recom-
mended and approved by Mercedes-Benz. Washin
gthe vehiclea nd cleaning the
paintwork
Automatic car wash G
WARNING
Braking efficiency is reduced after the vehicle has been washed. There is arisk of an acci-
dent.
After washing the vehicle, brake carefully
while paying attention to the traffic conditions in order to restore full braking efficiency.
! When the HOLD function is activated, the
vehicl ebrakes automatically in certain situa-
tions.
To avoi ddamage to the vehicle, deactivate
the HOLD function in the following or similar
situations:
R when towing away
R in ac ar wash
! Make sure that the automatic car washis
suitable for the size of the vehicle. Fold in the exterior mirrors before the vehicl eiswashed.
The exterior mirrors coul dotherwise be dam-
aged. !
Make sure that the automatic transmission
is in position Nwhen washing your vehicle in
at ow-through car wash. The vehicle could be
damagedift he transmission is in another
position.
! Make sure:
R the side windows and sliding sunroof are
closed completely.
R the blower is switched off
R the windscreen wiper switch is at position
0
The vehicle could otherwise be damaged.
You can wash the vehicle in an automatic car
wash from the very start.
If the vehicle is very dirty, wash off excess dirt
before cleaning the vehicle in an automatic car
wash.
After using an automatic car wash, wipe off the
wax from the windscreen and the windscreen
wiper blades. This will prevent smears and
reduce wiping noises caused by residue on the
windscreen.
Washing by hand In some countries, washing by hand is only
allowed at specially equipped washing bays.
Observe the legal requirements for each indi-
vidual country.
When using the vehicle in winter, remove all
traces of road salt deposits carefully and as
soon as possible.
When washing the underside of the vehicle, also
clean the insides of the wheels.
X Do not use hot water and do not wash the
vehicle in direct sunlight.
X Use asoft sponge to clean.
X Use amild cleaning agent, such as acar
shampo oapproved by Mercedes-Benz.
X Thoroughly hose down the vehicle with agen-
tle jet of water.
X Do not point the water jet directly towards the
air inlet.
X Use plenty of water and rinse out the sponge
frequently.
X Rinse the vehicle with clean water and dry
thoroughl ywithachamois.
X Do not let the cleaning agent dry on the paint-
work. Ca
re
217Maintenance an dcare Z
Page 258 of 261
G3
50dPROFESSIONAL :
Distance to to pedge 1976 mm
;
Distanc etolower edge 77
1mm =Rang
eofmovement 1010 mm
G3
50dPROFESSIONAL Vehicl
elength 4764 mm
Vehicl
ewidth including
exterior mirrors 2055 mm
Vehicl
ewidth excluding
exterior mirrors 1875 mm
Vehicl
eheight 1980 mm
Vehicl
eheight with roof
carrier installe datthe fac-
tory 2030 mm
Wheelbase
2850 mm
Minimum ground clear-
ance
245 mm
Maximum roof load
150 kg
Off-road driving vehicl
edata Fording depth
! The depth of water must not exceed the
values pecifiedinthetable. Not ethatthe
possible fordin gdept hisl ess in flowin gwater. The tabl
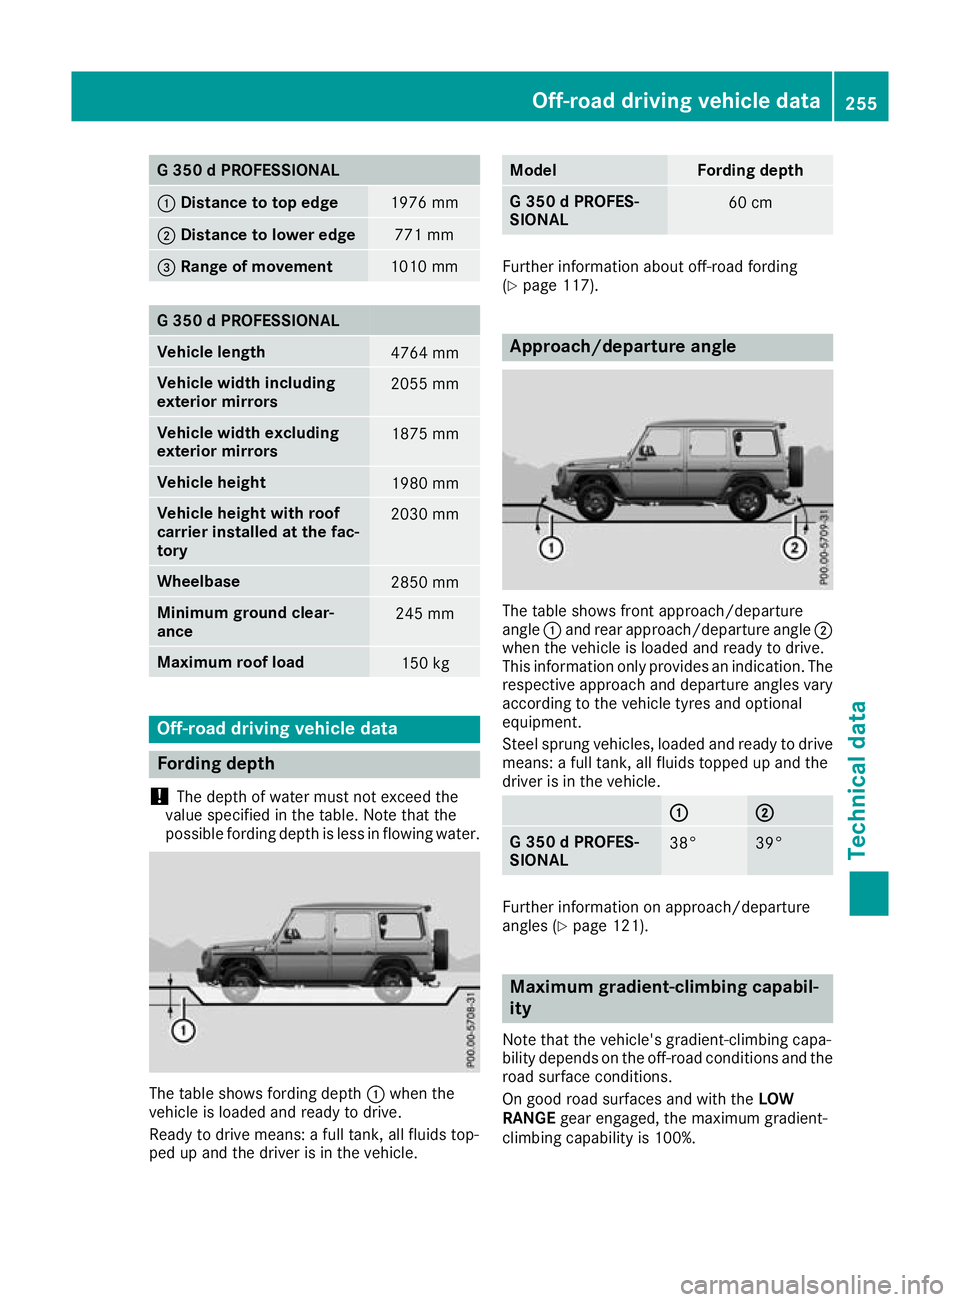
eshows fording depth :when the
vehicle is loaded and ready to drive.
Ready to drive means: afull tank,a ll fluids top-
ped up and the driver is in the vehicle. Model Fording depth
G3
50dPROFES-
SIONAL 60 cm
Further information abouto
ff-roadfording
(Y page 117). Approach/departure angle
The table shows front approach/departure
angle
:and rea rapproach/departure angle ;
when the vehicle is loaded and ready to drive.
This information only provides an indication .The
respective approach and departure angles vary
according to the vehicle tyres and optional
equipment.
Steel sprung vehicles, loaded and ready to drive
means: afull tank,a ll fluids topped up and the
driver is in the vehicle. : : ;
;
G3
50dPROFES-
SIONAL 38° 39°
Further information on approach/departure
angles (Y
page 121). Maximum gradient-climbing capabil-
ity
Note that the vehicle's gradient-climbing capa-
bility depends on the off-road conditions and the
road surface conditions.
On good road surfaces and with the LOW
RANGE gear engaged, the maximu mgradient-
climbing capability is 100%. Off-roa
ddriving vehicle data
255Technical data Z