2016 MERCEDES-BENZ G-Class transmission
[x] Cancel search: transmissionPage 155 of 302
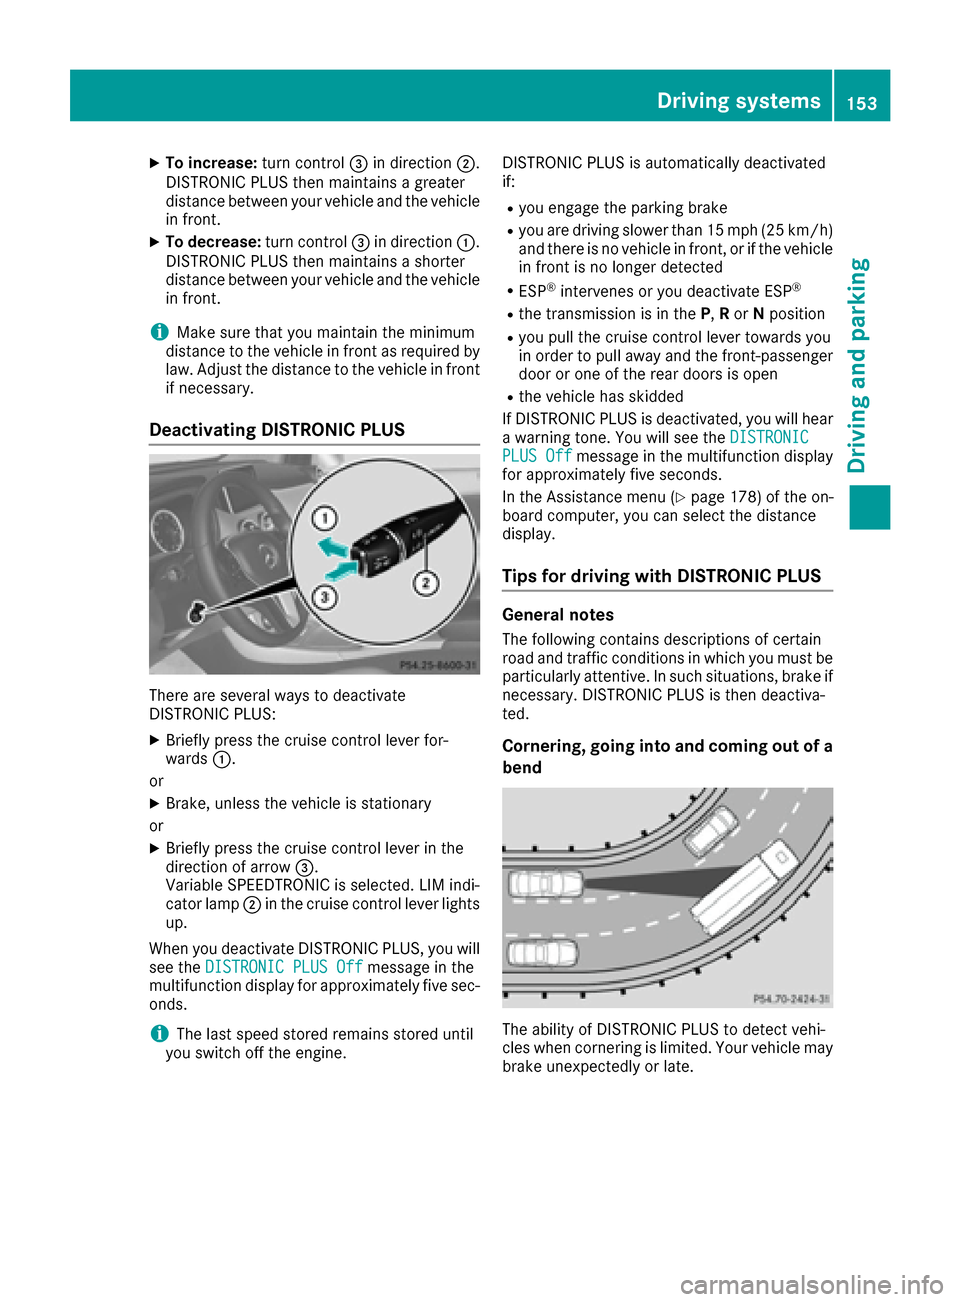
XTo increase:turn control=in direction ;.
DISTRONIC PLUS then maintains a greater
distance between your vehicle and the vehicle
in front.
XTo decrease: turn control=in direction :.
DISTRONIC PLUS then maintains a shorter
distance between your vehicle and the vehicle
in front.
iMake sure that you maintain the minimum
distance to the vehicle in front as required by
law. Adjust the distance to the vehicle in front
if necessary.
Deactivating DISTRONIC PLUS
There are several ways to deactivate
DISTRONIC PLUS:
XBriefly press the cruise control lever for-
wards :.
or
XBrake, unless the vehicle is stationary
or
XBriefly press the cruise control lever in the
direction of arrow =.
Variable SPEEDTRONIC is selected. LIM indi-
cator lamp ;in the cruise control lever lights
up.
When you deactivate DISTRONIC PLUS, you will
see the DISTRONIC PLUS Off
message in the
multifunction display for approximately five sec-
onds.
iThe last speed stored remains stored until
you switch off the engine. DISTRONIC PLUS is automatically deactivated
if:
Ryou engage the parking brake
Ryou are driving slower than 15 mph (25 km/h)
and there is no vehicle in front, or if the vehicle
in front is no longer detected
RESP®intervenes or you deactivate ESP®
Rthe transmission is in the
P,Ror Nposition
Ryou pull the cruise control lever towards you
in order to pull away and the front-passenger
door or one of the rear doors is open
Rthe vehicle has skidded
If DISTRONIC PLUS is deactivated, you will hear
a warning tone. You will see the DISTRONIC
PLUS Offmessage in the multifunction display
for approximately five seconds.
In the Assistance menu (
Ypage 178) of the on-
board computer, you can select the distance
display.
Tips for driving with DISTRONIC PLUS
General notes
The following contains descriptions of certain
road and traffic conditions in which you must be particularly attentive. In such situations, brake if
necessary. DISTRONIC PLUS is then deactiva-
ted.
Cornering, going into and coming out of a
bend
The ability of DISTRONIC PLUS to detect vehi-
cles when cornering is limited. Your vehicle may
brake unexpectedly or late.
Driving systems153
Driving an d parking
Z
Page 159 of 302

HOLD function
General notes
The HOLD function can assist the driver in the
following situations:
Rwhen pulling away, especially on steep slopes
Rwhen maneuvering on steep slopes
Rwhen waiting in traffic
The vehicle is kept stationary without the driver having to depress the brake pedal.
The braking effect is canceled and the HOLD
function deactivated when you depress the
accelerator pedal to pull away.
iDo not use the HOLD function when driving
off-road, on steep uphill or downhill gradients
or on slippery or loose surfaces. The HOLD
function cannot hold the vehicle on such sur-
faces.
Activation conditions
You can activate the HOLD function if:
Rthe vehicle is stationary
Rthe engine is running or if it has been auto-
matically switched off by the ECO start/stop
function
Rthe engine is running
Rthe driver's door is closed or your seat belt is
fastened
Rthe transmission is in position D,R or N
RDISTRONIC PLUS is deactivated
Activating the HOLD function
The vehicle's brakes are applied when the HOLD
function is activated. For this reason, deactivate
the HOLD function while in the car wash or while
towing.
XMake sure that the activation conditions are
met.
XDepress the brake pedal.
XQuickly depress the brake pedal further until
ë appears in the multifunction display.
The HOLD function is activated. You can
release the brake pedal.
iIf depressing the brake pedal the first time
does not activate the HOLD function, wait
briefly and then try again.
Deactivating the HOLD function
GWARNING
When leaving the vehicle, it can still roll away despite being braked by the HOLD function if:
Rthere is a malfunction in the system or in
the voltage supply.
Rthe HOLD function has been deactivated by
pressing the accelerator pedal or the brake
pedal, e.g. by a vehicle occupant.
Rthe electrical system in the engine com-
partment, the battery or the fuses have
been tampered with.
Rthe battery is disconnected
There is a risk of an accident.
If you wish to exit the vehicle, always turn off the HOLD function and secure the vehicle
against rolling away.
The HOLD function is deactivated automatically if:
Ryou accelerate and the transmission is in
position Dor R.
Ryou shift the transmission to position P.
Ryou depress the brake pedal again with a cer-
tain amount of pressure untilëdisap-
pears from the multifunction display.
Ryou activate DISTRONIC PLUS.
On steep uphill or downhill gradients or if there
is a malfunction, the transmission may also be
automatically shifted into position P.
Permanent all-wheel drive
!
Never tow the vehicle with one axle raised.
This may damage the transfer case. Damage
of this sort is not covered by the Mercedes-
Benz Limited Warranty. All wheels must
remain either on the ground or be fully raised.
Observe the instructions for towing the vehi-
cle with all wheels in full contact with the
ground.
!When testing the parking brake, operate the
vehicle only briefly (for a maximum of ten sec-
onds) on a brake test dynamometer. When
doing this, turn the SmartKey to position 0or
1 in the ignition. Failure to do this can cause
damage to the drive train or the brake system.
Driving systems157
Driving and parking
Z
Page 160 of 302

!A function or performance test should only
be carried out on a two-axle dynamometer.
Before you operate the vehicle on such a
dynamometer, please consult a qualified
workshop. You could otherwise damage the
drive train or the brake system.
The all-wheel drive system ensures that all four
wheels are permanently driven. The all-wheel
drive system improves vehicle traction together
with ESP
®and 4ETS if a drive wheel spins due to
insufficient grip.
If a drive wheel spins due to insufficient grip:
ROnly depress the accelerator pedal as far as
necessary when pulling away.
RTake your foot off the accelerator, slowly,
while the vehicle is in motion.
The permanent all-wheel drive system can nei-
ther reduce the risk of accident nor override the
laws of physics if you fail to adapt your driving
style or if you are inattentive. The all-wheel drive
system cannot take into account road, weather
or traffic conditions. The all-wheel drive system
is only an aid. You are responsible for maintain-
ing a safe distance to the vehicle in front, for
vehicle speed, for braking in good time and for
staying in lane.
In wintry driving conditions, always use winter
tires (M+S tires) and if necessary, snow chains
(
Ypage 264). Only in this way can the maximum
effect of all-wheel drive be achieved.
For information on driving off-road, see
(
Ypage 137).
PARKTRONIC
Important safety notes
!When parking, pay particular attention to
objects above or below the sensors, such as
flower pots or trailer drawbars. PARKTRONIC
does not detect such objects when they are in the immediate vicinity of the vehicle. You
could damage the vehicle or the objects.
The sensors may not detect snow and other
objects that absorb ultrasonic waves.
Ultrasonic sources such as an automatic car
wash, the compressed-air brakes on a truck
or a pneumatic drill could cause PARKTRONIC
to malfunction.
PARKTRONIC may not function correctly on
uneven terrain. PARKTRONIC is an electronic parking aid with
ultrasonic sensors. It indicates visually and audi-
bly the distance between your vehicle and an
object.
PARKTRONIC is only an aid. It is not a replace-
ment for your attention to your immediate sur-
roundings. You are always responsible for safe
maneuvering, parking and exiting a parking
space. Ensure that the areas in front, behind and
to the side of the vehicle are safe before maneu-
vering, parking or pulling away. There must not
be any persons, animals or objects in the area in
which you are maneuvering.
PARKTRONIC does not take into account any
persons or objects located below or above the
detection range. As a result, PARKTRONIC can-
not warn you about objects in this area.
PARKTRONIC is activated automatically when
you:
Rswitch on the ignition
Rshift the transmission to position D,Ror N
Rrelease the parking brake
PARKTRONIC is deactivated at speeds above
11 mph (18 km/h). It is reactivated at lower
speeds.
PARKTRONIC monitors the area around your
vehicle using six sensors in the front bumper
and four sensors in the rear bumper.
Range of the sensors
General notes
:Example: sensors in the front bumper, right-
hand side
158Driving systems
Driving and parking
Page 161 of 302

Side view
Top view
The sensors must be free from dirt, ice or slush.
Otherwise, they may not function correctly.
Clean the sensors regularly, taking care not to
scratch or damage them (
Ypage 244).
Front sensors
CenterApprox. 40 in (approx.
100 cm from the brush
guard)
CornersApprox. 24 in (approx.
60 cm)
Rear sensors
CenterApprox. 36 in (90 cm) from
the spare wheel
CornersApprox. 32 in (approx.
80 cm)
Minimum distance
CenterApprox. 8 in (approx. 20 cm)
CornersApprox. 8 in (approx. 20 cm)
If there is an obstacle within this range, the rel-
evant warning displays light up and a warning
tone sounds. If the distance falls below the min-
imum, the distance may no longer be shown.
Warning displays
Warning display for the front area
:
Segments on the left-hand side of the vehi-
cle
;Segments on the right-hand side of the vehi-cle
=Segments showing operational readiness
The warning displays show the distance
between the sensors and the obstacle. The
warning display for the front area is located on
the dashboard above the center air vents. The
warning display for the rear area is located on
the headliner in the rear compartment.
The warning display for each side of the vehicle
is divided into five yellow and two red segments.
PARKTRONIC is operational if yellow segments
showing operational readiness =light up.
The selected transmission position and the
direction in which the vehicle is rolling deter-
mine which warning display is active when the
engine is running.
Transmission posi-
tionWarning display
DFront area activated
R, Nor the vehicle is
rolling backwardsRear and front areas
activated
PNo areas activated
One or more segments light up as the vehicle
approaches an obstacle, depending on the vehi-
cle's distance from the obstacle.
From the:
Rsixth segment onwards, you will hear an inter-
mittent warning tone for approximately two
seconds.
Rseventh segment onwards, you will hear a
warning tone for approximately two seconds.
Driving systems159
Driving and parking
Z
Page 164 of 302
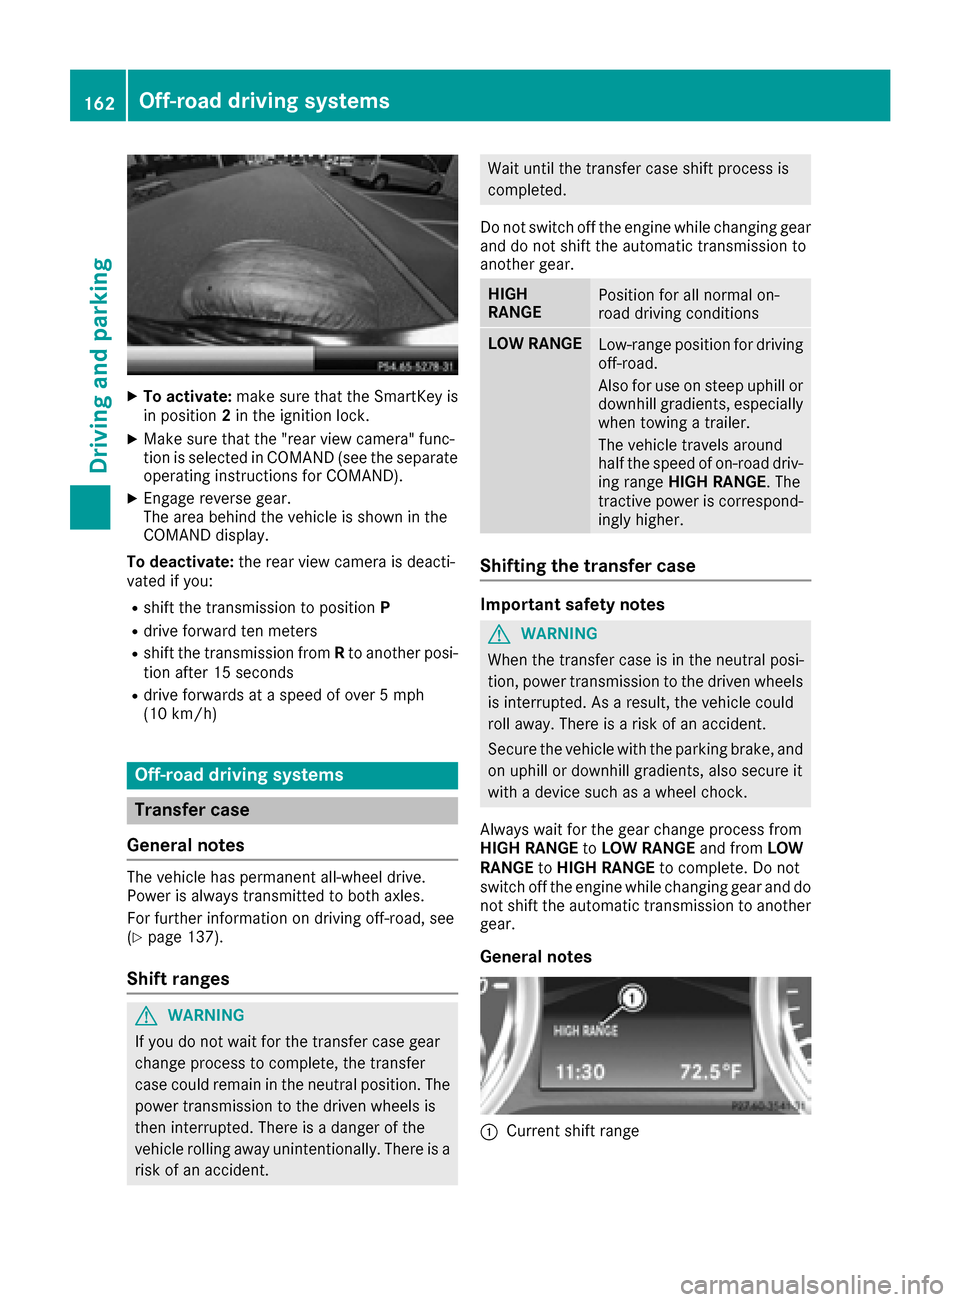
XTo activate:make sure that the SmartKey is
in position 2in the ignition lock.
XMake sure that the "rear view camera" func-
tion is selected in COMAND (see the separate
operating instructions for COMAND).
XEngage reverse gear.
The area behind the vehicle is shown in the
COMAND display.
To deactivate: the rear view camera is deacti-
vated if you:
Rshift the transmission to position P
Rdrive forward ten meters
Rshift the transmission fromRto another posi-
tion after 15 seconds
Rdrive forwards at a speed of over 5 mph
(10 km/h)
Off-road driving systems
Transfer case
General notes
The vehicle has permanent all-wheel drive.
Power is always transmitted to both axles.
For further information on driving off-road, see
(
Ypage 137).
Shift ranges
GWARNING
If you do not wait for the transfer case gear
change process to complete, the transfer
case could remain in the neutral position. The power transmission to the driven wheels is
then interrupted. There is a danger of the
vehicle rolling away unintentionally. There is a
risk of an accident.
Wait until the transfer case shift process is
completed.
Do not switch off the engine while changing gear
and do not shift the automatic transmission to
another gear.
HIGH
RANGEPosition for all normal on-
road driving conditions
LOW RANGELow-range position for driving
off-road.
Also for use on steep uphill or
downhill gradients, especially
when towing a trailer.
The vehicle travels around
half the speed of on-road driv-
ing range HIGH RANGE . The
tractive power is correspond-
ingly higher.
Shifting the transfer case
Important safety notes
GWARNING
When the transfer case is in the neutral posi-
tion, power transmission to the driven wheels
is interrupted. As a result, the vehicle could
roll away. There is a risk of an accident.
Secure the vehicle with the parking brake, and
on uphill or downhill gradients, also secure it
with a device such as a wheel chock.
Always wait for the gear change process from
HIGH RANGE toLOW RANGE and fromLOW
RANGE toHIGH RANGE to complete. Do not
switch off the engine while changing gear and do
not shift the automatic transmission to another
gear.
General notes
:Current shift range
162Off-road driving systems
Driving an d parking
Page 165 of 302

:Indicator lamp
;LOW RANGE button
Switching on the off-road gear ratio
!Only carry out the gear selection if:
Rthe engine is running.
Rthe vehicle is rolling.
Rthe automatic transmission is in selector
lever positionN.
Ryou are driving no faster than 25 mph
(40 km/h).
You could otherwise damage the transfer
case.
XMake sure the ECO start/stop function is
switched off (Ypage 114).
XPress LOW RANGE button ;.
When the shift procedure is complete, the
LOW RANGE
transfer case position appears in
the multifunction display.
Indicator lamp :lights up.
XShift the transmission to position D.
Switching off the off-road gear ratio
GWARNING
When the transfer case is in the neutral posi-
tion, power transmission to the driven wheels
is interrupted. As a result, the vehicle could
roll away. There is a risk of an accident.
Secure the vehicle with the parking brake, and
on uphill or downhill gradients, also secure it
with a device such as a wheel chock.
!Only carry out the gear selection if:
Rthe engine is running.
Rthe vehicle is rolling.
Rthe automatic transmission is in selector
lever position N.
Ryou are driving no faster than 43 mph
(70 km/h).
You could otherwise damage the transfer
case.
XPress button ;.
When the shift procedure is complete, the
HIGH
RANGEtransfer case position appears in
the multifunction display.
Indicator lamp :goes out.
If the gear change is not completed, the follow-
ing messages could appear in the display:
RTC Shift Conditions Not Fulfilled
You have not met one or more shift condi-
tions.
RTC NEUTRAL On
The transfer case has canceled the gear
change process and is in N. Transfer case
position N
appears in the multifunction dis-
play.
RTC Shift Canceled
The transfer case has canceled the gear
change process.
XCarry out the gear change process again.
Make sure to meet all conditions for changing gears.
RTC Malfunction Visit Workshop
There is a malfunction in the transfer case.
XDo not shift the transfer case.
XHave the vehicle checked as soon as possible
at a qualified specialist workshop.
Shifting to neutral
GWARNING
When the transfer case is in the neutral posi-
tion, power transmission to the driven wheels
Off-road driving systems163
Driving and parking
Z
Page 175 of 302

Multifunction display
:Transmission position (Ypage 121)
;Drive program (Ypage 122)
=Text field
?Menu bar
AOutside temperature or speed
(Ypage 179)
BTime
CTransfer case position (Ypage 162)
XTo show menu bar?:press the =
or ; button on the steering wheel.
Menu bar ?disappears after a few seconds.
Text field =shows the selected menu or sub-
menu as well as display messages.
For further information on displaying the trans-
mission position, see (
Ypage 119).
iYou can set the time using COMAND (see
the separate operating instructions).
The following messages may appear in the mul-
tifunction display:
Z Shift recommendation (
Ypage 124)
¯ Cruise control (
Ypage 141)
LIM
SPEEDTRONIC (Ypage 145)
è ECO start/stop function
(
Ypage 114)
LOW
RANGELOW RANGE off-road gear
(Ypage 162)
ë HOLD function (
Ypage 157)
Menus and submenus
Menu overview
Press the=or; button on the steering
wheel to call up the menu bar and select a menu.
Operating the on-board computer (
Ypage 172).
Depending on the equipment installed in the
vehicle, you can call up the following menus:
RTripmenu (Ypage 173)
RNavimenu (navigation instructions)
(Ypage 174)
RAudiomenu (Ypage 176)
RTelmenu (telephone) (Ypage 177)
RDriveAssistmenu (assistance)
(Ypage 178)
RServmenu (Ypage 178)
RSettmenu (settings) (Ypage 178)
RAMGmenu in AMG vehicles (Ypage 182)
Trip menu
Standard display
XPress and hold the %button on the steer-
ing wheel until the Tripmenu with trip odom-
eter :and odometer ;is shown.
Trip computer "From start" or "From
reset"
Example: trip computer "From Start"
:
Distance
;Time
Menus and submenus173
On-board computer and displays
Z
Page 184 of 302
AMG menu in AMG vehicles
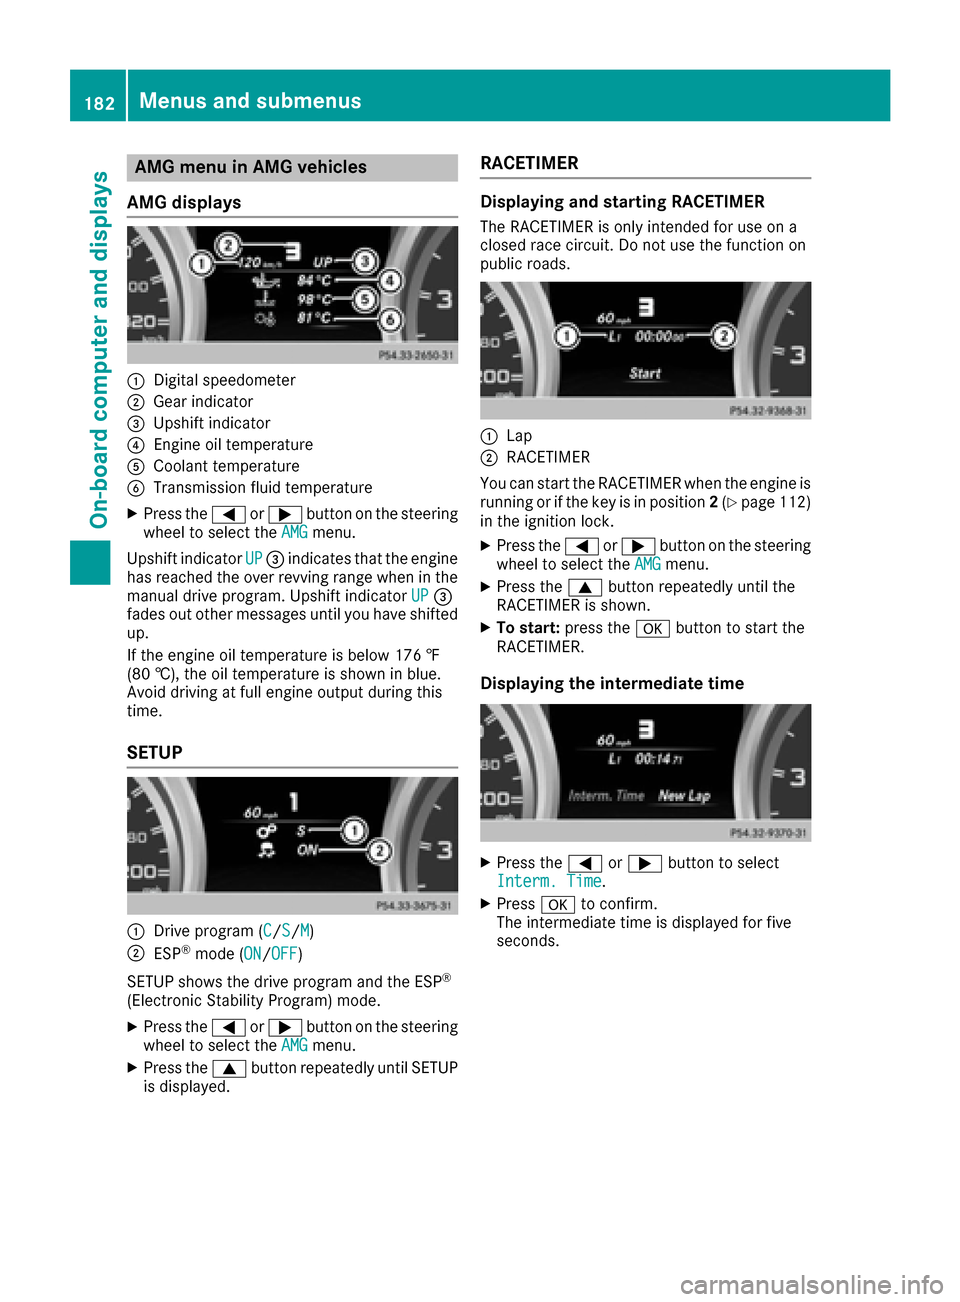
AMG displays
:Digital speedometer
;Gear indicator
=Upshif tindicator
?Engin eoil temperature
ACoolan ttemperature
BTransmission fluid temperature
XPress th e= or; buttonon th esteering
whee lto select th eAMGmenu.
Upshif tindicator UP
=indicates that th eengin e
has reached th eove rrevvin grange when in th e
manual drive program .Upshif tindicator UP
=
fade sout other message suntil you hav eshifte d
up.
If th eengin eoil temperature is belo w17 6 ‡
(80 †) ,the oi ltemper ature is shown in blue.
Avoid driving at full engine output during this
time.
SETUP
:Drive program (C/S/M)
;ESP®mode ( ON/OFF)
SETUP shows the drive program and the ESP
®
(Electronic Stability Program) mode.
XPress the =or; button on the steering
wheel to select the AMGmenu.
XPress the9button repeatedly until SETUP
is displayed.
RACETIMER
Displaying and starting RACETIMER
The RACETIMER is only intended for use on a
closed race circuit. Do not use the function on
public roads.
:Lap
;RACETIMER
You can start the RACETIMER when the engine is
running or if the key is in position 2(
Ypage 112)
in the ignition lock.
XPress the =or; button on the steering
wheel to select the AMGmenu.
XPress the9button repeatedly until the
RACETIMER is shown.
XTo start: press the abutton to start the
RACETIMER.
Displaying the intermediate time
XPress the =or; button to select
Interm. Time.
XPress ato confirm.
The intermediate time is displayed for five
seconds.
182Menus and submenus
On-board computer and displays