2016 MERCEDES-BENZ E-Class SEDAN ground point
[x] Cancel search: ground pointPage 101 of 350

Closing
Closingbutto nand lockin gbutto n(example :
Sedan)
Sedan: on vehicles with the trunk lid remote
closing feature, you can close the trunk lid
automatically. For vehicles with trunk lid
remote closing feature and KEYLESS-GO: you
can simultaneously close the trunk lid and
lock the vehicle.
Wagon: for vehicles with KEYLESS-GO, you
can simultaneously close the tailgate and
lock the vehicle.
XTo close: press closing button :in the
trunk lid/tailgate.
XTo simultaneously close the trunk lid/
tailgate and lock the vehicle:
Press closing button ;in the trunk lid/
tailgate. The KEYLESS-GO key must be in
the rear detection range of the vehicle.
The trunk lid/tailgate closes.
If all the doors are closed, the vehicle locks.
iIf KEYLESS-GO detects a SmartKey in the
trunk/cargo compartment, the trunk lid/
tailgate opens again after it is closed.
If KEYLESS-GO detects a second SmartKey
outside the vehicle, the trunk lid/tailgate
remains closed.
HANDS-FREE ACCESS
Important safety notes
GWARNING
The vehicle's exhaust system may be very hot. You could burn yourself by touching the
exhaust system if you use HANDS-FREE
ACCESS. There is a risk of injury. Always
ensure that you only make the kicking move-
ment within the detection range of sensors.
!If the key is within the rear detection
range of KEYLESS-GO, situations such as
the following could lead to the uninten-
tional opening of the trunk lid/tailgate:
Rusing a car wash
Rusing a power washer
Make sure that the SmartKey is at least
10 ft (3 m) away from the vehicle.
General notes
Sedan: with KEYLESS-GO and HANDS-FREE
ACCESS, you can open or close the trunk lid
or stop the closing procedure without using
your hands.
Wagon: with KEYLESS-GO and HANDS-FREE
ACCESS, you can open or close the tailgate or
stop the procedure without using your hands.
This is useful if you have your hands full. To do
this, make a kicking movement under the
bumper with your foot.
Observe the following points:
RCarry your KEYLESS-GO key about your
person. The KEYLESS-GO key must be in
the rear detection range of the vehicle.
RWhen making the kicking movement, make
sure that you are standing firmly on the
ground and that there is sufficient clear-
ance to the rear of the vehicle. You could
otherwise lose your balance e.g. on ice.
Trunk/cargo compartment99
Opening and closing
Z
Page 280 of 350

cialist workshop if you wish to leave your
vehicle parked for a long period of time.
iRemove the SmartKey if you park the
vehicle and do not require any electrical
consumers. The vehicle will then use very
little energy, thus conserving battery
power.
iIf the power supply has been interrupted,
e.g. if you reconnect the battery, you will
have to:
Rset the clock. Information on setting the
clock can be found in the Digital Opera-
tor's Manual.
On vehicles with COMAND and a naviga-
tion system, the clock is set automati-
cally.
Rreset the function for folding the exterior mirrors in/out automatically, by folding
the mirrors out once (
Ypage 117).
Charging the battery
GWARNING
During charging and jump-starting, explosive
gases can escape from the battery. There is a risk of an explosion.
Particularly avoid fire, open flames, creating
sparks and smoking. Ensure there is sufficient
ventilation while charging and jump-starting.
Do not lean over a battery.
GWARNING
Battery acid is caustic. There is a risk of injury.
Avoid contact with skin, eyes or clothing. Do
not inhale any battery gases. Do not lean over
the battery. Keep children away from batter-
ies. Wash away battery acid immediately with
plenty of clean water and seek medical atten-
tion.
GWARNING
A discharged battery can freeze at tempera-
tures below freezing point. When jump-start-
ing the vehicle or charging the battery, gases
can escape from the battery. There is a risk of an explosion.
Allow the frozen battery to thaw out before
charging it or jump-starting.
!Only use battery chargers with a maxi-
mum charging voltage of 14.8 V.
!Onlycharge the battery using the jump-
starting connection point.
The jump-starting connection point is in the
engine compartment (
Ypage 279).
XOpen the hood.
XConnect the battery charger to the positive
terminal and ground point in the same
order as when connecting the donor bat-
tery in the jump-starting procedure
(
Ypage 279).
If the indicator/warning lamps do not light up
at low temperatures, it is very likely that the
discharged battery has frozen. In this case,
you may neither charge the battery nor jump-
start the vehicle. The service life of a thawed- out battery may be shorter. The starting char-
acteristics may be impaired, especially at low
temperatures. Have the thawed-out battery
checked at a qualified specialist workshop.
Never charge a battery still installed in the
vehicle unless a battery charger unit
approved by Mercedes-Benz is being used . A
battery charger unit specially adapted for
Mercedes-Benz vehicles and tested and
approved by Mercedes-Benz is available as anaccessory. It permits the charging of the bat-
tery in its installed position. Contact an
authorized Mercedes-Benz Center for further
informa
tion and availability. Read the battery
charger's operating instructions before
charging the battery.
278Battery (vehicle)
Roadside Assistance
Page 281 of 350

Jump-starting
For the jump-starting procedure, use only the jump-starting connection point, consisting of a
positive terminal and a ground point, in the engine compartment.
GWARNING
Battery acid is caustic. There is a risk of injury.
Avoid contact with skin, eyes or clothing. Do not inhale any battery gases. Do not lean over the
battery. Keep children away from batteries. Wash away battery acid immediately with plenty of
clean water and seek medical attention.
GWARNING
During charging and jump-starting, explosive gases can escape from the battery. There is a risk of an explosion.
Particularly avoid fire, open flames, creating sparks and smoking. Ensure there is sufficient ven-
tilation while charging and jump-starting. Do not lean over a battery.
GWARNING
During the charging process, a battery produces hydrogen gas. If a short circuit occurs or sparks
are created, the hydrogen gas can ignite. There is a risk of an explosion.
RMake sure that the positive terminal of a connected battery does not come into contact with
vehicle parts.
RNever place metal objects or tools on a battery.
RIt is important that you observe the described order of the battery terminals when connecting
and disconnecting a battery.
RWhen jump-starting, make sure that the battery poles with identical polarity are connected.
RIt is particularly important to observe the described order when connecting and disconnecting
the jumper cables.
RNever connect or disconnect the battery terminals while the engine is running.
GWARNING
A discharged battery can freeze at temperatures below freezing point. When jump-starting the
vehicle or charging the battery, gases can escape from the battery. There is a risk of an explosion. Allow the frozen battery to thaw out before charging it or jump-starting.
!Vehicles with a gasoline engine: avoid repeated and lengthy starting attempts. Other-
wise, the catalytic converter could be damaged by non-combusted fuel.
HYBRID vehicles : make sure that you read the "HYBRID" supplement included in the vehicle
literature. You could otherwise fail to recognize dangers e.g. due to high voltage.
Jump-starting279
Roadside Assistance
Z
Page 283 of 350

XSlide cover:of positive terminal ;in the direction of the arrow.
XConnect positive terminal ;on your vehicle to positive terminal =of donor battery B
using the jumper cable, always begin with positive terminal ;on your own vehicle first.
XStart the engine of the donor vehicle and run it at idling speed.
XConnect negative terminal ?of donor battery Bto ground point Aof your vehicle using
the jumper cable, connecting the jumper cable to battery of other vehicle Bfirst.
XStart the engine.
XBefore disconnecting the jumper cables, let the engine run for several minutes.
XFirst, remove the jumper cables from ground point Aand negative terminal ?, then from
positive clamp ;and positive terminal =. Begin each time at the contacts on your own
vehicle first.
XClose cover :of positive clamp ;after removing the jumper cables.
XHave the battery checked at a qualified specialist workshop.
iJump-starting is not considered to be a normal operating condition.
iJumper cables and further information regarding jump-starting can be obtained at any
qualified specialist workshop.
Towing and tow-starting
Important safety notes
GWARNING
Functions relevant to safety are restricted or
no longer available if:
Rthe engine is not running.
Rthe brake system or the power steering is
malfunctioning.
Rthere is a malfunction in the voltage supply or the vehicle's electrical system.
If your vehicle is being towed, much more
force may be necessary to steer or brake.
There is a risk of an accident.
In such cases, use a tow bar. Before towing,
make sure that the steering moves freely.
GWARNING
When towing or tow-starting another vehicle
and its weight is greater than the permissible
gross weight of your vehicle, the:
Rthe towing eye could detach itself
Rthe vehicle/trailer combination could roll-
over.
There is a risk of an accident.
When towing or tow-starting another vehicle,
its weight should not be greater than the per- missible gross weight of your vehicle.
iDetails on the permissible gross vehicle
weight of your vehicle can be found on the
vehicle identification plate (
Ypage 336).
!If DISTRONIC PLUS or the HOLD function
is activated, the vehicle brakes automati-
cally in certain situations.
To prevent damage to the vehicle, deacti-
vate DISTRONIC PLUS and the HOLD func- tion in the following or other similar situa-
tions:
Rwhen towing the vehicle
Rin the car wash
!Only secure the tow rope or tow bar at the
towing eyes. Otherwise, the vehicle could
be damaged.
!Do not use the towing eye for recovery,
this could damage the vehicle. If in doubt,
recover the vehicle with a crane.
Towing and tow-starting281
Roadside Assistance
Z
Page 285 of 350
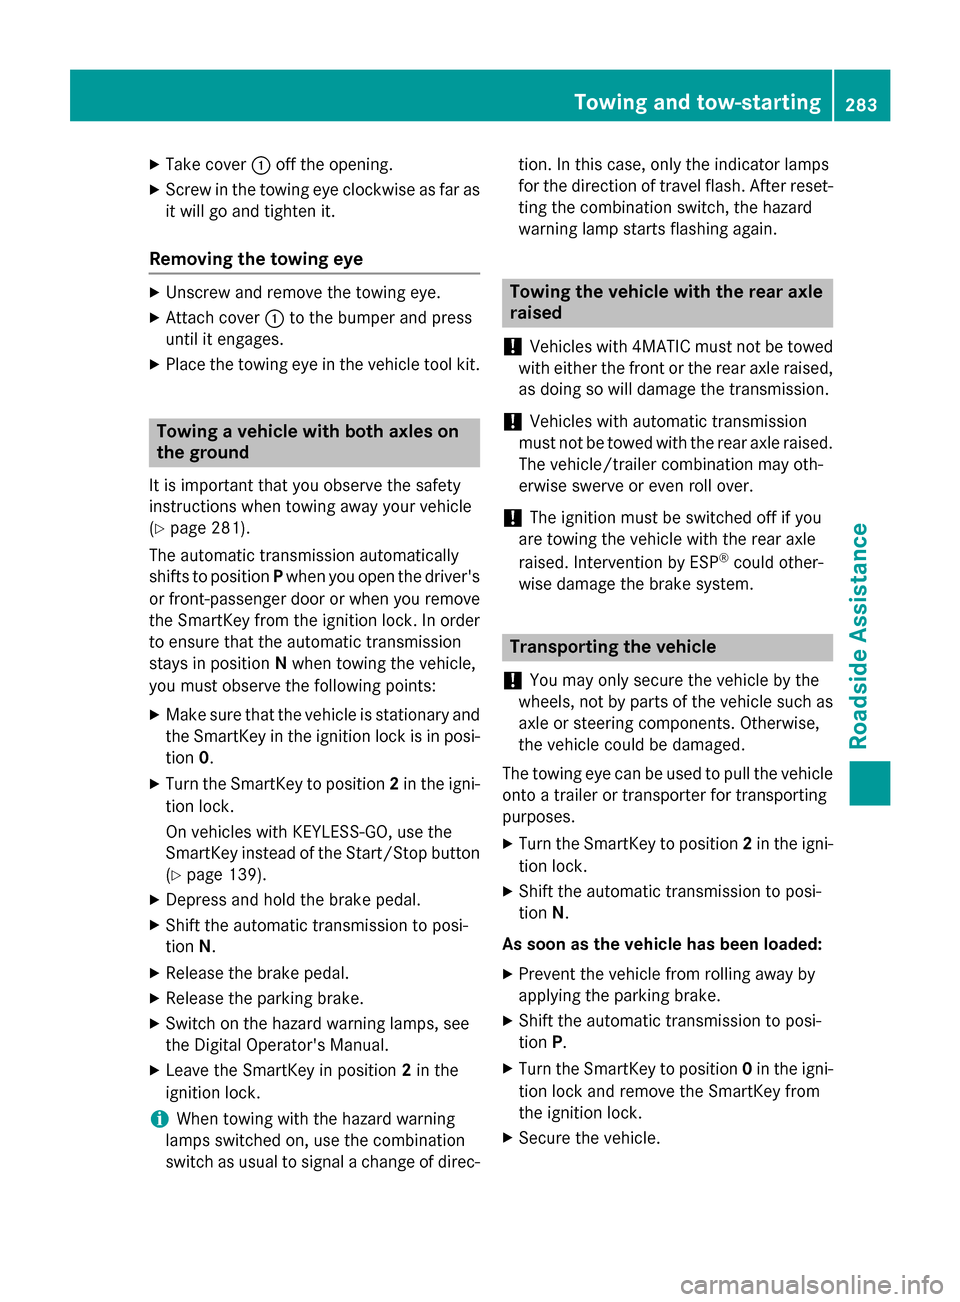
XTake cover:off the opening.
XScrew in the towing eye clockwise as far as
it will go and tighten it.
Removing the towing eye
XUnscrew and remove the towing eye.
XAttach cover :to the bumper and press
until it engages.
XPlace the towing eye in the vehicle tool kit.
Towing a vehicle with both axles on
the ground
It is important that you observe the safety
instructions when towing away your vehicle
(
Ypage 281).
The automatic transmission automatically
shifts to position Pwhen you open the driver's
or front-passenger door or when you remove
the SmartKey from the ignition lock. In order
to ensure that the automatic transmission
stays in position Nwhen towing the vehicle,
you must observe the following points:
XMake sure that the vehicle is stationary and
the SmartKey in the ignition lock is in posi- tion 0.
XTurn the SmartKey to position 2in the igni-
tion lock.
On vehicles with KEYLESS-GO, use the
SmartKey instead of the Start/Stop button
(
Ypage 139).
XDepress and hold the brake pedal.
XShift the automatic transmission to posi-
tion N.
XRelease the brake pedal.
XRelease the parking brake.
XSwitch on the hazard warning lamps, see
the Digital Operator's Manual.
XLeave the SmartKey in position 2in the
ignition lock.
iWhen towing with the hazard warning
lamps switched on, use the combination
switch as usual to signal a change of direc- tion. In this case, only the indicator lamps
for the direction of travel flash. After reset-
ting the combination switch, the hazard
warning lamp starts flashing again.
Towing the vehicle with the rear axle
raised
!
Vehicles with 4MATIC must not be towed
with either the front or the rear axle raised,
as doing so will damage the transmission.
!Vehicles with automatic transmission
must not be towed with the rear axle raised.
The vehicle/trailer combination may oth-
erwise swerve or even roll over.
!The ignition must be switched off if you
are towing the vehicle with the rear axle
raised. Intervention by ESP
®could other-
wise damage the brake system.
Transporting the vehicle
!
You may only secure the vehicle by the
wheels, not by parts of the vehicle such as
axle or steering components. Otherwise,
the vehicle could be damaged.
The towing eye can be used to pull the vehicle
onto a trailer or transporter for transporting
purposes.
XTurn the SmartKey to position 2in the igni-
tion lock.
XShift the automatic transmission to posi-
tion N.
As soon as the vehicle has been loaded:
XPrevent the vehicle from rolling away by
applying the parking brake.
XShift the automatic transmission to posi-
tion P.
XTurn the SmartKey to position 0in the igni-
tion lock and remove the SmartKey from
the ignition lock.
XSecure the vehicle.
Towing and tow-starting283
Roadside Assistance
Z
Page 312 of 350

XBring the front wheels into the straight-
ahead position.
XShift the transmission to positionP.
XVehicles with AIRMATIC: make sure that
"normal" level is selected (
Ypage 166).
XSwitch off the engine.
XRemove the SmartKey from the ignition
lock.
or, on vehicles with KEYLESS ‑GO:
XOpen the driver's door.
The on-board electronics now have status
0. This is the same as the SmartKey having
been removed.
XRemove the Start/Stop button from the
ignition lock (
Ypage 138).
XIf included in the vehicle equipment,
remove the tire-change tool kit from the
vehicle (
Ypage 270).
XSafeguard the vehicle against rolling away.
Securing the vehicle to prevent it from
rolling away
If your vehicle is equipped with a wheel chock,
it can be found in the tire-change tool kit
(
Ypage 270).
The folding wheel chock is an additional
safety measure to prevent the vehicle from
rolling away, for example when changing a
wheel.
XFold both plates upwards :.
XFold out lower plate;.
XGuide the lugs on the lower plate fully into
the openings in base plate =.
Securing the vehicle on level ground (example:
Sedan)
XOn level ground:place chocks or other
suitable items under the front and rear of
the wheel that is diagonally opposite the
wheel you wish to change.
Securing the vehicle on slight downhill gradients
(example: Sedan)
XOn light downhill gradients: place
chocks or other suitable items in front of
the wheels of the front and rear axle.
Raising the vehicle
GWARNING
If you do not position the jack correctly at the
appropriate jacking point of the vehicle, the
jack could tip over with the vehicle raised.
There is a risk of injury.
Only position the jack at the appropriate jack-
ing point of the vehicle. The base of the jack
must be positioned vertically, directly under
the jacking point of the vehicle.
310Changing a wheel
Wheels and tires
Page 313 of 350

!The jack is designed exclusively for jack-
ing up the vehicle at the jacking points.
Otherwise, your vehicle could be damaged.
Observe the following when raising the vehi-
cle:
RTo raise the vehicle, only use the vehicle-
specific jack that has been tested and
approved by Mercedes-Benz. If used incor-
rectly, the jack could tip over with the vehi- cle raised.
RThe jack is designed only to raise and hold
the vehicle for a short time while a wheel
is being changed. It is not suited for per-
forming maintenance work under the vehi-
cle.
RAvoid changing the wheel on uphill and
downhill slopes.
RBefore raising the vehicle, secure it from
rolling away by applying the parking brake
and inserting wheel chocks. Never disen-
gage the parking brake while the vehicle is
raised.
RThe jack must be placed on a firm, flat andnon-slip surface. On a loose surface, a
large, flat, load-bearing underlay must be
used. On a slippery surface, a non-slip
underlay must be used, e.g. rubber mats.
RDo not use wooden blocks or similar
objects as a jack underlay. Otherwise, the
jack will not be able to achieve its load-
bearing capacity due to the restricted
height.
RMake sure that the distance between the
underside of the tires and the ground does
not exceed 1.2 in (3 cm).
RNever place your hands and feet under the
raised vehicle.
RDo not lie under the vehicle.
RDo not start the engine when the vehicle is
raised.
RDo not open or close a door or the trunk lid/
tailgate when the vehicle is raised.
RMake sure that no persons are present in
the vehicle when the vehicle is raised. AMG vehicles with Performance Studio
equipment:
the wheel bolts are covered by a
hub cap. Before you can unscrew the wheel
bolts, you must remove the hub cap.
XTo remove: turn the center cover of hub
cap :counter-clockwise and remove.
XTo install: before installing, ensure that
hub cap :is in the open position. To do
this, turn the center cover counter-clock-
wise.
XPosition hub cap :and turn the center
cover clockwise until hub cap :engages
physically and audibly.
XMake sure that hub cap :is installed
securely.
XUsing lug wrench ;, loosen the bolts on
the wheel you wish to change by about one
full turn. Do not unscrew the bolts com-
pletely.
Changing a wheel311
Wheels and tires
Z
Page 314 of 350

Jacking points (example: Sedan)
The jacking points are located just behind thefront wheel housings and just in front of the
rear wheel housings (arrows).
AMG vehicles and vehicles with AMG
equipment: to protect the vehicle body, the
vehicle has covers next to the jacking points
on the outer sills.
Cover, front (example: vehicles with AMG Sports
package)
XAMG vehicles and vehicles with AMG
equipment: fold cover=upwards.
XPosition jack Aat jacking point ?.
XMake sure the foot of the jack is directly
beneath the jacking point.
XTurn crankBclockwise until jack Asits
completely on jacking point ?. The base of
the jack must lie evenly on the ground.
XTurn crank Buntil the tire is raised a max-
imum of 1.2 in (3 cm) from the ground.
Removing a wheel
!AMG vehicles: during removal and repo-
sitioning of the wheel, the wheel rim can
strike the ceramic-brake disc and damage
it. Therefore, you should proceed carefully
and get a second person assist to you.
Alternatively, you can use a second align-
ment bolt.
!Do not place wheel bolts in sand or on a
dirty surface. The bolt and wheel hub
threads could otherwise be damaged when
you screw them in.
312Changing a wheel
Wheels and tires