2016 MERCEDES-BENZ E-CLASS SALOON ESP
[x] Cancel search: ESPPage 344 of 557

Connecting USB devices
* NO
TEDama gecaused byhigh temp era‐
tures High
temp eratures can damage USB devices. #
Remo vethe USB device af ter use and
ta ke it out of theve hicle. The multimedia connection unit is
found in the
stow age compartment under the armrest and
has two USB ports. Depending on theve hicle's
equipment, additional USB ports may be found
in thestow age compartment of the cent recon‐
sole or rear folding compartment. #
Connect the USB device tothe USB port.
Pla yable music files are pla yed back only if
th e cor responding media display is activated.
% Use the USB port identified byç touse
Apple CarPlay™ and Android Auto™. Selecting a track
Multimedia sy
stem:
, Media
Vi ath e skip function #
Toskip backwards or forw ards toa track:
navigate up or down.
Vi ath e cur rent track list #
Select è. #
Select Current track list. #
Select a tra ck.
Selecting playback options
Multimedia sy stem:
, Media .
Z Options
Playing back similar trac ks #
Select Play similar tracks.
A track li stwith similar trac ksis created and
pla yed bac k.
Playback mode #
Select Play mode. #
Select Normal track sequence.
The cur rent track li stis pla yed in the order it
appears on the data storage medium. #
Select Random playback of the current track
list.
The cur rent track li stis pla yed in random
orde r. #
Select Random playback of the current
medium.
All trac kson the active data storage medium
are pla yed in random orde r.
% The available playback options depend on
th e connected media source.
Pa use and playback function
Multimedia sy stem:
, Media #
Press theto uchpad. #
Topause playback: select Ë. #
Tocontinue playba ck:select Ì.
Fa st forw ard/r ewind #
Press theto uchpad. #
Slide the controller tothe left or right 1. Multimedia sy
stem 341
Page 371 of 557

R
The bonnet was pr eviously opened.
The engine must be restar ted and the engine oil
le ve l will be de term ined again during driving.
On-board computer: , Service .
Engine oil level:
Yo u will see one of thefo llowing display
messa ges in the multifunction displa y:#
Engine oil level Measuring now: measu re‐
ment of the oil le vel is not yet possible.
Re peat there qu est af ter a maximum of 30
minutes' driving. #
Engine oil level OK andthe bar display for
indicating the oil le vel in the multifunction
display is green and is between "min" and
"max": the oil le vel is cor rect. #
Engine oil level Add 1.0 l andthe bar display
fo r indicating the oil le vel in the multifunction
display is orange and is below "min": top up
with 1 l of engine oil. #
Reduce engine oil level andthe bar display
fo r indicating the oil le vel in the multifunction
display is orange and is abo ve"max": drain off
theexc ess engine oil. Consult a qualified
specialist workshop. #
For engine oil level turn on ignition: switch on
th e ignition tocheck the engine oil le vel. #
Engine oil level System inoperative : sensor
fa ulty or not connected. Consult a qualified
specialist workshop. #
Engine oil level System currently unavail. :
close the engine bonn et.
To pping up engine oil &
WARNING Danger of bu rns from hot
component parts in the engine compart‐
ment
Cer tain component parts in the engine com‐
partment may be very hot, e.g. the engine,
th era diator and parts of theex haust sy stem. #
Let the engine cool down and only
to uch the component parts described
below: &
WARNING Risk offire and injury from
engine oil
If engine oil comes into con tact wi thhot
component parts in the engine compart‐
ment, it may ignite. #
Make sure that no engine oil is spilled
next tothefiller opening. #
Allow the engine tocool off and thor‐
oughly clean the engine oil from compo‐
nent parts before starting theve hicle. *
NO
TEEngine dama gecaused byan
incor rect oil filter, incor rect oil or addi‐
tives #
Do not use engine oils or oil filters
which do not cor respond tothe specifi‐
cations explicitly prescribed forthe
service inter vals. #
Do not alter the engine oil or oil filter in
order toachie velonger change inter vals
th an presc ribed. #
Do not use additives. 368
Maintenance and care
Page 385 of 557

tot
al loss of pressure in one or more tyres. How‐
eve r,th e tyre af fected must not show any clearly
visible damage.
Yo u can recognise MOExtended tyres bythe
MOExtended marking which appears on the side
wa ll of the tyre.
Ve hicles with tyre pressure loss warning sys‐
te m: MOExtended tyres may only be used in
conjunction wi than activated tyre pressure loss
wa rning sy stem.
Ve hicles with tyre pressure monitoring sys‐
te m: MOExtended tyres may only be used in
conjunction wi than activated tyre pressure mon‐
itoring sy stem.
If a pressure loss warning message appears in
th e multifunction display:
R Check the tyres for dama ge
R If driving on, obser vethefo llowing no tes &
WARNING Risk of accident when driving
in run-flat mode
When driving in run-flat mode, the handling
ch aracteristics are impaired. e.g. when cor‐ nering, when accelerating
stronglyand when
braking. #
Do not exceed the maximum permissi‐
ble speed. #
Avoid any abrupt steering and driving
manoeuvres as well as driving over
obs tacles (kerbs, pot holes, off-road).
This applies, in pa rticular, toa loaded
ve hicle. #
Stop driving in run-flat mode if you
notice:
R banging noise
R vehicle vibration
R smoke which smells like rubber
R continuous ESP ®
inter vention
R crac ksin tyre side walls #
After driving in run-flat mode, ha vethe
ri ms checkedby aqu alified specialist
wo rkshop with rega rd totheir fur ther
use. #
The defective tyre must be replaced in
eve rycase. Driving distance possible in li
mp-home mode
af te r the pressure loss warning Load condition Driving distance pos‐
sible in limp-homemode
Pa rtially laden 80 km
Fu lly laden 30 km R
The driving dis tance possible in li mp-home
mode may vary depending on the driving
st yle.
R Maximum permissible speed 80 km/h.
If a tyre has gone flat and cannot be replaced
with an MOEx tended tyre, a standard tyre may
be used as a temp orary measure. TIREFIT kit
storage location The TIREFIT kit is located under
the boot floor. 382
Breakdown assis tance
Page 390 of 557

#
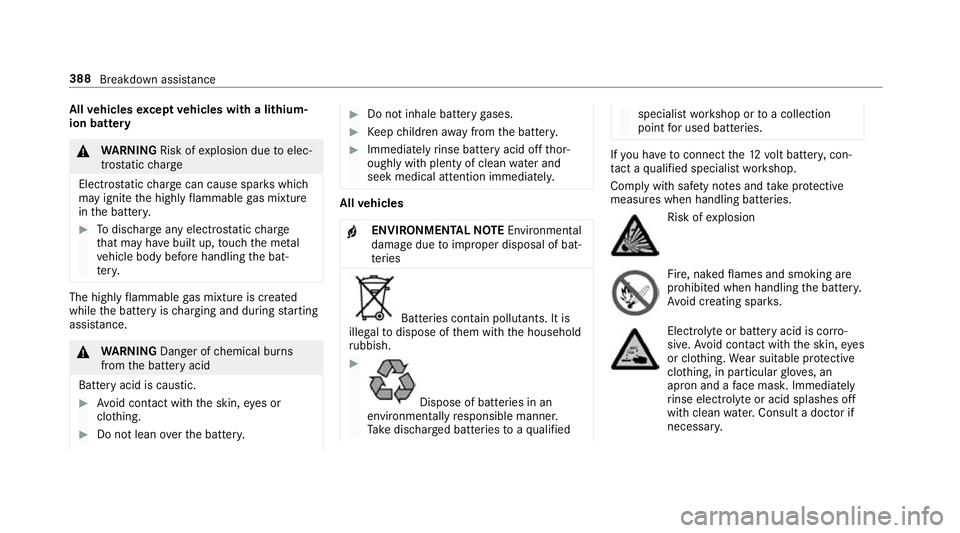
Toreduce the tyre pressure: press pres‐
su re re lease button 1next tomanome ter
2 . #
When the tyre pressure is cor rect, unscr ew
th efilling hose from theva lve of the sealed
tyre. #
Screw theva lve cap onto the tyre valve of
th e sealed tyre. #
Pull the tyre sealant bottle out of the tyre
inflation compressor.
The filling hose stay s on the tyre sealant bot‐
tle. #
Drive tothe nearest qualified specialist work‐
shop and ha vethe tyre, tyre sealant bottle
and filling hose replaced there. Batte
ry(vehicle) Note
s onthe12 V battery Plug-in
hybrid: make sure that youre ad the
separate Owner's Manual. You could otherwise
fa ilto recognise dangers, e.g. due tohigh volt‐
age. &
WARNING Risk of an accident due to
wo rkcar ried out incor rectly on the bat‐
te ry
Wo rkcar ried out incor rectly on the battery
can, forex ample, lead toa short circuit. This
can lead tofunction restrictions in saf ety-re l‐
eva nt sy stems, e.g. the lighting sy stem, ABS
(anti-lock braking sy stem) or ESP ®
(Elec‐
tronic Stability Prog ram). The operating
saf ety of your vehicle may be restricted. Yo
u could lose cont rol of theve hicle in the
fo llowing situations:
R when braking
R intheeve nt of ab rupt steering manoeu‐
vres and/or when theve hicle's speed is
not adap tedto thero ad conditions #
Intheeve nt of a sho rtcircuit or a simi‐
lar incident, contact a qualified special‐
ist workshop immediately. #
Do not continue driving. #
Alw ays ha vewo rkon the battery car ried
out at a qualified specialist workshop. R
Further information on ABS (→ page180)
R Further information on ESP ®
(→ page 181)
Fo r saf etyre asons, Mercedes-Benz recommends
th at you on lyuse bat teries which ha vebeen tes‐
te d and appr ovedfo ryo ur vehicle byMercedes-
Benz. These batteries pr ovide inc reased impact
pr otection toprev ent vehicle occupants from
suf fering acid bu rns should the battery be dam‐
aged in theeve nt of an accident. Breakdown assi
stance 387
Page 391 of 557

All
vehicles except vehicles with a lithium-
ion battery &
WARNING Risk ofexplosion due toelec‐
tros tatic charge
Electros taticch arge can cause spa rks which
may ignite the highly flammable gas mixture
in the batter y. #
Todischar geany electros tatic charge
th at may ha vebuilt up, touch the me tal
ve hicle body before handling the bat‐
te ry. The highly
flammable gas mixture is created
while the battery is charging and during starting
assis tance. &
WARNING Danger of chemical burns
from the battery acid
Battery acid is caustic. #
Avoid contact with the skin, eyes or
clo thing. #
Do not lean overth e batter y. #
Do not inhale battery gases. #
Keep children away from the batter y. #
Immedia tely rinse battery acid off thor‐
oughly with plenty of clean water and
seek medical attention immediately. All
vehicles
+ ENVIRONMENTAL
NOTEEnvironmental
dama gedue toimproper disposal of bat‐
te ries Batteries conta
in pollutants. It is
illegal todispose of them with the household
ru bbish. #
Dispose of batteries in an
environmen tally responsible manner.
Ta ke dischar ged batteries toaqu alified specialist
workshop or toa collection
point for used batteries. If
yo u ha vetoconnect the12 volt batter y,con‐
ta ct a qualified specialist workshop.
Comply with saf ety no tes and take protective
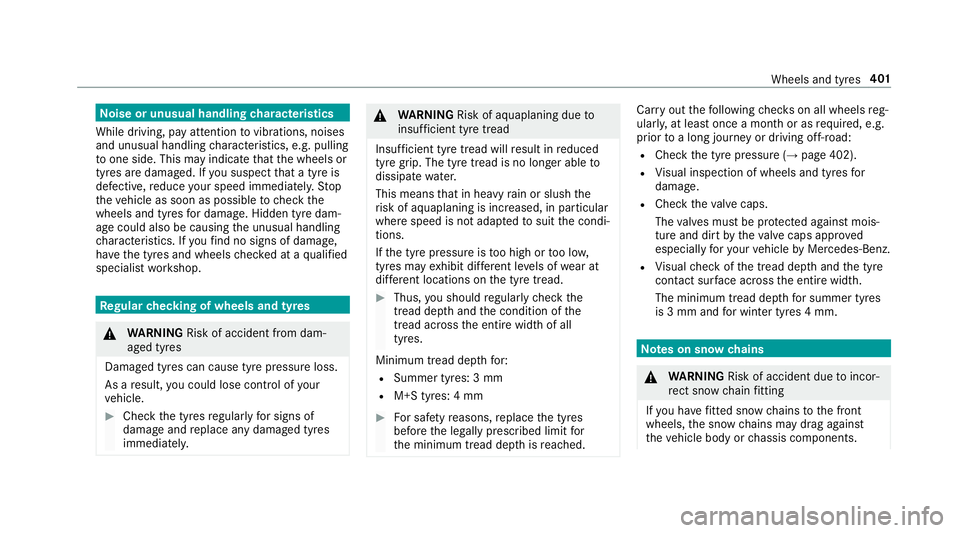
measures when handling batteries. Risk of
explosion Fire, naked
flames and smoking are
prohibi ted when handling the batter y.
Av oid creating spar ks. Electrolyte
or battery acid is cor ro‐
sive. Avoid contact with the skin, eyes
or clo thing. Wear suitable pr otective
clo thing, in particular glove s, an
apron and a face mas k.Immedia tely
ri nse electrolyte or acid splashes off
with clean water.Consult a doc tor if
necessar y. 388
Breakdown assis tance
Page 404 of 557

No
ise or unusual handling characteristics
While driving, pay attention tovibrations, noises
and unusual handling characteristics, e.g. pulling
to one side. This may indicate that the wheels or
tyres are damaged. If you suspect that a tyre is
defective, reduce your speed immediatel y.Stop
th eve hicle as soon as possible tocheck the
wheels and tyres for dama ge. Hidden tyre dam‐
age could also be causing the unusual handling
ch aracteristics. If youfind no signs of damage,
ha ve the tyres and wheels checked at a qualified
specialist workshop. Re
gular checking of wheels and ty res&
WARNING Risk of accident from dam‐
aged tyres
Dama ged tyres can cause tyre pressure loss.
As a result, you could lose cont rol of your
ve hicle. #
Check the tyres regularly for signs of
dama geand replace any damaged tyres
immediatel y. &
WARNING Risk of aquaplaning due to
insuf ficient tyre tread
Insu fficient tyre tread will result in reduced
tyre grip. The tyre tread is no longer able to
dissipate water.
This means that in heavy rain or slush the
ri sk of aquaplaning is increased, in particular
where speed is not adap tedto suit the condi‐
tions.
If th e tyre pressure is too high or too lo w,
tyres may exhibit dif fere nt le vels of wear at
dif fere nt locations on the tyre tread. #
Thus, you should regularly check the
tread de pth and the condition of the
tread across the entire width of all
tyres.
Minimum tread dep thfor:
R Summer tyres: 3 mm
R M+S tyres: 4 mm #
For saf etyre asons, replace the tyres
before the legally prescribed limit for
th e minimum tread dep thisreached. Car
ryout thefo llowing checks on all wheels reg‐
ularly, at least once a month or as requ ired, e.g.
prior toa long journey or driving off- road:
R Check the tyre pressure (→ page 402).
R Visual inspection of wheels and tyres for
damage.
R Check theva lve caps.
The valves must be pr otected against mois‐
ture and dirt bytheva lve caps appr oved
especially foryo ur vehicle byMercedes-Benz.
R Visual check of the tread dep thand the tyre
contac t surface across the entire width.
The minimum tread dep thfor summer tyres
is 3 mm and for winter tyres 4 mm. Note
s on snow chains &
WARNING Risk of accident due toincor‐
re ct snow chain fitting
If yo u ha vefitted snow chains tothe front
wheels, the snow chains may drag against
th eve hicle body or chassis components. Wheels and tyres
401
Page 405 of 557

This could cause damage
totheve hicle or
th e tyres. #
Neverfit snow chains on the front
wheels. #
Only fit snow chains on there ar wheels
in pairs. *
NO
TEDama getothe wheel trim from fit‐
te d snow chains If sn
ow ch ains are fitted tosteel wheels, the
wheel trims can be damaged. #
Remo vethe wheel trims of steel wheels
before fitting snow chains. R
Snow chains are on ly permissible for cer tain
wheel/tyre combinations. You can obtain
information about this from a Mercedes-Benz
Service Cent re.
R For saf etyre asons, on lyuse sn owchains that
ha ve been specifically appr ovedfo ryo ur
ve hicle byMercedes-Benz, or snow chains
with the same quality standard. R
If sn owchains are fitted, the maximum per‐
missible speed is 50 km/h.
R Vehicles with Parking Pilo t:Do not use
Pa rking Assist PARKTRONIC if sn ow chains
are fitted.
R Vehicles with AIR BODY CONT ROL:On ly
drive at raised vehicle le vel if snow chains
are fitted.
% You can permanently limit the maximum
ve hicle speed for driving with winter tyres
(→ page 193).
% You can deactivate ESP ®
to pull away
( → page 184). This allo ws the wheels to
spin, achieving an increased driving forc e. Ty
re pressure Note
s on tyre pressure &
WARNING Risk of accident due toinsuf‐
fi cient or excessive tyre pressure
Underinfla ted or overinfla ted tyres pose the
fo llowing risks:
R The tyres may bur st, especially as the
load and vehicle speed increase.
R The tyres may wearexc essively and/or
une venly, which may greatlyimpair tyre
traction.
R The driving characteristics, as well as
st eering and braking, may be greatly
impaired. #
Comply with there commended tyre
pressure and check the tyre pressure of
all tyres including the spare wheel regu‐
larly:
R at least once a month
R when the load changes 402
Wheels and tyres
Page 407 of 557

The tyre pressure
table sho ws there commended
tyre pressure for all tyres appro vedfo rth is vehi‐
cle. The recommended tyre pressures apply for
cold tyres under various operating conditions,
i.e. loading and/or speed of theve hicle.
If one or more tyre sizes precede a tyre pres‐
sure, the tyre pressure information following is
only valid forth ose tyre sizes. If
th e preceding tyre sizes are complemented by
th e+ symbol, the tyre pressure information
fo llowing sho wsalternative tyre pressures.
These tyre pressures may impr oveyour vehicle's
ri de comfort. Fuel consum ption may then
increase slightl y.
The load conditions "partially laden" and "fully
laden" are defined in theta ble for dif fere nt num‐
be rs of passengers and amounts of luggage. The
actual number of seats may dif fer from this.
Be sure toalso obse rveth efo llowing fur ther
re lated subjects:
R Notes on tyre pressure (→ page 402) Ty
re pressure moni toring sy stem Fu
nction of the ty repressure moni toring sys‐
tem
The sy stem checks the tyre pressure of the tyres
fi tted totheve hicle bymeans of a tyre pressu re
sensor.
New tyre pressure sensors, e.g. in winter tyres,
are automatically taught-in thefirs t time they are
driven. The tyre pressure appears in
the multifunction
display (→ page247).
If th ere is a subs tantial pressure loss or if the
tyre temp erature is excessive, a warning will be
given:
R Via display messages (→ page473).
R Viath eh warning lamp in the instrument
clus ter (→ page 508).
It is the driver's responsibility toset the tyre
pressure tothere commended cold tyre pressure
suitable forth e operating situation. Set the tyre
pressure for cold tyres using a tyre pressu re
ga uge. No tethat the cor rect tyre pressure for
th e cur rent operating situation mu stfirs t be
ta ught-in tothe tyre pressure monitoring sys‐
te m.
In most cases, the tyre pressure monitoring sys‐
te m will auto matically update the new refere nce
va lues af teryo u ha vechanged the tyre pressure.
Yo u can, ho wever,also update there fere nce val‐
ues byrestarting the tyre pressure monitoring
sy stem manually (→ page 405).404
Wheels and tyres