2016 MERCEDES-BENZ CLS-Class key
[x] Cancel search: keyPage 131 of 246

Using the touchpad
You determine the first letter of the contact
you are looking for with the first character you
enter.
XDraw the letter on the touchpad surface.
The first contact with the selected first
character is highlighted in the address
book.
Further information on handwriting recog-
nition on the touchpad (
Ypage 27).
XDraw additional letters on the touchpad
surface one after another.
XTo complete the search and return to the
address book: press the touchpad.
XTo select and call the contact: glide up or
down and press.
Adding a new contact
You can enter address data directly into the
address book. If you store telephone num-
bers in the COMAND phone book, these are
also saved in the address book. If you store a
navigation destination, COMAND creates an
address book entry which includes the com-
plete navigable address data.
XCall up the address book (Ypage 128).
XTo switch to the menu bar: slide 6the
controller.
XTo select New: turn and press the controller.
The surname and first name input lines are
displayed.
XEnter characters using the controller
(
Ypage 33) or the number keypad or the
touchpad (
Ypage 27) depending on the
vehicle's equipment.
XEnter characters using the controller
(
Ypage 33) or the number keypad.
XTo save the surname and first name: select
¬.
The details for the contact are displayed.
XTo add a desired entry (e.g. Add E-Mail
Address): turn and press the controller.
Depending on the type of entry, the corre-
sponding input menu appears.
XEnter characters using the controller
(
Ypage 33) or the number keypad or the
touchpad (
Ypage 27) depending on the
vehicle's equipment.
XEnter characters using the controller
(
Ypage 33) or the number keypad.
XTo finish and save an entry: select ¬.
Displaying contact details
XCall up the address book (Ypage 128).
XTo select a contact: turn and press the con-
troller.
The details for the contact are displayed.
The entries can be categorized as follows:
\ Business details
6 Home details
iAn address book entry can contain the
following information:
Rname
Rfirst name
Rcompany
Rup to five telephone numbers
Rtwo email addresses
RInternet address
Rtwo addresses
Rgeo-coordinates
Address book129
Telephone
Z
Page 132 of 246

Adding information to a contact
Amaximum of fiv etelephon enumber scan be
saved for on econtact .
XCall up th eaddress book (Ypage 128).
XTo selectacontact :tur nand press th econ-
troller .
The details for th econtact are displayed.
XTo add th edesired entr y(e.g. AddE-Mail
Addres s): turnand press th econtroller .
Dependin gon th etyp eof entry, th ecorre-
sponding input men uappears.
XEnte rcharacters usin gth econtroller
(
Ypage 33 )or th enumber keypad or th e
touchpad (
Ypage 27)depending on th e
vehicle's equipment.
XEnte rcharacters usin gth econtroller
(
Ypage 33) or th enumber keypad.
XTo finish and sav ean entry: select ¬.
Startingroute guidance to an address
or geo-coor dinates
If an address wit h a ZIPcode is saved, th e
address can be used for rout eguidance .If th e
ZIP code canno tbe assigned to an exact
address ,you can adjust th edestination sub-
sequently usin gth econtroller .
XCall up theaddress book (Ypage 128).
XTo selectacontact :tur nand press th econ-
troller .
The details for th econtact are displayed.
XTo select th eaddress or geo-coordinates:
tur nand press th econtroller .
The navigation men uis displayed.
XTo select Start:slide 6and press th e
controller .
The rout eto th edestination address is cal-
culated and rout eguidance starts.
Makes a call
XCall up th eaddr essbook (Ypage 128).
XTo select acontact :tur nand pre ssthecon-
troller .
The details for th econtact are displayed.
XTo select atelephon enumber :tur nand
press th econtroller .
The number is dialed .Further information
about th efunction sduring acall
(
Ypage 120).
Sending text messages
XCall up th eaddress book (Ypage 128).
XTo selectacontact :tur nand pre ssthecon-
troller .
The details for th econtact are displayed.
XTo highligh tth etelephon enumber :tur nth e
controller .
XTo select G:slide9 thecontroller .
XTo select SendTex tMessag e:tur nand
press th econtroller .
The entr yfields for ate xt message are dis-
played (
Ypage 142).
Observ eth erequirements for th emessage
function (
Ypage 138).
Sending e-mail
XCall up th eaddr essbook (Ypage 128).
XSelectan entry: tur nand pre ssthecontrol -
ler .
The details for th econtact are displayed.
XTo select an e-mail address :tur nand pre ss
th econtroller .
The entr yfields for an e-mail are displayed
(
Ypage 142).
Observ eth erequirements for th emessage
function (
Ypage 138).
130Address book
Telephone
Page 138 of 246

XTo call up the telephone menu: press the
%button.
XTo switch to the menu bar: slide 6the
controller.
XTo select Call Lists: turn and press the
controller.
XTo select Calls ReceivedorCalls
Dialed: turn and press the controller.
The relevant list is displayed.
XTo highlight the desired entry: turn the con-
troller.
XTo select G: slide 9the controller.
XTo select Details: turn and press the con-
troller.
The details are displayed.
XTo go back to the list: slide 8the con-
troller repeatedly until the list is highligh-
ted.
Saving telephone numbers
Adding new entries to the address book
XTo call up the telephone menu: press the
% button.
XTo switch to the menu bar: slide 6the
controller.
XTo select Call Lists: turn and press the
controller.
XTo select Calls ReceivedorCalls
Dialed: turn and press the controller.
The relevant list is displayed.
XTo highlight the desired telephone number:
turn the controller.
XTo select G: slide 9the controller.
XTo select Save: turn and press the control-
ler.
XSelect New Entry.
XSelect a number category, e.g. Home.
XSelect a telephone category, e.g. Mobile
Phone.
The selected category is marked with #.
If you have marked a number as Prefer‐
red, it is shown at the top of the list.
XSelectContinue.
The entry field for the name of the new con-
tact is displayed. The entry field for the
telephone number is filled in automatically.
XEnter characters using the controller
(
Ypage 33) or the number keypad or the
touchpad (
Ypage 27) depending on the
vehicle's equipment.
XEnter characters using the controller
(
Ypage 33) or the number keypad.
XTo finish and save an entry: select ¬.
The new contact has been created.
Adding information to an address book
entry
XTo call up the telephone menu: press the
% button.
XTo switch to the menu bar: slide 6the
controller.
XTo select Call Lists: turn and press the
controller.
XTo select Calls ReceivedorCalls
Dialed: turn and press the controller.
The relevant list is displayed.
XTo highlight the desired telephone number:
turn the controller.
XTo select G: slide 9the controller.
XTo select Save: turn and press the control-
ler.
XSelect Add Phone No..
XSelect a number category, e.g. Home.
XSelect a telephone category, e.g. Mobile
Phone.
136Call lists
Telephone
Page 144 of 246

Writing text messages
Writing a new text message
Observe the requirements for the message
function (
Ypage 138).
XTo call up the telephone menu: press the
% button.
XTo switch to the menu bar: slide 6the
controller.
XTo select 1: turn and press the controller.
The message menu is displayed.
XTo switch to the menu bar: slide 6the
controller.
XTo select New: turn and press the controller.
XTo select Text Message: turn and press
the controller.
The text message input menu is displayed.
The To:
input line is selected.
Entering a recipient
XEnter characters using the controller
(
Ypage 33) or the number keypad.
or
XTo enter a phone number from the phone
book: select the Æsymbol.
The contacts from the address book which
have a phone number are displayed.
XSearch for and select an entry
(
Ypage 124).
The number is copied to the recipient line.
Entering text and sending text messages
XTo select an input line for text: select 5in
the character bar.
XEnter characters. COMAND contains templates which you
can use when writing your messages
(
Ypage 143).
XTo send the text message: select
OK.
Answering a text message
Observe the requirements for the message
function (
Ypage 138).
XDisplay the message (Ypage 140).
XPress the controller.
XTo selectReply: turn and press the con-
troller.
The text message input menu is displayed.
The addressee's details are automatically
filled in using the details in the original
message.
Writing e-mails
Writing a new e-mail
Observe the requirements for the message
function (
Ypage 138).
XTo call up the telephone menu: press the
% button.
XTo switch to the menu bar: slide 6the
controller.
XTo select 1: turn and press the controller.
The message menu is displayed.
XTo switch to the menu bar: slide 6the
controller.
142Messages (text messages and e-mails)
Telephone
Page 145 of 246

XTo selectNew: turn and press the controller.
XTo select E-Mail: turn and press the con-
troller.
The e-mail input menu appears. The To:
input line is selected.
Entering a recipient
XEnter characters using the controller
(
Ypage 33) or the number keypad.
or
XTo insert an e-mail address from the
address book: select the Æsymbol.
The contacts from the address book which
have an e-mail address are displayed.
XSearch for and select an entry
(
Ypage 124).
The e-mail address is copied to the addres-
see line.
Entering the subject
XTo select the Subject:input line: select
5 in the character bar.
XEnter characters.
Entering text and sending e-mails
XTo select an input line for text: select 5in
the character bar.
XEnter characters.
COMAND contains templates which you
can use when writing your messages
(
Ypage 143).
XTo send the e-mail: select OK.
Answering an e-mail
Observe the requirements for the message
function (
Ypage 138).
XDisplay the message (Ypage 140).
XTo call up a menu: press the controller.
XTo selectReply: turn and press the con-
troller.
The e-mail input menu appears. The
addressee's details are automatically filled
in using the details in the original message.
When replying to an e-mail, you can also
select Reply
toAllinstead of Reply. In thiscase, the reply is sent not just to the sender
but to all those who received the original mes-
sage.
Forwarding an e-mail
Observe the requirements for the message
function (
Ypage 138).
XDisplay the message (Ypage 140).
XTo call up a menu: press the controller.
XTo select Forward: turn and press the con-
troller.
The input menu appears. The subject line is automatically filled in with the same details
as those in the original message.
Text templates
Using text templates
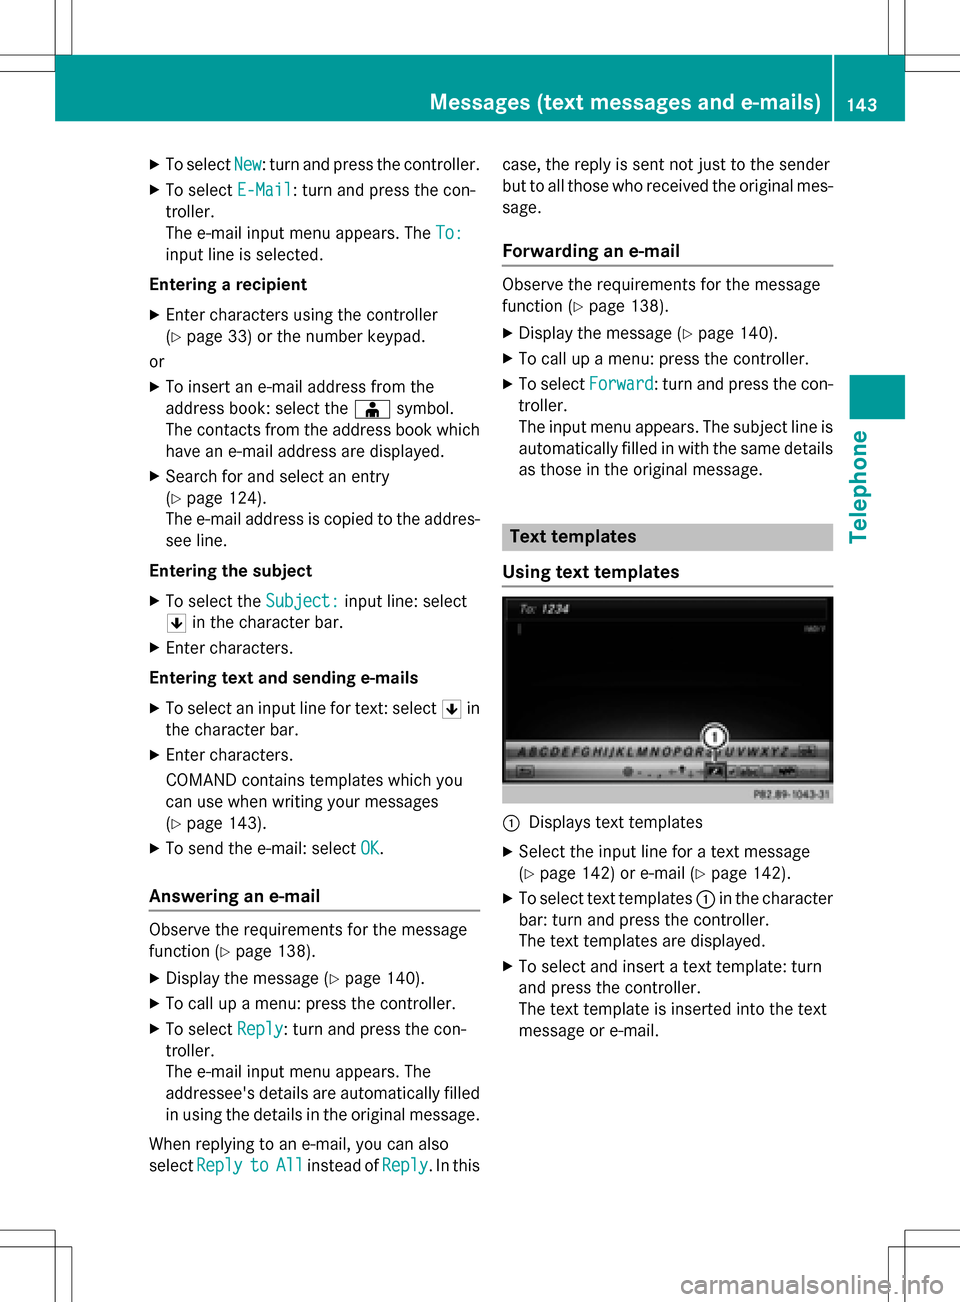
:Displays text templates
XSelect the input line for a text message
(
Ypage 142) or e-mail (Ypage 142).
XTo select text templates :in the character
bar: turn and press the controller.
The text templates are displayed.
XTo select and insert a text template: turn
and press the controller.
The text template is inserted into the text
message or e-mail.
Messages (text messages and e-mails)143
Telephone
Z
Page 146 of 246

Editing text templates
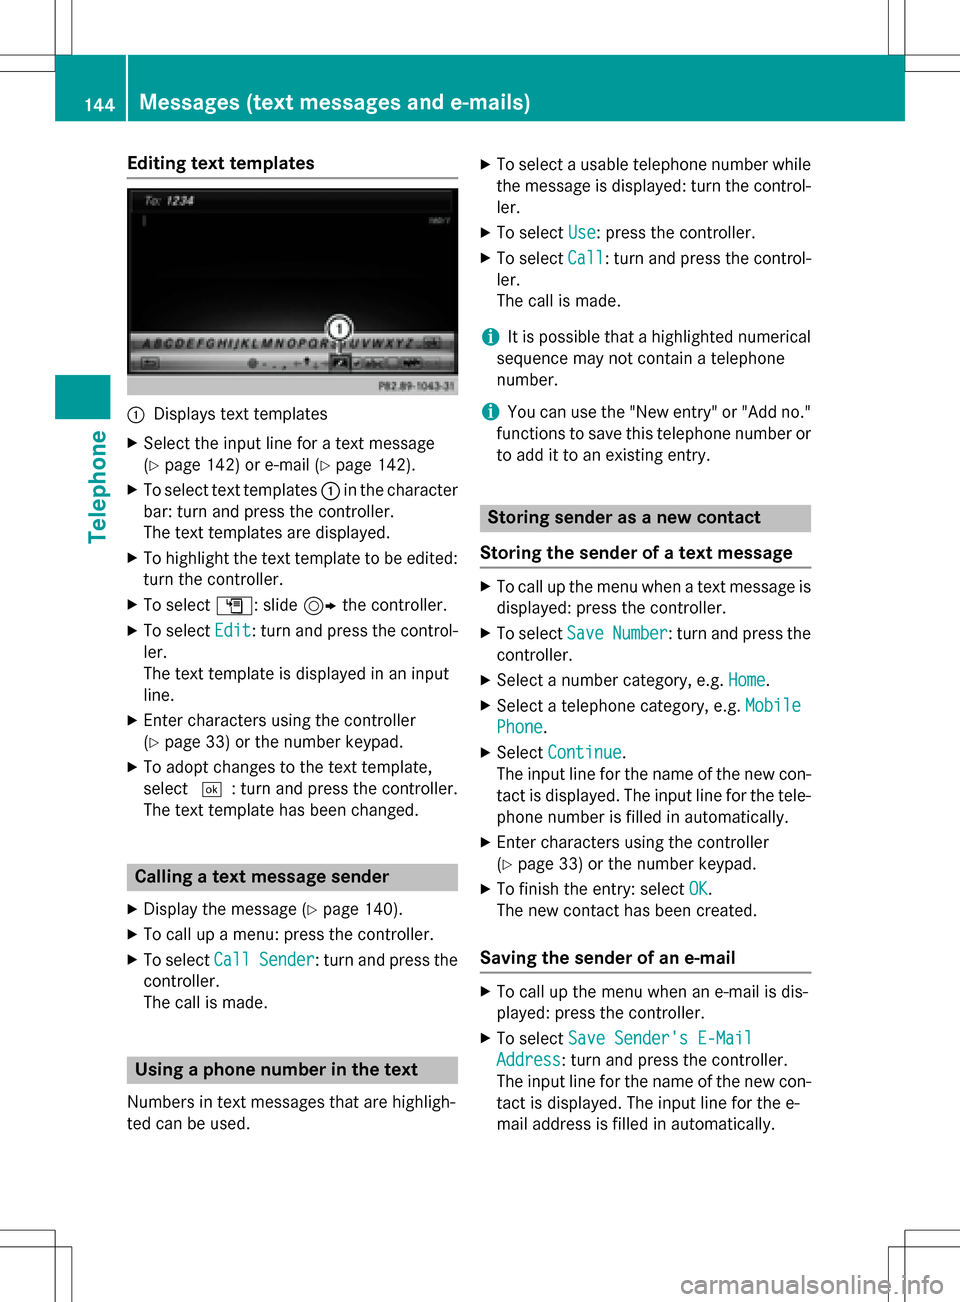
:Displays text templates
XSelect the input line for a text message
(
Ypage 142) or e-mail (Ypage 142).
XTo select text templates:in the character
bar: turn and press the controller.
The text templates are displayed.
XTo highlight the text template to be edited: turn the controller.
XTo select G: slide 9the controller.
XTo select Edit: turn and press the control-
ler.
The text template is displayed in an input
line.
XEnter characters using the controller
(
Ypage 33) or the number keypad.
XTo adopt changes to the text template,
select ¬: turn and press the controller.
The text template has been changed.
Calling a text message sender
XDisplay the message (Ypage 140).
XTo call up a menu: press the controller.
XTo select CallSender: turn and press the
controller.
The call is made.
Using a phone number in the text
Numbers in text messages that are highligh-
ted can be used.
XTo select a usable telephone number while
the message is displayed: turn the control-
ler.
XTo select Use: press the controller.
XTo selectCall: turn and press the control-
ler.
The call is made.
iIt is possible that a highlighted numerical
sequence may not contain a telephone
number.
iYou can use the "New entry" or "Add no."
functions to save this telephone number or
to add it to an existing entry.
Storing sender as a new contact
Storing the sender of a text message
XTo call up the menu when a text message is displayed: press the controller.
XTo select SaveNumber: turn and press the
controller.
XSelect a number category, e.g. Home.
XSelect a telephone category, e.g. Mobile
Phone.
XSelectContinue.
The input line for the name of the new con-
tact is displayed. The input line for the tele-
phone number is filled in automatically.
XEnter characters using the controller
(
Ypage 33) or the number keypad.
XTo finish the entry: select OK.
The new contact has been created.
Saving the sender of an e-mail
XTo call up the menu when an e-mail is dis-
played: press the controller.
XTo select Save Sender's E-Mail
Address: turn and press the controller.
The input line for the name of the new con-
tact is displayed. The input line for the e-
mail address is filled in automatically.
144Messages (text messages and e-mails)
Telephone
Page 147 of 246

XEnter characters using the controller
(
Ypage 33) or the number keypad.
XTo finish the entry: selectOK.
The new contact has been created.
Deleting messages
XCall up the message folder (Ypage 140).
XTo select the message: turn and press the
controller.
XTo select G: slide 9the controller.
XTo select Delete: turn and press the con-
troller.
XTo select Yes: turn and press the controller.
The message is deleted from the mobile
phone and COMAND.
or
XTo select No: turn and press the controller.
The process is canceled.
iThis delete function is not supported by all
mobile phones. The Delete
failed.mes-
sage then appears.
Messages (text messages and e-mails)145
Telephone
Z
Page 156 of 246

XTo selectInternet: turn and press the
controller.
The menu with the Internet functions is dis-
played.
XTo select Mercedes-Benz Apps: turn and
press the controller.
XTo select Local Search: turn and press
the controller.
Further information on how to enter the
search position and search term
(
Ypage 154).
iYou will first need to register COMAND
before you can use the Internet functions.
To do so, you have to enter your name and
postal address once in the vehicle and con-
firm the general terms and conditions.
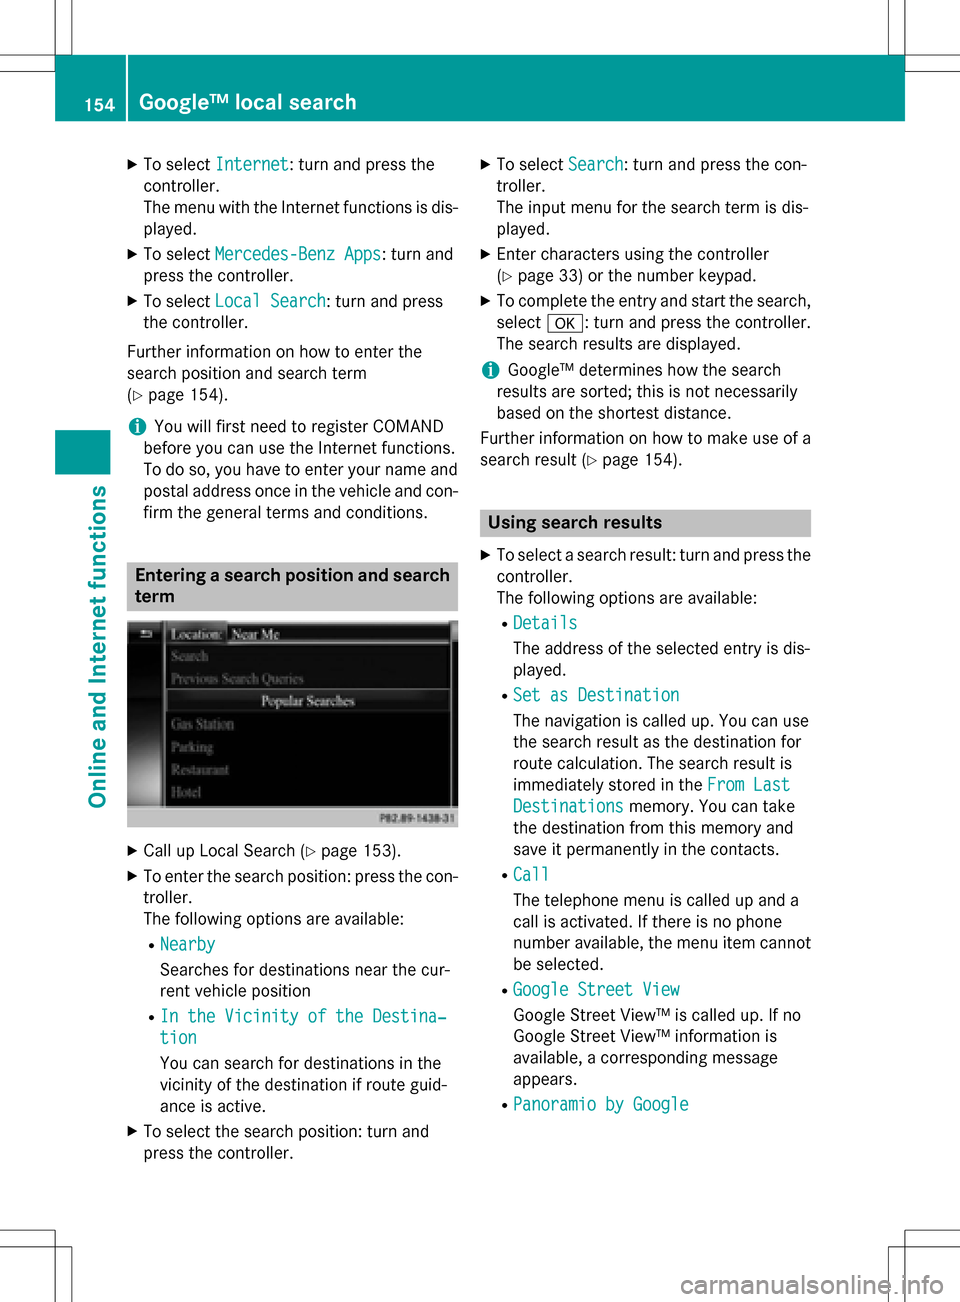
Entering a search position and search term
XCall up Local Search (Ypage 153).
XTo enter the search position: press the con-
troller.
The following options are available:
RNearby
Searches for destinations near the cur-
rent vehicle position
RIn the Vicinity of the Destina‐
tion
You can search for destinations in the
vicinity of the destination if route guid-
ance is active.
XTo select the search position: turn and
press the controller.
XTo select Search: turn and press the con-
troller.
The input menu for the search term is dis-
played.
XEnter characters using the controller
(
Ypage 33) or the number keypad.
XTo complete the entry and start the search,
select a: turn and press the controller.
The search results are displayed.
iGoogle™ determines how the search
results are sorted; this is not necessarily
based on the shortest distance.
Further information on how to make use of a
search result (
Ypage 154).
Using search results
XTo select a search result: turn and press the
controller.
The following options are available:
RDetails
The address of the selected entry is dis-
played.
RSet as Destination
The navigation is called up. You can use
the search result as the destination for
route calculation. The search result is
immediately stored in the From Last
Destinationsmemory. You can take
the destination from this memory and
save it permanently in the contacts.
RCall
The telephone menu is called up and a
call is activated. If there is no phone
number available, the menu item cannot be selected.
RGoogle Street View
Google Street View™ is called up. If no
Google Street View™ information is
available, a corresponding message
appears.
RPanoramio by Google
154Google™ local search
Online and Internet functions