2016 MERCEDES-BENZ CLA fuel cap release
[x] Cancel search: fuel cap releasePage 11 of 374

Driving tips
Automati c transmissio n ................ .1 61
Brakes .......................................... .1 75
Break-in period .............................. 146
Checking brake lining thickness .... 176
DISTRONIC PLUS ........................... 186
Downhill gradient ........................... 175
Drinking and driving ....................... 173
Driving in winter ............................ .1 77
Driving on flooded roads ................ 177
Driving on wet roads ..................... .1 77
Exhaust check ............................... 173
Fuel ................................................ 173
General .......................................... 172
Hydroplaning ................................. 177
Icy road surfaces ........................... 177
Limited braking efficiency on sal-
ted roads ....................................... 175
Snow chains .................................. 331
The first 1000 miles (1500 km) ..... 146
Wet road surface ........................... 175
DVD video
Operating (on-board computer) ..... 217
DYNAMIC SELECT button
Climate control (3-zone automatic
climate control) ............................ .1 35
Climate control (air-conditioning
system) .......................................... 132
DYNAMIC SELECT button (all vehi-
cles except Mercedes-AMG vehi-
cles) .................................................... 155
DYNAMIC SELECT controller
(Mercedes-AMG vehicles) ................. 156
E
EBD (electronic brake force distri-
bution)
Display message ............................ 230
Function/notes ................................ 72
ECO display
Function/notes ............................ .1 74
On-board computer ....................... 214
ECO start/stop function
Automatic engine start .................. 152
Automatic engine switch-off .......... 152
Deactivating/activating ................. 153
General information ....................... 152 Important safety notes .................. 151
Introduction ................................... 151
Electronic Stability Program
see ESP ®
(Electronic Stability Program)
Emergency
Automatic measures after an acci-
dent ................................................. 58
Emergency release
Driver's door ................................... .8 5
Trunk ............................................... 87
Vehicle ............................................. 85
Emergency Tensioning Devices
Activation ......................................... 56
Emissions control
Service and warranty information ... .2 2
Engine
Check Engine warning lamp .......... .2 67
Display message ............................ 243
ECO start/stop function ................ 151
Engine number ............................... 365
Irregular running ............................ 154
Jump-starting ................................. 319
Starting (important safety notes) ... 149
Starting problems .......................... 154
Starting the engine with the
SmartKey ....................................... 149
Starting with the Start/Stop but-
ton ................................................. 150
Switching off .................................. 170
Tow-starting (vehicle) ..................... 325
Engine electronics
Problem (malfunction) ................... 154
Engine jump starting
see Jump starting (engine)
Engine oil
Adding ........................................... 298
Additives ........................................ 369
Checking the oil level ..................... 297
Checking the oil level using the
dipstick .......................................... 298
Display message ............................ 245
Filli ng capacity ............................... 368
No tes about oil grades ................... 368
Notes on oil level/consumption .... 297
Temperature (on-board computer,
Mercedes-AMG vehicles) ............... 223
Viscosity ........................................ 369 Index 9
Page 317 of 374

Do not continue driving. Contact a qualified
specialist workshop.
i In cases such as the one mentioned
above, contact an authorized Mercedes-
Benz Center. Or call 1-800-FOR-MERCedes
(in the USA) or 1-800-387-0100 (in Can-
ada). X
Correct the tire pressure if it is still at least
130 kPa (1.3 bar/19 psi). See the Tire and
Loading Information placard on the driver's
side B-pillar or the tire pressure table in the
fuel filler flap for values. X
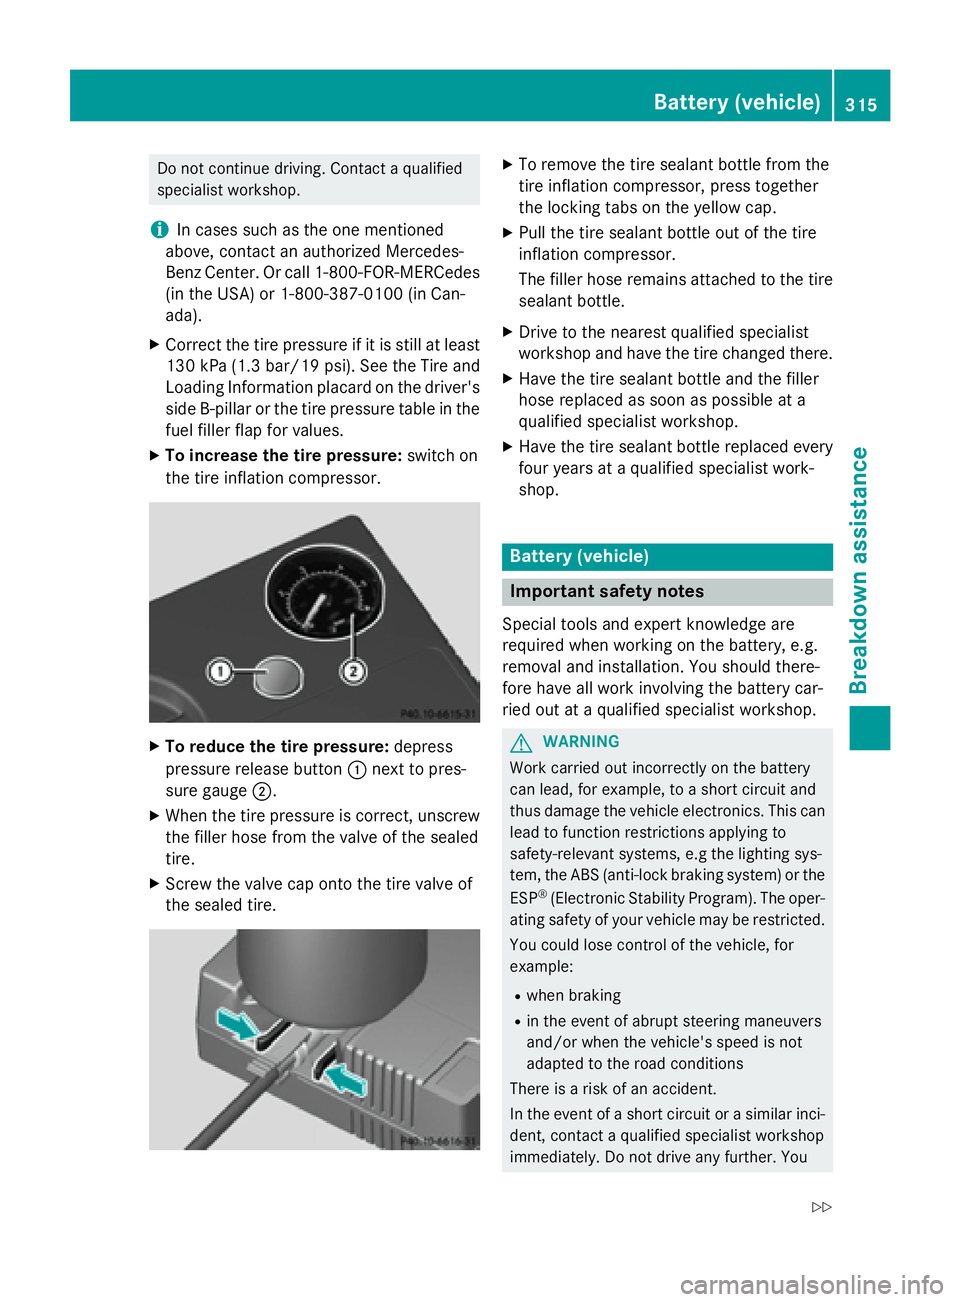
To increase the tire pressure: switch on
the tire inflation compressor.
X
To reduce the tire pressure: depress
pressure release button �C next to pres-
sure gauge �D .X
When the tire pressure is correct, unscrew
the filler hose from the valve of the sealed
tire. X
Screw the valve cap onto the tire valve of
the sealed tire. X
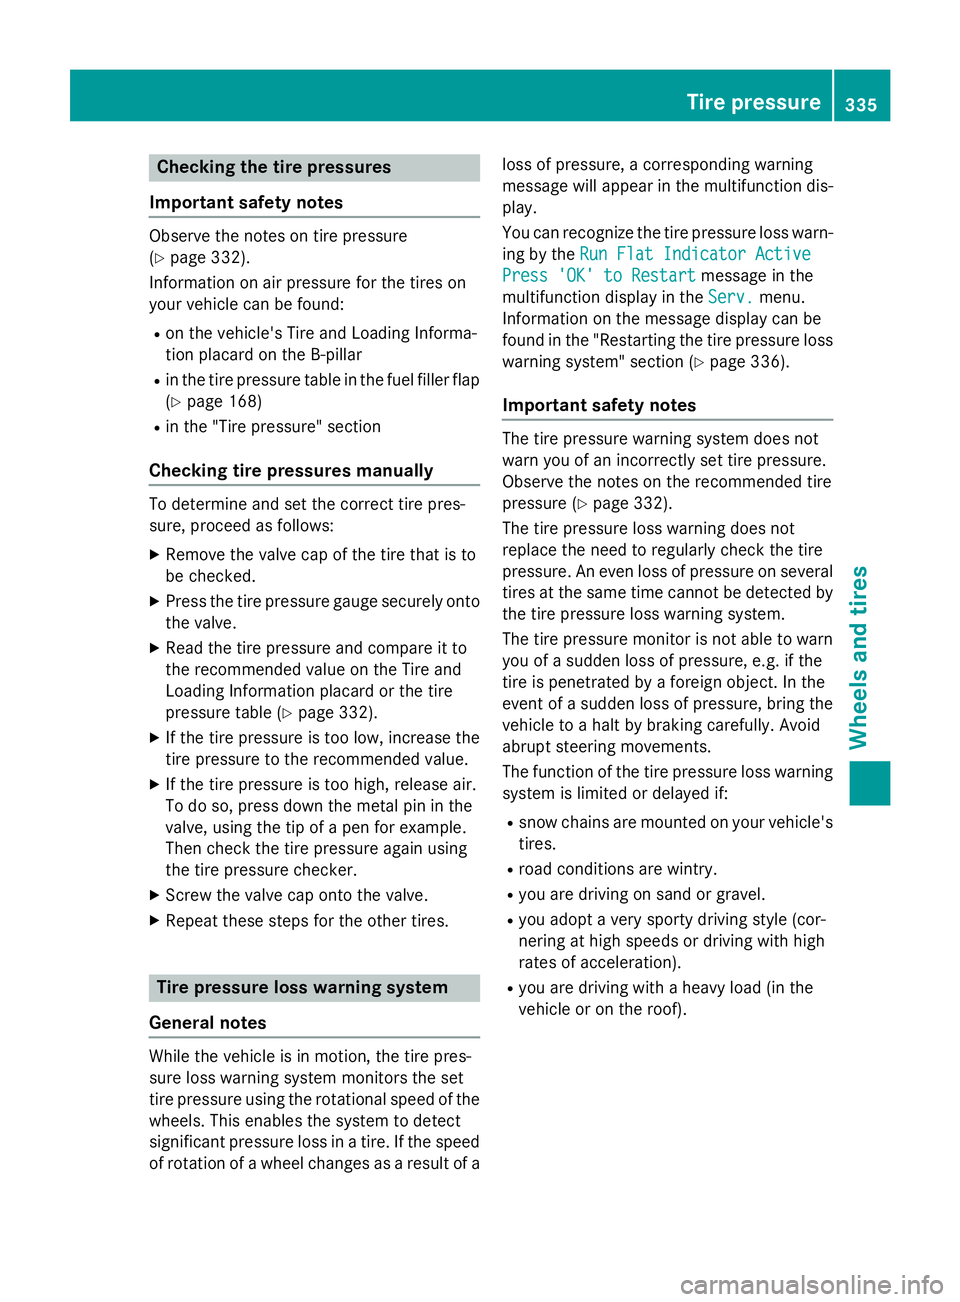
To remove the tire sealant bottle from the
tire inflation compressor, press together
the locking tabs on the yellow cap. X
Pull the tire sealant bottle out of the tire
inflation compressor.
The filler hose remains attached to the tire
sealant bottle. X
Drive to the nearest qualified specialist
workshop and have the tire changed there. X
Have the tire sealant bottle and the filler
hose replaced as soon as possible at a
qualified specialist workshop. X
Have the tire sealant bottle replaced every
four years at a qualified specialist work-
shop.
Battery (vehicle)
Important safety notes Special tools and expert knowledge are
required when working on the battery, e.g.
removal and installation. You should there-
fore have all work involving the battery car-
ried out at a qualified specialist workshop.
G WARNING
Work carried out incorrectly on the battery
can lead, for example, to a short circuit and
thus damage the vehicle electronics. This can
lead to function restrictions applying to
safety-relevant systems, e.g the lighting sys-
tem, the ABS (anti-lock braking system) or the
ESP ®
(Electronic Stability Program). The oper-
ating safety of your vehicle may be restricted.
You could lose control of the vehicle, for
example: R
when braking R
in the event of abrupt steering maneuvers
and/or when the vehicle's speed is not
adapted to the road conditions
There is a risk of an accident.
In the event of a short circuit or a similar inci-
dent, contact a qualified specialist workshop
immediately. Do not drive any further. YouBattery (vehicle) 315
Breakdown assistance Z
Page 337 of 374

Checking the tire pressures
Important safety notes Observe the notes on tire pressure
( Y
page 332).
Information on air pressure for the tires on
your vehicle can be found: R
on the vehicle's Tire and Loading Informa-
tion placard on the B-pillar R
in the tire pressure table in the fuel filler flap
( Y
page 168) R
in the "Tire pressure" section
Checking tire pressures manually To determine and set the correct tire pres-
sure, proceed as follows: X
Remove the valve cap of the tire that is to
be checked. X
Press the tire pressure gauge securely onto
the valve. X
Read the tire pressure and compare it to
the recommended value on the Tire and
Loading Information placard or the tire
pressure table ( Y
page 332).X
If the tire pressure is too low, increase the
tire pressure to the recommended value. X
If the tire pressure is too high, release air.
To do so, press down the metal pin in the
valve, using the tip of a pen for example.
Then check the tire pressure again using
the tire pressure checker. X
Screw the valve cap onto the valve. X
Repeat these steps for the other tires.
Tire pressure loss warning system
General notes
While the vehicle is in motion, the tire pres-
sure loss warning system monitors the set
tire pressure using the rotational speed of the
wheels. This enables the system to detect
significant pressure loss in a tire. If the speed
of rotation of a wheel changes as a result of a loss of pressure, a corresponding warning
message will appear in the multifunction dis-
play.
You can recognize the tire pressure loss warn-
ing by the Run Flat Indicator Active
Press 'OK' to Restart message in the
multifunction display in the Serv.
menu.
Information on the message display can be
found in the "Restarting the tire pressure loss
warning system" section ( Y
page 336).
Important safety notes The tire pressure warning system does not
warn you of an incorrectly set tire pressure.
Observe the notes on the recommended tire
pressure ( Y
page 332).
The tire pressure loss warning does not
replace the need to regularly check the tire
pressure. An even loss of pressure on several
tires at the same time cannot be detected by
the tire pressure loss warning system.
The tire pressure monitor is not able to warn
you of a sudden loss of pressure, e.g. if the
tire is penetrated by a foreign object. In the
event of a sudden loss of pressure, bring the
vehicle to a halt by braking carefully. Avoid
abrupt steering movements.
The function of the tire pressure loss warning
system is limited or delayed if: R
snow chains are mounted on your vehicle's
tires. R
road conditions are wintry. R
you are driving on sand or gravel. R
you adopt a very sporty driving style (cor-
nering at high speeds or driving with high
rates of acceleration). R
you are driving with a heavy load (in the
vehicle or on the roof). Tire pressure 335
Wheels and tires Z