2016 MERCEDES-BENZ B-Class ELECTRIC belt
[x] Cancel search: beltPage 61 of 342
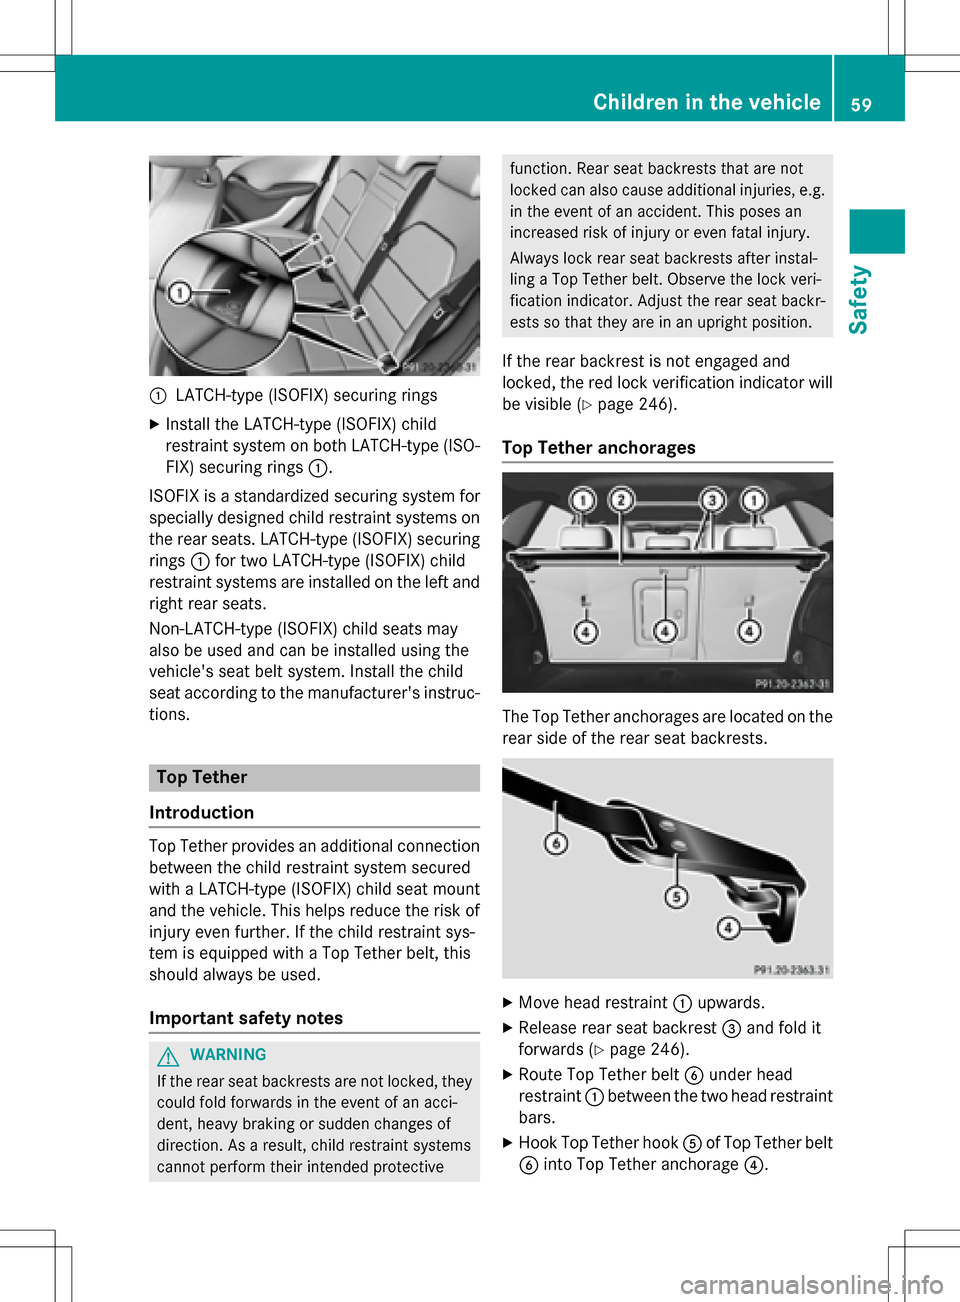
:LATCH-type (ISOFIX) securing rings
XInstall the LATCH-type (ISOFIX) child
restraint system on both LATCH-type (ISO-
FIX) securing rings:.
ISOFIX is a standardized securing system for
specially designed child restraint systems on
the rear seats. LATCH-type (ISOFIX) securing
rings :for two LATCH-type (ISOFIX) child
restraint systems are installed on the left and
right rear seats.
Non-LATCH-type (ISOFIX) child seats may
also be used and can be installed using the
vehicle's seat belt system. Install the child
seat according to the manufacturer's instruc-
tions.
Top Tether
Introduction
Top Tether provides an additional connection
between the child restraint system secured
with a LATCH-type (ISOFIX) child seat mount
and the vehicle. This helps reduce the risk of
injury even further. If the child restraint sys-
tem is equipped with a Top Tether belt, this
should always be used.
Important safety notes
GWARNING
If the rear seat backrests are not locked, they
could fold forwards in the event of an acci-
dent, heavy braking or sudden changes of
direction. As a result, child restraint systems
cannot perform their intended protective
function. Rear seat backrests that are not
locked can also cause additional injuries, e.g.
in the event of an accident. This poses an
increased risk of injury or even fatal injury.
Always lock rear seat backrests after instal-
ling a Top Tether belt. Observe the lock veri-
fication indicator. Adjust the rear seat backr-
ests so that they are in an upright position.
If the rear backrest is not engaged and
locked, the red lock verification indicator will
be visible (
Ypage 246).
Top Tether anchorages
The Top Tether anchorages are located on the
rear side of the rear seat backrests.
XMove head restraint :upwards.
XRelease rear seat backrest =and fold it
forwards (
Ypage 246).
XRoute Top Tether belt Bunder head
restraint :between the two head restraint
bars.
XHook Top Tether hook Aof Top Tether belt
B into Top Tether anchorage ?.
Children in the vehicle59
Safety
Z
Page 62 of 342
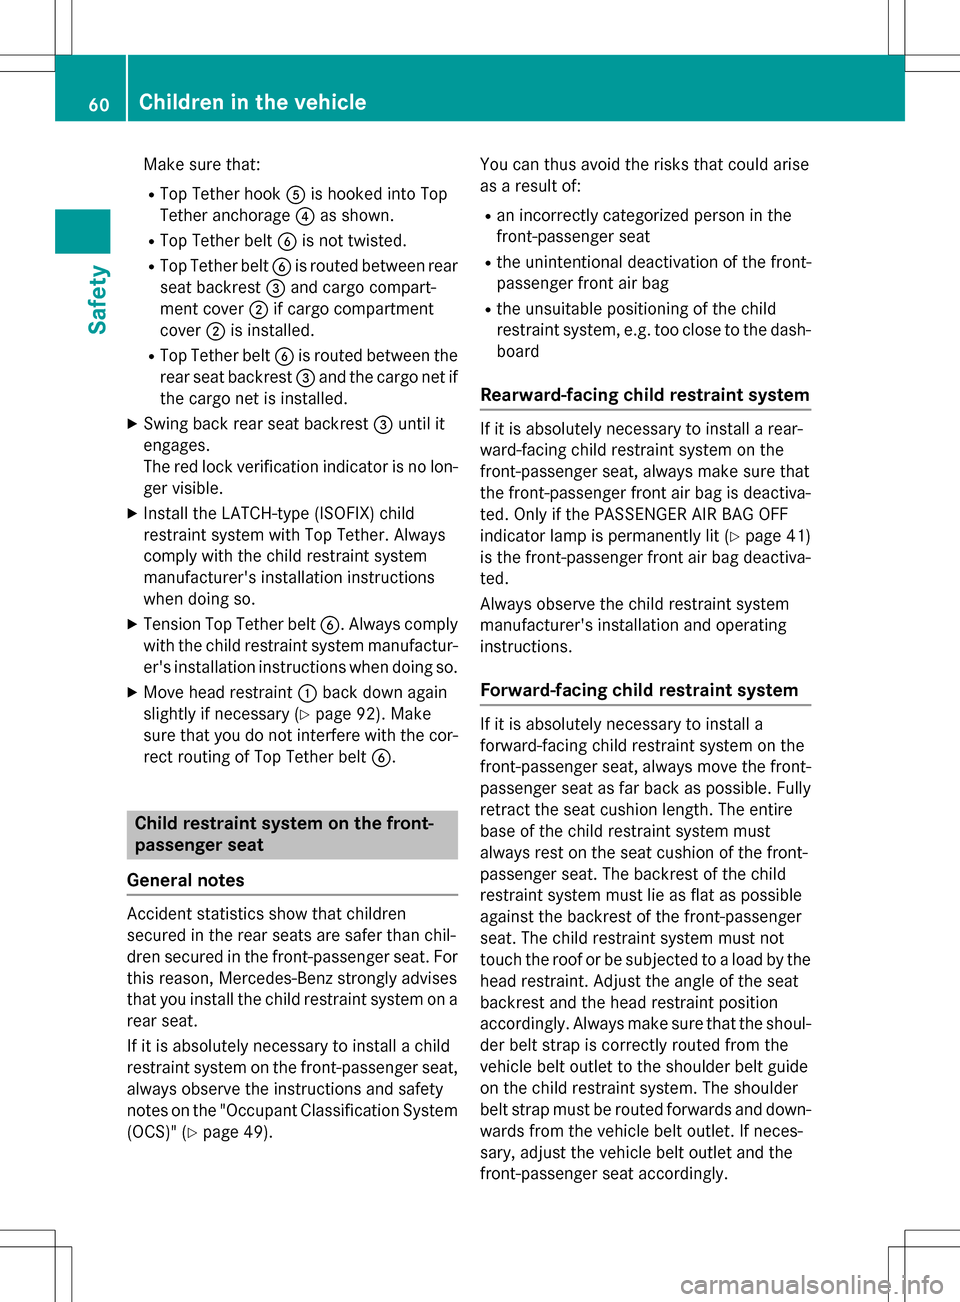
Make sure that:
RTop Tether hookAis hooked into Top
Tether anchorage ?as shown.
RTop Tether belt Bis not twisted.
RTop Tether belt Bis routed between rear
seat backrest =and cargo compart-
ment cover ;if cargo compartment
cover ;is installed.
RTop Tether belt Bis routed between the
rear seat backrest =and the cargo net if
the cargo net is installed.
XSwing back rear seat backrest =until it
engages.
The red lock verification indicator is no lon-
ger visible.
XInstall the LATCH-type (ISOFIX) child
restraint system with Top Tether. Always
comply with the child restraint system
manufacturer's installation instructions
when doing so.
XTension Top Tether belt B. Always comply
with the child restraint system manufactur-
er's installation instructions when doing so.
XMove head restraint :back down again
slightly if necessary (
Ypage 92). Make
sure that you do not interfere with the cor-
rect routing of Top Tether belt B.
Child restraint system on the front-
passenger seat
General notes
Accident statistics show that children
secured in the rear seats are safer than chil-
dren secured in the front-passenger seat. For
this reason, Mercedes-Benz strongly advises
that you install the child restraint system on a
rear seat.
If it is absolutely necessary to install a child
restraint system on the front-passenger seat,
always observe the instructions and safety
notes on the "Occupant Classification System (OCS)" (
Ypage 49). You can thus avoid the risks that could arise
as a result of:
Ran incorrectly categorized person in the
front-passenger seat
Rthe unintentional deactivation of the front-
passenger front air bag
Rthe unsuitable positioning of the child
restraint system, e.g. too close to the dash-
board
Rearward-facing child restraint system
If it is absolutely necessary to install a rear-
ward-facing child restraint system on the
front-passenger seat, always make sure that
the front-passenger front air bag is deactiva-
ted. Only if the PASSENGER AIR BAG OFF
indicator lamp is permanently lit (
Ypage 41)
is the front-passenger front air bag deactiva-
ted.
Always observe the child restraint system
manufacturer's installation and operating
instructions.
Forward-facing child restraint system
If it is absolutely necessary to install a
forward-facing child restraint system on the
front-passenger seat, always move the front-
passenger seat as far back as possible. Fully
retract the seat cushion length. The entire
base of the child restraint system must
always rest on the seat cushion of the front-
passenger seat. The backrest of the child
restraint system must lie as flat as possible
against the backrest of the front-passenger
seat. The child restraint system must not
touch the roof or be subjected to a load by the
head restraint. Adjust the angle of the seat
backrest and the head restraint position
accordingly. Always make sure that the shoul- der belt strap is correctly routed from the
vehicle belt outlet to the shoulder belt guide
on the child restraint system. The shoulder
belt strap must be routed forwards and down-
wards from the vehicle belt outlet. If neces-
sary, adjust the vehicle belt outlet and the
front-passenger seat accordingly.
60Children in the vehicle
Safety
Page 90 of 342

Useful information
i
This Operator's Manual describes all
models and all standard and optional equip-
ment of your vehicle available at the time of
publication of the Operator's Manual.
Country-specific differences are possible.
Please note that your vehicle may not be
equipped with all features described. This
also applies to safety-related systems and
functions.
iRead the information on qualified special-
ist workshops (
Ypage 26).
Correct driver's seat position
GWARNING
You could lose control of your vehicle if you do the following while driving:
Radjust the driver's seat, head restraint,
steering wheel or mirrors
Rfasten the seat belt
There is a risk of an accident.
Adjust the driver's seat, head restraint, steer-
ing wheel and mirror and fasten your seat belt before starting the vehicle's drive system.
XObserve the safety guidelines on seat
adjustment (
Ypage 89).
XMake sure that seat =is adjusted prop-
erly.
Manual seat adjustment (
Ypage 90)
Electrical seat adjustment (
Ypage 91)
When adjusting the seat, make sure that:
Ryou are as far away from the driver's air
bag as possible
Ryou are sitting in a normal upright posi-
tion
Ryou can fasten the seat belt properly
Ryou have moved the backrest to an
almost vertical position
Ryou have set the seat cushion angle so
that your thighs are gently supported
Ryou can depress the pedals properly
XCheck whether the head restraint is adjus-
ted properly (
Ypage 91).
When doing so, make sure that you have
adjusted the head restraint so that the back
of your head is supported at eye level by the
center of the head restraint.
XObserve the safety notes on steering col-
umn adjustment (
Ypage 94).
XMake sure that steering wheel :is adjus-
ted properly.
Adjusts the steering wheel (
Ypage 94)
When adjusting the steering wheel, make
sure that:
Ryou can hold the steering wheel with your
arms slightly bent
Ryou can move your legs freely
Ryou can see all the displays in the instru-
ment cluster clearly
XObserve the safety guidelines for seat belts
(
Ypage 42).
XCheck whether you have fastened seat
belt ;properly (
Ypage 44).
88Correct driver's seat position
Seats, steering wheel and mirrors
Page 91 of 342
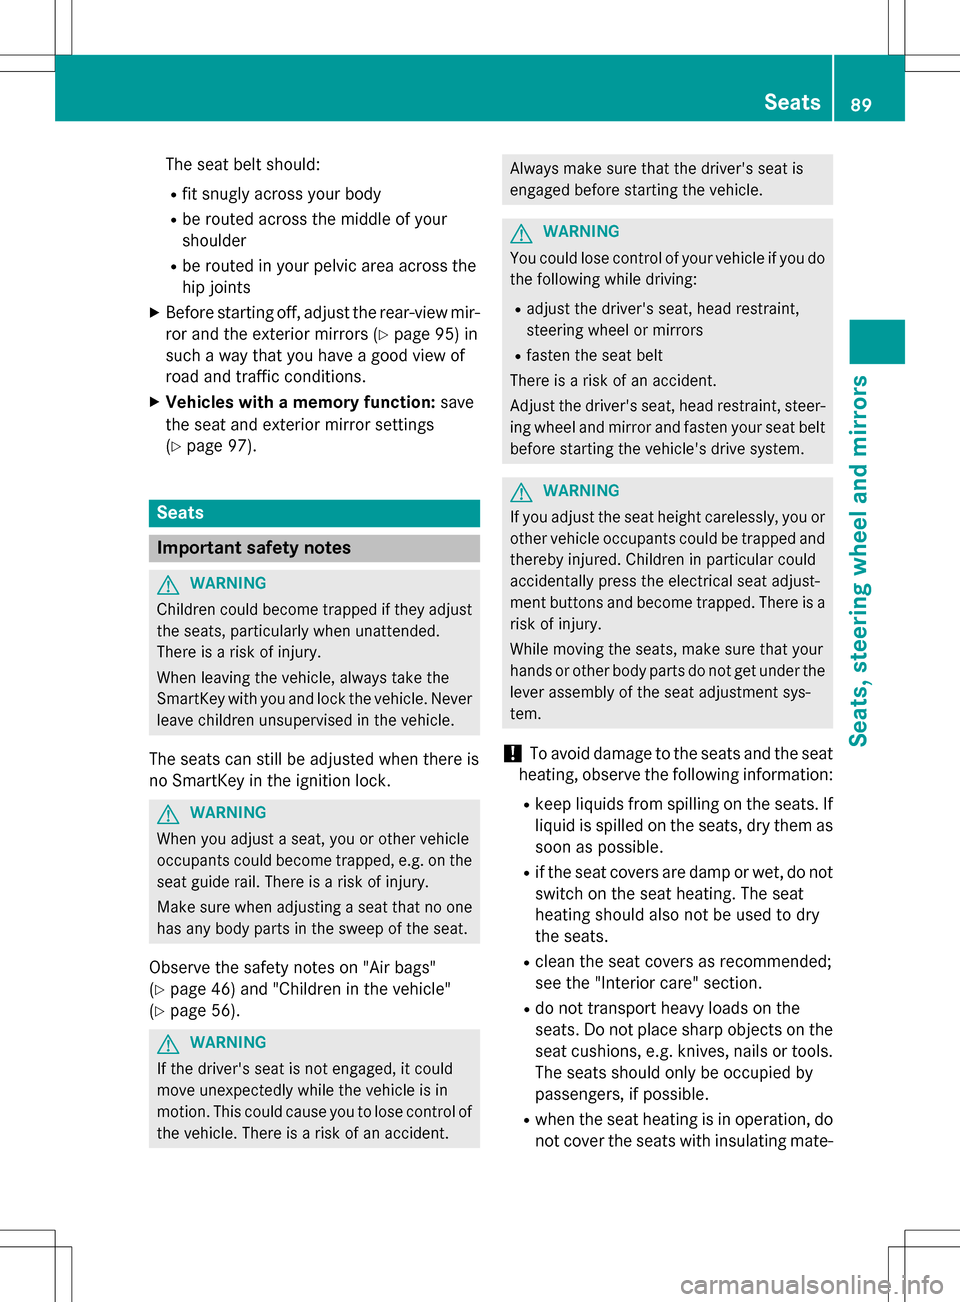
The seat belt should:
Rfit snugly across your body
Rbe routed across the middle of your
shoulder
Rbe routed in your pelvic area across the
hip joints
XBefore starting off, adjust the rear-view mir-
ror and the exterior mirrors (
Ypage 95) in
such a way that you have a good view of
road and traffic conditions.
XVehicles with a memory function: save
the seat and exterior mirror settings
(
Ypage 97).
Seats
Important safety notes
GWARNING
Children could become trapped if they adjust
the seats, particularly when unattended.
There is a risk of injury.
When leaving the vehicle, always take the
SmartKey with you and lock the vehicle. Never
leave children unsupervised in the vehicle.
The seats can still be adjusted when there is
no SmartKey in the ignition lock.
GWARNING
When you adjust a seat, you or other vehicle
occupants could become trapped, e.g. on the seat guide rail. There is a risk of injury.
Make sure when adjusting a seat that no one
has any body parts in the sweep of the seat.
Observe the safety notes on "Air bags"
(
Ypage 46) and "Children in the vehicle"
(
Ypage 56).
GWARNING
If the driver's seat is not engaged, it could
move unexpectedly while the vehicle is in
motion. This could cause you to lose control of the vehicle. There is a risk of an accident.
Always make sure that the driver's seat is
engaged before starting the vehicle.
GWARNING
You could lose control of your vehicle if you do the following while driving:
Radjust the driver's seat, head restraint,
steering wheel or mirrors
Rfasten the seat belt
There is a risk of an accident.
Adjust the driver's seat, head restraint, steer-
ing wheel and mirror and fasten your seat belt before starting the vehicle's drive system.
GWARNING
If you adjust the seat height carelessly, you or
other vehicle occupants could be trapped and
thereby injured. Children in particular could
accidentally press the electrical seat adjust-
ment buttons and become trapped. There is a
risk of injury.
While moving the seats, make sure that your
hands or other body parts do not get under the
lever assembly of the seat adjustment sys-
tem.
!To avoid damage to the seats and the seat
heating, observe the following information:
Rkeep liquids from spilling on the seats. If
liquid is spilled on the seats, dry them as
soon as possible.
Rif the seat covers are damp or wet, do not
switch on the seat heating. The seat
heating should also not be used to dry
the seats.
Rclean the seat covers as recommended;
see the "Interior care" section.
Rdo not transport heavy loads on the
seats. Do not place sharp objects on the
seat cushions, e.g. knives, nails or tools.
The seats should only be occupied by
passengers, if possible.
Rwhen the seat heating is in operation, do not cover the seats with insulating mate-
Seats89
Seats, steering wheel and mirrors
Z
Page 93 of 342
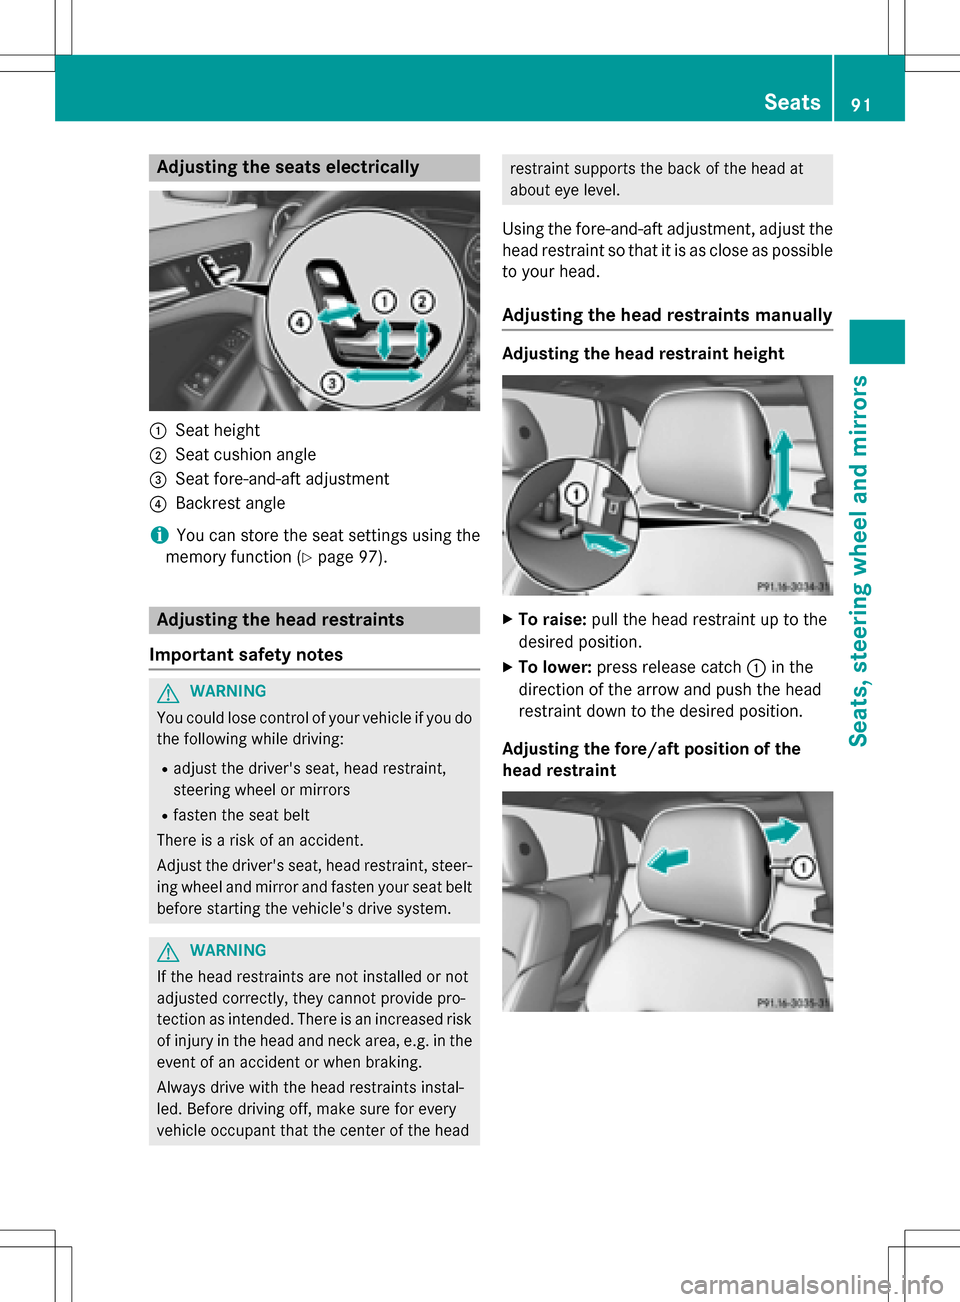
Adjusting the seats electrically
:Seat height
;Seat cushion angle
=Seat fore-and-aft adjustment
?Backrest angle
iYou can store the seat settings using the
memory function (
Ypage 97).
Adjusting the head restraints
Important safety notes
GWARNING
You could lose control of your vehicle if you do th e following while driving:
Radjust the driver's seat, head restraint,
steering wheel or mirrors
Rfaste nth e seat belt
There is a risk of an accident.
Adjus tth e driver's seat, head restraint, steer-
ing wheel and mirror and fasten your seat belt
before starting the vehicle's drive system.
GWARNING
If th e head restraints are not installed or not
adjusted correctly, they cannot provide pro-
tection as intended. There is an increased risk
of injury in the head and neck area, e.g. in the event of an accident or when braking.
Always drive with the head restraints instal-
led. Before driving off, make sure for every
vehicle occupant that the center of the head
restraint supports the back of the head at
about eye level.
Using th e fore-and-aft adjustment, adjust the
head restraint so that it is as close as possible
to your head.
Adjusting the head restraints ma nually
Adjusting the headrestraint height
XTo raise: pull the head restraint up to the
desired position.
XTo lower: press release catch :in the
direction of the arrow and push the head
restraint down to the desired position.
Adjusting the fore/aft position of the
head restrain t
Seats91
Seats, steering wheel and mirrors
Z
Page 96 of 342

Problems with the seat heating
ProblemPossible causes/consequences andMSolutions
The seat heating has
switched off prema-
turely or cannot be
switched on.The on-board voltage is too low because too many electrical con-
sumers are switched on.
XSwitch off electrical consumers that you do not need, such as
the rear window defroster or interior lighting.
Once the battery is sufficiently charged, the seat heating will
switch back on automatically.
Steering wheel
Important safety notes
GWARNING
You could lose control of your vehicle if you do the following while driving:
Radjust the driver's seat, head restraint,
steering wheel or mirrors
Rfasten the seat belt
There is a risk of an accident.
Adjust the driver's seat, head restraint, steer-
ing wheel and mirror and fasten your seat belt before starting the vehicle's drive system.
GWARNING
Children could injure themselves if they
adjust the steering wheel. There is a risk of
injury.
When leaving the vehicle, always take the
SmartKey with you and lock the vehicle. Never
leave children unsupervised in the vehicle.
Adjusting the steering wheel
GWARNING
If the steering wheel is unlocked while the
vehicle is in motion, it could change position
unexpectedly. This could cause you to lose
control of the vehicle. There is a risk of an
accident.
Before starting off, make sure the steering
wheel is locked. Never unlock the steering
wheel while the vehicle is in motion.
:Release lever
;Adjusts the steering wheel height
=Adjusts the steering wheel position (fore-
and-aft adjustment)
XPush release lever :down completely.
The steering column is unlocked.
XAdjust the steering wheel to the desired
position.
XPush release lever :up completely.
The steering column is locked.
XCheck if the steering column is locked.
When doing so, try to push the steering
wheel up or down or try to move it in the
fore-and-aft direction.
94Steering wheel
Seats, steering wheel and mirrors
Page 97 of 342
Mirrors
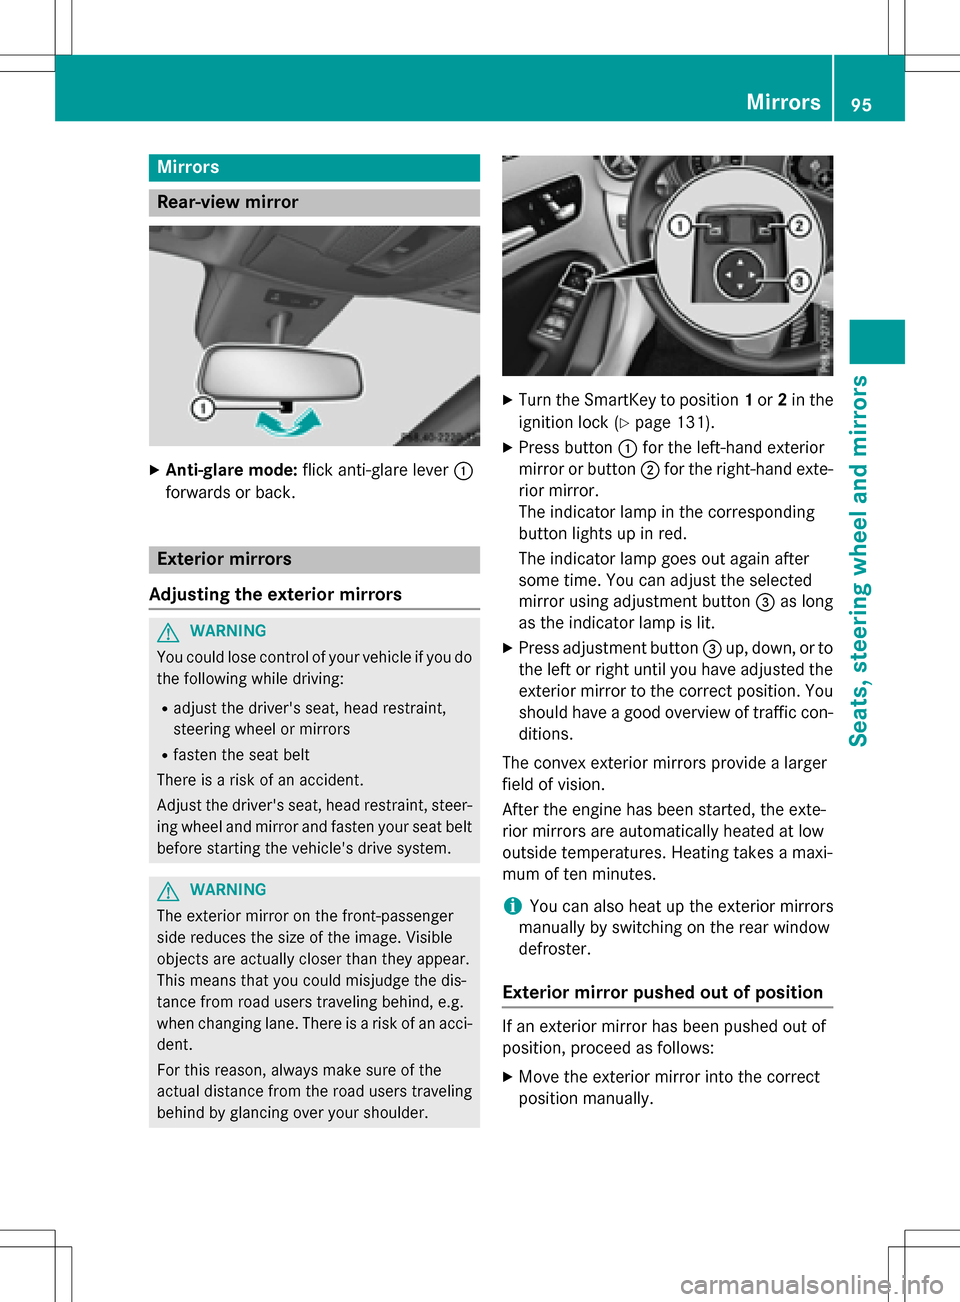
Rear-view mirror
XAnti-glare mode:flick anti-glare lever :
forwards or back.
Exterior mirrors
Adjusting the exterior mirrors
GWARNING
You could lose control of your vehicle if you do the following while driving:
Radjust the driver's seat, head restraint,
steering wheel or mirrors
Rfasten the seat belt
There is a risk of an accident.
Adjust the driver's seat, head restraint, steer-
ing wheel and mirror and fasten your seat belt before starting the vehicle's drive system.
GWARNING
The exterior mirror on the front-passenger
side reduces the size of the image. Visible
objects are actually closer than they appear.
This means that you could misjudge the dis-
tance from road users traveling behind, e.g.
when changing lane. There is a risk of an acci-
dent.
For this reason, always make sure of the
actual distance from the road users traveling
behind by glancing over your shoulder.
XTurn the SmartKey to position 1or 2in the
ignition lock (
Ypage 131).
XPress button :for the left-hand exterior
mirror or button ;for the right-hand exte-
rior mirror.
The indicator lamp in the corresponding
button lights up in red.
The indicator lamp goes out again after
some time. You can adjust the selected
mirror using adjustment button =as long
as the indicator lamp is lit.
XPress adjustment button =up, down, or to
the left or right until you have adjusted the
exterior mirror to the correct position. You
should have a good overview of traffic con-
ditions.
The convex exterior mirrors provide a larger
field of vision.
After the engine has been started, the exte-
rior mirrors are automatically heated at low
outside temperatures. Heating takes a maxi-
mum of ten minutes.
iYou can also heat up the exterior mirrors
manually by switching on the rear window
defroster.
Exterior mirror pushed out of position
If an exterior mirror has been pushed out of
position, proceed as follows:
XMove the exterior mirror into the correct
position manually.
Mirrors95
Seats, steering wheel and mirrors
Z
Page 158 of 342
The electric parking brake can only be
released:
Rwhen the SmartKey is in position1or 2in
the ignition lock (
Ypage 131) or
Rif the ignition was switched on using the
Start/Stop button
Applying automatically
When the vehicle's HOLD function is holding
the vehicle at a standstill, the electric parking
brake is engaged automatically.
In addition, at least one of the following con-
ditions must be fulfilled:
Rthe drive system is switched off.
Rthe driver's door is open and the seat belt is
not fastened.
Rthere is a system malfunction.
Rthe power supply is insufficient.
Rthe vehicle is stationary for a lengthy
period.
The red F(USA only) or !(Canada
only) indicator lamp in the instrument cluster
lights up.
Releasing automatically
Your vehicle's electric parking brake is auto-
matically released if all of the following con-
ditions are met:
Rthe vehicle has been started.
Rthe transmission is in position Dor R.
Rthe seat belt has been fastened.
Ryou depress the accelerator pedal.
If the transmission is in position R, the tailgate
must be closed.
If your seat belt is not fastened, the following
conditions must be fulfilled to automatically
release the electric parking brake:
Rthe driver's door is closed.
Ryou have shifted out of transmission posi-
tion Por you have previously driven faster
than 2 mph (3 km/h). Ensure that you do not depress the acceler-
ator pedal unintentionally. Otherwise the
parking brake will be released and the vehicle
will start to move.
Emergency braking
The vehicle can also be braked during an
emergency by using the electric parking
brake.
XWhile driving, push handle :of the electric
parking brake (
Ypage 155).
The vehicle is braked as long as you keep
handle :of the electric parking brake
pressed. The longer the electric parking
brake handle :is depressed, the greater
the braking force.
During braking:
Ra warning tone sounds
Rthe Please Release Parking Brake
message appears
Rthe red F(USA only) or !(Canada
only) indicator lamp in the instrument clus-
ter flashes
When the vehicle has been braked to a stand-
still, the electric parking brake is applied.
Parking the vehicle for a long period
If you leave the vehicle parked for longer than
four weeks, the battery may be damaged by
exhaustive discharging.
If you leave the vehicle parked for longer than six weeks, the vehicle may suffer damage as a
result of lack of use.
XVisit a qualified specialist workshop and
seek advice.
iYou can obtain information about trickle
chargers from a qualified specialist work-
shop.
156Parking
Driving and parking