2016 MERCEDES-BENZ AMG GT S navigation
[x] Cancel search: navigationPage 110 of 226

Problems with the navigation system
ProblemPossible causes/consequences andMSolutions
COMAND does not
resume route guidance
after the journey has
been interrupted.Route guidance is canceled if you interrupt the journey for more
than two hours.
"Interrupting the journey" refers to stopping the vehicle.
"Continuing route guidance" refers to switching COMAND back on
and driving on.
XContinue route guidance manually (Ypage 87).
ProblemPossible causes/consequences andMSolutions
COMAND is unable to
determine the vehicle's
position.COMAND has to redetermine the position of the vehicle if the
vehicle has been transported.
Example:
RAfter transporting the vehicle by ferry
RAfter transporting the vehicle by motorail
XStart the vehicle and pull away.
COMAND determines the vehicle's position. Depending on the
driving situation, this may take some time.
Route guidance may be restricted during the determination of
the vehicle's position.
When positioning is complete, route guidance is resumed with
navigation announcements and route guidance displays.
ProblemPossible causes/consequences andMSolutions
TheNavigation
UnavailablePlease
refer to the Oper‐
ator's Manual.mes-
sage appears.
COMAND has an integrated hard drive on which the digital map is
stored.
To protect the integrated hard drive against damage, COMAND
deactivates it at very high and low temperatures. The navigation
system will then be temporarily unavailable.
XLet the vehicle and COMAND heat up or cool down to a normal
temperature.
XTo hide the message: switch COMAND off and then on again.
108Problems with the navigation system
Navigation
Page 111 of 226

ProblemPossible causes/consequences andMSolutions
A message informs you
that the data medium
containing the digital
map is incompatible
with the vehicle soft-
ware.The data medium containing the digital map cannot be used for the
update.
XTo confirm the message: press the controller.
XRemove the data medium.
XHave the system database checked at an authorized Mercedes-
Benz Center.
ProblemPossible causes/consequences andMSolutions
The map software
update has failed.The data medium is dirty.
XClean the data medium.
XRestart the update.
The data medium is scratched.
XConsult an authorized Mercedes-Benz Center.
There is overheating due to excessive temperatures in the vehicle
interior.
XWait until the vehicle interior has cooled down.
XRestart the update.
COMAND's integrated hard disk is defective.
XConsult an authorized Mercedes-Benz Center.
ProblemPossible causes/consequences andMSolutions
COMAND asks for an
activation code during
the map update.The digital map is secured with an activation code.
XConsult an authorized Mercedes-Benz Center.
Problems with the navigation system109
Navigation
Z
Page 129 of 226
XTo selectYes: turn and press the controller.
The phone number is deleted.
or
XTo select No: turn and press the controller.
The process is canceled.
Closing the phone book
XTo select &from the character bar: turn
the controller and press to confirm.
Address book
Introduction
Always pay attention to traffic conditions.
Familiarize yourself with the address book
functions before beginning your journey.
You can use COMAND when the road and
traffic conditions permit. You could otherwise
become involved in an accident in which you
or others could be injured.
The address book displays all the contacts
from the various sources (mobile phone,
memory card, USB device, COMAND phone
book, navigation).
You can use the contacts to make telephone
calls, navigate and to write messages.
If a mobile phone is connected to COMAND
and automatic calling up is activated
(
Ypage 132), the mobile phone's contacts
are displayed in the address book. If you dis- connect the mobile phone from COMAND,
these contacts are no longer displayed in the
address book.
When you import, save, edit or add contacts,
they will be saved in COMAND. These con-
tacts will remain there even when you con-
nect COMAND to a different mobile phone.
You can view these contacts even without a
mobile phone.
iThe address book can store a total of
5000 contacts.
R2000 entries are reserved for perma-
nently saved contacts.
R3000 entries are reserved for contacts
that you can load from the mobile phone.
iBefore selling your vehicle, delete the
contacts saved in COMAND using the reset function (
Ypage 47).
Calling up the address book
XTo show the main function bar: slide 5
the controller.
XTo select Phone: turn and press the con-
troller.
The telephone menu is displayed.
XTo select Phone: slide5and press the
controller.
XTo select Address Book: turn and press
the controller.
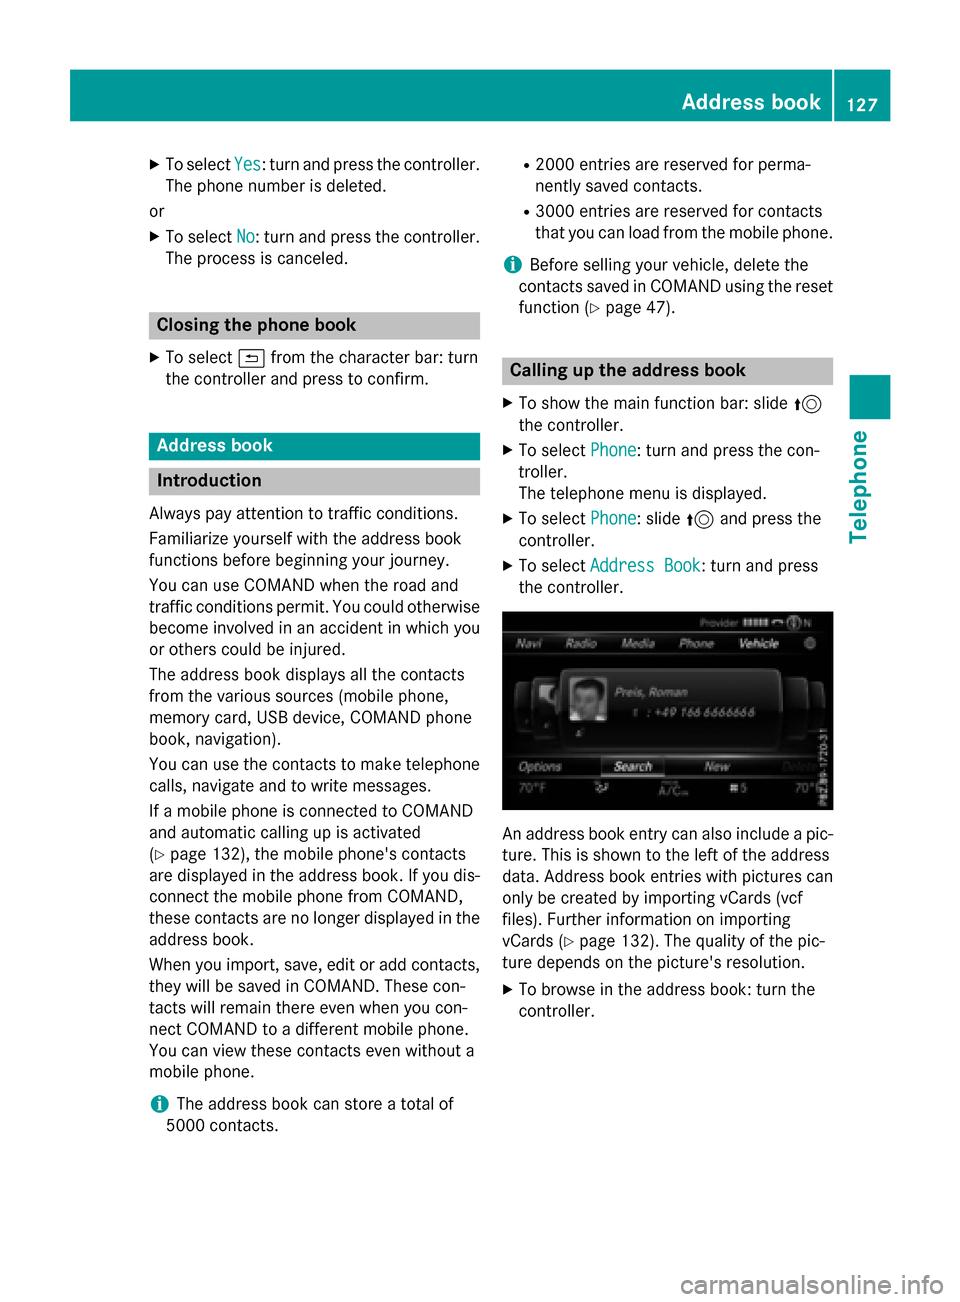
An address book entry can also include a pic-
ture. This is shown to the left of the address
data. Address book entries with pictures can
only be created by importing vCards (vcf
files). Further information on importing
vCards (
Ypage 132). The quality of the pic-
ture depends on the picture's resolution.
XTo browse in the address book: turn the
controller.
Address book127
Telephone
Z
Page 130 of 226
Searching for a contact
Using the character bar
XCall up the address book (Ypage 127).
XTo switch to the menu bar: slide 6the
controller.
XTo select Search: turn and press the con-
troller.
XTo select characters: turn the controller
and press to confirm.
The first contact with the selected first
character is highlighted in the phone book.
If there are similar contacts, the next dif-
ferent character is shown. For example,
with contacts such as Jana
andJohn, the
beginnings of the names are identical. The
next different characters A
andOare
offered for selection.
XSelect the characters of the contact you are
searching for one by one, pressing and con-
firming with the controller each time.
XTo complete the search: slide 5the con-
troller repeatedly until the character bar
disappears.
or
XTo select ¬: turn and press the control-
ler.
The contacts in the address book are dis-
played.
XTo select a contact: turn and press the con-
troller.
Information about character entry
(
Ypage 32).
Using the touchpad
XCall up the address book (Ypage 127).
XTo switch to the menu bar: glide down.
XSelect Search.
XDraw the letter on the touchpad surface.
The first contact with the selected first
character is highlighted in the address
book.
Further information on handwriting recog-
nition on the touchpad (
Ypage 27).
XDraw additional letters on the touchpad
surface one after another.
XTo complete the search and return to the
phone book: press the touchpad.
XTo select and call the contact: glide up or
down and press.
Adding a new contact
You can enter address data directly into the
address book. If you store telephone num-
bers in the COMAND phone book, these are
also saved in the address book. If you store a
navigation destination, COMAND creates an
address book entry which includes the com-
plete navigable address data.
XCall up the address book (Ypage 127).
XTo switch to the menu bar: slide 6the
controller.
XTo select New: turn and press the controller.
The surname and first name input lines are
displayed.
XEnter characters using the controller
(
Ypage 32) or the touchpad (Ypage 27).
XTo save the surname and first name: select ¬.
The details for the contact are displayed.
XTo add a desired entry (e.g. Add E-Mail
Address): turn and press the controller.
Depending on the type of entry, the corre-
sponding input menu appears.
XEnter characters using the controller
(
Ypage 32) or the touchpad (Ypage 27).
XTo finish and save an entry: select ¬.
128Address book
Telephone
Page 131 of 226
Displaying contact details
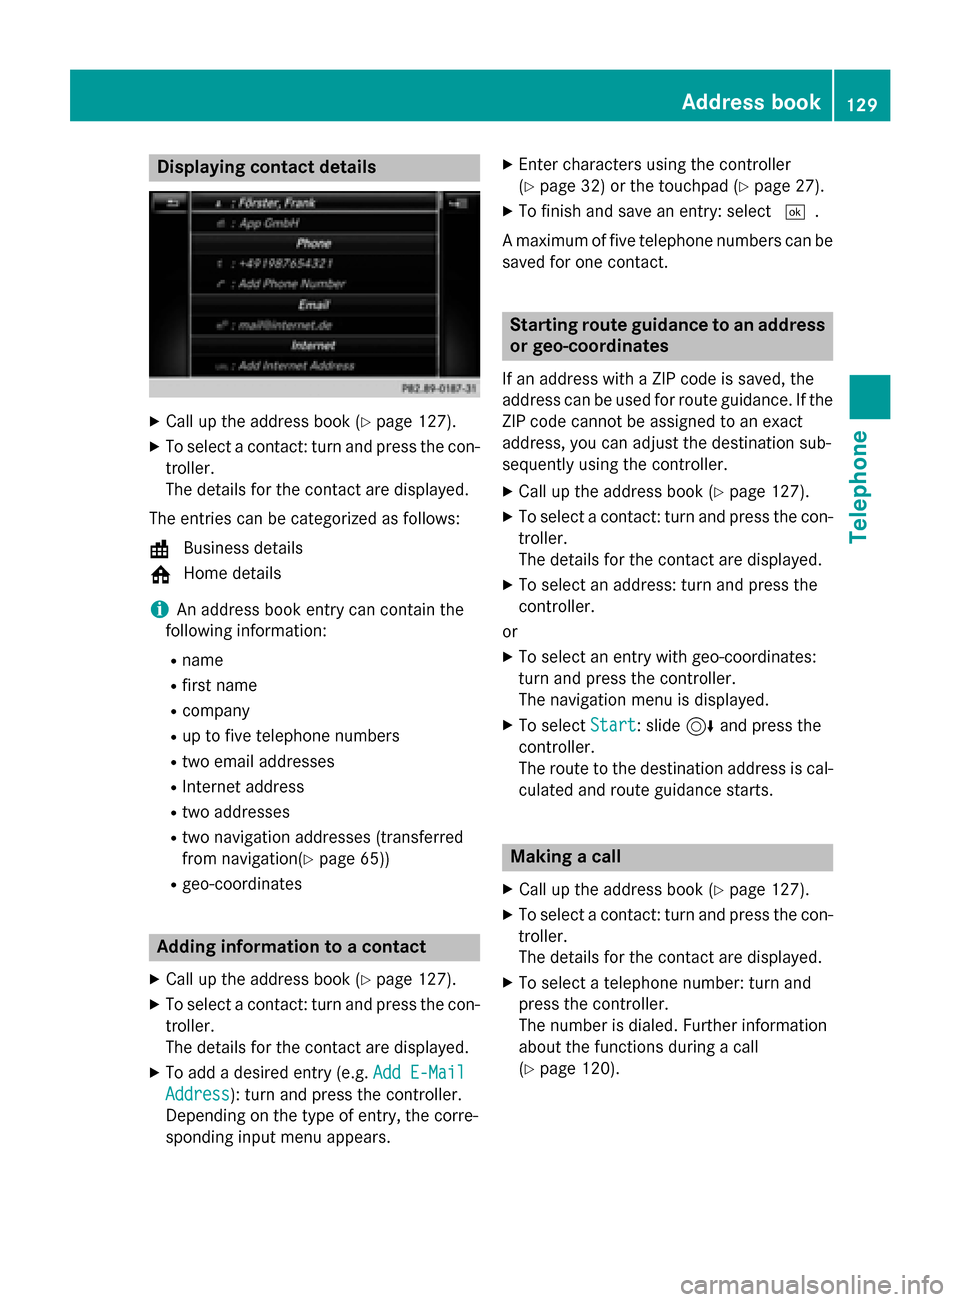
XCall up theaddress boo k (Ypage 127).
XTo select acontact :turn and press th econ-
troller.
The details fo rth econtact are displayed .
The entries can be categorized as follows :
\ Business details
6 Home details
iAn address boo kentr ycan contain th e
following information :
Rname
Rfirst nam e
Rcompany
Rup to fivetelephon enumber s
Rtwoemail addresses
RInternet address
Rtw oaddresses
Rtw onavigation addresses (transferred
from navigation(
Ypage 65) )
Rgeo-coordinates
Adding information to acontact
XCall up th eaddress boo k (Ypage 127).
XTo select acontact :turn and press th econ-
troller.
The details fo rth econtact are displayed .
XTo addadesire dentr y(e.g. Add E-Mail
Addres s): turn and press th econtroller .
Dependin gon th etyp eof entry, th ecorre-
spondin ginput men uappears .
XEntercharacters usin gth econtroller
(
Ypage 32) or th etouchpad (Ypage 27).
XTo finish and sav ean entry: selec t¬.
A maximum of fiv etelephon enumber scan be
saved fo ron econtact .
Starting rout eguidance to an address
or geo-coordinate s
If an address with aZIP code is saved, th e
address can be used fo rrout eguidance. If th e
ZIP code canno tbe assigned to an exact
address ,you can adjust th edestination sub-
sequentl yusin gth econtroller .
XCall up theaddress boo k (Ypage 127).
XTo select acontact :turn and press th econ-
troller.
The details fo rth econtact are displayed .
XTo selectan address :turn and press th e
controller .
or
XTo selec tan entr ywit hgeo-coordinates:
turn and press th econtroller .
The navigation men uis displayed .
XTo selectStart:slid e6 and press th e
controller .
The rout eto th edestination address is cal -
culated and rout eguidanc estarts.
Makin g acall
XCall up th eaddress boo k (Ypage 127).
XTo select acontact :turn and press th econ-
troller.
The details fo rth econtact are displayed .
XTo select atelephon enumber :turn and
press th econtroller .
The number is dialed. Further information
about th efunction sdurin g acall
(
Ypage 120).
Address book12 9
Telephone
Z
Page 135 of 226
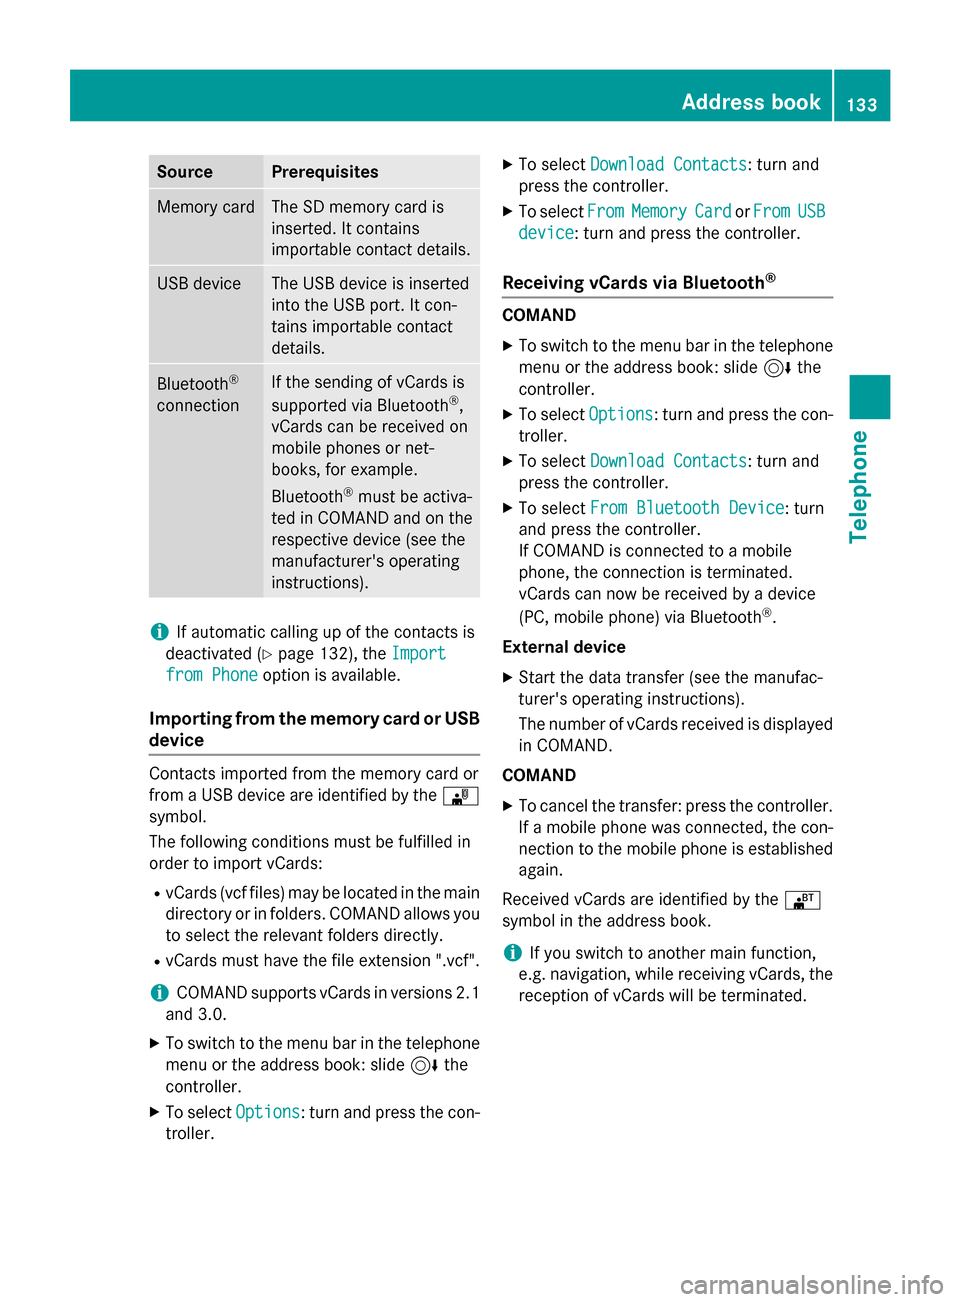
SourcePrerequisites
Memory cardThe SD memory card is
inserted. It contains
importable contact details.
USB deviceThe USB device is inserted
into the USB port. It con-
tains importable contact
details.
Bluetooth®
connection
If the sending of vCards is
supported via Bluetooth®,
vCards can be received on
mobile phones or net-
books, for example.
Bluetooth
®must be activa-
ted in COMAND and on the
respective device (see the
manufacturer's operating
instructions).
iIf automatic calling up of the contacts is
deactivated (
Ypage 132), the Import
from Phoneoption is available.
Importing from the memory card or USB
device
Contacts imported from the memory card or
from a USB device are identified by the ¯
symbol.
The following conditions must be fulfilled in
order to import vCards:
RvCards (vcf files) may be located in the main
directory or in folders. COMAND allows you
to select the relevant folders directly.
RvCards must have the file extension ".vcf".
iCOMAND supports vCards in versions 2.1
and 3.0.
XTo switch to the menu bar in the telephone menu or the address book: slide 6the
controller.
XTo select Options: turn and press the con-
troller.
XTo select Download Contacts: turn and
press the controller.
XTo select FromMemoryCardorFromUSB
device: turn and press the controller.
Receiving vCards via Bluetooth®
COMAND
XTo switch to the menu bar in the telephone
menu or the address book: slide 6the
controller.
XTo select Options: turn and press the con-
troller.
XTo select Download Contacts: turn and
press the controller.
XTo select From Bluetooth Device: turn
and press the controller.
If COMAND is connected to a mobile
phone, the connection is terminated.
vCards can now be received by a device
(PC, mobile phone) via Bluetooth
®.
External device
XStart the data transfer (see the manufac-
turer's operating instructions).
The number of vCards received is displayed in COMAND.
COMAND
XTo cancel the transfer: press the controller.
If a mobile phone was connected, the con-
nection to the mobile phone is established
again.
Received vCards are identified by the ®
symbol in the address book.
iIf you switch to another main function,
e.g. navigation, while receiving vCards, the
reception of vCards will be terminated.
Address book133
Telephone
Z
Page 157 of 226
XTo select the required option: turn and
press the controller.
XTo selectEnter search term: turn and
press the controller.
The input menu for the search term is dis-
played.
XTo complete the entry and start the search,
select a: turn and press the controller.
The search results are displayed.
iGoogle™ determines how the search
results are sorted; this is not necessarily
based on the shortest distance.
Further information on how to make use of a
search result (
Ypage 155).
Using search results
XTo select a search result: turn and press the
controller.
A menu appears.
Displaying details
XSelect Details.
The address of the selected entry is dis-
played.
Using a search result as a destination
XSelect Set as Destination.
The navigation is called up. You can use the
search result as the destination for route
calculation.
iAt the same time the search result is
stored in the "Last destinations" memory.
You can take the destination from this
memory and save it permanently in the
contacts.
Calling up a destination
XSelect Call.
The telephone menu is called up and a call
is activated.
iIf there is no phone number available, the
menu item cannot be selected. Calling up Google Street View™
XSelect
Google Street View.
Google Street View™ is called up.
iIf no Google Street View™ information is
available, a corresponding message
appears.
Calling up Panoramio by Google™
XSelect Panoramio by Google.
Panoramio by Google™ is called up. You
see pictures of places worth seeing in the
vicinity of the search result.
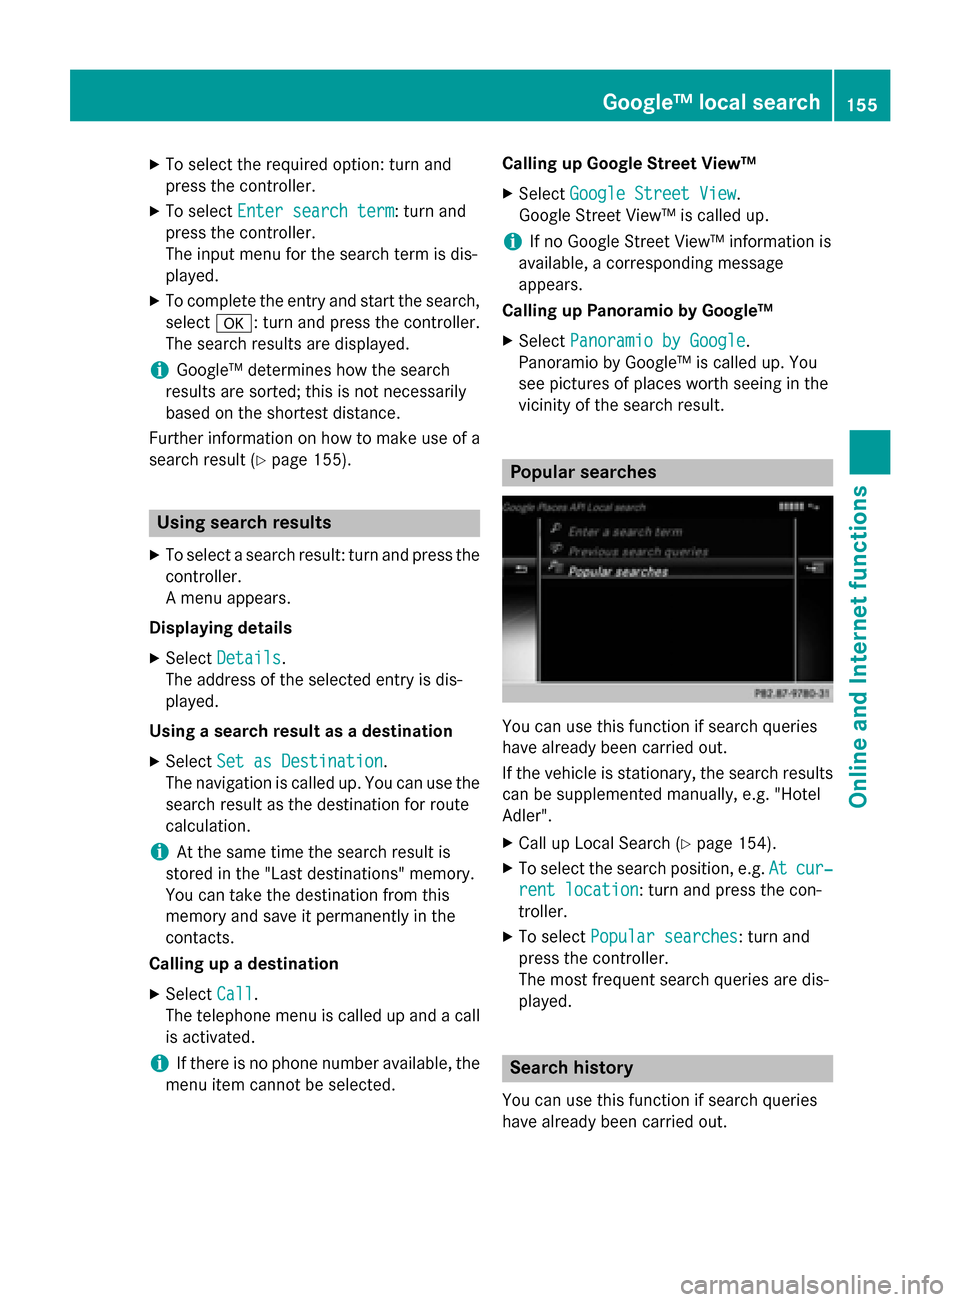
Popular searches
You can use this function if search queries
have already been carried out.
If the vehicle is stationary, the search results
can be supplemented manually, e.g. "Hotel
Adler".
XCall up Local Search (Ypage 154).
XTo select the search position, e.g. Atcur‐
rent location: turn and press the con-
troller.
XTo select Popular searches: turn and
press the controller.
The most frequent search queries are dis-
played.
Search history
You can use this function if search queries
have already been carried out.
Google™ local search155
Online and Internet functions
Z
Page 158 of 226

If the vehicle is stationary, the search results
can be supplemented manually, e.g. "Hotel
Adler".
XCall up Local Search (Ypage 154).
XTo select the search position, e.g.Atcur‐
rent location: turn and press the con-
troller.
XTo select Search history: turn and press
the controller.
The most recent search queries are dis-
played.
Local Search settings
Calling up settings
XTo call up Internet functions (Ypage 153).
XTo select Mercedes-Benz Apps: turn and
press the controller.
XTo select GoogleLocalSearch: turn and
press the controller.
XTo select G: slide 9the controller.
The current settings are displayed.
Setting the search radius
XCall up Local Search settings (Ypage 156).
XTo select Search radius: turn and press
the controller.
A menu appears.
XTo select the desired entry: turn and press the controller.
The selected setting is accepted.
Exiting a menu
XSelect &.
Resetting last location searches
XCall up Local Search settings (Ypage 156).
XTo select Reset last location
searches: turn the controller and press to
confirm.
A prompt appears asking whether the last
location searches should be deleted.
XTo select Yes: turn and press the controller.
The search queries are deleted.
or
XTo select No: turn and press the controller.
The process is canceled.
Deleting search queries
XCall up Local Search settings (Ypage 156).
XTo select Delete all searches: turn the
controller and press to confirm.
A prompt appears, asking whether the last
search queries should be deleted.
XTo select Yes: turn and press the controller.
The last search queries are deleted.
or
XTo select No: turn and press the controller.
The process is canceled.
Destination/route download
Prerequisites
To download navigation locations you need a
Google™ account and your vehicle identifica-
tion number. Further information about the
vehicle identification number (VIN)
(
Ypage 159).
To download navigation locations, the
mbrace system must be:
Ractivated
Roperational
Ractivated for the services of the system and
for Internet access
For information on the mbrace system, see
the separate vehicle Operator's Manual.
156Destination/route download
Online and Internet functions