2016 MERCEDES-BENZ AMG GT ROADSTER display
[x] Cancel search: displayPage 211 of 289
Quick access for audio
Changing the station/music track
Depending on the audio source that is currently
activated, you can use this function to select thenext station or music track.
X Swipe upwards with two fingers on the touch-
pad.
The current audio source is displayed.
X To select the previous or next station/
music track:
swipe to the left or right.
The selected station/music track is played.
Switching the character entry between
touchpad and controller Requirement: an input line for text, numbers or
characters has been selected.
X To switch to the controller: press the con-
troller.
Character entry using the controller is active.
X To switch to the touchpad: press the touch-
pad with your finger.
Handwriting recognition on the touchpad is
active. Favourites
Calling up and exiting favourites X
To call up: press thegbutton on the con-
troller or on the touchpad.
X Select a favourite, e. g. Vehicle
Vehicle.
The favourites are displayed.
X To exit: press the gbutton again. Adding favourites Adding a predefined favourite
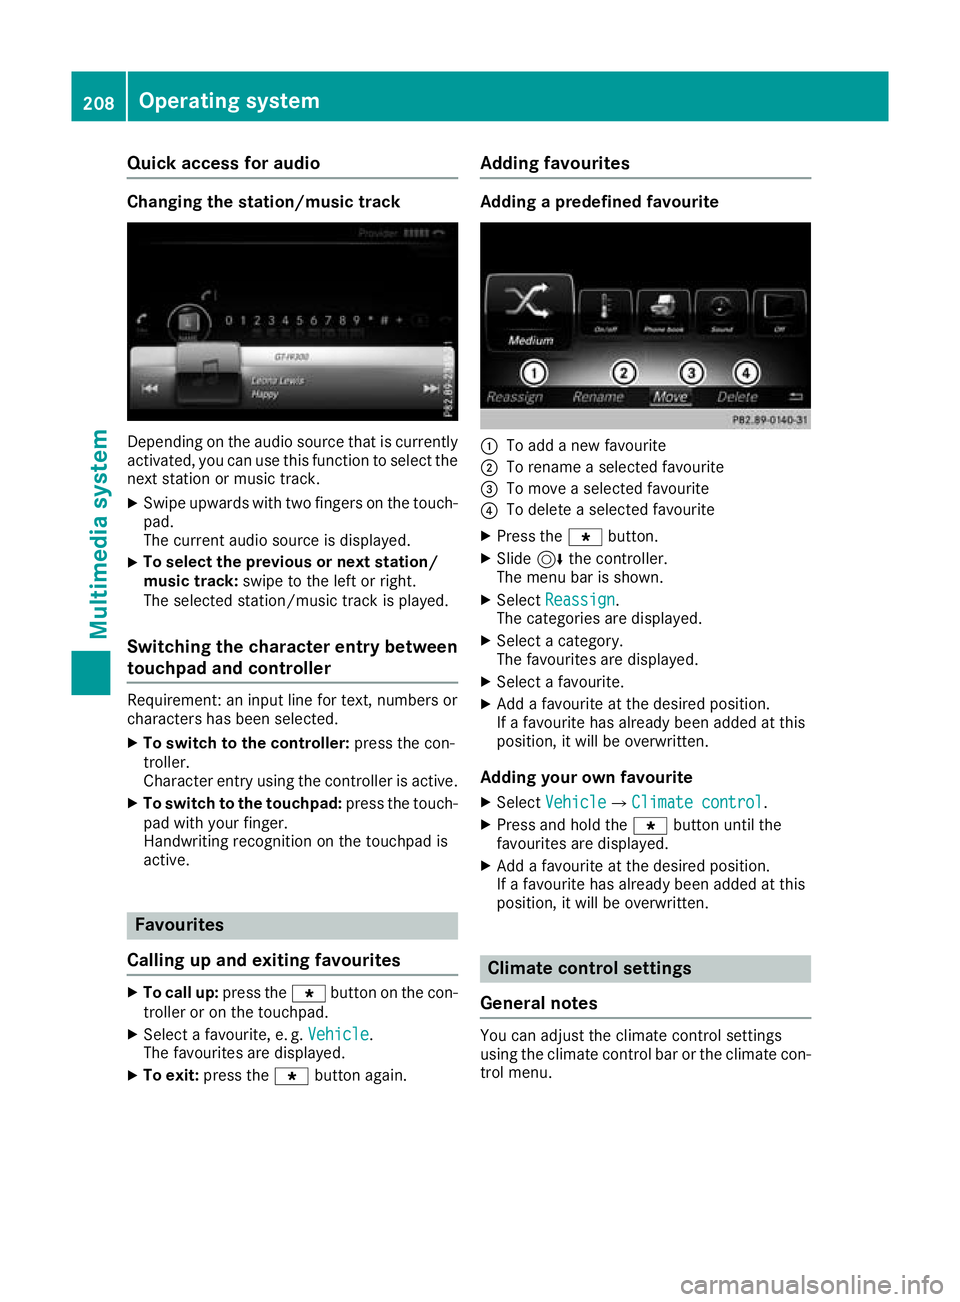
:
To add a new favourite
; To rename a selected favourite
= To move a selected favourite
? To delete a selected favourite
X Press the gbutton.
X Slide 6the controller.
The menu bar is shown.
X Select Reassign
Reassign .
The categories are displayed.
X Select a category.
The favourites are displayed.
X Select a favourite.
X Add a favourite at the desired position.
If a favourite has already been added at this
position, it will be overwritten.
Adding your own favourite
X Select Vehicle VehicleQ Climate control
Climate control.
X Press and hold the gbutton until the
favourites are displayed.
X Add a favourite at the desired position.
If a favourite has already been added at this
position, it will be overwritten. Climate control settings
General notes You can adjust the climate control settings
using the climate control bar or the climate con-
trol menu. 208
Operating systemMultimedia system
Page 212 of 289
Important climate control functions can be set
in the climate control bar:
R Temperature
R Airflow
R Air distribution
The climate control bar is visible in most dis-
plays.
You can find all available climate control func-
tions in the climate control menu. You can use
the climate control bar to switch to the climate
control menu.
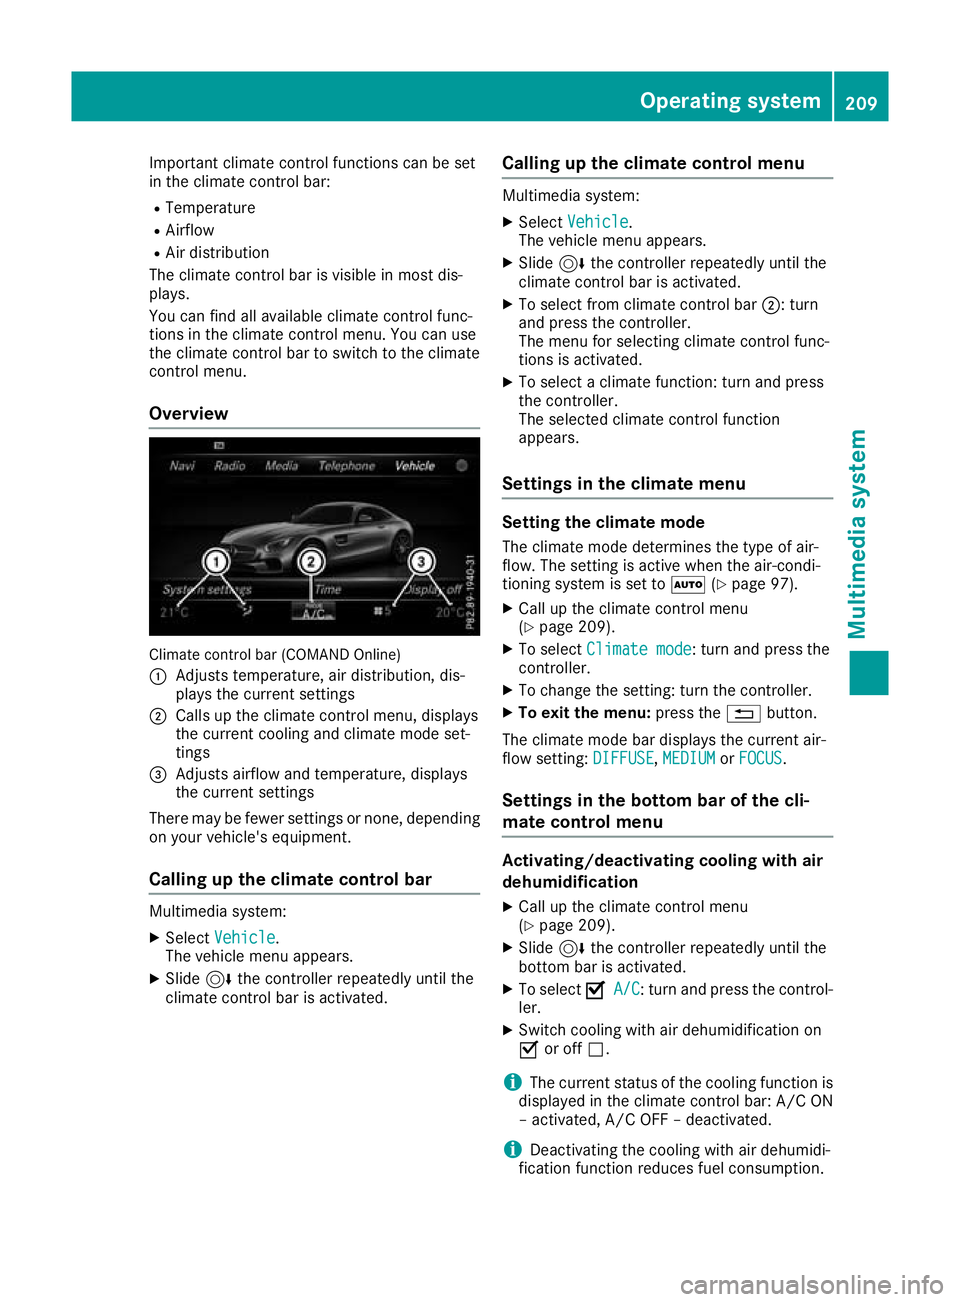
Overview Climate control bar (COMAND Online)
: Adjusts temperature, air distribution, dis-
plays the current settings
; Calls up the climate control menu, displays
the current cooling and climate mode set-
tings
= Adjusts airflow and temperature, displays
the current settings
There may be fewer settings or none, depending
on your vehicle's equipment.
Calling up the climate control bar Multimedia system:
X Select Vehicle Vehicle.
The vehicle menu appears.
X Slide 6the controller repeatedly until the
climate control bar is activated. Calling up the climate control menu Multimedia system:
X Select Vehicle
Vehicle.
The vehicle menu appears.
X Slide 6the controller repeatedly until the
climate control bar is activated.
X To select from climate control bar ;: turn
and press the controller.
The menu for selecting climate control func-
tions is activated.
X To select a climate function: turn and press
the controller.
The selected climate control function
appears.
Settings in the climate menu Setting the climate mode
The climate mode determines the type of air-
flow. The setting is active when the air-condi-
tioning system is set to Ã(Ypage 97).
X Call up the climate control menu
(Y page 209).
X To select Climate mode Climate mode: turn and press the
controller.
X To change the setting: turn the controller.
X To exit the menu: press the%button.
The climate mode bar displays the current air-
flow setting: DIFFUSE
DIFFUSE, MEDIUM MEDIUMorFOCUS
FOCUS.
Settings in the bottom bar of the cli-
mate control menu Activating/deactivating cooling with air
dehumidification
X Call up the climate control menu
(Y page 209).
X Slide 6the controller repeatedly until the
bottom bar is activated.
X To select O OA/C
A/C: turn and press the control-
ler.
X Switch cooling with air dehumidification on
O or off ª.
i The current status of the cooling function is
displayed in the climate control bar: A/C ON
– activated, A/C OFF – deactivated.
i Deactivating the cooling with air dehumidi-
fication function reduces fuel consumption. Operating system
209Multimedia system Z
Page 214 of 289

X
Enter the town.
The Gsymbol: the location is contained on
the digital map multiple times.
X To switch to the list: slide5the control-
ler.
X Select the location.
If available, the postcode is shown. If there
are different postcodes available for the loca- tion, the corresponding digits are displayed
with an X
X.
X Enter the street and house number.
The address is in the menu.
Further options for destination entry:
R Keyword search
The keyword search finds destinations using
fragments of words.
R select the last destination
R select a contact
R select a POI
You can search for a POI by location, name or
telephone number.
R select destination on the map
R enter intermediate destination
You can map the route to the destination
yourself with up to four intermediate destina- tions.
R select travel guide destination (only available
for selected European countries)
R select destinations from Mercedes-Benz
Apps
R select geo-coordinates
Calculating the route Prerequisite: the address has been entered and
is in the menu.
X Select Start StartorContinue
Continue.
The route is calculated with the selected route
type and the selected route options.
If route guidance has already been activated,
a prompt will appear asking whether you wish to end the current route guidance.
X Select Yes
Yes orSet as intermediate des‐ Set as intermediate des‐
tination
tination.
Yes Yes cancels the current route guidance and
starts route calculation to the new destina-
tion.
Set as intermediate destination
Set as intermediate destination adds
the new destination in addition to the existing destination and opens the intermediate des-
tinations list. Connecting the mobile phone
Requirements For telephony via the Bluetooth
®
interface, you
require a Bluetooth ®
-capable mobile phone. The
mobile phone must support Hands-Free Profile
1.0 or above.
Multimedia system:
X Select Vehicle VehicleQSystem set‐ System set‐
tings
tingsQ Activate Bluetooth
Activate Bluetooth .
X Activate Bluetooth ®
O.
Mobile phone:
X Activate Bluetooth ®
and, if necessary, Blue-
tooth ®
visibility for other devices (see the
manufacturer's operating instructions).
The Bluetooth ®
device names for all of one man-
ufacturer's products might be identical. To
make it possible to clearly identify your mobile
phone, change the device name (see the man-
ufacturer's operating instructions).
If the mobile phone supports the PBAP (P hone
Book Access Profile) and MAP (Message
Access Profile) Bluetooth ®
profiles, the follow-
ing information will be transmitted after you
connect:
R Phone book
R Call lists
R Messages
i Further information on suitable mobile
phones can be obtained on the Internet at:
http://www.mercedes-benz.com/
connect
Searching for and authorising a mobile
phone Before using your mobile phone with the multi-
media system for the first time, you will need to
search for the phone and then authorise (con-
nect) it. Depending on the mobile phone, author-
isation takes place by means of Secure Simple
Pairing or by entering a passkey. The multimedia
system automatically makes the procedure that is relevant for your mobile phone available. The
mobile phone is always connected automati- Operating system
211Multimedia system Z
Page 215 of 289
cally after authorisation. Further information on
using a mobile phone with the multimedia sys-
tem (see the Digital Owner's Manual).
If the multimedia system does not detect your
mobile phone, this may be due to particular
security settings on your mobile phone (see the
manufacturer's operating instructions).
Only one mobile phone can be connected to the multimedia system at any one time.
Searching for a mobile phone
Audio 20:
X Select Tel/
Tel/ ®QConnect Connect
device deviceQSearch for phones Search for phonesQStart Start
search
search.
The available mobile phones are displayed.
COMAND Online:
X Select Telephone TelephoneQConnect Connect
device
deviceQSearch for phones Search for phonesQStart Start
search
search.
The available mobile phones are displayed.
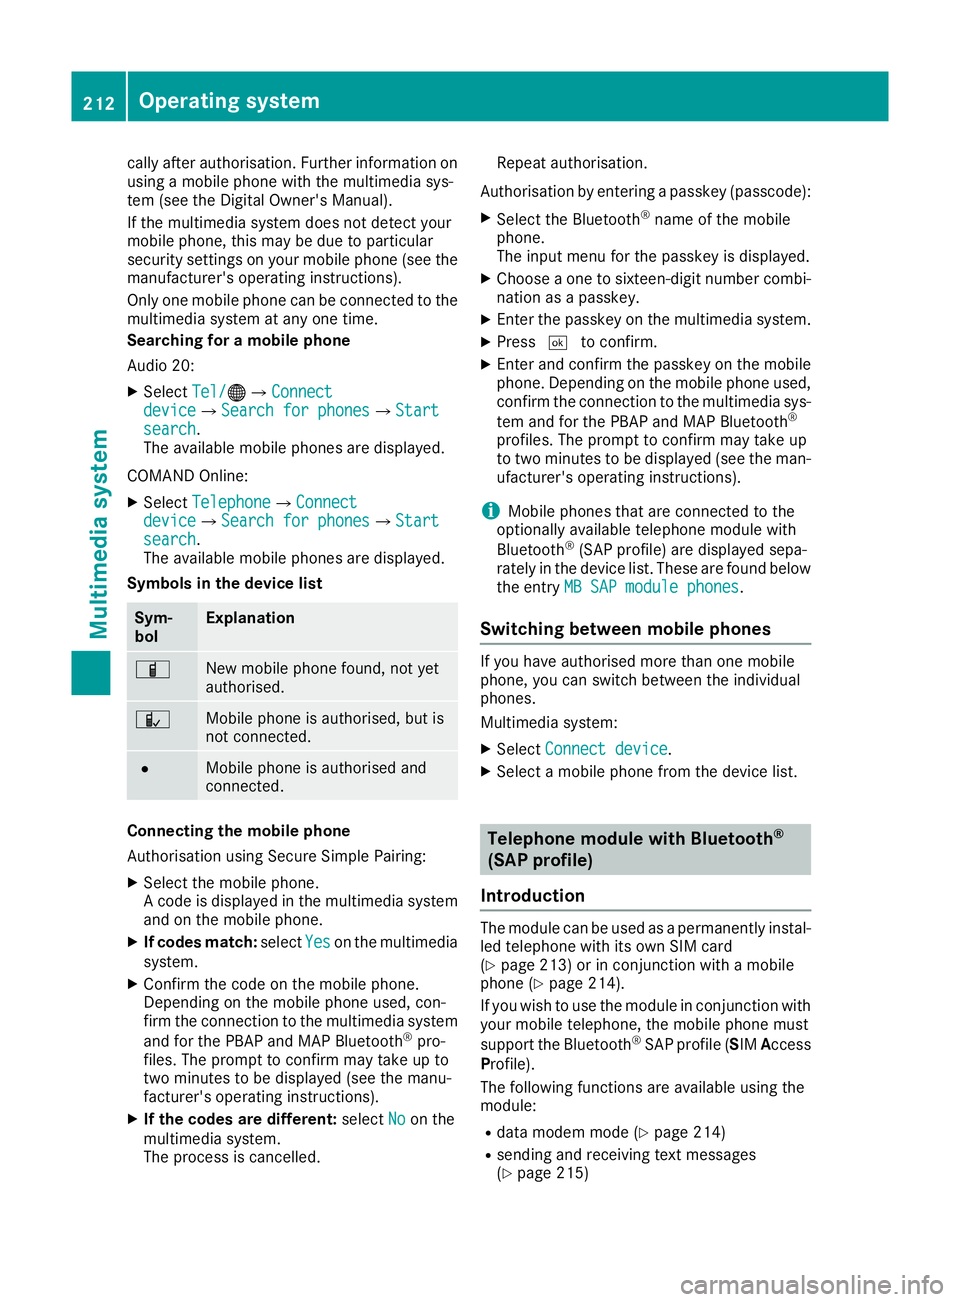
Symbols in the device list Sym-
bol Explanation
Ï
New mobile phone found, not yet
authorised.
Ñ
Mobile phone is authorised, but is
not connected.
#
Mobile phone is authorised and
connected.
Connecting the mobile phone
Authorisation using Secure Simple Pairing:
X Select the mobile phone.
A code is displayed in the multimedia system
and on the mobile phone.
X If codes match: selectYes Yeson the multimedia
system.
X Confirm the code on the mobile phone.
Depending on the mobile phone used, con-
firm the connection to the multimedia system
and for the PBAP and MAP Bluetooth ®
pro-
files. The prompt to confirm may take up to
two minutes to be displayed (see the manu-
facturer's operating instructions).
X If the codes are different: selectNo
No on the
multimedia system.
The process is cancelled. Repeat authorisation.
Authorisation by entering a passkey (passcode): X Select the Bluetooth ®
name of the mobile
phone.
The input menu for the passkey is displayed.
X Choose a one to sixteen-digit number combi-
nation as a passkey.
X Enter the passkey on the multimedia system.
X Press ¬to confirm.
X Enter and confirm the passkey on the mobile
phone. Depending on the mobile phone used,
confirm the connection to the multimedia sys-
tem and for the PBAP and MAP Bluetooth ®
profiles. The prompt to confirm may take up
to two minutes to be displayed (see the man- ufacturer's operating instructions).
i Mobile phones that are connected to the
optionally available telephone module with
Bluetooth ®
(SAP profile) are displayed sepa-
rately in the device list. These are found below
the entry MB SAP module phones
MB SAP module phones.
Switching between mobile phones If you have authorised more than one mobile
phone, you can switch between the individual
phones.
Multimedia system:
X Select Connect device Connect device.
X Select a mobile phone from the device list. Telephone module with Bluetooth
®
(SAP profile)
Introduction The module can be used as a permanently instal-
led telephone with its own SIM card
(Y page 213) or in conjunction with a mobile
phone (Y page 214).
If you wish to use the module in conjunction with
your mobile telephone, the mobile phone must
support the Bluetooth ®
SAP profile (SIM Access
Profile).
The following functions are available using the
module:
R data modem mode (Y page 214)
R sending and receiving text messages
(Y page 215) 212
Operating systemMultimedia system
Page 218 of 289
The transfer of data may take up to ten minutes.
Transmission occurs automatically after a Blue-
tooth ®
connection is automatically established.
Text messages Requirements
The module is connected with the mobile phone
(Y page 214) or is being used in the SIM card
mode (Y page 213).
Activating/deactivating text message
downloading from the mobile phone Dial number Function
00080 Text message down-
loading is deactiva-
ted.
00081 Text message down-
loading is activated.
For further information on receiving text mes-
sages when using the telephone module; see
Digital Owner's Manual.
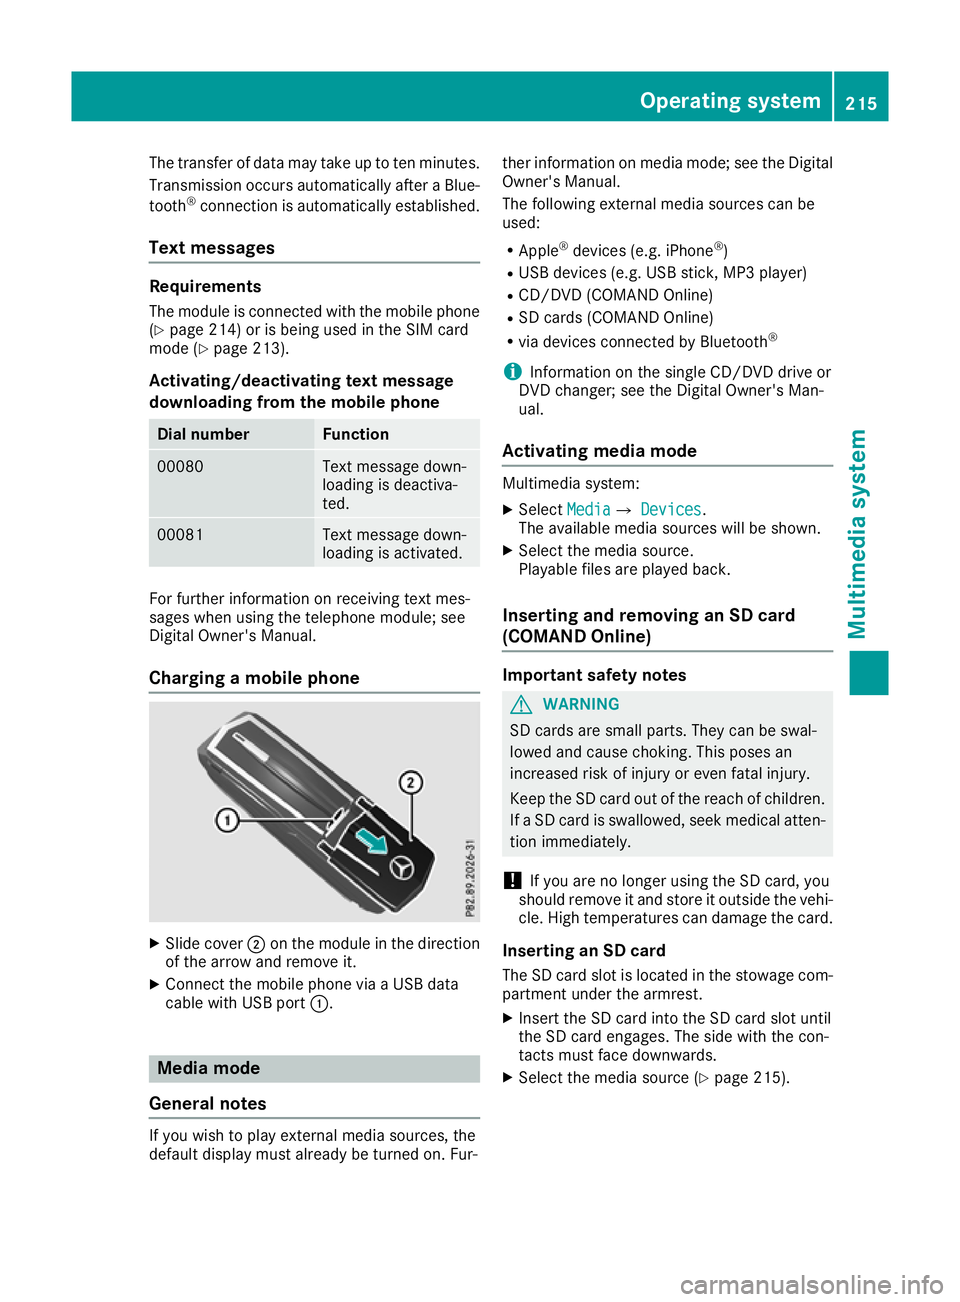
Charging a mobile phone X
Slide cover ;on the module in the direction
of the arrow and remove it.
X Connect the mobile phone via a USB data
cable with USB port :. Media mode
General notes If you wish to play external media sources, the
default display must already be turned on. Fur- ther information on media mode; see the Digital
Owner's Manual.
The following external media sources can be
used:
R Apple ®
devices (e.g. iPhone ®
)
R USB devices (e.g. USB stick, MP3 player)
R CD/DVD (COMAND Online)
R SD cards (COMAND Online)
R via devices connected by Bluetooth ®
i Information on the single CD/DVD drive or
DVD changer; see the Digital Owner's Man-
ual.
Activating media mode Multimedia system:
X Select Media MediaQ Devices
Devices.
The available media sources will be shown.
X Select the media source.
Playable files are played back.
Inserting and removing an SD card
(COMAND Online) Important safety notes
G
WARNING
SD cards are small parts. They can be swal-
lowed and cause choking. This poses an
increased risk of injury or even fatal injury.
Keep the SD card out of the reach of children. If a SD card is swallowed, seek medical atten-
tion immediately.
! If you are no longer using the SD card, you
should remove it and store it outside the vehi-
cle. High temperatures can damage the card.
Inserting an SD card
The SD card slot is located in the stowage com- partment under the armrest.
X Insert the SD card into the SD card slot until
the SD card engages. The side with the con-
tacts must face downwards.
X Select the media source (Y page 215). Operating system
215Multimedia system Z
Page 228 of 289
When leaving the vehicle, always take the key
with you and lock the vehicle. Never leave
children unattended in the vehicle.
! Do not enter an automatic car wash with the
rear aerofoil extended. Otherwise, the rear
aerofoil may be damaged.
Only extend the rear aerofoil in order to wash
it by hand. Retract it again when you have fin- ished cleaning it.
You can extend and retract the rear spoiler man-
ually for cleaning.
X Close the tailgate.
X Select key position 2with the Start/Stop but-
ton (Y page 103). X
To extend: press button :.
The rear spoiler is extended.
Button :flashes until the rear spoiler has
extended and then lights up in red.
X To retract: press and hold button :until the
rear spoiler is completely retracted.
Button :flashes until the rear spoiler has
retracted and then goes out.
Rear spoiler retracts manually Rear spoiler retracts manually
appears in the display.
If you release button :while retracting the rear
spoiler, it extends again automatically.
Problems with the rear spoiler Problem
Possible causes/consequences and
M MSolutions The rear spoiler stops
before reaching the end
position when retracting
manually. You have opened the tailgate while manually retracting the rear
spoiler.
X Close the tailgate.
The rear spoiler extends or, if you press and hold the ¬button,
continues retracting. The rear spoiler stops
before reaching the end
position when retract-
ing/extending manually. You have switched off the ignition.
X Switch the ignition back on.
X Press the ¬button.
The rear spoiler extends/retracts. The rear spoiler cannot
be retracted again after
manually extending it. You have opened the tailgate while manually extending the rear
spoiler.
X Close the tailgate. The rear spoiler does not
extend or retract auto-
matically. The rear spoiler's movement is blocked, e.g. by an object jammed
between the body and the rear spoiler.
X Remove the object. Garage door opener
General notes The HomeLink
®
garage door opener integrated
in the rear-view mirror allows you to operate up
to three different door and gate systems.
Once programmed, the integrated garage door
opener in the rear-view mirror will assume the
function of the garage door system's remote control. Please also read the operating instruc-
tions for the garage door system.
When programming a garage door opener, park
the vehicle outside the garage. Do not run the
engine while programming.
The garage door opener is available only for cer- tain countries. Observe the legal requirements
for each individual country. Features
225Stowing and features Z
Page 237 of 289
Checking the oil level using the on-board computer
X
Select key position 2with the Start/Stop button.
X Use ò on the steering wheel to call up the list of menus.
X Press the :or9 button on the steering wheel to select the Service
Servicemenu.
X Confirm by pressing aon the steering wheel.
X Use : or9 to select the Engine oil level:
Engine oil level: submenu.
X Press ato confirm the selection.
The Engine oil level Measuring now Measurement accurate only if vehicle is
Engine oil level Measuring now Measurement accurate only if vehicle is
level
level message appears in the multifunction display.
The measurement takes a few seconds. You will see one of the following messages in the multi-
function display: Display messages
Possible causes/consequences and
M
MSolutions Engine oil level OK
Engine oil level OK The oil level is correct.
Add 1 litre engine
Add 1 litre engine
oil when next refu‐ oil when next refu‐
elling elling The oil level is too low.
X Top up 1.0 litre of engine oil. Engine oil level
Engine oil level
Reduce oil level Reduce oil level The engine oil level is too high.
X Have excess engine oil siphoned off. For engine oil
For engine oil
level turn on igni‐ level turn on igni‐
tion tion The ignition is switched off.
X Select key position 2with the Start/Stop button. Waiting period for
Waiting period for
engine oil level engine oil level
not observed not observed The required waiting period was not observed.
X The engine must be at normal operating temperature.
Measurements can only be taken within the first 4 minutes after the
engine has been switched off. Engine oil level Engine oil level
Not Not
with
with the
theengine
engine
running
running The engine is running; oil level measurement is not possible.
X Switch off the engine.
X Repeat the measurement. Observe the required waiting period. Engine oil level
Engine oil level
Correct Correct
measurement
measurement
only if vehicle is
only if vehicle is
on level ground on level ground The vehicle is not parked on a level surface.
X Park the vehicle on a level surface. Engine oil level
Engine oil level
cannot be measured. cannot be measured. The oil level measurement with the oil dipstick is possible. The meas-
uring system is malfunctioning.
X Consult a qualified specialist workshop. Topping up engine oil
G
WARNING
Certain components in the engine compart-
ment could be very hot, e.g. the engine, the
radiator and parts of the exhaust system. There is a risk of injury when accessing the
engine compartment.
As far as possible, allow the engine to cool
down and only touch the components descri- bed in the following. 234
Engine compartmentMaintenance and care
Page 239 of 289
Example
X Park the vehicle on a level surface.
Only check the coolant level if the vehicle is
on a level surface and the engine has cooled
down.
X Set the Start/Stop button to key position 2.
X Check the coolant temperature display in the
instrument cluster.
The coolant temperature must be below
70 †.
X Select key position 0with the Start/Stop but-
ton.
X Remove the engine cover.
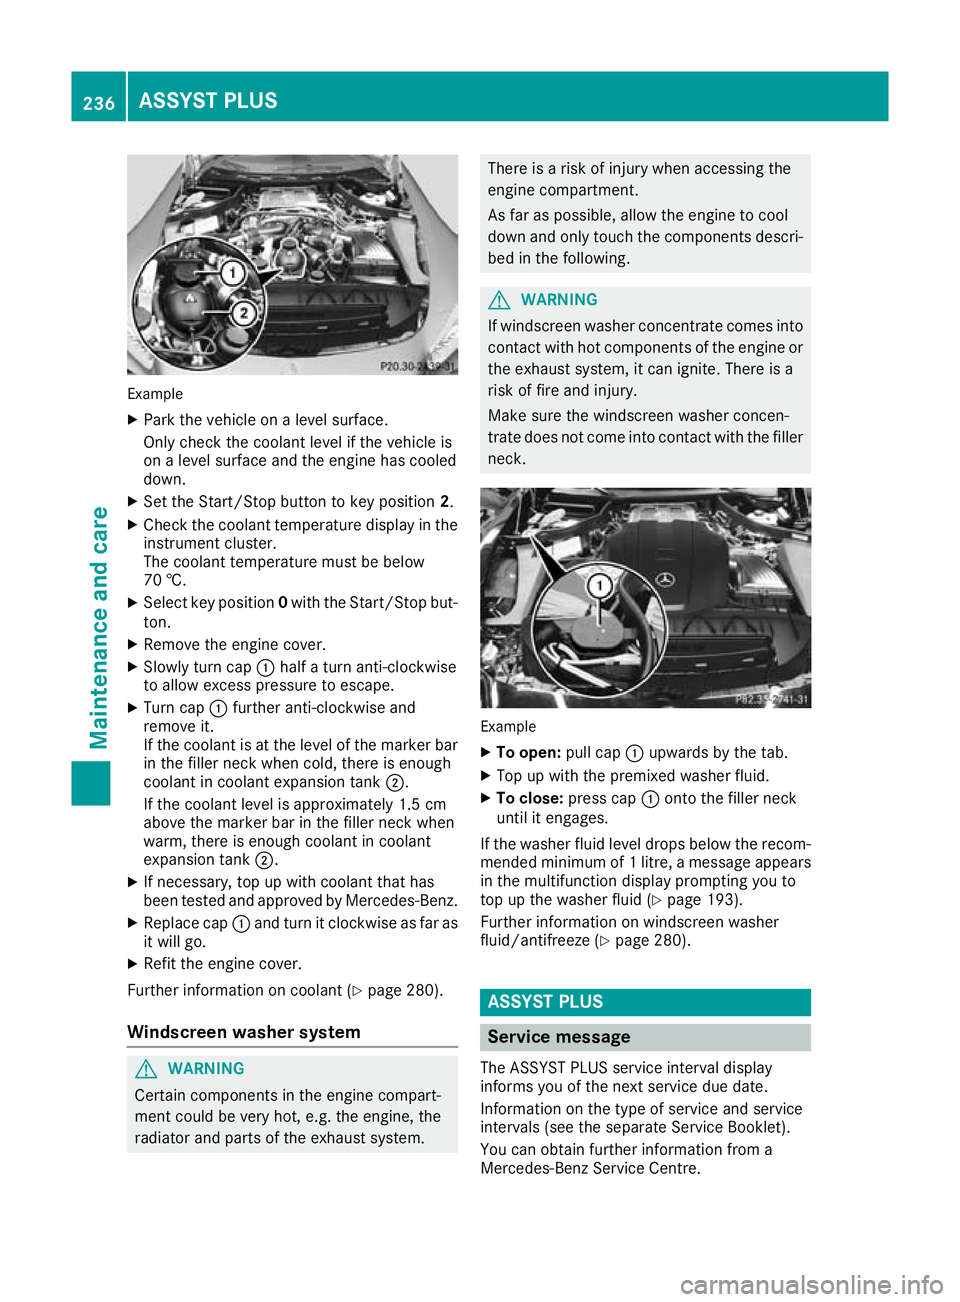
X Slowly turn cap :half a turn anti-clockwise
to allow excess pressure to escape.
X Turn cap :further anti-clockwise and
remove it.
If the coolant is at the level of the marker bar
in the filler neck when cold, there is enough
coolant in coolant expansion tank ;.
If the coolant level is approximately 1.5 cm
above the marker bar in the filler neck when
warm, there is enough coolant in coolant
expansion tank ;.
X If necessary, top up with coolant that has
been tested and approved by Mercedes-Benz.
X Replace cap :and turn it clockwise as far as
it will go.
X Refit the engine cover.
Further information on coolant (Y page 280).
Windscreen washer system G
WARNING
Certain components in the engine compart-
ment could be very hot, e.g. the engine, the
radiator and parts of the exhaust system. There is a risk of injury when accessing the
engine compartment.
As far as possible, allow the engine to cool
down and only touch the components descri- bed in the following. G
WARNING
If windscreen washer concentrate comes into contact with hot components of the engine or
the exhaust system, it can ignite. There is a
risk of fire and injury.
Make sure the windscreen washer concen-
trate does not come into contact with the filler neck. Example
X To open: pull cap:upwards by the tab.
X Top up with the premixed washer fluid.
X To close: press cap :onto the filler neck
until it engages.
If the washer fluid level drops below the recom- mended minimum of 1 litre, a message appears
in the multifunction display prompting you to
top up the washer fluid (Y page 193).
Further information on windscreen washer
fluid/antifreeze (Y page 280). ASSYST PLUS
Service message
The ASSYST PLUS service interval display
informs you of the next service due date.
Information on the type of service and service
intervals (see the separate Service Booklet).
You can obtain further information from a
Mercedes-Benz Service Centre. 236
ASSYST PLUSMaintenance and care