2016 LINCOLN MKZ HYBRID climate settings
[x] Cancel search: climate settingsPage 8 of 543

Cleaning Leather Seats................................311
Repairing Minor Paint Damage...................311
Cleaning the Alloy Wheels...........................311
Vehicle Storage
.............................................312
Wheels and Tires
Temporary Mobility Kit.................................314
Tire Care.........................................................327
Using Summer Tires
.....................................341
Using Snow Chains
......................................342
Tire Pressure Monitoring System.............342
Technical Specifications..............................347
Capacities and Specifications
Engine Specifications
..................................349
Motorcraft Parts
............................................350
Vehicle Identification Number...................351
Vehicle Certification Label..........................351
Transmission Code Designation..............352
Capacities and Specifications...................353
Audio System
General Information.....................................358 Audio Unit -
Vehicles With: Premium AM/
FM/CD.........................................................359
Media Hub.......................................................361
MyLincoln Touch ™
General Information
.....................................362
Settings...........................................................376
Entertainment................................................395
Phone...............................................................418
Electric Vehicle Information.......................428
Information.....................................................434
Climate............................................................448
Navigation......................................................452
MyLincoln Touch ™ Troubleshooting
.........465
Accessories
Accessories....................................................474
Extended Service Plan (ESP)
Extended Service Plan (ESP).....................476
Scheduled Maintenance
General Maintenance Information...........479 Normal Scheduled Maintenance..............484
Special Operating Conditions Scheduled
Maintenance.............................................486
Scheduled Maintenance Record..............489
Appendices
End User License Agreement
..................500
Type Approvals.............................................525
5
MKZ Hybrid (CC9) Hybrid Electric Vehicle (HEV), Canada/United States of America, enUSA, First Printing Table of Contents
Page 119 of 543

Settings
—
On or Off
Easy Entry / Exit
Right or Left Hand Traffic
Traffic Set Up
Adaptive Hdlamps
Lighting
On or Off
Auto Highbeam
On or Off
Daytime Lights
Select time interval
Autolamp Delay
On or Off
Autolock
Locks
On or Off
Autounlock
On or Off
Mislock
All doors or Driver door
Remote Unlocking
Hold OK to Initialize
Neutral Tow
Set to XXX % - Hold
OK to Reset
Oil Life Reset
Enable or Disable Switch
Power Decklid
Auto or Last Settings
Heater – A/C
Climate Control
Remote Start
Auto Heated or Off
Steering Wheel
Auto or Off
Front Defrost
Auto or Off
Rear Defrost
116
MKZ Hybrid (CC9) Hybrid Electric Vehicle (HEV), Canada/United States of America, enUSA, First Printing Information Displays
Page 144 of 543

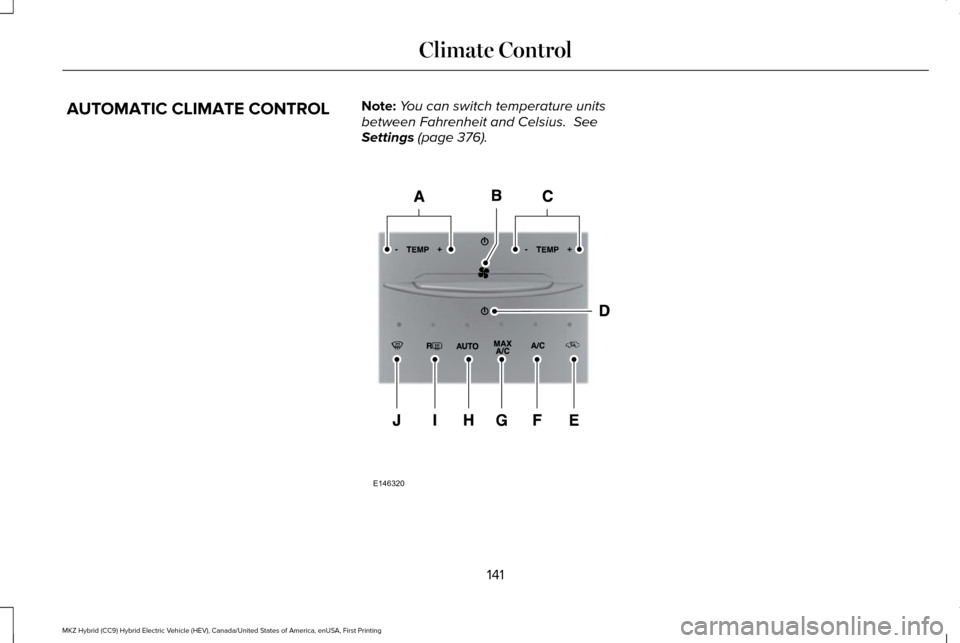
AUTOMATIC CLIMATE CONTROL
Note:
You can switch temperature units
between Fahrenheit and Celsius. See
Settings (page 376). 141
MKZ Hybrid (CC9) Hybrid Electric Vehicle (HEV), Canada/United States of America, enUSA, First Printing Climate ControlE146320
Page 146 of 543

HINTS ON CONTROLLING THE
INTERIOR CLIMATE
General Hints
Note:
Prolonged use of recirculated air may
cause the windows to fog up.
Note: You may feel a small amount of air
from the footwell air vents regardless of the
air distribution setting.
Note: To reduce humidity build-up inside
your vehicle, do not drive with the system
switched off or with recirculated air always
switched on.
Note: Do not place objects under the front
seats as this may interfere with the airflow
to the rear seats.
Note: Remove any snow, ice or leaves from
the air intake area at the base of the
windshield.
Note: To improve the time to reach a
comfortable temperature in hot weather,
drive with the windows open until you feel
cold air through the air vents. Automatic Climate Control
Note:
Adjusting the settings when your
vehicle interior is extremely hot or cold is not
necessary. The system automatically adjusts
to heat or cool the cabin to your selected
temperature as quickly as possible. For the
system to function efficiently, the instrument
panel and side air vents should be fully
open.
Note: If you select AUTO during cold outside
temperatures, the system directs airflow to
the windshield and side window vents. In
addition, the fan may run at a slower speed
until the engine warms up.
Note: If you select AUTO during hot outside
temperatures, or when the inside of the
vehicle is hot, the system automatically uses
recirculated air to maximize interior cooling.
When the interior reaches the selected
temperature, the system automatically
switches to using outside air.
Heating the Interior Quickly
1. Select the
AUTO function. 2. Adjust the temperature function to the
desired setting.
Recommended Settings for Heating
1. Select the
AUTO function.
2. Adjust the temperature function to the desired setting. Use 72°F (22°C) as a
starting point, then adjust the setting as
necessary.
Cooling the Interior Quickly
1. Select the
MAX A/C function.
Recommended Settings for Cooling
1. Select the
AUTO function.
2. Adjust the temperature function to the desired setting. Use 72°F (22°C) as a
starting point, then adjust the setting as
necessary.
Side Window Defogging in Cold
Weather
1. Press the defrost button.
143
MKZ Hybrid (CC9) Hybrid Electric Vehicle (HEV), Canada/United States of America, enUSA, First Printing Climate Control
Page 147 of 543

2. Adjust the temperature control to the
desired setting. Use 72°F (22°C) as a
starting point, then adjust the setting as
necessary.
HEATED WINDOWS AND MIRRORS
Heated Rear Window
Note: Make sure the engine is running
before operating the heated windows. Press the button to clear the
heated rear window of thin ice and
fog. The heated rear window will
automatically turn off after a short period of
time. Start the engine before you switch the
heated rear window on.
Note: Do not use razor blades or other sharp
objects to clean or remove decals from the
inside of the heated rear window. The
vehicle warranty does not cover damage
caused to the heated rear window grid lines. Heated Exterior Mirror
When you switch the heated rear window
on, the heated exterior mirrors will
automatically turn on.
Note:
Do not remove ice from the mirrors
with a scraper or adjust the mirror glass
when it is frozen in place.
Note: Do not clean the mirror housing or
glass with harsh abrasives, fuel or other
petroleum-based cleaning products.
CABIN AIR FILTER
Your vehicle is equipped with a cabin air
filter, which gives you and your passengers
the following benefits:
• It improves your driving comfort by
reducing particle concentration.
• It improves the interior compartment
cleanliness.
• It protects the climate control
components from particle deposits.
You can locate the cabin air filter behind the
glove box. Note:
Make sure you have a cabin air filter
installed at all times. This prevents foreign
objects from entering the system. Running
the system without a filter in place could
result in degradation or damage to the
system.
Replace the filter at regular intervals. See
Scheduled Maintenance (page 479).
For additional cabin air filter information, or
to replace the filter, see an authorized dealer.
REMOTE START
The remote start feature allows you to
pre-condition the interior of your vehicle. The
climate control system works to achieve
comfort according to your pre-selected
settings.
Note: You cannot adjust the system during
remote start operation. You cannot switch
on the displays or indicators during remote
start.
144
MKZ Hybrid (CC9) Hybrid Electric Vehicle (HEV), Canada/United States of America, enUSA, First Printing Climate ControlE184884
Page 148 of 543

Switch the ignition on to return the system
to its pre-selected settings. You can now
make adjustments normally, but you need to
switch certain vehicle-dependent features
back on, such as:
•
Heated seats.
• Cooled seats.
• Heated steering wheel.
• Heated mirrors.
• Heated rear window.
You can adjust the default remote start
settings using the information display
controls. See Information Displays (page
110).
Automatic Settings
In hot weather, the system is set to 72°F
(22°C). The cooled seats are set to high (if
available, and selected to AUTO in the
information display).
In moderate weather, the system either heats
or cools (based on pre-selected settings).
The rear defroster, heated mirrors and
heated seats do not automatically switch on. In cold weather, the system is set to 72°F
(22°C). The heated seats are set to high (if
available, and selected to AUTO in the
information display). The rear defroster and
heated mirrors automatically switch on.
145
MKZ Hybrid (CC9) Hybrid Electric Vehicle (HEV), Canada/United States of America, enUSA, First Printing Climate Control
Page 158 of 543

Do not do the following:
•
Place heavy objects on the seat.
• Operate the seat heater if water or any
other liquid is spilled on the seat. Allow
the seat to dry thoroughly.
• Operate the heated seats unless the
engine is running. Doing so can cause
the battery to lose charge.
The rear seat heat controls are located on
the rear of the center console. Press the heated seat symbol to cycle
through the various heat settings and off.
More indicator lights indicate warmer
settings. The heated seat module resets at every
ignition run cycle. While the ignition is on,
press the high or low heated seat switch to
enable heating mode. When activated, they
will turn off automatically when you turn the
engine off.
CLIMATE CONTROLLED SEATS (If
Equipped)
Heated Seats WARNING
People who are unable to feel pain to
their skin because of advanced age,
chronic illness, diabetes, spinal cord injury,
medication, alcohol use, exhaustion or other
physical conditions, must exercise care when
using the heated seat. The heated seat may
cause burns even at low temperatures,
especially if used for long periods of time.
Do not place anything on the seat that
insulates against heat, such as a blanket or
cushion. This may cause the heated seat to
overheat. Do not puncture the seat with pins,
needles or other pointed objects. This may
damage the heating element which may
cause the heated seat to overheat. An
overheated seat may cause serious personal
injury. 155
MKZ Hybrid (CC9) Hybrid Electric Vehicle (HEV), Canada/United States of America, enUSA, First Printing SeatsE146322
Page 159 of 543

Do not do the following:
•
Place heavy objects on the seat.
• Operate the heated seat if water or any
other liquid spills on the seat. Allow the
seat to dry thoroughly.
• Operate the heated seats unless the
engine is running. Doing so can cause
the battery to lose charge. Touch the heated seat symbol to cycle
through the various heat settings and off.
More indicator lights indicate warmer
settings.
Cooled Seats
The cooled seats will only function when the
engine is running. To operate the cooled seats:
Press the cooled seat symbol to cycle
through the various cooling settings and off.
More indicator lights indicate cooler settings.
If the engine falls below 350 RPM while the
cooled seats are on, the feature will turn itself
off. You will need to reactivate it.
Climate controlled seat air filter
replacement
Your vehicle is equipped with lifetime air
filters that are integrated with the seats.
Regular maintenance or replacement is not
needed.
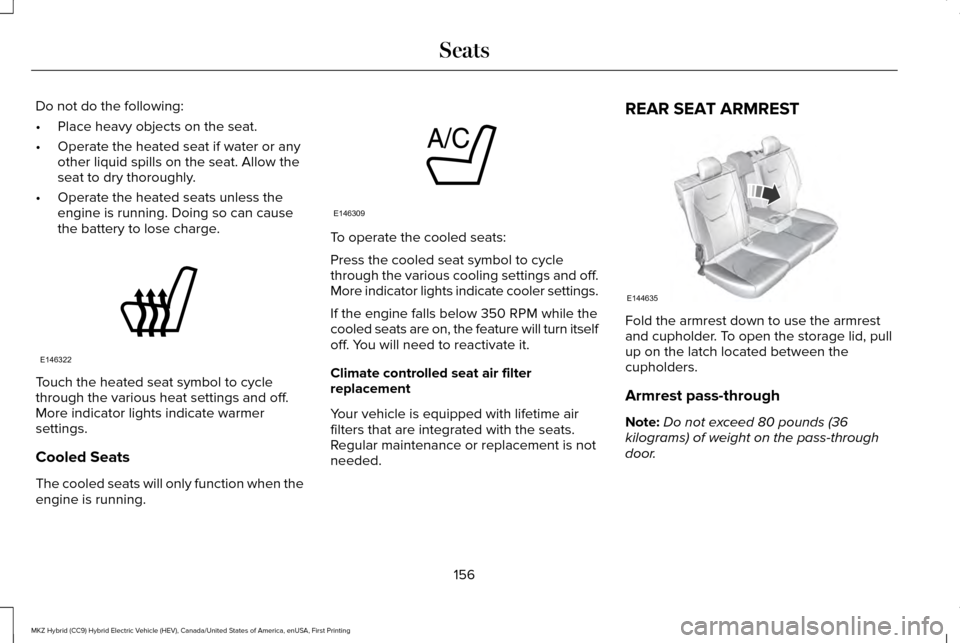
REAR SEAT ARMREST
Fold the armrest down to use the armrest
and cupholder. To open the storage lid, pull
up on the latch located between the
cupholders.
Armrest pass-through
Note:
Do not exceed 80 pounds (36
kilograms) of weight on the pass-through
door.
156
MKZ Hybrid (CC9) Hybrid Electric Vehicle (HEV), Canada/United States of America, enUSA, First Printing SeatsE146322 E146309 E144635