2016 KIA Sportage rear view mirror
[x] Cancel search: rear view mirrorPage 170 of 501
483
Features of your vehicle
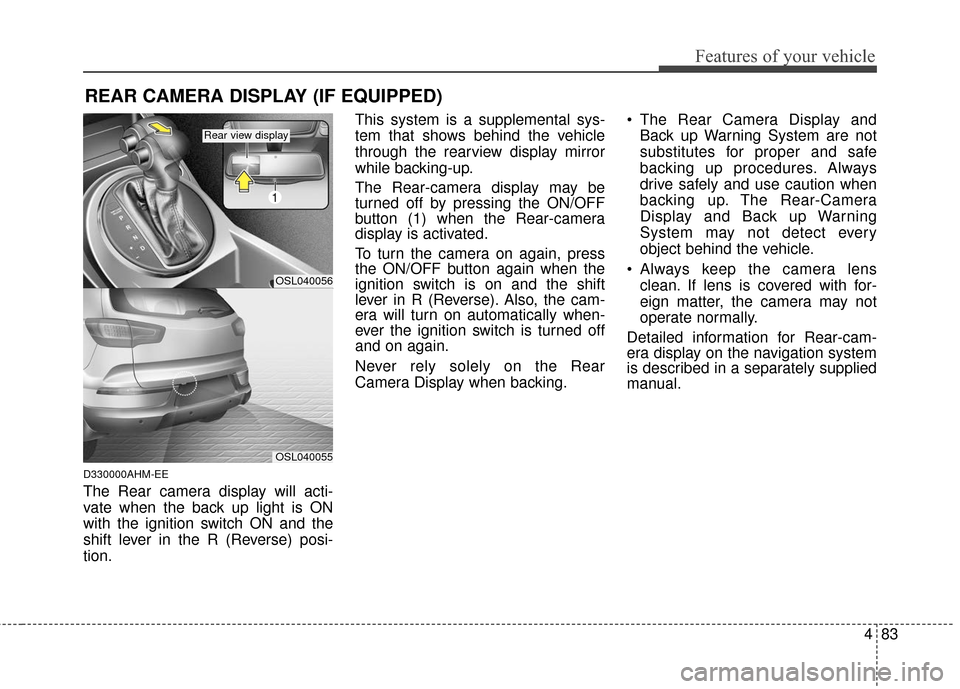
D330000AHM-EE
The Rear camera display will acti-
vate when the back up light is ON
with the ignition switch ON and the
shift lever in the R (Reverse) posi-
tion.This system is a supplemental sys-
tem that shows behind the vehicle
through the rearview display mirror
while backing-up.
The Rear-camera display may be
turned off by pressing the ON/OFF
button (1) when the Rear-camera
display is activated.
To turn the camera on again, press
the ON/OFF button again when the
ignition switch is on and the shift
lever in R (Reverse). Also, the cam-
era will turn on automatically when-
ever the ignition switch is turned off
and on again.
Never rely solely on the Rear
Camera Display when backing.
The Rear Camera Display and
Back up Warning System are not
substitutes for proper and safe
backing up procedures. Always
drive safely and use caution when
backing up. The Rear-Camera
Display and Back up Warning
System may not detect every
object behind the vehicle.
Always keep the camera lens clean. If lens is covered with for-
eign matter, the camera may not
operate normally.
Detailed information for Rear-cam-
era display on the navigation system
is described in a separately supplied
manual.
REAR CAMERA DISPLAY (IF EQUIPPED)
OSL040056
1
OSL040055
Rear view display
Page 171 of 501
Features of your vehicle
84
4
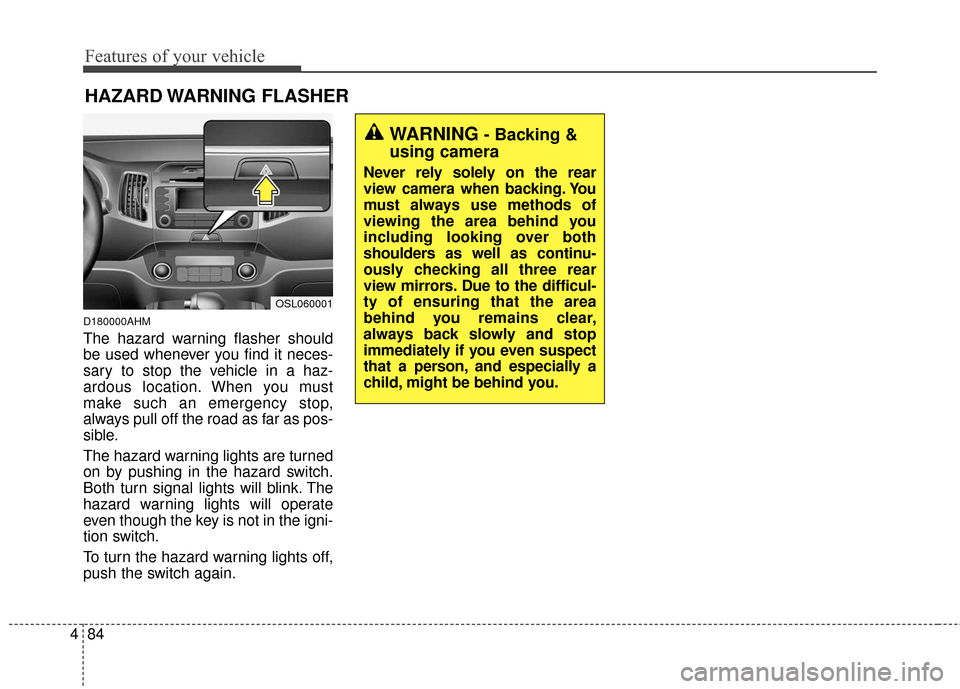
D180000AHM
The hazard warning flasher should
be used whenever you find it neces-
sary to stop the vehicle in a haz-
ardous location. When you must
make such an emergency stop,
always pull off the road as far as pos-
sible.
The hazard warning lights are turned
on by pushing in the hazard switch.
Both turn signal lights will blink. The
hazard warning lights will operate
even though the key is not in the igni-
tion switch.
To turn the hazard warning lights off,
push the switch again.
HAZARD WARNING FLASHER
OSL060001
WARNING- Backing &
using camera
Never rely solely on the rear
view camera when backing. You
must always use methods of
viewing the area behind you
including looking over both
shoulders as well as continu-
ously checking all three rear
view mirrors. Due to the difficul-
ty of ensuring that the area
behind you remains clear,
always back slowly and stop
immediately if you even suspect
that a person, and especially a
child, might be behind you.
Page 184 of 501
497
Features of your vehicle
DEFROSTER
220000AUN
If you want to defrost and defog the
front windshield, refer to “Windshield
defrosting and defogging” in this sec-
tion.Rear window defroster
The defroster heats the window to
remove frost, fog and thin ice from
the rear window, while the engine is
running.
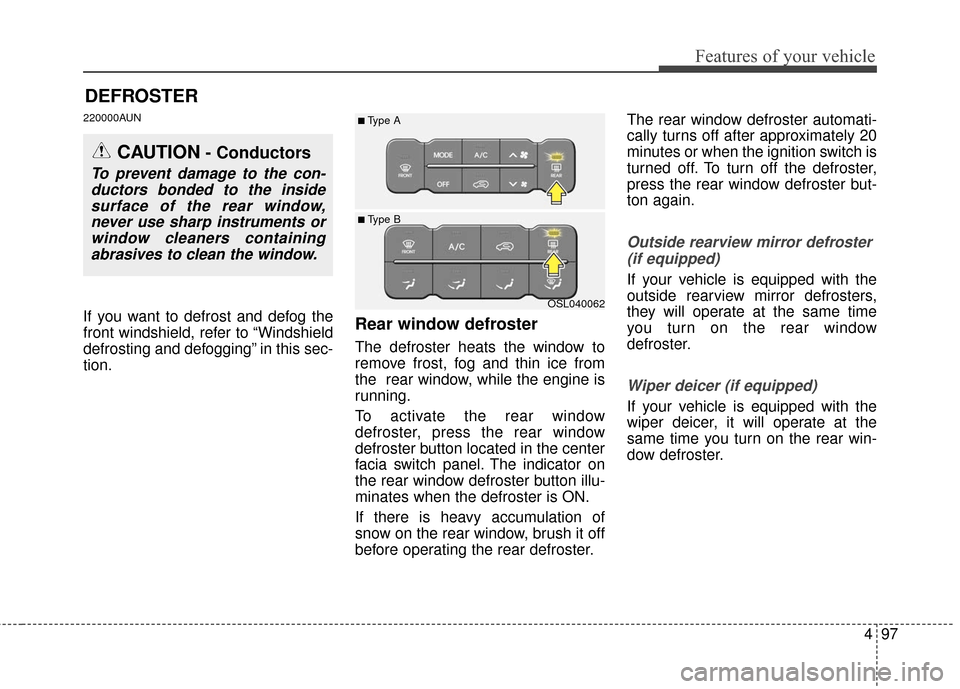
To activate the rear window
defroster, press the rear window
defroster button located in the center
facia switch panel. The indicator on
the rear window defroster button illu-
minates when the defroster is ON.
If there is heavy accumulation of
snow on the rear window, brush it off
before operating the rear defroster.The rear window defroster automati-
cally turns off after approximately 20
minutes or when the ignition switch is
turned off. To turn off the defroster,
press the rear window defroster but-
ton again.
Outside rearview mirror defroster
(if equipped)
If your vehicle is equipped with the
outside rearview mirror defrosters,
they will operate at the same time
you turn on the rear window
defroster.
Wiper deicer (if equipped)
If your vehicle is equipped with the
wiper deicer, it will operate at the
same time you turn on the rear win-
dow defroster.
CAUTION- Conductors
To prevent damage to the con-ductors bonded to the insidesurface of the rear window,never use sharp instruments orwindow cleaners containingabrasives to clean the window.
OSL040062
■ Type B
■Type A
Page 202 of 501
4115
Features of your vehicle
For maximum defrosting, set thetemperature control to the extreme
right/hot position and the fan speed
control to the highest speed.
If warm air to the floor is desired while defrosting or defogging, set
the mode to the floor-defrost posi-
tion.
Before driving, clear all snow and ice from the windshield, rear win-
dow, outside rear view mirrors, and
all side windows.
Clear all snow and ice from the hood and air inlet in the cowl grill to
improve heater and defroster effi-
ciency and to reduce the probabili-
ty of fogging up the inside of the
windshield.
Manual climate control system
To defog inside windshield
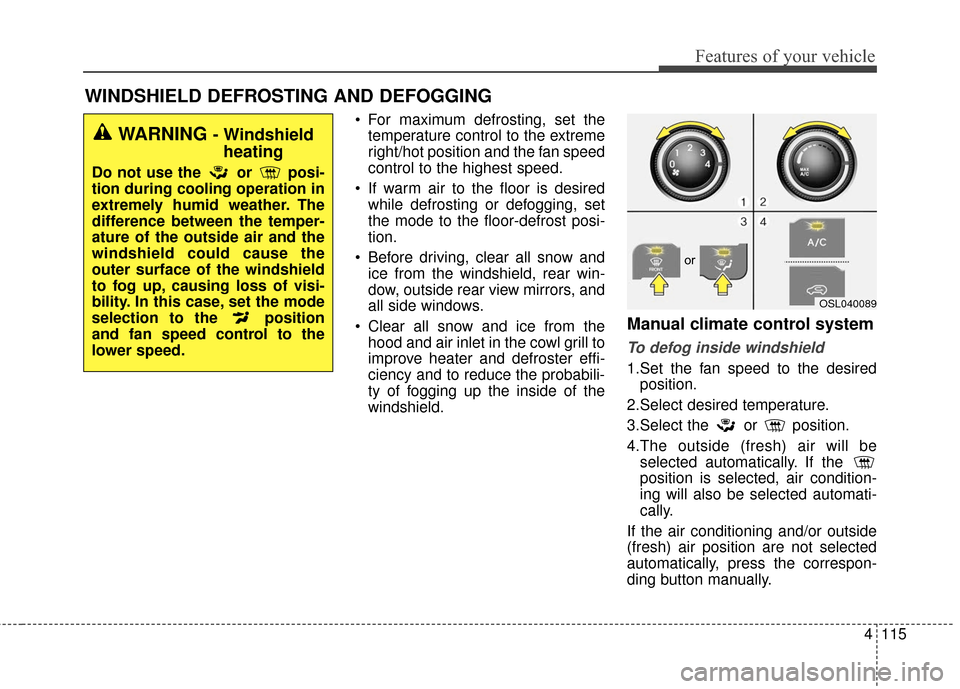
1.Set the fan speed to the desiredposition.
2.Select desired temperature.
3.Select the or position.
4.The outside (fresh) air will be selected automatically. If the
position is selected, air condition-
ing will also be selected automati-
cally.
If the air conditioning and/or outside
(fresh) air position are not selected
automatically, press the correspon-
ding button manually.
WINDSHIELD DEFROSTING AND DEFOGGING
WARNING - Windshield heating
Do not use the or posi-
tion during cooling operation in
extremely humid weather. The
difference between the temper-
ature of the outside air and the
windshield could cause the
outer surface of the windshield
to fog up, causing loss of visi-
bility. In this case, set the mode
selection to the position
and fan speed control to the
lower speed.
OSL040089
or
Page 208 of 501
4121
Features of your vehicle
D270500BUN-C1
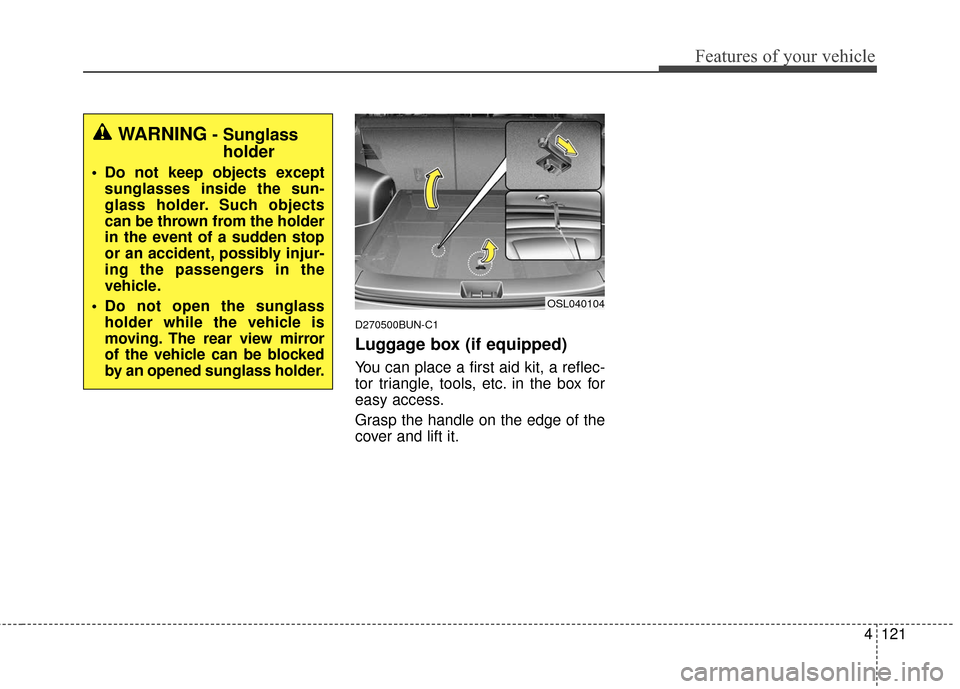
Luggage box (if equipped)
You can place a first aid kit, a reflec-
tor triangle, tools, etc. in the box for
easy access.
Grasp the handle on the edge of the
cover and lift it.
OSL040104
WARNING- Sunglassholder
Do not keep objects except
sunglasses inside the sun-
glass holder. Such objects
can be thrown from the holder
in the event of a sudden stop
or an accident, possibly injur-
ing the passengers in the
vehicle.
Do not open the sunglass holder while the vehicle is
moving. The rear view mirror
of the vehicle can be blocked
by an opened sunglass holder.
Page 328 of 501
53
Driving your vehicle
E020100AUN
Before entering vehicle
• Be sure that all windows, outsidemirror(s), and outside lights are
clean.
Check the condition of the tires.
Check under the vehicle for any sign of leaks.
Be sure there are no obstacles behind you if you intend to back up.
E020200AUN
Necessary inspections
Fluid levels, such as engine oil,
engine coolant, brake fluid, and
washer fluid should be checked on a
regular basis, at the exact interval
depending on the fluid. Further
details are provided in section 7,
“Maintenance”.
E020300AHM
Before starting
Close and lock all doors.
Position the seat so that all con-trols are easily reached.
Adjust the inside and outside rearview mirrors.
Be sure that all lights work.
Check all gauges.
Check the operation of warning lights when the ignition switch is
turned to the ON position.
Release the parking brake and make sure the brake warning light
goes out.
Buckle your seat belt.
For safe operation, be sure you are
familiar with your vehicle and its
equipment.
BEFORE DRIVING
WARNING
Driving while distracted can
result in a loss of vehicle con-
trol, that may lead to an acci-
dent, severe personal injury,
and death. The driver’s primary
responsibility is in the safe and
legal operation of a vehicle, and
use of any handheld devices,
other equipment, or vehicle sys-
tems which take the driver’s
eyes, attention and focus away
from the safe operation of a
vehicle or which are not permis-
sible by law should never be
used during operation of the
vehicle.
Page 499 of 501
I5
Index
Maintenance services . . . . . . . . . . . . . . . . . . . . . . . . . . . 7-3Owner maintenance precautions . . . . . . . . . . . . . . . . 7-4
Owner’s responsibility . . . . . . . . . . . . . . . . . . . . . . . . 7-3
Maintenance under severe usage conditions . . . . . . . . 7-12
Manual climate control system. . . . . . . . . . . . . . . . . . . 4-98
Manual transaxle. . . . . . . . . . . . . . . . . . . . . . . . . . . . . . 5-12 Manual transaxle operation . . . . . . . . . . . . . . . . . . . 5-12
Mirrors . . . . . . . . . . . . . . . . . . . . . . . . . . . . . . . . . . . . \
. 4-47 Inside rearview mirror . . . . . . . . . . . . . . . . . . . . . . . 4-47
Outside rearview mirror . . . . . . . . . . . . . . . . . . . . . . 4-51
Normal maintenance schedule . . . . . . . . . . . . . . . . . . . . 7-7
Owner maintenance . . . . . . . . . . . . . . . . . . . . . . . . . . . . 7-5 Owner maintenance schedule. . . . . . . . . . . . . . . . . . . 7-5
Panoramic sunroof . . . . . . . . . . . . . . . . . . . . . . . . . . . . 4-37
Parking brake . . . . . . . . . . . . . . . . . . . . . . . . . . . . . . . . 7-24 Rear-camera display . . . . . . . . . . . . . . . . . . . . . . . . . . . 4-83
Recommended lubricants and capacities . . . . . . . . . . . . 8-4
Recommended SAE viscosity number. . . . . . . . . . . . 8-6
Remote keyless entry . . . . . . . . . . . . . . . . . . . . . . . . . . . 4-7 Battery replacement . . . . . . . . . . . . . . . . . . . . . . . . . . 4-9
Remote keyless entry system operations . . . . . . . . . . 4-7
Transmitter precautions . . . . . . . . . . . . . . . . . . . . . . . 4-8
Road warning . . . . . . . . . . . . . . . . . . . . . . . . . . . . . . . . . 6-2 Hazard warning flasher . . . . . . . . . . . . . . . . . . . . . . . 6-2
Seat belts . . . . . . . . . . . . . . . . . . . . . . . . . . . . . . . . . . . . \
3-22 Care of seat belts . . . . . . . . . . . . . . . . . . . . . . . . . . . 3-36
Pre-tensioner seat belt . . . . . . . . . . . . . . . . . . . . . . . 3-31
Seat belt precautions . . . . . . . . . . . . . . . . . . . . . . . . 3-33
Seat belt restraint system . . . . . . . . . . . . . . . . . . . . . 3-22
Seats . . . . . . . . . . . . . . . . . . . . . . . . . . . . . . . . . . . . \
. . . . 3-2 Front seat . . . . . . . . . . . . . . . . . . . . . . . . . . . . . . . . . . 3-5
Rear seat . . . . . . . . . . . . . . . . . . . . . . . . . . . . . . . . . . 3-15\
Smart key . . . . . . . . . . . . . . . . . . . . . . . . . . . . . . . . . . . 4-\
11 Battery replacement . . . . . . . . . . . . . . . . . . . . . . . . . 4-15
Smart key functions . . . . . . . . . . . . . . . . . . . . . . . . . 4-12
Smart key precautions . . . . . . . . . . . . . . . . . . . . . . . 4-13
Special driving conditions . . . . . . . . . . . . . . . . . . . . . . 5-50 Driving at night . . . . . . . . . . . . . . . . . . . . . . . . . . . . 5-52
M
M
R
S
O
P