Page 394 of 556

Driving your vehicle
64
5
Use high quality ethylene gly-
col coolant
Your vehicle is delivered with high
quality ethylene glycol coolant in the
cooling system. It is the only type of
coolant that should be used because
it helps prevent corrosion in the cool-
ing system, lubricates the water
pump and prevents freezing. Be sure
to replace or replenish your coolant
in accordance with the maintenance
schedule in section 7. Before winter,
have your coolant tested to assure
that its freezing point is sufficient for
the temperatures anticipated during
the winter.
Check battery and cables
Winter puts additional burdens on
the battery system. Visually inspect
the battery and cables as described
in section 7. The level of charge in
your battery can be checked by an
authorized Kia dealer or a service
station.
Change to "winter weight" oil
if necessary
In some climates it is recommended
that a lower viscosity "winter weight"
oil be used during cold weather. See
section 8 for recommendations. If
you aren't sure what weight oil you
should use, consult an authorized
Kia dealer.
Check spark plugs and igni-
tion system
Inspect your spark plugs as
described in section 7 and replace
them if necessary. Also check all
ignition wiring and components to be
sure they are not cracked, worn or
damaged in any way.
To keep locks from freezing
To keep the locks from freezing,
squirt an approved de-icer fluid or
glycerine into the key opening. If a
lock is covered with ice, squirt it with
an approved de-icing fluid to remove
the ice. If the lock is frozen internally,
you may be able to thaw it out by
using a heated key. Handle the heat-
ed key with care to avoid injury.
Use approved window washer
anti-freeze in system
To keep the water in the window
washer system from freezing, add an
approved window washer anti-freeze
solution in accordance with instruc-
tions on the container. Window wash-
er anti-freeze is available from an
authorized Kia dealer and most auto
parts outlets. Do not use engine
coolant or other types of anti-freeze
as these may damage the paint finish.
Page 403 of 556
What to do in an emergency
26
ROAD WARNING
Hazard warning flasher
The hazard warning flasher serves
as a warning to other drivers to exer-
cise extreme caution when
approaching, overtaking, or passing
your vehicle.
It should be used whenever emer-
gency repairs are being made or
when the vehicle is stopped near the
edge of a roadway.Depress the flasher switch with the
ignition switch in any position. The
flasher switch is located in the center
console switch panel. All turn signal
lights will flash simultaneously.
• The hazard warning flasher oper-
ates whether your vehicle is run-
ning or not.
The turn signals do not work when the hazard flasher is on.
Care must be taken when using the hazard warning flasher while
the vehicle is being towed.
OPS063001
Page 405 of 556

What to do in an emergency
46
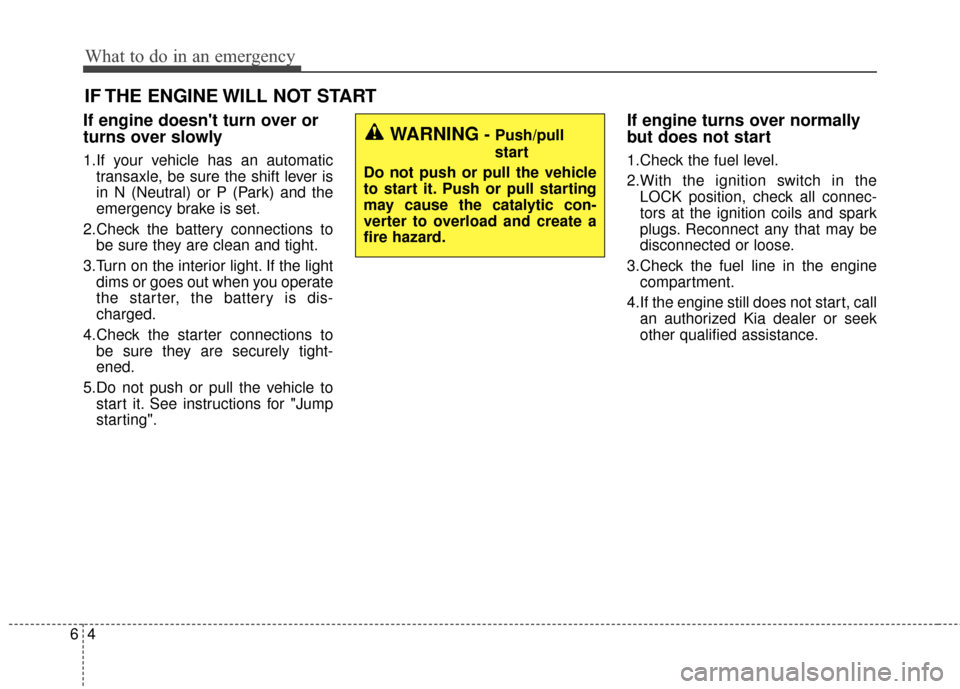
IF THE ENGINE WILL NOT START
If engine doesn't turn over or
turns over slowly
1.If your vehicle has an automatictransaxle, be sure the shift lever is
in N (Neutral) or P (Park) and the
emergency brake is set.
2.Check the battery connections to be sure they are clean and tight.
3.Turn on the interior light. If the light dims or goes out when you operate
the starter, the battery is dis-
charged.
4.Check the starter connections to be sure they are securely tight-
ened.
5.Do not push or pull the vehicle to start it. See instructions for "Jump
starting".
If engine turns over normally
but does not start
1.Check the fuel level.
2.With the ignition switch in theLOCK position, check all connec-
tors at the ignition coils and spark
plugs. Reconnect any that may be
disconnected or loose.
3.Check the fuel line in the engine compartment.
4.If the engine still does not start, call an authorized Kia dealer or seek
other qualified assistance.
WARNING- Push/pull
start
Do not push or pull the vehicle
to start it. Push or pull starting
may cause the catalytic con-
verter to overload and create a
fire hazard.
Page 406 of 556

65
What to do in an emergency
EMERGENCY STARTING
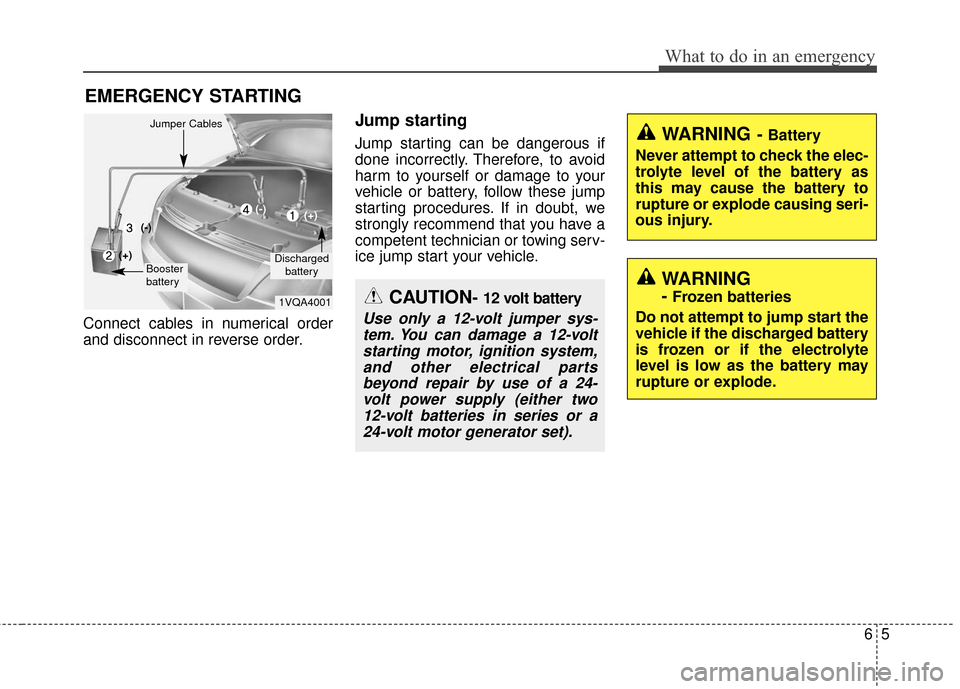
Connect cables in numerical order
and disconnect in reverse order.
Jump starting
Jump starting can be dangerous if
done incorrectly. Therefore, to avoid
harm to yourself or damage to your
vehicle or battery, follow these jump
starting procedures. If in doubt, we
strongly recommend that you have a
competent technician or towing serv-
ice jump start your vehicle.
CAUTION- 12 volt battery
Use only a 12-volt jumper sys-tem. You can damage a 12-voltstarting motor, ignition system,and other electrical partsbeyond repair by use of a 24-volt power supply (either two12-volt batteries in series or a24-volt motor generator set).
WARNING- Battery
Never attempt to check the elec-
trolyte level of the battery as
this may cause the battery to
rupture or explode causing seri-
ous injury.
1VQA4001
Discharged battery
Jumper Cables
Booster
battery
(-)
(+)
(+)(-)
WARNING
- Frozen batteries
Do not attempt to jump start the
vehicle if the discharged battery
is frozen or if the electrolyte
level is low as the battery may
rupture or explode.
Page 423 of 556

What to do in an emergency
22
6
8. With the engine start/stop button
position on or ignition switch posi-
tion on, switch on the compressor
and let it run for approximately 5~7
minutes to fill the sealant up to
proper pressure. (refer to the Tire
and Wheels, chapter 8). The infla-
tion pressure of the tire after filling
is unimportant and will be
checked/corrected later.
Be careful not to overinflate the tire
and stay away from the tire when
filling it. 9. Switch off the compressor.
10. Detach the hoses from the
sealant bottle connector and
from the tire valve.
Return the Tire Mobility Kit to its stor-
age location in the vehicle.Distributing the sealant
11. Immediately drive approximately 7~10km (4~6miles or, about
10min) to evenly distribute the
sealant in the tire.
Do not exceed a speed of 80 km/h
(50 mph). If possible, do not fall
below a speed of 20 km/h (12 mph).
While driving, if you experience any
unusual vibration, ride disturbance or
noise, reduce your speed and drive
with caution until you can safely pull
off of the side of the road.
Call for road side service or towing.
When you use the Tire Mobility Kit,
the tire pressure sensors and wheel
may be stained by sealant.
Therefore, remove the tire pressure
sensors and wheel stained by
sealant and have it serviced by an
authorized Kia dealer.
WARNING - Carbon monoxide
Do not leave your vehicle run-
ning in a poorly ventilated area
for extended periods of time.
Carbon monoxide poisoning
and suffocation can occur.
WARNING - Tire pressure
Do not attempt to drive your
vehicle if the tire pressure is
below 200kpa (29 PSI). This
could result in an accident due
to sudden tire failure.
Page 424 of 556

623
What to do in an emergency
Checking the tire inflation pres-
sure
1.After driving approximately7~10km (4~6miles or about
10min), stop at a safety location.
2.Connect connection hose (9) of the compressor directly to the tire
valve.
3.Plug the compressor power cord into the vehicle power outlet.
4.Adjust the tire inflation pressure to the recommended tire inflation.
With the ignition switched on, pro-
ceed as follows.
- To increase the inflation pres-sure : Switch on the compressor,
position I. To check the current
inflation pressure setting, briefly
switch off the compressor.✽ ✽ NOTICE
The pressure gauge may show high-
er than actual reading when the
compressor is running. To get an
accurate tire pressure, the compres-
sor needs to be turned off.
- To reduce the inflation pres-
sure: Loosen the screw cap (8)
on the compressor hose.
CAUTION - Tire pressure
sensor
When you use the Tire MobilityKit including sealant notapproved by Kia, the tire pres-sure sensors may be damagedby sealant. The sealant on thetire pressure sensor and wheelshould be removed when youreplace the tire with a new oneand inspect the tire pressuresensors in authorized dealer.
Page 426 of 556

625
What to do in an emergency
TOWING
Towing service
If emergency towing is necessary,
we recommend having it done by an
authorized Kia dealer or a commer-
cial tow-truck service. Proper lifting
and towing procedures are neces-
sary to prevent damage to the vehi-
cle. The use of wheel dollies or
flatbed is recommended.
For trailer towing guidelines informa-tion, refer to “Trailer towing” in chap-ter 5.
It is acceptable to tow the vehicle
with the rear wheels on the ground
(without dollies) and the front wheels
off the ground.
If any of the loaded wheels or sus-
pension components are damaged
or the vehicle is being towed with the
front wheels on the ground, use a
towing dolly under the front wheels.
When being towed by a commercial
tow truck and wheel dollies are not
used, the front of the vehicle should
always be lifted, not the rear.
OXM069028 dolly
dolly
WARNING
- Side and curtain air bag
If your vehicle is equipped with
side and curtain air bag, set the
ignition switch to LOCK or ACC
position when the vehicle is
being towed.
The side and curtain air bag
may deploy when the ignitions
is ON, and the rollover sensor
detects the situation as a
rollover.
Page 427 of 556
What to do in an emergency
26
6
When towing your vehicle in an
emergency without wheel dollies :
1. Set the ignition switch in the ACC
position.
2. Place the transaxle shift lever in N (Neutral).
3. Release the parking brake.Removable towing hook (front)
(if equipped)
1.Remove the towing hook from the tool case.
2.Remove the hole cover pressing the lower part of the cover on the
front bumper.
CAUTION - Towing gear
position
Failure to place the transaxleshift lever in N (Neutral) maycause internal damage to thetransaxle.
CAUTION - Towing
Do not tow the vehicle back- wards with the front wheels onthe ground as this may causedamage to the vehicle.
Do not tow with sling-type equipment. Use wheel lift orflatbed equipment.
OUN046030
OCM054034
OPS063009