2016 KIA Soul EV belt
[x] Cancel search: beltPage 303 of 524
53
Driving your vehicle
Before entering vehicle
• Be sure that all windows, outsidemirror(s), and outside lights are
clean.
Check the condition of the tires.
Check under the vehicle for any sign of leaks.
Be sure there are no obstacles behind you if you intend to back up.
Necessary inspections
Fluid levels, such as coolant, brake
fluid, and washer fluid should be
checked on a regular basis, at the
exact interval depending on the fluid.
Further details are provided in chap-
ter 7, “Maintenance”.
Before starting
Close and lock all doors.
Position the seat so that all con-trols are easily reached.
Buckle your seat belt.
Adjust the inside and outside rearview mirrors.
Be sure that all lights work.
Check all gauges.
Check the operation of warning lights when the POWER button is
turned to the ON position.
Release the parking brake and make sure the brake warning light
goes out.
For safe operation, be sure you are
familiar with your vehicle and its
equipment.
BEFORE DRIVING
WARNING - Distracted driving
Focus on the road while driving.
The driver's primary responsibil-
ity is in the safe and legal opera-
tion of the vehicle. Use of any
handled devices, other equip-
ment or vehicle systems that
distract the drive should not be
used during vehicle operation.
Page 319 of 524
519
Driving your vehicle
To release EPB (electronic parking
brake) automatically:
Shift lever in P (Park)With the vehicle is in the ready
( ) mode depress the brake
pedal and shift out of P (Park) to R
(Reverse) or D (Drive).
Shift lever in N (Neutral) With the vehicle is in the ready
( ) mode depress the brake
pedal and shift out of N (Neutral) to
R (Reverse) or D (Drive).
1. The vehicle is in the ready ( ) mode.
2. Fasten the driver's seat belt.
3. Close the driver's door, tailgate.
4. Depress the accelerator pedal while the shift lever is in R(Rear)
with trunk closed, D (Drive).
Make sure the brake warning light goes off.✽ ✽NOTICE
• You can engage the EPB even
though the POWER button is in
the OFF position, but you cannot
release it.
• Depress the brake pedal and release the parking brake manual-
ly with the EPB switch when you
drive downhill or when backing
up the vehicle.
Do not follow the above procedure
when driving on a flat level ground.
The vehicle may suddenly move for-
ward.
✽ ✽ NOTICE
If the parking brake warning light
is still on even though the EPB
has been released, have the system
checked by an authorized Kia dealer.
EPB (electronic parking brake) may
be automatically applied when:
Requested by other systems.
CAUTION
Do not drive your vehicle with
the EPB applied. It may causeexcessive brake pad and brakerotor wear.
Page 320 of 524
Driving your vehicle
20
5
System warning
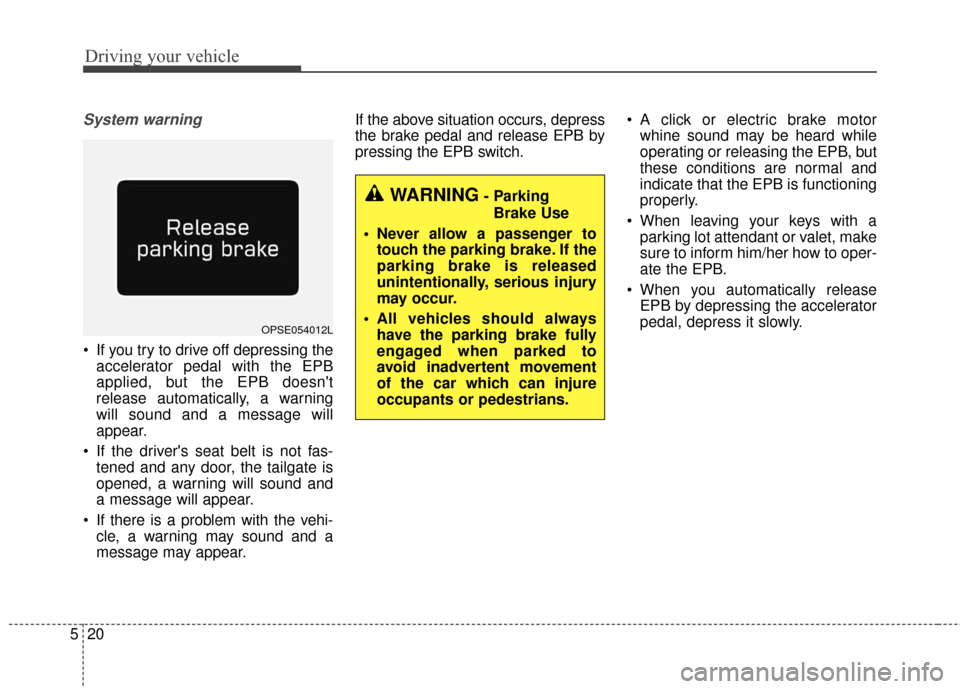
If you try to drive off depressing the
accelerator pedal with the EPB
applied, but the EPB doesn't
release automatically, a warning
will sound and a message will
appear.
If the driver's seat belt is not fas- tened and any door, the tailgate is
opened, a warning will sound and
a message will appear.
If there is a problem with the vehi- cle, a warning may sound and a
message may appear. If the above situation occurs, depress
the brake pedal and release EPB by
pressing the EPB switch.
A click or electric brake motor
whine sound may be heard while
operating or releasing the EPB, but
these conditions are normal and
indicate that the EPB is functioning
properly.
When leaving your keys with a parking lot attendant or valet, make
sure to inform him/her how to oper-
ate the EPB.
When you automatically release EPB by depressing the accelerator
pedal, depress it slowly.
OPSE054012L
WARNING- Parking
Brake Use
Never allow a passenger to touch the parking brake. If the
parking brake is released
unintentionally, serious injury
may occur.
All vehicles should always have the parking brake fully
engaged when parked to
avoid inadvertent movement
of the car which can injure
occupants or pedestrians.
Page 325 of 524
525
Driving your vehicle
✽ ✽NOTICE
A click sound may be heard in the
motor compartment when the vehi-
cle begins to move after the vehicle is
started. These conditions are normal
and indicate that the Electronic
Stability Control System is function-
ing properly.
✽ ✽NOTICE
For maximum protection, always
wear your seat belt. No system, no
matter how advanced, can compen-
sate for all driver error and/or driv-
ing conditions. Always drive respon-
sibly.
ESC operation
ESC ON condition
When the POWER buttonis turned ON, ESC and
ESC OFF indicator lights
illuminate for approximately
3 seconds, then ESC is
turned on.
ton for at least half a sec-
ond after turning the igni-
tion ON to turn ESC off.
(ESC OFF indicator will
illuminate). To turn the
ESC on, press the ESC
OFF button (ESC OFF
indicator light will go off).
you may hear a slight tick-
ing sound. This is the ESC
performing an automatic
system self-check and does
not indicate a problem. When operating
When the ESC is in opera-
tion, the ESC indicator light
blinks.
Stability Control is operat-
ing properly, you can feel a
slight pulsation in the vehi-
cle. This is only the effect
of brake control and indi-
cates nothing unusual.
-
WARNING
Electronic stability control
(ESC) will not prevent acci-
dents. Excessive speed in
turns, abrupt maneuvers and
hydroplaning on wet surfaces
can still result in serious acci-
dents. Only a safe and attentive
driver can prevent accidents by
avoiding maneuvers that cause
the vehicle to lose traction.
Even with ESC installed, always
follow all the normal precau-
tions for driving - including driv-
ing at safe speeds for the condi-
tions.
Page 339 of 524
539
Driving your vehicle
Hazardous driving conditions
When hazardous driving conditions
are encountered such as water,
snow, ice, mud, sand, or similar haz-
ards, follow these suggestions:
Drive cautiously and allow extradistance for braking.
Avoid sudden braking or steering.
When braking with non-ABS brakes pump the brake pedal with
a light up-and-down motion until
the vehicle is stopped.
Do not pump the brake pedal on a
vehicle equipped with ABS. If stalled in snow, mud, or sand,
use second gear. Accelerate slow-
ly to avoid spinning the drive
wheels.
Use sand, rock salt, or other non- slip material under the drive
wheels to provide traction when
stalled in ice, snow, or mud.
Reducing the risk of a rollover
This multi-purpose passenger vehi-
cle is defined as a Crossover Utility
Vehicle (CUV). CUV’s have higher
ground clearance and a narrower
track to make them capable of per-
forming in a wide variety of off-road
applications. Specific design charac-
teristics give them a higher center of
gravity than ordinary vehicles. An
advantage of the higher ground
clearance is a better view of the
road, which allows you to anticipate
problems. They are not designed for
cornering at the same speeds as
conventional passenger vehicles,
any more than low-slung sports vehi-
cles are designed to perform satis-
factorily in off-road conditions. Due to
this risk, driver and passengers are
strongly recommended to buckle
their seat belts. In a rollover crash,
an unbelted person is more likely to
die than a person wearing a seat
belt. There are steps that a driver can
make to reduce the risk of a rollover.
SPECIAL DRIVING CONDITIONS
WARNING- Downshifting
Do not downshift with an auto-
matic transaxle while driving on
slippery surfaces. The sudden
change in tire speed could
cause the tires to skid and
result in an accident.
Page 380 of 524
Maintenance
67
At least monthly:
Check the coolant level in thecoolant reservoir.
Check the operation of all exterior lights, including the stoplights, turn
signals and hazard warning flash-
ers.
Check the inflation pressures of all tires including the spare.
At least twice a year
(i.e., every Spring and Fall):
Check the radiator, heater and air conditioning hoses for leaks or
damage.
Check the windshield washer spray and wiper operation. Clean
the wiper blades with clean cloth
dampened with washer fluid.
Check the headlight alignment.
Check the muffler, exhaust pipes, shields and clamps.
Check the lap/shoulder belts for wear and function.
Check for worn tires and loose wheel lug nuts.
At least once a year:
Clean the body and door drainholes.
Lubricate the door hinges and checks, and hood hinges.
Lubricate the door and hood locks and latches.
Lubricate the door rubber weather- strips.
Check the air conditioning system.
Inspect and lubricate the reduction gear linkage and controls.
Clean the battery and terminals.
Check the brake fluid level.
Page 415 of 524
741
Maintenance
4. Tire ply composition and mate-rial
The number of layers or plies of rub-
ber-coated fabric in the tire. Tire
manufacturers also must indicate the
materials in the tire, which include
steel, nylon, polyester, and others.
The letter "R" means radial ply con-
struction; the letter "D" means diago-
nal or bias ply construction; and the
letter "B" means belted-bias ply con-
struction.
5. Maximum permissible inflationpressure
This number is the greatest amount
of air pressure that should be put in
the tire. Do not exceed the maximum
permissible inflation pressure. Refer
to the Tire and Loading Information
label for recommended inflation
pressure.
6. Maximum load rating
This number indicates the maximum
load in kilograms and pounds that
can be carried by the tire. When
replacing the tires on the vehicle,
always use a tire that has the same
load rating as the factory installed
tire.
7. Uniform tire quality grading
Quality grades can be found where
applicable on the tire sidewall
between tread shoulder and maxi-
mum section width.
For example:
TREADWEAR 200
TRACTION AA
TEMPERATURE A
Tires degrade over time, even when
they are not being used. Regardless
of the remaining tread, we recom-
mend that tires be replaced after
approximately six (6) years of normal
service. Heat caused by hot climates
or frequent high loading conditions
can accelerate the aging process. Tread wear
The tread wear grade is a compara-
tive rating based on the wear rate of
the tire when tested under controlled
conditions on a specified govern-
ment test course. For example, a tire
graded 150 would wear one-and-a-
half times (1½) as well on the gov-
ernment course as a tire graded 100.
The relative performance of tires
depends upon the actual conditions
of their use, however, and may
depart significantly from the norm
due to variations in driving habits,
service practices and differences in
road characteristics and climate.
These grades are molded on the
side-walls of passenger vehicle tires.
The tires available as standard or
optional equipment on your vehicle
may vary with respect to grade.
Page 416 of 524
Maintenance
42
7
Traction - AA, A, B & C
The traction grades, from highest to
lowest, are AA, A, B and C. Those
grades represent the tire’s ability to
stop on wet pavement as measured
under controlled conditions on spec-
ified government test surfaces of
asphalt and concrete. A tire marked
C may have poor traction perform-
ance.
The traction grade assigned to this
tire is based on straight-ahead brak-
ing traction tests, and does not
include acceleration, cornering,
hydroplaning, or peak traction char-
acteristics. Temperature -A, B & C
The temperature grades are A (the
highest), B and C representing the
tire’s resistance to the generation of
heat and its ability to dissipate heat
when tested under controlled condi-
tions on a specified indoor laboratory
test wheel.
Sustained high temperature can
cause the material of the tire to
degenerate and reduce tire life, and
excessive temperature can lead to
sudden tire failure. Grades B and A
represent higher levels of perform-
ance on the laboratory test wheel
than the minimum required by law.
Tire terminology and definitions
Air Pressure: The amount of air
inside the tire pressing outward on
the tire. Air pressure is expressed in
pounds per square inch (psi) or kilo-
pascal (kPa).
Accessory Weight: This means the
combined weight of optional acces-
sories. Some examples of optional
accessories are, automatic transaxle,
power seats, and air conditioning.
Aspect Ratio
: The relationship of a
tire's height to its width.
Belt: A rubber coated layer of cords
that is located between the plies and
the tread. Cords may be made from
steel or other reinforcing materials.
Bead: The tire bead contains steel
wires wrapped by steel cords that
hold the tire onto the rim.
Bias Ply Tire : A pneumatic tire in
which the plies are laid at alternate
angles less than 90 degrees to the
centerline of the tread.