2016 KIA Soul EV air condition
[x] Cancel search: air conditionPage 389 of 524
715
Maintenance
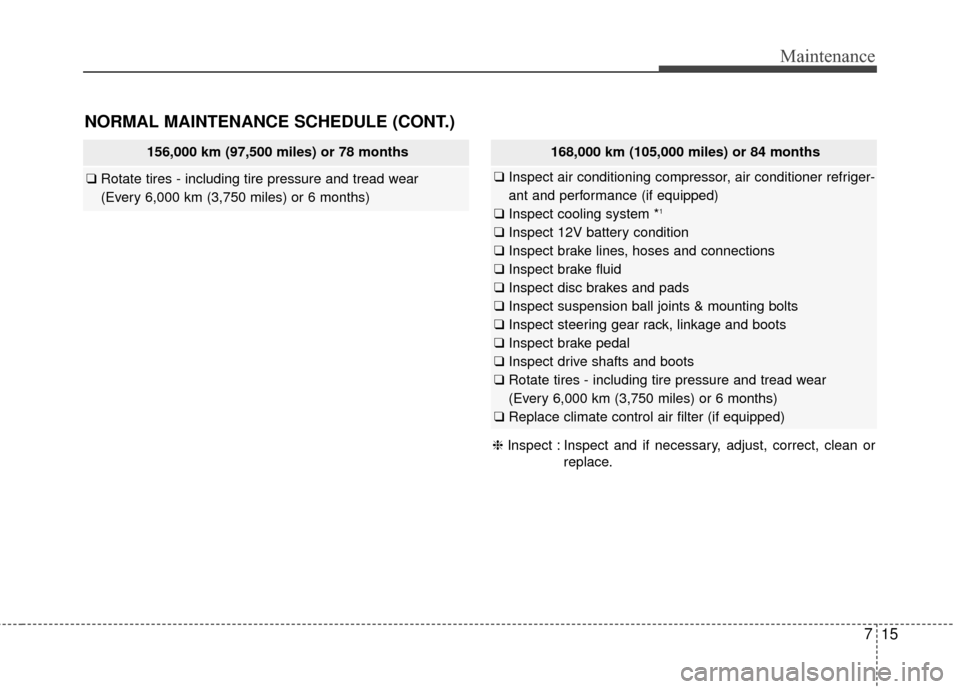
156,000 km (97,500 miles) or 78 months
❑Rotate tires - including tire pressure and tread wear
(Every 6,000 km (3,750 miles) or 6 months)
NORMAL MAINTENANCE SCHEDULE (CONT.)
168,000 km (105,000 miles) or 84 months
❑Inspect air conditioning compressor, air conditioner refriger-
ant and performance (if equipped)
❑ Inspect cooling system *
1
❑Inspect 12V battery condition
❑ Inspect brake lines, hoses and connections
❑ Inspect brake fluid
❑ Inspect disc brakes and pads
❑ Inspect suspension ball joints & mounting bolts
❑ Inspect steering gear rack, linkage and boots
❑ Inspect brake pedal
❑ Inspect drive shafts and boots
❑ Rotate tires - including tire pressure and tread wear
(Every 6,000 km (3,750 miles) or 6 months)
❑ Replace climate control air filter (if equipped)
❈ Inspect : Inspect and if necessary, adjust, correct, clean or
replace.
Page 390 of 524
Maintenance
16
7
NORMAL MAINTENANCE SCHEDULE (CONT.)
❈ Inspect : Inspect and if necessary, adjust, correct, clean or
replace.
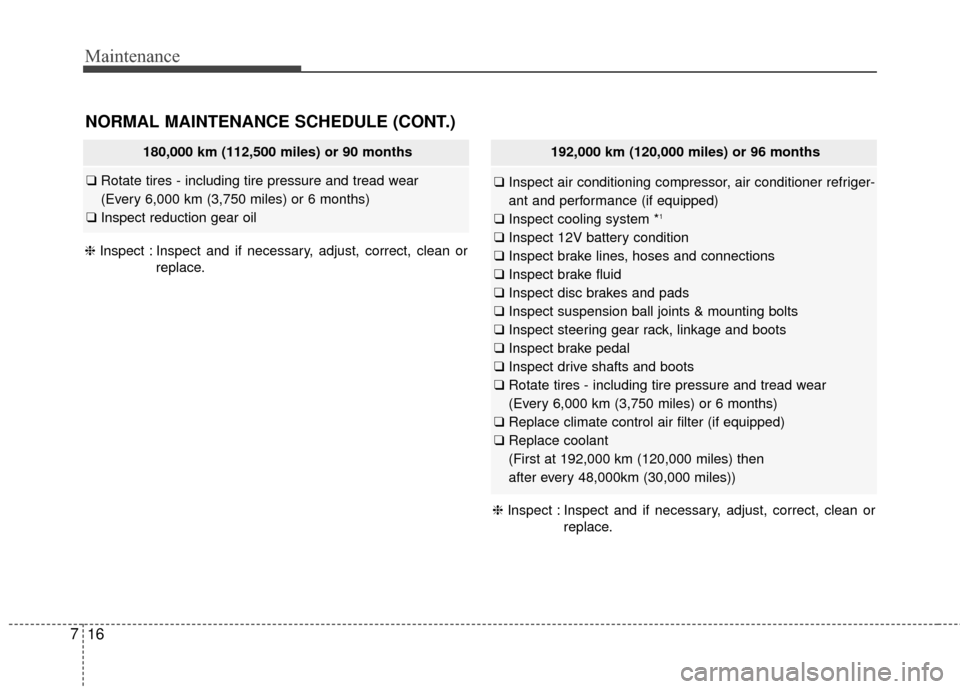
180,000 km (112,500 miles) or 90 months
❑Rotate tires - including tire pressure and tread wear
(Every 6,000 km (3,750 miles) or 6 months)
❑ Inspect reduction gear oil
192,000 km (120,000 miles) or 96 months
❑Inspect air conditioning compressor, air conditioner refriger-
ant and performance (if equipped)
❑ Inspect cooling system *
1
❑Inspect 12V battery condition
❑ Inspect brake lines, hoses and connections
❑ Inspect brake fluid
❑ Inspect disc brakes and pads
❑ Inspect suspension ball joints & mounting bolts
❑ Inspect steering gear rack, linkage and boots
❑ Inspect brake pedal
❑ Inspect drive shafts and boots
❑ Rotate tires - including tire pressure and tread wear
(Every 6,000 km (3,750 miles) or 6 months)
❑ Replace climate control air filter (if equipped)
❑ Replace coolant
(First at 192,000 km (120,000 miles) then
after every 48,000km (30,000 miles))
❈ Inspect : Inspect and if necessary, adjust, correct, clean or
replace.
Page 392 of 524
Maintenance
18
7
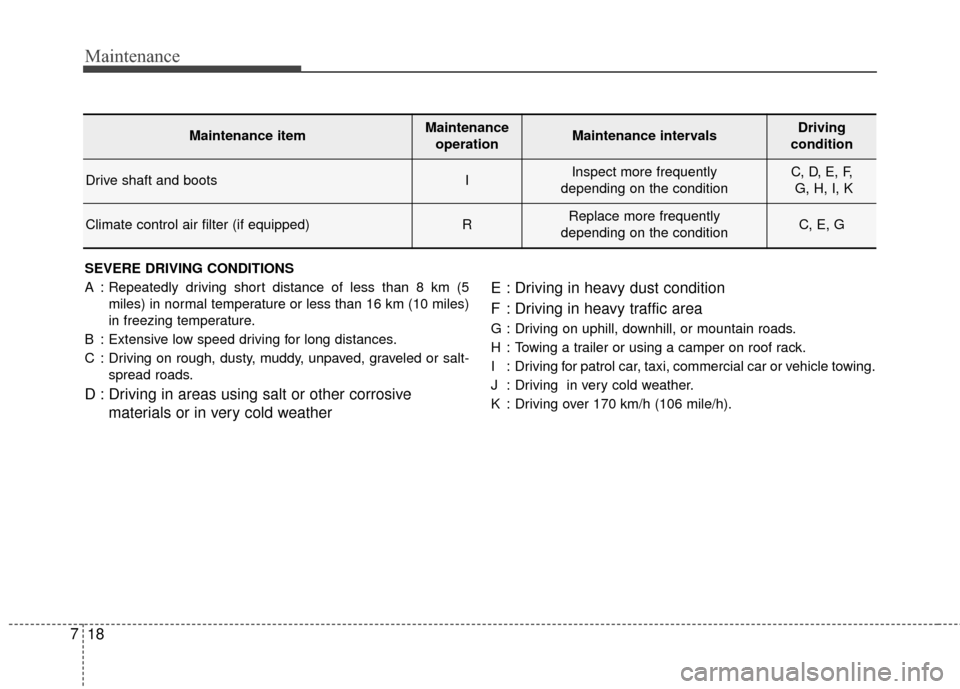
SEVERE DRIVING CONDITIONS
A : Repeatedly driving short distance of less than 8 km (5
miles) in normal temperature or less than 16 km (10 miles)
in freezing temperature.
B : Extensive low speed driving for long distances.
C : Driving on rough, dusty, muddy, unpaved, graveled or salt- spread roads.
D : Driving in areas using salt or other corrosive materials or in very cold weather E : Driving in heavy dust condition
F : Driving in heavy traffic area
G : Driving on uphill, downhill, or mountain roads.
H : Towing a trailer or using a camper on roof rack.
I : Driving for patrol car, taxi, commercial car or vehicle towing.
J : Driving in very cold weather.
K : Driving over 170 km/h (106 mile/h).
Maintenance itemMaintenance
operationMaintenance intervalsDriving
condition
Drive shaft and bootsIInspect more frequently
depending on the conditionC, D, E, F, G, H, I, K
Climate control air filter (if equipped)RReplace more frequently
depending on the conditionC, E, G
Page 393 of 524
719
Maintenance
EXPLANATION OF SCHEDULED MAINTENANCE ITEMS
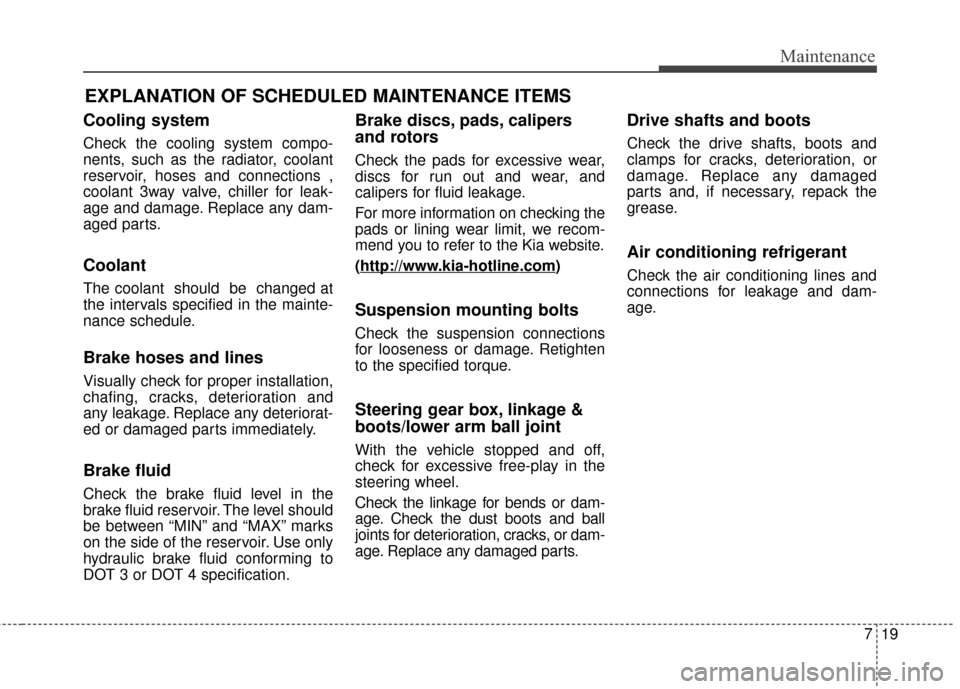
Cooling system
Check the cooling system compo-
nents, such as the radiator, coolant
reservoir, hoses and connections ,
coolant 3way valve, chiller for leak-
age and damage. Replace any dam-
aged parts.
Coolant
The coolant should be changed at
the intervals specified in the mainte-
nance schedule.
Brake hoses and lines
Visually check for proper installation,
chafing, cracks, deterioration and
any leakage. Replace any deteriorat-
ed or damaged parts immediately.
Brake fluid
Check the brake fluid level in the
brake fluid reservoir. The level should
be between “MIN” and “MAX” marks
on the side of the reservoir. Use only
hydraulic brake fluid conforming to
DOT 3 or DOT 4 specification.
Brake discs, pads, calipers
and rotors
Check the pads for excessive wear,
discs for run out and wear, and
calipers for fluid leakage.
For more information on checking the
pads or lining wear limit, we recom-
mend you to refer to the Kia website.
(http://www
.kia-hotline.com)
Suspension mounting bolts
Check the suspension connections
for looseness or damage. Retighten
to the specified torque.
Steering gear box, linkage &
boots/lower arm ball joint
With the vehicle stopped and off,
check for excessive free-play in the
steering wheel.
Check the linkage for bends or dam-
age. Check the dust boots and ball
joints for deterioration, cracks, or dam-
age. Replace any damaged parts.
Drive shafts and boots
Check the drive shafts, boots and
clamps for cracks, deterioration, or
damage. Replace any damaged
parts and, if necessary, repack the
grease.
Air conditioning refrigerant
Check the air conditioning lines and
connections for leakage and dam-
age.
Page 397 of 524
723
Maintenance
BRAKE FLUID
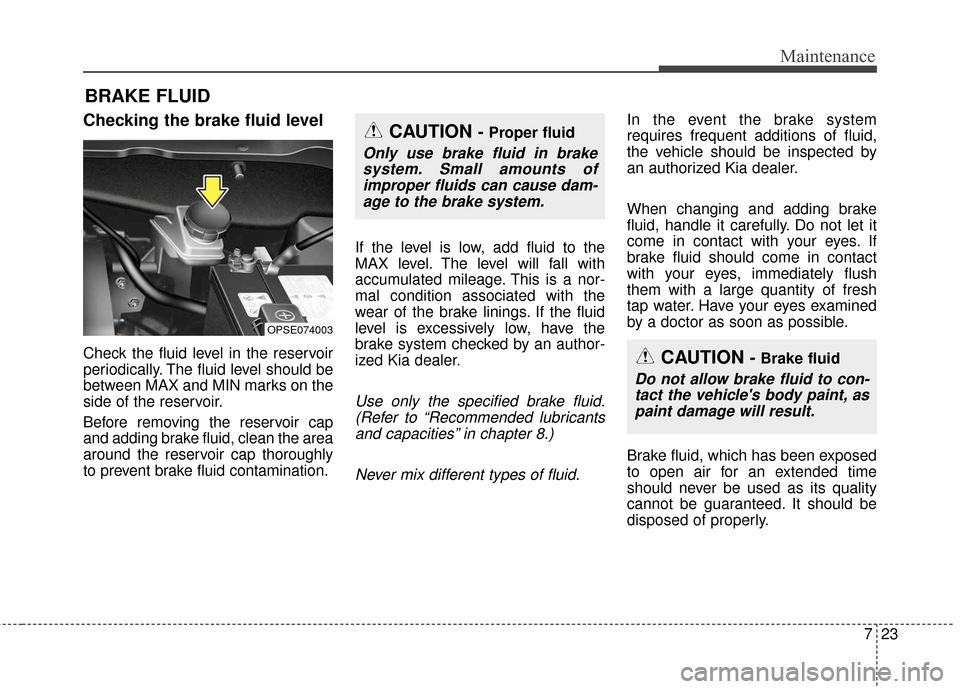
Checking the brake fluid level
Check the fluid level in the reservoir
periodically. The fluid level should be
between MAX and MIN marks on the
side of the reservoir.
Before removing the reservoir cap
and adding brake fluid, clean the area
around the reservoir cap thoroughly
to prevent brake fluid contamination.If the level is low, add fluid to the
MAX level. The level will fall with
accumulated mileage. This is a nor-
mal condition associated with the
wear of the brake linings. If the fluid
level is excessively low, have the
brake system checked by an author-
ized Kia dealer.
Use only the specified brake fluid.
(Refer to “Recommended lubricantsand capacities” in chapter 8.)
Never mix different types of fluid.
In the event the brake system
requires frequent additions of fluid,
the vehicle should be inspected by
an authorized Kia dealer.
When changing and adding brake
fluid, handle it carefully. Do not let it
come in contact with your eyes. If
brake fluid should come in contact
with your eyes, immediately flush
them with a large quantity of fresh
tap water. Have your eyes examined
by a doctor as soon as possible.
Brake fluid, which has been exposed
to open air for an extended time
should never be used as its quality
cannot be guaranteed. It should be
disposed of properly.
OPSE074003
CAUTION - Proper fluid
Only use brake fluid in brakesystem. Small amounts ofimproper fluids can cause dam-age to the brake system.
CAUTION - Brake fluid
Do not allow brake fluid to con-tact the vehicle's body paint, aspaint damage will result.
Page 410 of 524

Maintenance
36
7
Remove the valve cap from the tire
valve stem. Press the tire gauge firm-
ly onto the valve to get a pressure
measurement. If the cold tire inflation
pressure matches the recommended
pressure on the tire and loading
information label, no further adjust-
ment is necessary. If the pressure is
low, add air until you reach the rec-
ommended amount.
If you overfill the tire, release air by
pushing on the metal stem in the cen-
ter of the tire valve. Recheck the tire
pressure with the tire gauge. Be sure
to put the valve caps back on the
valve stems. They help prevent leaks
by keeping out dirt and moisture.
Inspect your tires frequently for
proper inflation as well as wear and
damage. Always use a tire pres-
sure gauge.
Tires with too much or too little pres- sure wear unevenly causing poor
handling, loss of vehicle control, and
sudden tire failure leading to acci-
dents, injuries, and even death. The
recommended cold tire pressure for
your vehicle can be found in this
manual and on the tire label located
on the driver's side center pillar.Tire rotation
To equalize tread wear, it is recom-
mended that the tires be rotated every
12,000 km (7,500 miles) or sooner if
irregular wear develops.
During rotation, check the tires for cor-
rect balance.
When rotating tires, check for uneven
wear and damage. Abnormal wear is
usually caused by incorrect tire pres-
sure, improper wheel alignment, out-
of-balance wheels, severe braking or
severe cornering. Look for bumps or
bulges in the tread or side of tire.
Replace the tire if you find either of
these conditions. Replace the tire if
fabric or cord is visible. After rotation,
be sure to bring the front and rear tire
pressures to specification and check
lug nut tightness.
Refer to “Tire and wheels” in chapter 8.
Disc brake pads should be inspectedfor wear whenever tires are rotated.
Rotate radial tires that have an
asymmetric tread pattern only from
front to rear and not from right to left.
S2BLA790A
WARNING- Mixing tires
Do not mix bias ply and radial
ply tires under any circum-
stances. This may cause unusu-
al handling characteristics.
Page 415 of 524
741
Maintenance
4. Tire ply composition and mate-rial
The number of layers or plies of rub-
ber-coated fabric in the tire. Tire
manufacturers also must indicate the
materials in the tire, which include
steel, nylon, polyester, and others.
The letter "R" means radial ply con-
struction; the letter "D" means diago-
nal or bias ply construction; and the
letter "B" means belted-bias ply con-
struction.
5. Maximum permissible inflationpressure
This number is the greatest amount
of air pressure that should be put in
the tire. Do not exceed the maximum
permissible inflation pressure. Refer
to the Tire and Loading Information
label for recommended inflation
pressure.
6. Maximum load rating
This number indicates the maximum
load in kilograms and pounds that
can be carried by the tire. When
replacing the tires on the vehicle,
always use a tire that has the same
load rating as the factory installed
tire.
7. Uniform tire quality grading
Quality grades can be found where
applicable on the tire sidewall
between tread shoulder and maxi-
mum section width.
For example:
TREADWEAR 200
TRACTION AA
TEMPERATURE A
Tires degrade over time, even when
they are not being used. Regardless
of the remaining tread, we recom-
mend that tires be replaced after
approximately six (6) years of normal
service. Heat caused by hot climates
or frequent high loading conditions
can accelerate the aging process. Tread wear
The tread wear grade is a compara-
tive rating based on the wear rate of
the tire when tested under controlled
conditions on a specified govern-
ment test course. For example, a tire
graded 150 would wear one-and-a-
half times (1½) as well on the gov-
ernment course as a tire graded 100.
The relative performance of tires
depends upon the actual conditions
of their use, however, and may
depart significantly from the norm
due to variations in driving habits,
service practices and differences in
road characteristics and climate.
These grades are molded on the
side-walls of passenger vehicle tires.
The tires available as standard or
optional equipment on your vehicle
may vary with respect to grade.
Page 416 of 524
Maintenance
42
7
Traction - AA, A, B & C
The traction grades, from highest to
lowest, are AA, A, B and C. Those
grades represent the tire’s ability to
stop on wet pavement as measured
under controlled conditions on spec-
ified government test surfaces of
asphalt and concrete. A tire marked
C may have poor traction perform-
ance.
The traction grade assigned to this
tire is based on straight-ahead brak-
ing traction tests, and does not
include acceleration, cornering,
hydroplaning, or peak traction char-
acteristics. Temperature -A, B & C
The temperature grades are A (the
highest), B and C representing the
tire’s resistance to the generation of
heat and its ability to dissipate heat
when tested under controlled condi-
tions on a specified indoor laboratory
test wheel.
Sustained high temperature can
cause the material of the tire to
degenerate and reduce tire life, and
excessive temperature can lead to
sudden tire failure. Grades B and A
represent higher levels of perform-
ance on the laboratory test wheel
than the minimum required by law.
Tire terminology and definitions
Air Pressure: The amount of air
inside the tire pressing outward on
the tire. Air pressure is expressed in
pounds per square inch (psi) or kilo-
pascal (kPa).
Accessory Weight: This means the
combined weight of optional acces-
sories. Some examples of optional
accessories are, automatic transaxle,
power seats, and air conditioning.
Aspect Ratio
: The relationship of a
tire's height to its width.
Belt: A rubber coated layer of cords
that is located between the plies and
the tread. Cords may be made from
steel or other reinforcing materials.
Bead: The tire bead contains steel
wires wrapped by steel cords that
hold the tire onto the rim.
Bias Ply Tire : A pneumatic tire in
which the plies are laid at alternate
angles less than 90 degrees to the
centerline of the tread.