Page 77 of 524

47
Features of your vehicle
Tailgate unlocking
Using the tailgate handle button
1. Carry the smart key.
2. Press the tailgate handle button.
3. When all doors are locked, thehazard warning lights will blink two
times.
Once the tailgate is opened and
then closed, the tailgate will lock
automatically.
If you are within 0.7~1 m (28~40 in.)
from the outside tailgate handle, with
your smart key in possession, the
tailgate will unlock and open when
you press the tailgate handle switch.
Using the button on the smart key
1. Press the tailgate unlock button(3) for more than 1 second.
2. When all doors are locked, the hazard warning lights will blink two
times.
Panic
1. Press the panic button(4) for morethan 1 second.
2. The horn sounds and hazard warning light flash for about 30
seconds.
Start-up
You can start the vehicle without
inserting the key. For detailed infor-
mation refer to the “POWER button”
in chapter 5.
Loss of the smart key
A maximum of 2 smart keys can be
registered to a single vehicle.
If you happen to lose your smart key,
you will not be able to start the vehi-
cle. You should immediately take the
vehicle and remaining key to your
authorized Kia dealer(tow the vehi-
cle, if necessary) to protect it from
potential theft.
Page 105 of 524

435
Features of your vehicle
MIRRORS
Inside rearview mirror
Adjust the rearview mirror so that the
center view through the rear window
is seen. Make this adjustment before
you start driving.
Do not place objects in the rear seat or
cargo area which would interfere with
your vision through the rear window.
Day/night rearview mirror (if equipped)
Make this adjustment before you
start driving and while the day/night
lever is in the day position.
Pull the day/night lever toward you to
reduce the glare from the headlights
of the vehicles behind you during
night driving.
Remember that you lose somerearview clarity in the night position. Electric chromic mirror (ECM)
(if equipped)
The electric rearview mirror automat-
ically controls the glare from the
headlights of the vehicles behind you
in nighttime or low light driving condi-
tions. The sensor mounted in the mir-
ror senses the light level around the
vehicle, and automatically controls
the headlight glare from the vehicles
behind you.
When the vehicle is in the ready ( )
mode the glare is automatically con-
trolled by the sensor mounted in the
rearview mirror.
Whenever the shift lever is shifted
into reverse (R), the mirror will auto-
matically go to the brightest setting in
order to improve the drivers view
behind the vehicle.
OAM049023
Day
Night
WARNING- Mirror adjust- ment
Do not adjust the rearview mir-
ror while the vehicle is moving.
This could result in loss of con-
trol.
WARNING
Do not modify the inside mirror
and don’t install a wide mirror. It
could result in injury, during an
accident or deployment of the
air bag.
Page 106 of 524

Features of your vehicle
36
4
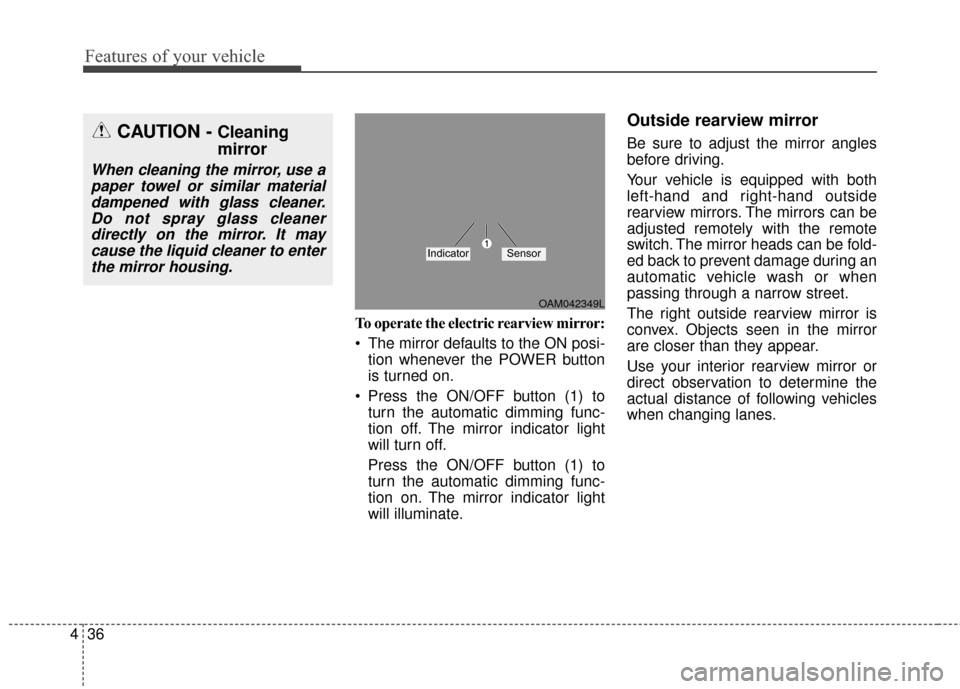
To operate the electric rearview mirror:
The mirror defaults to the ON posi-
tion whenever the POWER button
is turned on.
Press the ON/OFF button (1) to turn the automatic dimming func-
tion off. The mirror indicator light
will turn off.
Press the ON/OFF button (1) to
turn the automatic dimming func-
tion on. The mirror indicator light
will illuminate.
Outside rearview mirror
Be sure to adjust the mirror angles
before driving.
Your vehicle is equipped with both
left-hand and right-hand outside
rearview mirrors. The mirrors can be
adjusted remotely with the remote
switch. The mirror heads can be fold-
ed back to prevent damage during an
automatic vehicle wash or when
passing through a narrow street.
The right outside rearview mirror is
convex. Objects seen in the mirror
are closer than they appear.
Use your interior rearview mirror or
direct observation to determine the
actual distance of following vehicles
when changing lanes.CAUTION - Cleaning
mirror
When cleaning the mirror, use apaper towel or similar materialdampened with glass cleaner.Do not spray glass cleanerdirectly on the mirror. It maycause the liquid cleaner to enterthe mirror housing.
OAM042349L
IndicatorSensor
Page 108 of 524
Features of your vehicle
38
4
Folding the outside rearview mirror
Manual type
To fold the outside rearview mirror,
grasp the housing of the mirror and
then fold it toward the rear of the
vehicle. Electric type
The outside rearview mirror can be
folded or unfolded by pressing the
switch as below.
Left (1)
: The mirror will unfold.
Right (2) : The mirror will fold. Center (AUTO, 3)
:
The mirror will fold or unfold auto-
matically as follows:
Without smart key system - The mirror will fold or unfold whenthe door is locked or unlocked by
the transmitter.
With smart key system - The mirror will fold or unfold whenthe door is locked or unlocked by
the smart key.
- The mirror will fold or unfold when the door is locked or unlocked by
the button on the outside door
handle.
- The mirror will unfold when you approach the vehicle (all doors
closed and locked) with a smart
key in possession.
OPS043037
OPS043038
Page 125 of 524
455
Features of your vehicle
If this warning message is still illumi-
nated even after you have stopped
the vehicle for a certain time, refrain
from driving and have your vehicle
inspected by an authorized Kia deal-
er.Stop vehicle and check powersupply
This warning message illuminates
when a failure occurs in the power
supply system.In this case, park the
vehicle in a safe location and tow
your vehicle to the nearest author-
ized Kia dealer and have the vehicle
inspected.
Check brakes
This warning message illuminates
when the brake performance is low or
the regenerative brake does not work
properly due to a failure in the brake
system.In this case, it may take longer
for the brake pedal to operate and the
braking distance may become longer.
Refrain from driving when the warn-
ing message is displayed. In this
case, have your vehicle inspected by
an authorized Kia dealer as soon as
possible.
OPSE044221L
OPSE044220L
Page 126 of 524
Features of your vehicle
56
4
Stop vehicle and check brakes
This warning message illuminates
when a failure occurs in the brake
system.In this case, park the vehicle
in a safe location and tow your vehicle
to the nearest authorized Kia dealer
and have the vehicle inspected.
Shift to P position
This warning message illuminates if
you try to turn off the vehicle without
the shift lever in P (Park) position.
At this time, the POWER button turns to the ACC position (If you
press the POWER button once
more, it will turn to the ON position).
Low Key Battery
This warning message illuminatesif the battery of the smart key is
discharged when the POWER but-
ton changes to the OFF position.
OPSE044142LOPSE044148LOPSE044222L
Page 137 of 524

467
Features of your vehicle
Seat Belt Warning Light
This warning light informs the driver
that the seat belt is not fastened.
For more details, refer to the “Seat
Belts” in chapter 3.
Parking Brake & BrakeFluid Warning Light
This warning light illuminates:
Once you set the POWER button to the ON position.
- It illuminates for approximately 3seconds
- It remains on if the parking brake is applied.
When the parking brake is applied.
When the brake fluid level in the reservoir is low.
- If the warning light illuminateswith the parking brake released, it
indicates the brake fluid level in
reservoir is low. If the brake fluid level in the reservoir
is low:
1.Drive carefully to the nearest safe
location and stop your vehicle.
2.Turn the vehicle off, check the brake fluid level immediately and add fluid
as required (For more details, refer
to “Brake Fluid” in chapter 7).
Then check all brake components
for fluid leaks. If any leaks in the
brake system is still found, the
warning light remains on, or the
brakes do not operate properly, do
not drive the vehicle.
In this case, have your vehicle
towed to an authorized Kia dealer
and inspected.
Page 154 of 524

Features of your vehicle
84
4
Never place anything over sensor
(1) located on the instrument
panel. This will ensure better auto-
light system control.
Don’t clean the sensor using a win- dow cleaner. The cleaner may
leave a light film which could inter-
fere with sensor operation.
If your vehicle has window tint or other types of metallic coating on
the front windshield, the Auto light
system may not work properly.High beam operation
To turn on the high beam headlights,
push the lever away from you. Pull it
back for low beams.
The high beam indicator will light
when the headlight high beams are
switched on.
To prevent the battery from being
discharged, do not leave the lights
on for a prolonged time while the
vehicle is not in the ready ( ) mode. To flash the headlights, pull the lever
towards you. It will return to the normal
(low beam) position when released.
The headlight switch does not need to
be on to use this flashing feature.
OAM049044
OAM049043
WARNING- High beams
Do not use high beam when
there are other vehicles. Using
high beam could obstruct the
other driver's vision.