2016 JEEP GRAND CHEROKEE clock
[x] Cancel search: clockPage 46 of 276

For the first 1500 miles (2414 km):
• Do not participate in track events, sport driving schools, or similar activities duringthe first 1500 miles (2414 km).
NOTE:
Check engine oil with every refueling and add if necessary. Oil and fuel consumption
may be higher through the first oil change interval.
HEADLIGHT SWITCH
The headlight switch is located on the left side of the instrument panel, next to the
steering wheel. The headlight switch controls the operation of the headlights, parking
lights, instrument panel lights, cargo lights and fog lights (if equipped).
To turn on the headlights, rotate the
headlight switch clockwise. When the
headlight switch is on, the parking lights,
taillights, license plate light and instru-
ment panel lights are also turned on. To
turn off the headlights, rotate the head-
light switch back to the O (Off) position.
NOTE:
• Your vehicle is equipped with plastic headlight and fog light (if equipped)
lenses that are lighter and less suscep-
tible to stone breakage than glass
lights. Plastic is not as scratch resis-
tant as glass and therefore different
lens cleaning procedures must be fol-
lowed.
• To minimize the possibility of scratch- ing the lenses and reducing light out-
put, avoid wiping with a dry cloth. To
remove road dirt, wash with a mild
soap solution followed by rinsing.
CAUTION!
Do not use abrasive cleaning components, solvents, steel wool or other abrasive
materials to clean the lenses.
Headlight Switch
1 — Auto
2 — Rotate Headlight Switch
3 — Push Fog Lights
4 — Rotate Dimmer
OPERATING YOUR VEHICLE
44
Page 92 of 276

UCONNECT 5.0
Clock Setting
To start the clock setting procedure:
1. Push the MORE button on the faceplate. Next press the “Settings” button on thetouchscreen and then press the “Clock and Date” button on the touchscreen.
2. Press the “Set Time” button on the touchscreen.
3. Press the “Up” or “Down” arrows to adjust the hours or minutes, next select the “AM” or “PM” button on the touchscreen. You can also select 12hr or 24hr format
by pressing the desired button on the touchscreen.
Uconnect 5.0 Radio
1 — Radio Mode Button
2 — Reverse Seek Button
3 — Forward Seek Button
4 — Compass Information Button
5 — Climate Controls Button
6 — MORE Functions Button
7 — Audio Button
8 — Information Button
9 — Tune Button10 — AM/FM/SXM Button
11 — Browse/Enter Button Tune/
Scroll Knob
12 — Back Function Button
13 — Screen Off Button
14 — Mute Button/Rotate Volume
Knob
15 — Uconnect Phone Button
16 — Media Mode Button
ELECTRONICS
90
Page 93 of 276

4. Once the time is set press the “Done” button on the touchscreen to exit the timescreen.
NOTE:
In the Clock Setting Menu you can also select the “Show Time Status” button on the
touchscreen, then select from “On” or “Off” to display the time in the status bar.
Equalizer, Balance And Fade
1. Push the MORE button on the faceplate. Next press the “Settings” button on the touchscreen.
2. Then scroll down and press the “Audio” button on the touchscreen to get to the Audio menu.
3. The Audio Menu shows the following options for you to customize your audio settings.
Equalizer
• Press the “Equalizer” button on the touchscreen to adjust the Bass, Mid and Treble. Use the “+” or “–” button on the touchscreen to adjust the equalizer to your
desired settings. Press the “Back Arrow” button on the touchscreen when done.
Balance/Fade
• Press the “Balance/Fade” button on the touchscreen to adjust the sound from the speakers. Use the arrow button on the touchscreen to adjust the sound level from
the front and rear or right and left side speakers. Press the Center “C” button on
the touchscreen to reset the balance and fade to the factory setting. Press the
“Back Arrow” button on the touchscreen when done.
Speed Adjusted Volume
• Press the “Speed Adjusted Volume” button on the touchscreen to select between OFF, 1, 2 or 3. This will decrease the radio volume relative to a decrease in vehicle
speed. Press the “Back Arrow” button on the touchscreen when done.
Loudness
• Press the “Loudness” button on the touchscreen to select the Loudness feature. When this feature is activated it improves sound quality at lower volumes.
Surround Sound
• Press the “Surround Sound” button on the touchscreen, select “On” or “Off” followed by pressing the “Back Arrow” button on the touchscreen. When this
feature is activated, it provides simulated surround sound mode.
Radio Operation
Seek Up/Seek Down
• Press the up or down button to seek through radio stations in AM, FM or SXMbands.
• Hold either button to bypass stations without stopping.
ELECTRONICS
91
Page 103 of 276

CAUTION!
Do NOT attach any object to the touchscreen, doing so can result in damage to the
screen.
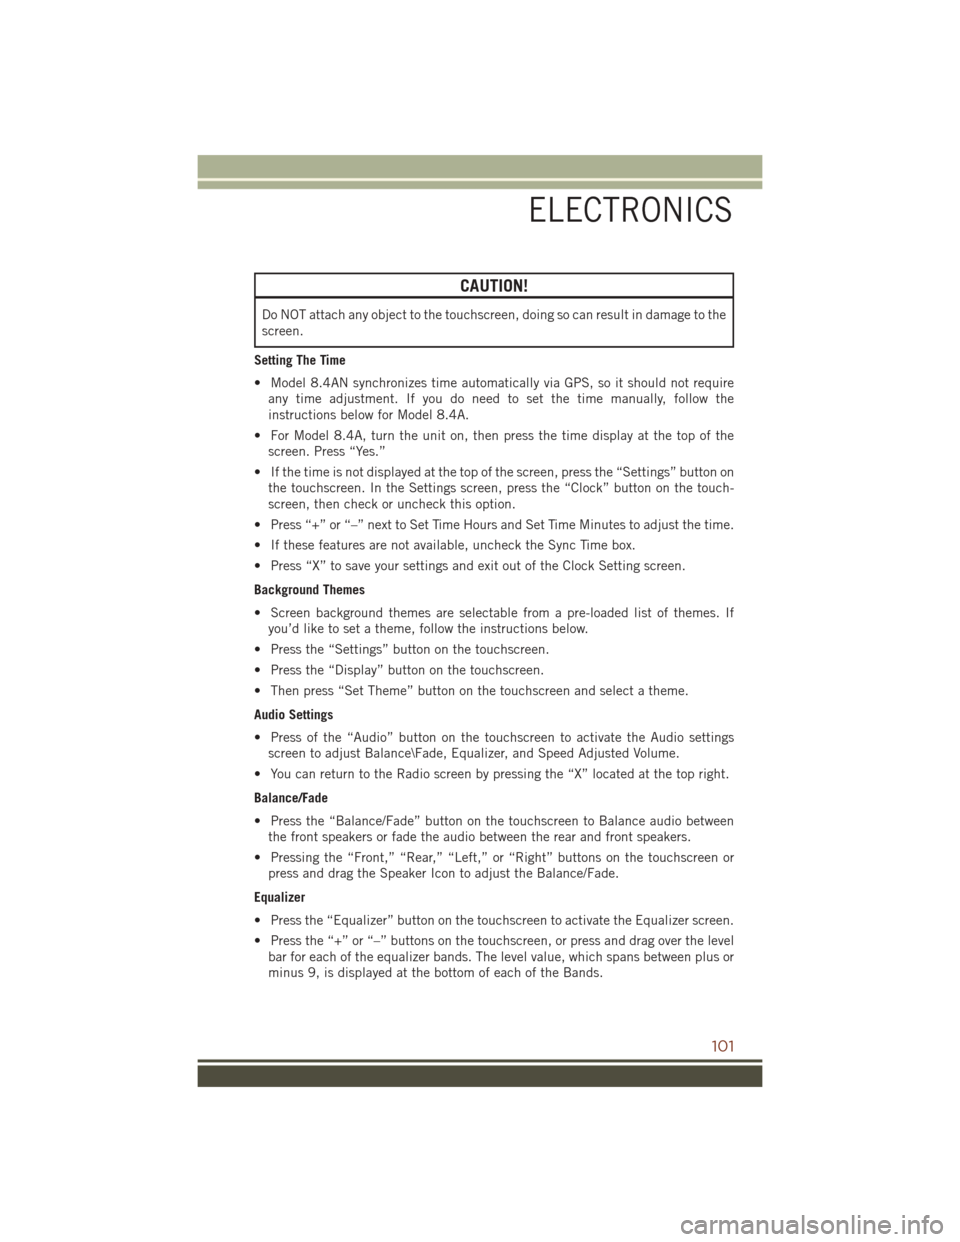
Setting The Time
• Model 8.4AN synchronizes time automatically via GPS, so it should not require any time adjustment. If you do need to set the time manually, follow the
instructions below for Model 8.4A.
• For Model 8.4A, turn the unit on, then press the time display at the top of the screen. Press “Yes.”
• If the time is not displayed at the top of the screen, press the “Settings” button on the touchscreen. In the Settings screen, press the “Clock” button on the touch-
screen, then check or uncheck this option.
• Press “+” or “–” next to Set Time Hours and Set Time Minutes to adjust the time.
• If these features are not available, uncheck the Sync Time box.
• Press “X” to save your settings and exit out of the Clock Setting screen.
Background Themes
• Screen background themes are selectable from a pre-loaded list of themes. If you’d like to set a theme, follow the instructions below.
• Press the “Settings” button on the touchscreen.
• Press the “Display” button on the touchscreen.
• Then press “Set Theme” button on the touchscreen and select a theme.
Audio Settings
• Press of the “Audio” button on the touchscreen to activate the Audio settings screen to adjust Balance\Fade, Equalizer, and Speed Adjusted Volume.
• You can return to the Radio screen by pressing the “X” located at the top right.
Balance/Fade
• Press the “Balance/Fade” button on the touchscreen to Balance audio between the front speakers or fade the audio between the rear and front speakers.
• Pressing the “Front,” “Rear,” “Left,” or “Right” buttons on the touchscreen or press and drag the Speaker Icon to adjust the Balance/Fade.
Equalizer
• Press the “Equalizer” button on the touchscreen to activate the Equalizer screen.
• Press the “+” or “–” buttons on the touchscreen, or press and drag over the level bar for each of the equalizer bands. The level value, which spans between plus or
minus 9, is displayed at the bottom of each of the Bands.
ELECTRONICS
101
Page 150 of 276

PROGRAMMABLE FEATURES
DID Main Menu Selectable Items
The DID can be used to view the following main menu items:
• Speedometer• Stop/Start Info — If Equipped
• Vehicle Info • Audio
• Driver Assist • Messages
• Fuel Economy • Screen Setup
• Trip Info
Refer to “Driver Information Display (DID)” in “Understanding Your Instrument
Panel” in the Owner's Manual on the DVD for further information.
Uconnect Customer Programmable Features
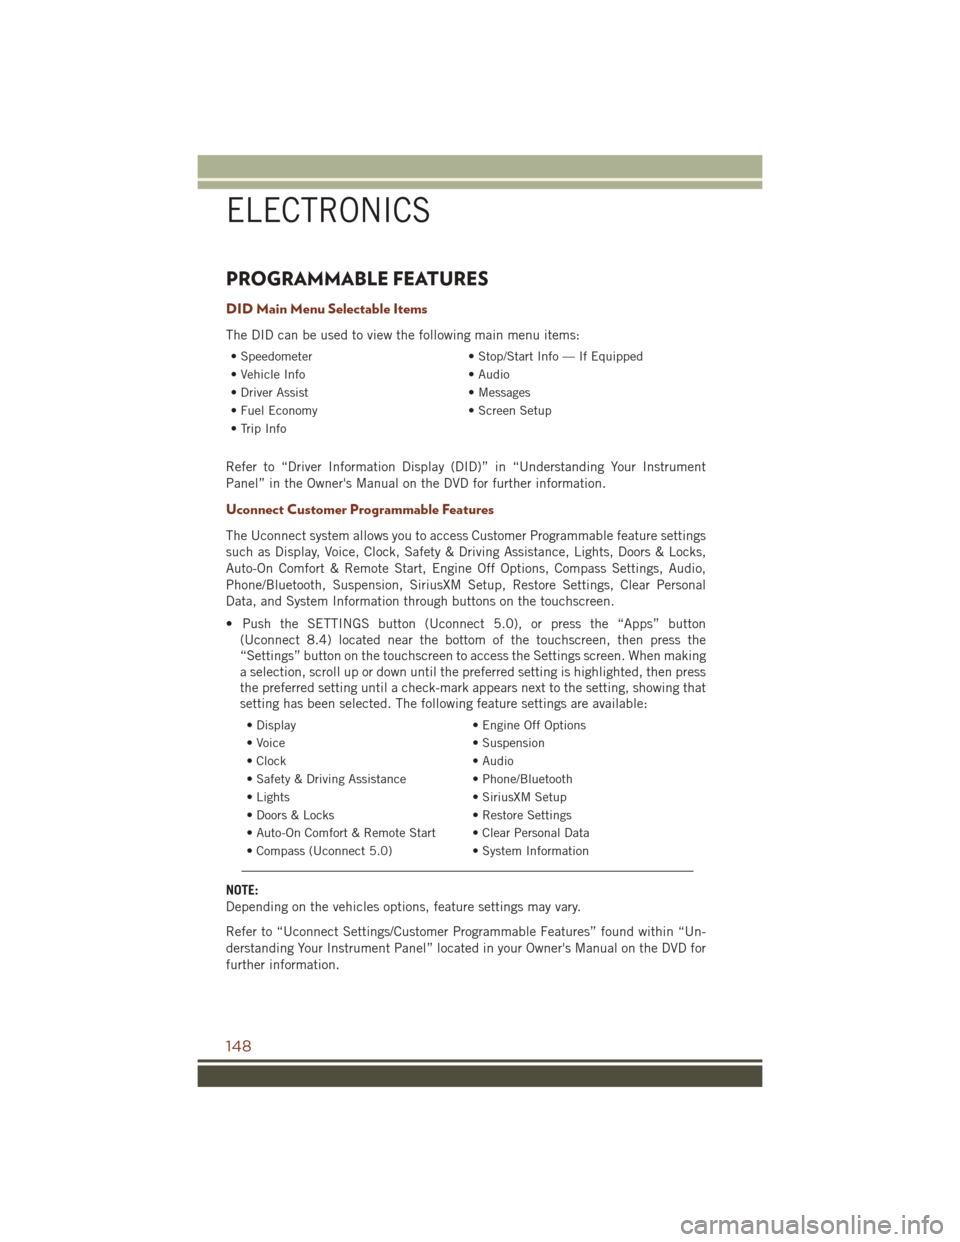
The Uconnect system allows you to access Customer Programmable feature settings
such as Display, Voice, Clock, Safety & Driving Assistance, Lights, Doors & Locks,
Auto-On Comfort & Remote Start, Engine Off Options, Compass Settings, Audio,
Phone/Bluetooth, Suspension, SiriusXM Setup, Restore Settings, Clear Personal
Data, and System Information through buttons on the touchscreen.
• Push the SETTINGS button (Uconnect 5.0), or press the “Apps” button (Uconnect 8.4) located near the bottom of the touchscreen, then press the
“Settings” button on the touchscreen to access the Settings screen. When making
a selection, scroll up or down until the preferred setting is highlighted, then press
the preferred setting until a check-mark appears next to the setting, showing that
setting has been selected. The following feature settings are available:
• Display • Engine Off Options
• Voice • Suspension
• Clock • Audio
• Safety & Driving Assistance • Phone/Bluetooth
• Lights • SiriusXM Setup
• Doors & Locks • Restore Settings
• Auto-On Comfort & Remote Start • Clear Personal Data
• Compass (Uconnect 5.0) • System Information
NOTE:
Depending on the vehicles options, feature settings may vary.
Refer to “Uconnect Settings/Customer Programmable Features” found within “Un-
derstanding Your Instrument Panel” located in your Owner's Manual on the DVD for
further information.
ELECTRONICS
148
Page 165 of 276

Trailer Hitch Receiver Cover Removal (Summit Models) — If Equipped
Your vehicle may be equipped with a trailer hitch receiver cover, this must be
removed to access the trailer hitch receiver (if equipped). This hitch receiver cover is
located at the bottom center of the rear fascia.
1. Turn the two locking retainers located at the bottom of the hitch receiver cover a1/4 turn counterclockwise.
NOTE:
Use a suitable tool such as a coin in the slot of the locking retainer if needed for
added leverage.
Hitch Receiver Cover
1 — Hitch Receiver Cover Tab
Locations
2 — Locking Retainers
UTILITY
163
Page 167 of 276

Trailer Hitch Receiver Cover Removal (SRT Models) — If Equipped
Your vehicle may be equipped with a trailer hitch receiver cover, this must be
removed to access the trailer hitch receiver (if equipped). This hitch receiver cover is
located at the bottom center of the rear fascia.
1. Turn the two locking retainers located at the bottom of the hitch receiver cover a1/4 turn counterclockwise.
NOTE:
Use a suitable tool such as a coin in the slot of the locking retainer if needed for
added leverage.
Hitch Receiver Cover
1 — Hitch Receiver Cover Retaining
Tabs
2 — Hitch Receiver Cover
3 — Locking Retainers
UTILITY
165
Page 184 of 276

DIESEL FUEL FILTERS/WATER SEPARATOR
Draining Fuel/Water Separator
If the “Water in Fuel” indicator light
is illuminated and an audible chime
is heard five times, you should stop the
engine and drain the water from the sepa-
rator.
The best access to this water drain valve
is from under the vehicle.
The drain valve is located on the bottom
of the Fuel Filter and Water Separator
assembly which is located on the left side
of the vehicle in front of the fuel tank.
1. Loosen the drain valve (located on the bottom of the filter assembly) then
turn the ignition switch to the ON/
RUN position to allow any accumu-
lated water to drain.
2. When clean fuel is visible, close the drain and switch the ignition to the OFF position.
Refer to the Diesel Supplement on the DVD for further details.
Fuel Filter Replacement
1. Ensure engine is turned off.
2. Place drain pan under the fuel filter assembly.
3. Open the water drain valve, and let any accumulated water drain.
4. Close the water drain valve.
5. Remove using a socket. Rotate counterclockwise for removal.
6. Remove the used filter cartridge from the housing and dispose of according to your local regulations.
7. Wipe clean the sealing surfaces of the lid and housing.
8. Lubricate o-ring on new filter with clean engine oil.
9. Repeat steps 5 through 8 to service second filter in fuel filter assembly.
Fuel Filter And Water Separator Assembly
1 — Fuel Filter Access
2 — Water In Fuel Drain
DIESEL
182