Page 144 of 745

RCP monitors the rear detection zones on both sides of
the vehicle, for objects that are moving toward the side of
the vehicle with a minimum speed of approximately
3 mph (5 km/h), to objects moving a maximum of
approximately 20 mph (32 km/h), such as in parking lot
situations.NOTE:
In a parking lot situation, oncoming vehicles can
be obscured by vehicles parked on either side. If the
sensors are blocked by other structures or vehicles, the
system will not be able to alert the driver.
When RCP is on and the vehicle is in REVERSE, the
driver is alerted using both the visual and audible
alarms, including reducing the radio volume.
WARNING!
RCP is not a Back Up Aid system. It is intended to be
used to help a driver detect an oncoming vehicle in a
parking lot situation. Drivers must be careful when
backing up, even when using RCP. Always check
carefully behind your vehicle, look behind you, and
be sure to check for pedestrians, animals, other
vehicles, obstructions, and blind spots before back-
ing up. Failure to do so can result in serious injury or
death.
RCP Detection Zones
142 UNDERSTANDING THE FEATURES OF YOUR VEHICLE
Page 181 of 745

Turn Signals
Move the multifunction lever up or down and the arrows
on each side of the instrument cluster flash to show
proper operation of the front and rear turn signal lights.
NOTE:If either light remains on and does not flash, or
there is a very fast flash rate, check for a defective outside
light bulb. If an indicator fails to light when the lever is
moved, it would suggest that the indicator bulb is
defective.
Lane Change Assist
Tap the lever up or down once, without moving beyond
the detent, and the turn signal (right or left) will flash
three times then automatically turn off.
Flash-To-Pass
You can signal another vehicle with your headlights by
partially pulling the multifunction lever toward the steer-
ing wheel. This will cause the high beam headlights to
turn on until the lever is released.
High/Low Beam Switch
Push the multifunction lever toward the instrument
panel to switch the headlights to high beams. Pulling the
multifunction back toward the steering wheel will turn
the low beams back on, or shut the high beams off.
3
UNDERSTANDING THE FEATURES OF YOUR VEHICLE 179
Page 184 of 745
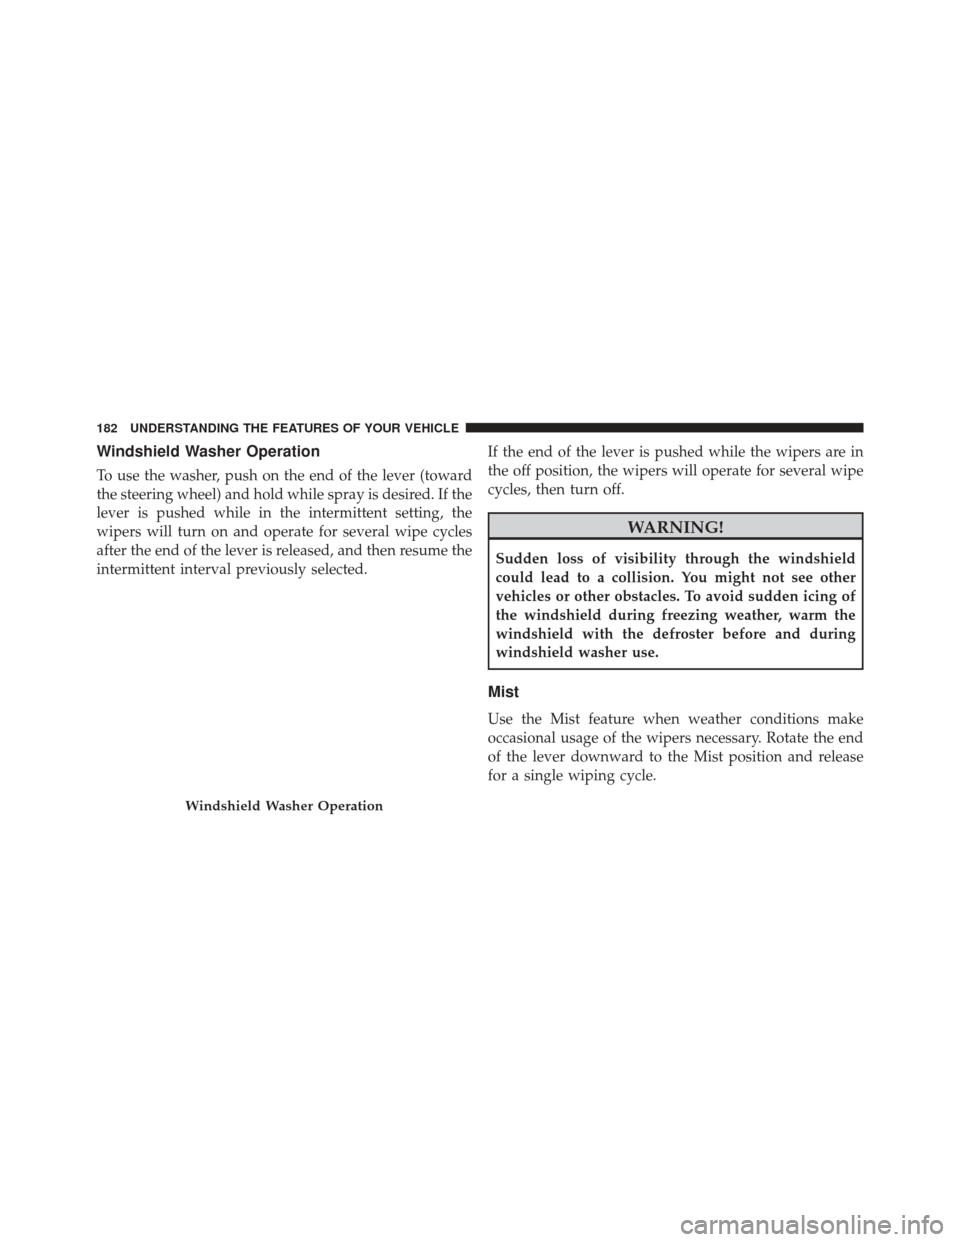
Windshield Washer Operation
To use the washer, push on the end of the lever (toward
the steering wheel) and hold while spray is desired. If the
lever is pushed while in the intermittent setting, the
wipers will turn on and operate for several wipe cycles
after the end of the lever is released, and then resume the
intermittent interval previously selected.If the end of the lever is pushed while the wipers are in
the off position, the wipers will operate for several wipe
cycles, then turn off.
WARNING!
Sudden loss of visibility through the windshield
could lead to a collision. You might not see other
vehicles or other obstacles. To avoid sudden icing of
the windshield during freezing weather, warm the
windshield with the defroster before and during
windshield washer use.
Mist
Use the Mist feature when weather conditions make
occasional usage of the wipers necessary. Rotate the end
of the lever downward to the Mist position and release
for a single wiping cycle.
Windshield Washer Operation
182 UNDERSTANDING THE FEATURES OF YOUR VEHICLE
Page 187 of 745
HEADLIGHT WASHERS — IF EQUIPPED
The multifunction lever operates the headlight washers
when the ignition switch is in the ON position and the
headlights are turned on. The multifunction lever is
located on the left side of the steering column.
To use the headlight washers, push the multifunction
lever inward (toward the steering column) and release it.
The headlight washers will spray a timed high-pressure
spray of washer fluid onto each headlight lens. In addi-
tion, the windshield washers will spray the windshield
and the windshield wipers will cycle.
NOTE:After turning the ignition switch and headlights
ON, the headlight washers will operate on the first spray
of the windshield washer and then every eleventh spray
after that.
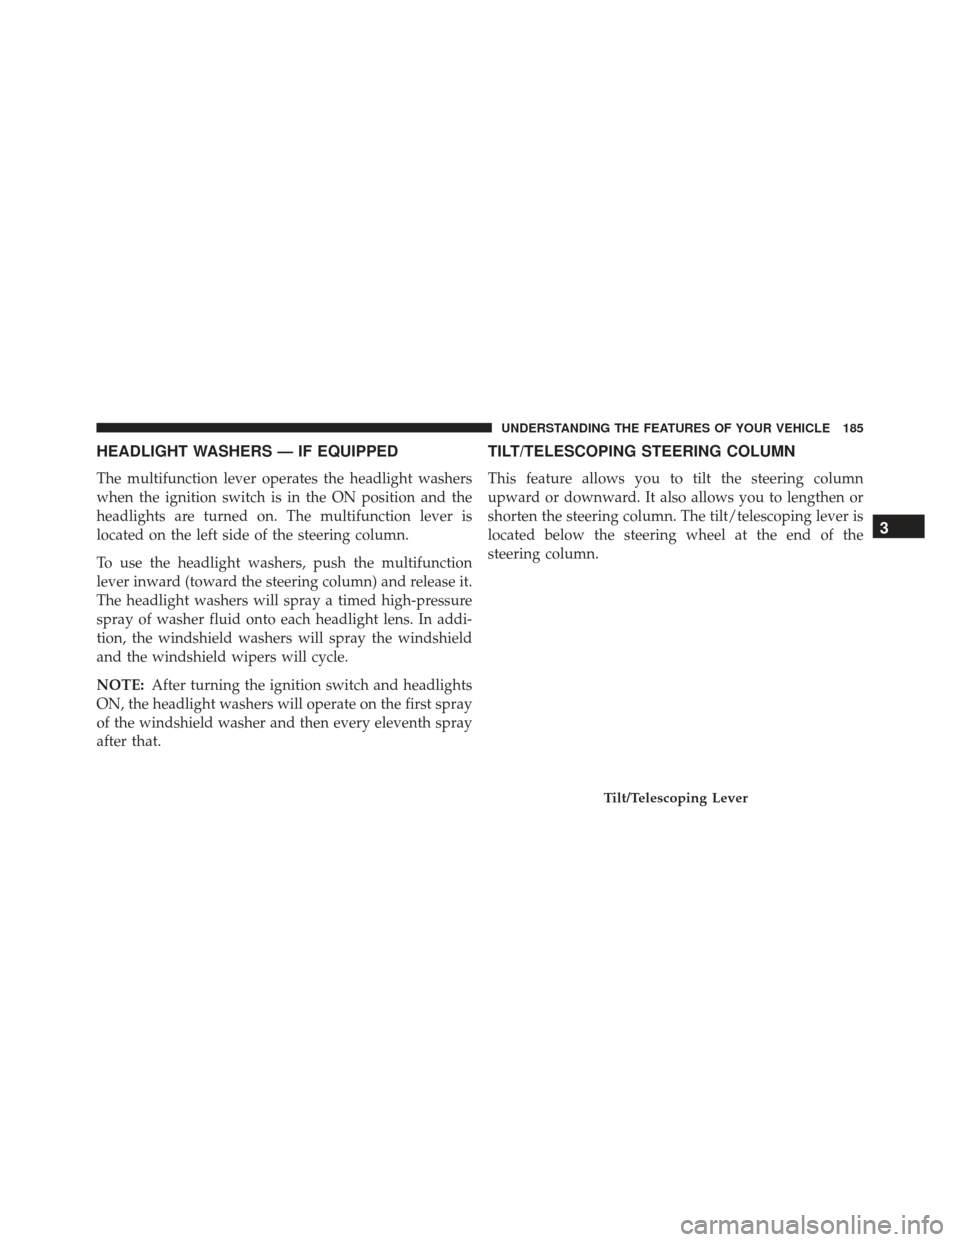
TILT/TELESCOPING STEERING COLUMN
This feature allows you to tilt the steering column
upward or downward. It also allows you to lengthen or
shorten the steering column. The tilt/telescoping lever is
located below the steering wheel at the end of the
steering column.
Tilt/Telescoping Lever
3
UNDERSTANDING THE FEATURES OF YOUR VEHICLE 185
Page 188 of 745
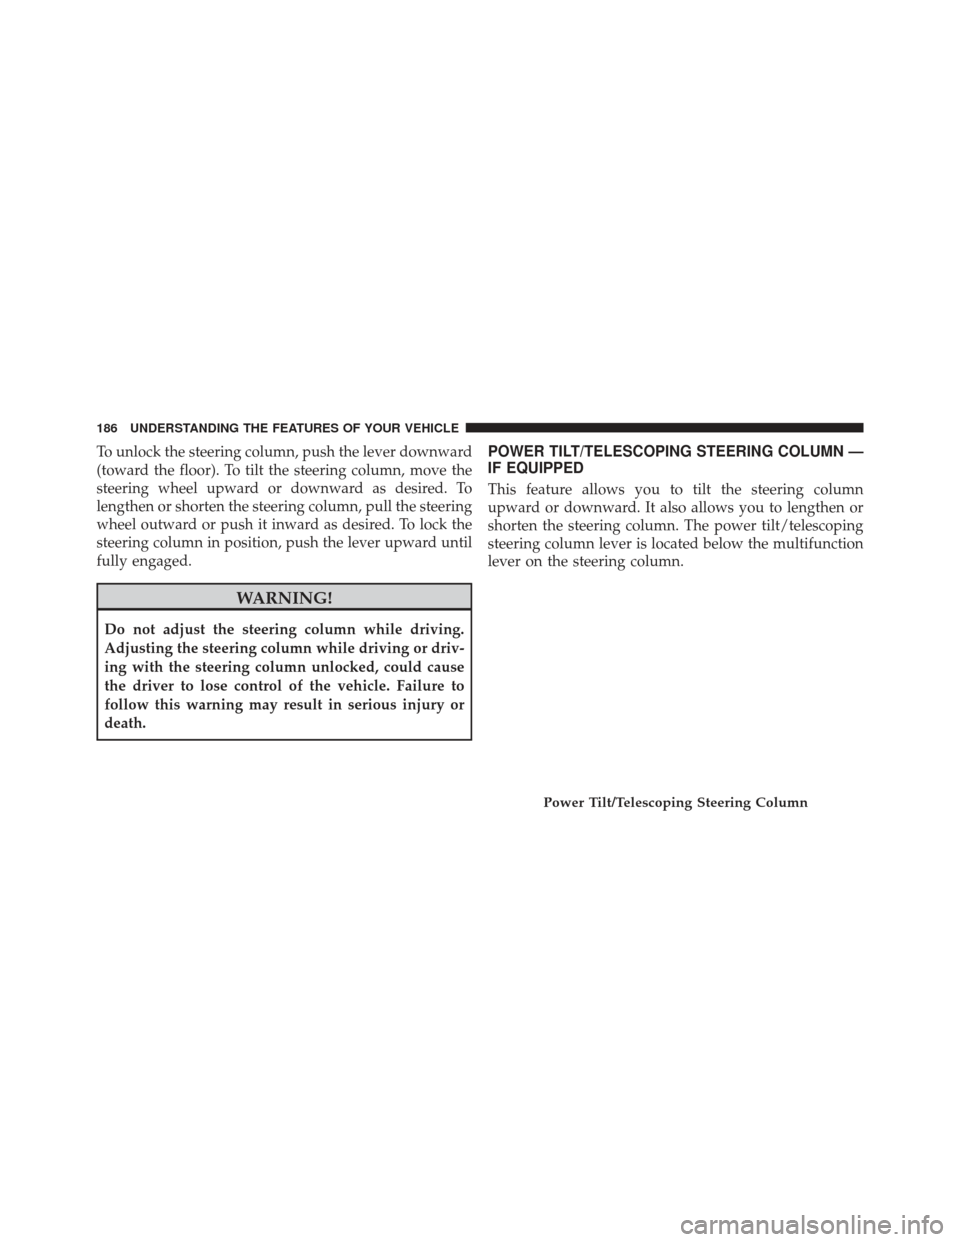
To unlock the steering column, push the lever downward
(toward the floor). To tilt the steering column, move the
steering wheel upward or downward as desired. To
lengthen or shorten the steering column, pull the steering
wheel outward or push it inward as desired. To lock the
steering column in position, push the lever upward until
fully engaged.
WARNING!
Do not adjust the steering column while driving.
Adjusting the steering column while driving or driv-
ing with the steering column unlocked, could cause
the driver to lose control of the vehicle. Failure to
follow this warning may result in serious injury or
death.
POWER TILT/TELESCOPING STEERING COLUMN —
IF EQUIPPED
This feature allows you to tilt the steering column
upward or downward. It also allows you to lengthen or
shorten the steering column. The power tilt/telescoping
steering column lever is located below the multifunction
lever on the steering column.
Power Tilt/Telescoping Steering Column
186 UNDERSTANDING THE FEATURES OF YOUR VEHICLE
Page 189 of 745
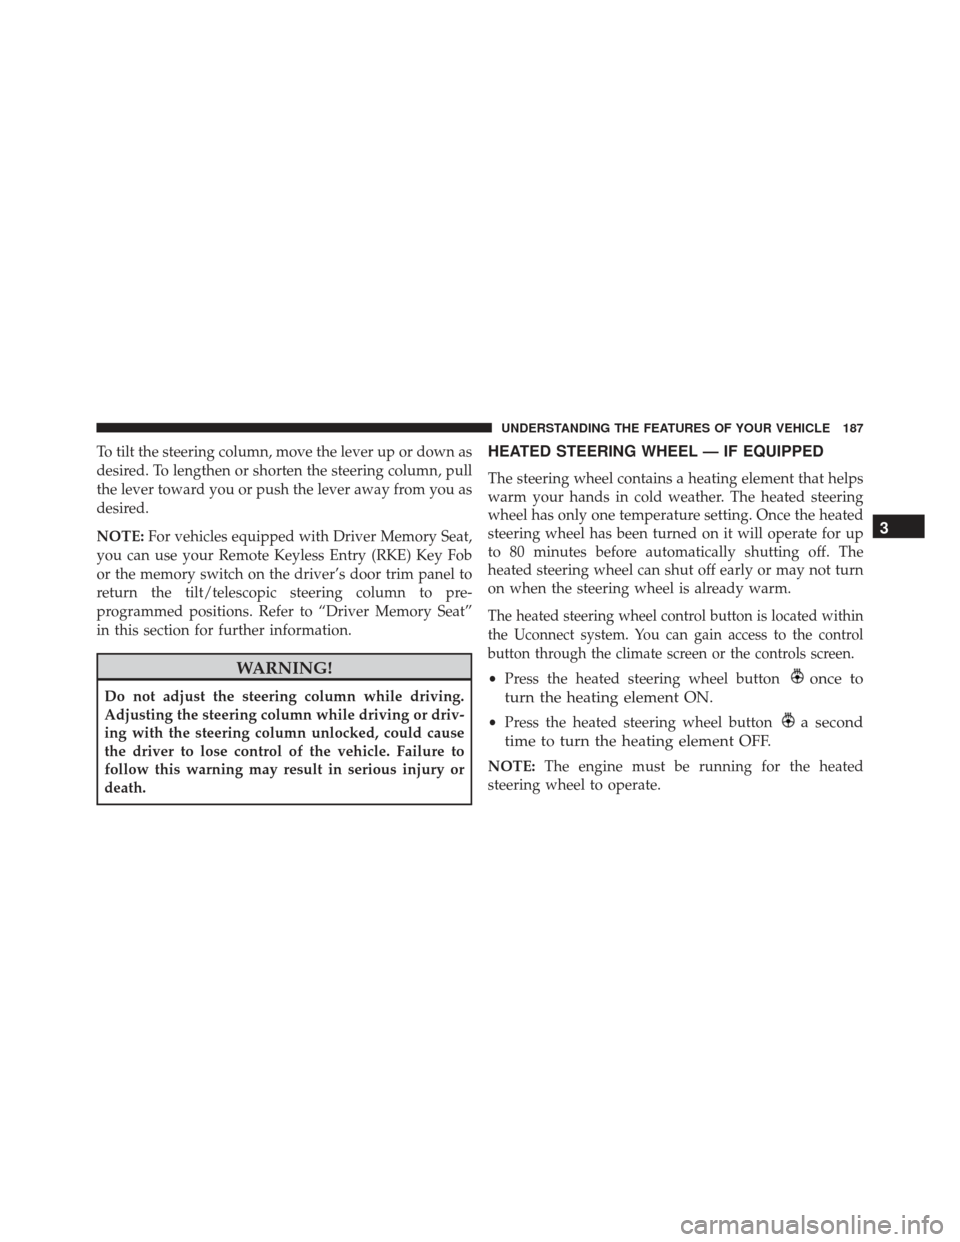
To tilt the steering column, move the lever up or down as
desired. To lengthen or shorten the steering column, pull
the lever toward you or push the lever away from you as
desired.
NOTE:For vehicles equipped with Driver Memory Seat,
you can use your Remote Keyless Entry (RKE) Key Fob
or the memory switch on the driver’s door trim panel to
return the tilt/telescopic steering column to pre-
programmed positions. Refer to “Driver Memory Seat”
in this section for further information.
WARNING!
Do not adjust the steering column while driving.
Adjusting the steering column while driving or driv-
ing with the steering column unlocked, could cause
the driver to lose control of the vehicle. Failure to
follow this warning may result in serious injury or
death.
HEATED STEERING WHEEL — IF EQUIPPED
The steering wheel contains a heating element that helps
warm your hands in cold weather. The heated steering
wheel has only one temperature setting. Once the heated
steering wheel has been turned on it will operate for up
to 80 minutes before automatically shutting off. The
heated steering wheel can shut off early or may not turn
on when the steering wheel is already warm.
The heated steering wheel control button is located within
the Uconnect system. You can gain access to the control
button through the climate screen or the controls screen.
• Press the heated steering wheel buttononce to
turn the heating element ON.
• Press the heated steering wheel buttona second
time to turn the heating element OFF.
NOTE: The engine must be running for the heated
steering wheel to operate.
3
UNDERSTANDING THE FEATURES OF YOUR VEHICLE 187
Page 197 of 745
WARNING!(Continued)
brakes must be applied manually. An audible
chime will sound when the brakes are released.
You should switch off the ACC system:
• When driving in fog, heavy rain, heavy snow, sleet,
heavy traffic, and complex driving situations (i.e.,
in highway construction zones).
• When entering a turn lane or highway off ramp;
when driving on roads that are winding, icy, snow-
covered, slippery, or have steep uphill or downhill
slopes.
• When towing a trailer up or down steep slopes.
• When circumstances do not allow safe driving at a
constant speed.
Adaptive Cruise Control (ACC) Operation
The speed control buttons (located on the right side of the
steering wheel) operates the ACC system.
Adaptive Cruise Control Buttons
1 — Normal (Fixed Speed)
Cruise Control On/Off 5 — Distance Setting Increase
2 — SET+/Accel 6 — Adaptive Cruise Control
(ACC) On/Off
3 — RES/Resume 7 — Distance Setting Decrease
4 — SET-/Decel 8 — CANC/Cancel
3
UNDERSTANDING THE FEATURES OF YOUR VEHICLE 195
Page 213 of 745
Precautions While Driving With ACC
In certain driving situations, ACC may have detection
issues. In these cases, ACC may brake late or unexpect-
edly. The driver needs to stay alert and may need to
intervene.
Towing A Trailer
Towing a trailer is not advised when using ACC.
Offset Driving
ACC may not detect a vehicle in the same lane that is
offset from your direct line of travel, or a vehicle merging
in from a side lane. There may not be sufficient distance
to the vehicle ahead. The offset vehicle may move in and
out of the line of travel, which can cause your vehicle to
brake or accelerate unexpectedly.
Offset Driving Condition Example
3
UNDERSTANDING THE FEATURES OF YOUR VEHICLE 211