Page 9 of 40
; Yellow 3 ft")
7
2
3
The colored guide lines on the display screen indicate vehicle width and\
approximate
distances to objects with reference to the vehicle body line.
• Red 1.5 ft (0.5 m); Yellow 3 ft (1 m); Green 7 ft (2 m) and 10 ft \
(3 m).
There are some areas where the system will not show objects.
• When in the front or the rear view display, an
object below the bumper or on the ground may
not be viewed
2.
• When in the bird’s-eye view, a tall object near
the seam of the camera viewing areas
3
will not appear in the monitor.
The distance between objects viewed on the Around
View Monitor differs from the actual distance.
Objects in the bird’s-eye view will appear further
than the actual distance.
MOVING OBJECT DETECTION (MOD)
If the MOD system detects moving objects
surrounding the vehicle, a yellow frame
1 will
be displayed on the camera image and a chime
will sound.
In the bird’s-eye view, a yellow frame is displayed on
those camera images (front, rear, right, left) where
moving objects are detected.
When the following are displayed:
• Blue MOD icon 2; the system is operative in this view.
• Gray MOD icon 3; the system is not operative in this view.
• No MOD icon; the system is off.
To temporarily turn the system on or off, touch the MOD key 4.
For more information, refer to the “Monitor, climate, audio, phone and voice recognition systems (section 4\
) ” of your
Owner’s Manual.
123
4
Page 10 of 40

8
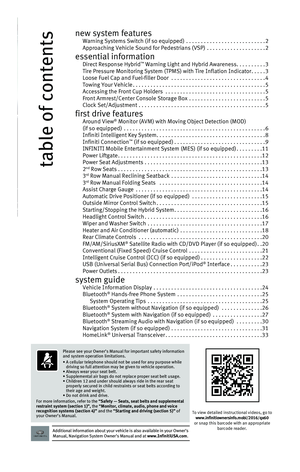
Infiniti Intelligent Key System
The Infiniti Intelligent Key system allows you to lock or unlock your ve\
hicle, open your liftgate
and remotely start the hybrid system. It is important to make sure the I\
ntelligent Key is with
you (that is, in your pocket or purse).
LOCKING AND UNLOCKING THE VEHICLE
The lock and unlock operating range of the Intelligent Key is within 31.\
5 in (80 cm) from
each request switch.
To lock the vehicle, push either door handle request
switch
1 once or press the button 2 on the
key fob.
To unlock the vehicle, perform one of the
following procedures:
• Push either door handle request switch 1 once; the corresponding door will unlock.
Push the door handle request switch
1 again within 1 minute; all other doors will
unlock, or
• Press the button 4 on the key fob to unlock the driver’s side door. Press the button
4 again; all other doors will unlock.
REMOTE HYBRID SYSTEM START* (if so equipped)
The remote hybrid system start must be enabled in the vehicle
settings within the vehicle information display.
The remote hybrid system start operating range is approximately
200 ft (60 m) from the vehicle. The effective operating range may be
shorter due to environmental conditions or obstacles between you
and the vehicle.
For the remote hybrid system start to function, the vehicle must be
in the P (PARK) position with the ignition off and all the doors
closed and locked.
To start your vehicle remotely:
1. Press the button 2.
2. Within 5 seconds, press and hold the remote hybrid system start button 3 for at
least 2 seconds.
The hybrid system will start, and the parking lights will turn on.
Automatic climate control will begin heating or cooling the vehicle depe\
nding on the
outside ambient temperature.
The hybrid system will run for 10 minutes and then turn off.
Repeat steps 1 and 2 to extend the time for an additional 10-minute peri\
od.
• After two remote starts, the ignition switch must be cycled before the r\
emote start can be
used again.
To start driving, depress the brake pedal and press the ignition switch \
START/STOP button.
first drive features
3
2
4
5
6
1
*Laws in some communities may restrict the use of remote starters. Check\
local regulations before using this feature.
Page 11 of 40

9
LIFTGATE RELEASE
To open the rear liftgate, press the button 5 for longer than 1 second.
To close the rear liftgate, press the button 5 again for longer than 1 second.
PANIC ALARM
The Intelligent Key can also be used to activate the panic alarm by pres\
sing and holding
the
button 6 for more than 1 second. Once activated, the panic alarm and headlights \
will stay on for a period of time.
INTELLIGENT KEY BATTERY DISCHARGE
If the battery of the Intelligent Key is discharged or
environmental conditions interfere with the
Intelligent Key operation, start the hybrid system
according to the following procedure:
1. Move the shift lever to the P (PARK) position.
2. Firmly apply the foot brake.
3. Touch the ignition switch with the Intelligent Key
and a chime will sound.
4. Within 10 seconds after the chime sounds, pre
ss the ignition switch START/STOP
button while depressing the brake pedal and the hybrid system will start.
For more information, refer to the “Pre-driving checks and adjustments (section 3)”, the “Starting and driving (section 5)” and
the “Maintenance and do-it-yourself (section 8)” of your Owner’s Manual.
Infiniti Connection™ * (if so equipped)
Infiniti Connection™ combines personalized
convenience, concierge settings and personal security
features to compliment the Total Ownership Experience
®.
For more details on Infiniti Connection or to enroll your
vehicle, please visit www.InfinitiConnection.com or
call 855-444-7244.
To access Infiniti Connection:
1. Press the INFO button 1 on the control panel.
2. Select the “Infiniti Connection” key 2 on
the display.
Available services include:
Automatic Collision Notification – In case of air bag
deployment, a signal is sent containing the vehicle
location and customer information to notify the
proper authorities.
Emergency Call – This service provides emergency
assistance by connecting the subscriber to an
Infiniti Connection Specialist.
*INFINITI Connection™ is only available on vehicles equipped with an optional INFINITI Connec\
tion™ subscription service.
2
3
1
Page 12 of 40

10
first drive features
• In case of an emergency, press the in-vehicle
telematics SOS button
4.
• A Response Specialist will provide assistance
based on the situation described by the
vehicle’s occupant.
Enhanced Roadside Assistance – Roadside
Assistance can be accessed by touching the “Infiniti
Connection” key
2 on the Info menu or the key
3 on the map screen.
• This service allows subscribers to receive assistance for a non-emergenc\
y incident, such
as towing, or a third party response.
My Schedule – Access your personal online Google Calendar™, hear details read via
text-to-speech** and select a location as a destination via the Navigati\
on System.
Report Stolen Vehicle – A Response Specialist will attempt to obtain \
location
information from a reported stolen vehicle and provide that information \
to a local law
enforcement agency.
Remote Door Lock/Unlock – Remotely access your vehicle via an Infinit\
i Connection
Response Specialist or the designated website to remotely lock or unlock\
your vehicle.
Alarm Notification – This system will notify you when the factory-ins\
talled vehicle alarm
system has been activated.
Scheduled Maintenance Notification – Receive scheduled maintenance no\
tifications
based on mileage data provided by your vehicle.
Maintenance Alert – Receive notification of a vehicle system malfunct\
ion that triggers
instrument panel warning lights.
Destination Assistance – Receive point-of-interest assistance via a g\
uided IVR (Interactive
Voice Response) or a Response Specialist by pressing the
key 3 on the map screen or
the Infiniti Connection™ web portal.
Destination Send-to-Vehicle – Find and download point-of-interest inf\
ormation from
Google Maps™ mapping service.
Connected Search – Select “Connected Search” from the Destinati\
on menu on the
vehicle’s Navigation System to conduct a point-of-interest search wit\
hin a certain distance
of the vehicle’s location.
Drive Zone – Monitor the movement of your vehicle within a specified \
region. Set up
boundaries in the Monitoring section of the Infiniti Connection™ web portal.
Max Speed Alert – Set a maximum speed on the Infiniti Connection™ web portal. You will
receive notifications if your vehicle exceeds the maximum speed setting.\
Mobile Information Service – Receive the latest news headlines, stock\
quotes and sports
scores by setting up preferences on the Mobile Information Service page \
in the Infiniti
Connection
™ web portal.
Valet Alert – Use to set up a 0.2-mile radius around your vehicle.
4
**Laws in some communities may restrict the use of text-to-speech. Check\
local regulations before using this feature.
Page 13 of 40
 (if so equipped)
With this entertainment system, you can play video
files via a DVD or CD, providing images and sound
from the front and rear displa")
11
INFINITI Mobile Entertainment System (MES) (if so equipped)
With this entertainment system, you can play video
files via a DVD or CD, providing images and sound
from the front and rear display screens.
WATCHING A DVD
1. Insert a DVD into the DVD slot 1.
2. The DVD will play automatically.
• To watch or control videos on the front display,
make sure the vehicle is in the P (PARK) position
and the parking brake is applied.
REAR DISPLAYS
To turn the rear displays on or off from the
front seats:
1. Press the SETTING button 2 on the control panel.
2. Select the “Rear Display” key on the display.
3. Toggle the “L” (left) or “R” (right) display 3
ON or OFF.
To access standard DVD controls on the front
display while playing a DVD on the rear display, press the DISC•AUX
button on the control panel while the vehicle is in the P (PARK)
position and the parking brake is applied.
To turn the rear displays on or off from the rear seats:
1. Select the desired seat by sliding the DISPLAY SELECT switch 4 on
the remote control to the L (left) or R (right) position.
2. Press the POWER button 5 on the remote control.
• Activate alerts by pressing the “Connect to Voice Menu” key on the\
“Infiniti Connection”
screen or by pressing the
key 3 on the map screen.
• At the prompt, say “Valet Alert” and then “Activate” or “\
Deactivate”.
Driving is serious business. Only use Infiniti Connection™ and Infiniti Connection Plus services when safe to do so. Services,
including automatic crash notification and SOS, require an active subscr\
iption and are dependent upon the telematics device
being in an operative condition, its ability to connect to a wireless ne\
twork, compatible wireless network availability, navigation
map data, and GPS satellite signal receptions, the absence of which can \
limit or prevent the ability to reach Infiniti Connection
Customer Care or receive support. Services require compatible 2G GSM/GPR\
S cellular network provided by AT&T. 2G cellular
network not available in all areas and/or available at all times. Cellul\
ar technology is evolving, and changes to cellular networks
provided by independent companies are not within Infiniti’s control. \
AT&T has announced that on December 31, 2016 AT&T
will terminate 2G network availability. AT&T has advised that, if purcha\
sed/leased vehicle prior to March 31, 2016, you must
enroll by March 31, 2016 to have the services on the 2G network through \
December 31, 2016. Like other devices that rely
on 2G network coverage, once the 2G network is terminated, Infiniti Conn\
ection and Infiniti Connection Plus services will not
function unless equipment replacements, upgrades, or alternative 2G netw\
ork coverage are available at that time, which Infiniti
cannot guarantee. Infiniti is not responsible for associated costs that \
may be required for continued operation due to cellular
network termination (including equipment upgrades, if available, or roa\
ming charges on alternative networks). Certain vehicle
services, including Google
® compatible services, provided by independent companies are not within Infiniti’s control and
are subject to change without notice or liability to Infiniti and its af\
filiates and agents. Complimentary 12-month subscription
begins on your date of purchase. Subsequently, your credit card (if on \
file) will be charged at the then current subscription
rate and your service will continue for 1-year periods under the terms o\
f your Subscription Agreement, or until 2G coverage is
terminated on December 31, 2016 (if equipment upgrades or roaming charg\
es are not available by that date). Text rates and/
or data usage may apply.
For more information, refer to the “Viewing technical information (section 7)” of your Navigation System Owner’s Manual.
5 4
3
2
1
Page 14 of 40

12
Power Liftgate
When the liftgate is closed and locked, the liftgate
will open automatically by:
• Pushing the power liftgate switch 1 on the
instrument panel.
• Pushing the liftgate opener switch 2; the
liftgate must be unlocked, or you must have the
Intelligent Key with you (that is, in your pocket
or purse).
• Pressing the button 3 on the
Infiniti Intelligent Key for more than
1 second.
The power liftgate operation can be
turned on or off by the power liftgate
main switch
4 on the instrument panel.
• When the power liftgate main switch4 is pushed
to the OFF position, power operation is not
available using the liftgate close switch
5 or the
liftgate opener switch
2.
For more information, refer to the “Pre-driving checks and adjustments
(section 3)” of your Owner’s Manual.
2
53
To control the DVD from the rear seats, use the
remote control.
OPERATING TIPS
You can also connect auxiliary devices, such as
video games, camcorders or portable video players,
to the auxiliary jacks. (Your device will be controlled
through its own control panel.)
Rear Auxiliary Mode allows rear seat passengers to
independently display different sources on each screen.
Use the headphones, also provided with the system,
to listen to audio wirelessly and independently.
For the best audio sound quality, please make sure
you are facing the monitor directly in front of you.
To reduce driver distraction, movies will not be
shown on the front display while the vehicle is in
any drive position.
For more information, refer to the “Monitor, climate, audio, phone and voice recognition systems (section 4\
) ” of your
Owner’s Manual.
first drive features
41
Page 15 of 40

13
Power Seat Adjustments
To slide the seat forward or backward, push the
switch 1 forward or backward.
To recline the seatback, push the switch 2
forward or backward.
SEAT LIFTER
To raise or lower the front portion or height of the
seat, push the front or back end of the
switch
1 up or down.
POWER LUMBAR SUPPORT (if so equipped for driver’s seat)
To adjust the seat lumbar support, push the front or back end of the switch 3.
For more information, refer to the “Safety — Seats, seat belts and supplemental restraint system (sectio\
n 1) ” of your
Owner’s Manual.
2nd Row Seats
To slide the seat forward or backward, pull
the center of the bar
1 up and hold it while
you slide the seat forward or backward to the
desired position. Release the bar to lock the
seat in position.
To recline the seatback, pull up on the recline
handle
2 and lean back. To bring the seatback
forward, pull the recline handle up and lean your
body forward. Release the recline handle to lock the
seatback in position.
MULTI-MODE/CHILD SEAT ACCESS FUNCTION
This feature is not available on the driver’s side of the 2nd row seat.
If a child safety seat is installed on the passenger’s side of the 2nd row seat, the 3rd row can
be accessed without removing the child safety seat.
To access the 3rd row from outside the vehicle, lift up on the seatback release lever 3.
EZ ENTRY MODE
To enter the 3rd row from outside the vehicle, lift up fully on the seatback release lev\
er 3.
This will release the back of the seat and fold up the seat cushion.
For access to the rear seat, slide the entire seat forward by pushing on\
the upper
seatback area.
To return the seat to a locked position, push the upper seatback rearwar\
d until the
seatback and track are locked. Push the seat cushion down. Locking the s\
eatback will also
lock the track.
For more information, refer to the “Safety — Seats, seat belts and supplemental restraint system (section 1) ”
of your Owner’s Manual.
123
3
21
Page 16 of 40

14
3rd Row Manual Reclining Seatback
To recline the seatback, pull up on the latch 1
located on the outside corner of each seatback.
Lean back until the desired angle is obtained.
To bring the seatback forward again, pull up on the
latch
1 and move your body forward. The seatback
will move forward.
For more information, refer to the “Safety — Seats, seat belts and
supplemental restraint system (section 1)” of your Owner’s Manual.
first drive features
Assist Charge Gauge
This shows the power consumed 2 or generated
1 by the electric motor.
For more information, refer to the “HEV Overview (section HEV)” and the
“Instruments and controls (section 2)” of your Owner’s Manual.12
3rd Row Manual Folding Seats
The 3rd row seats can be folded flat for maximum
cargo hauling or extra storage space.
Before folding down the 3rd row seats:
• The vehicle’s shift lever must be in the P (PARK) or
N (NEUTRAL)
position.
MANUAL SEAT FOLD DOWN
To fold the 3rd row seats flat:
1. Pull the strap to release the head restraint
forward
1.
2. Stow the 3rd row seat belts in the seat belt hooks
2 found in the cargo area.
3. Pull up on the latch located on the corner of each
seatback and lower the seatback forward over the
seat base
3.
For more information, refer to the “Safety — Seats, seat belts and
supplemental restraint system (section 1)” of your Owner’s Manual.
1
1
2
3