2016 HYUNDAI TUCSON turn signal
[x] Cancel search: turn signalPage 20 of 642

F20
Climate control air filter .....................................7-40
Filter Inspection ...............................................................7-40
Wiper blades .........................................................7-42
Blade Inspection ..............................................................7-42
Blade Replacement .........................................................7-42
Battery...................................................................7-45
For Best Battery Service ..............................................7-46
Battery Recharging ........................................................7-46
Reset features .................................................................7-47
Tires and wheels ..................................................7-48
Tire Care ............................................................................7-48
Recommended Cold Tire Inflation Pressures ...........7-49
Check Tire Inflation Pressure ......................................7-50
Tire Rotation.....................................................................7-51
Wheel Alignment and Tire Balance ............................7-52
Tire Replacement ............................................................7-52
Wheel Replacement ........................................................7-53
Tire Traction .....................................................................7-53
Tire Maintenance ............................................................7-54
Tire Sidewall Labeling ....................................................7-54
Tire Terminology and Definitions................................7-58
All Season Tires ...............................................................7-61
Summer Tires ...................................................................7-61
Snow Tires ........................................................................7-61
Radial-Ply Tires ...............................................................7-62
Low Aspect Ratio Tires..................................................7-62
Fuses ......................................................................7-64
Instrument Panel Fuse Replacement..........................7-65
Engine Compartment Panel Fuse Replacement.......7-66
Fuse/Relay Panel Description ......................................7-69
Light bulbs.............................................................7-77
Headlamp, Parking lamp, Turn signal lamp,
side marker and front fog lamp bulb
replacement ......................................................................7-78
Side repeater lamp replacement .................................7-88
Rear combination light bulb replacement .................7-88
High mounted stop lamp replacement .......................7-91
License plate light bulb replacement .........................7-91
Interior light bulb replacement ....................................7-92
Appearance care ..................................................7-94
Exterior Care ....................................................................7-94
Interior Care .....................................................................7-99
Emission control system ...................................7-101
Crankcase Emission Control System ........................7-101
Evaporative Emission Control System Including
Onboard Refueling Vapor Recovery (ORVR) .........7-101
Exhaust Emission Control System ............................7-102
California perchlorate notice ...........................7-105
F20
Page 26 of 642

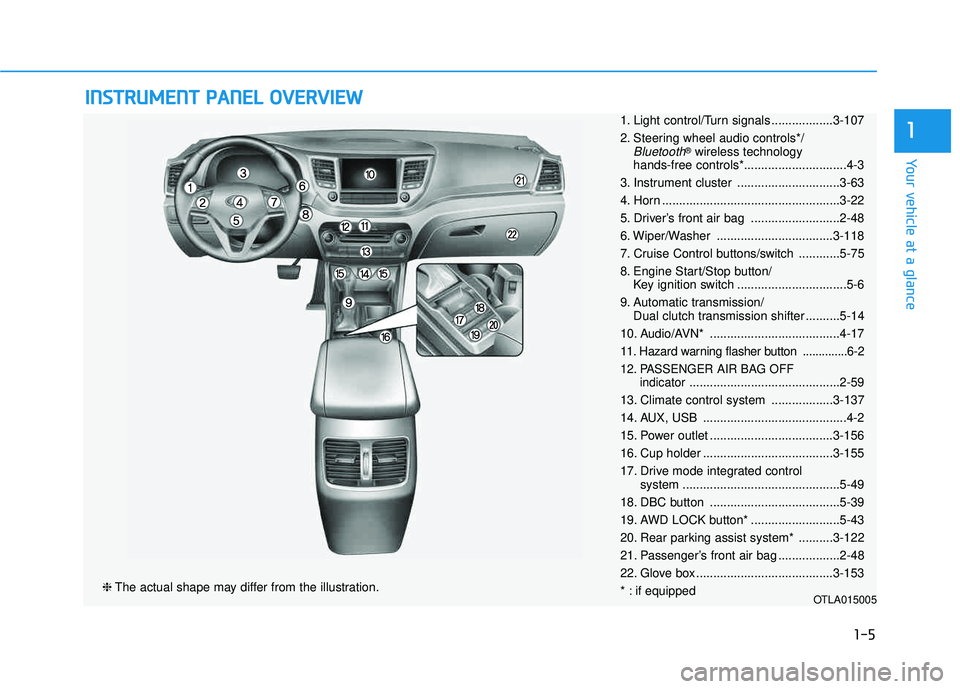
IINN SSTT RR UU MM EENN TT PP AA NN EELL OO VVEERR VV IIEE WW
❈ The actual shape may differ from the illustration.
1-5
Your vehicle at a glance
11. Light control/Turn signals ..................3-107
2. Steering wheel audio controls*/
Bluetooth®
wireless technology
hands-free controls*..............................4-3
3. Instrument cluster ..............................3-63
4. Horn ....................................................3-22
5. Driver’s front air bag ..........................2-48
6. Wiper/Washer ..................................3-118
7. Cruise Control buttons/switch ............5-75
8. Engine Start/Stop button/ Key ignition switch ................................5-6
9. Automatic transmission/ Dual clutch transmission shifter ..........5-14
10. Audio/AVN* ......................................4-17
11. Hazard warning flasher button ..............6-2
12. PASSENGER AIR BAG OFF indicator............................................2-59
13. Climate control system ..................3-137
14. AUX, USB ..........................................4-2
15. Power outlet ....................................3-156
16. Cup holder ......................................3-155
17. Drive mode integrated control system ..............................................5-49
18. DBC button ......................................5-39
19. AWD LOCK button* ..........................5-43
20. Rear parking assist system* ..........3-122
21. Passenger’s front air bag ..................2-48
22. Glove box ........................................3-153
* : if equipped
OTLA015005
Page 104 of 642

3-6
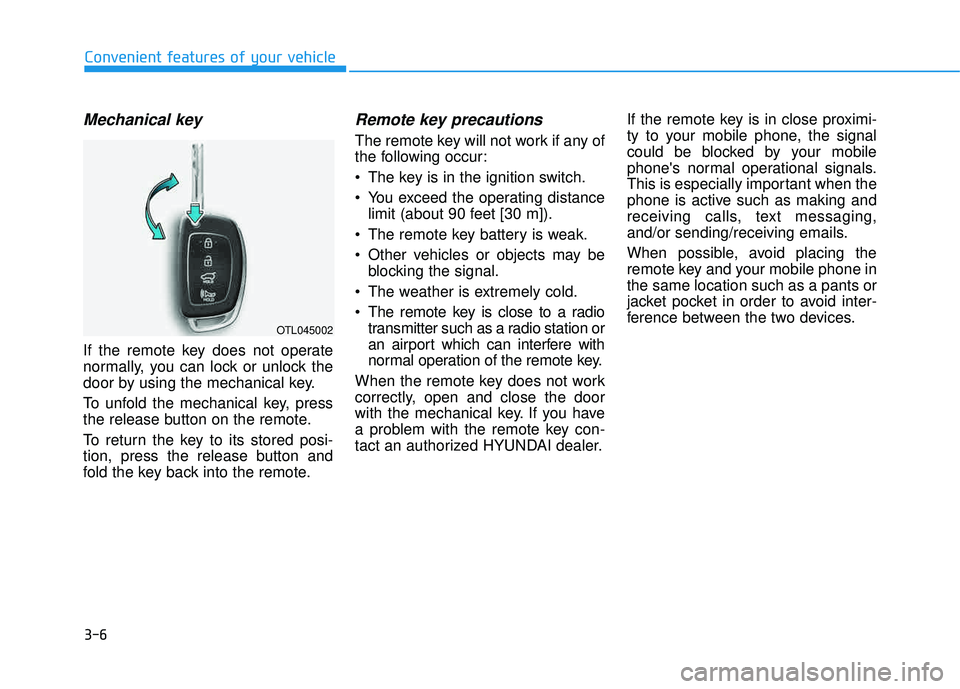
Mechanical key
If the remote key does not operate
normally, you can lock or unlock the
door by using the mechanical key.
To unfold the mechanical key, press
the release button on the remote.
To return the key to its stored posi-
tion, press the release button and
fold the key back into the remote.
Remote key precautions
The remote key will not work if any of
the following occur:
The key is in the ignition switch.
You exceed the operating distancelimit (about 90 feet [30 m]).
The remote key battery is weak.
Other vehicles or objects may be blocking the signal.
The weather is extremely cold.
The remote key is close to a radio transmitter such as a radio station or
an airport which can interfere with
normal operation of the remote key.
When the remote key does not work
correctly, open and close the door
with the mechanical key. If you have
a problem with the remote key con-
tact an authorized HYUNDAI dealer. If the remote key is in close proximi-
ty to your mobile phone, the signal
could be blocked by your mobile
phone's normal operational signals.
This is especially important when the
phone is active such as making and
receiving calls, text messaging,
and/or sending/receiving emails.
When possible, avoid placing the
remote key and your mobile phone inthe same location such as a pants or
jacket pocket in order to avoid inter-
ference between the two devices.
Convenient features of your vehicle
OTL045002
Page 111 of 642

3-13
Convenient features of your vehicle
3
Immobilizer System
The immobilizer system protects your
vehicle from theft. If an improperly
coded key (or other device) is used,
the engine’s fuel system is disabled.
When the ignition switch is placed in
the ON position, the immobilizer sys-
tem indicator should come on briefly,
then go off. If the indicator starts to
blink, the system does not recognize
the coding of the key.
Turn the ignition switch to the
LOCK/OFF position, then turn the igni-
tion switch to the ON position again.
The system may not recognize your
key’s coding if another immobilizer
key or other metal object (i.e., key
chain) is near the key. The engine
may not start because the metal may
interrupt the transponder signal from
transmitting normally. If the system repeatedly does not
recognize the coding of the key, it is
recommended that you contact your
HYUNDAI dealer.Do not attempt to alter this system or
add other devices to it. Electrical
problems could result that may make
your vehicle inoperable.
The transponder in your key is an
important part of the immobilizer
system. It is designed to give
years of trouble-free service, how-
ever you should avoid exposure to
moisture, static electricity and
rough handling. Immobilizer sys-
tem malfunction could occur.
Information
This device complies with Part 15 of
the FCC rules.
Operation is subject to the following
three conditions:
1. This device may not cause harmful
interference.
2. This device must accept any interfer- ence received, including interference
that may cause undesired operation.
3. Changes or modifications not expressly approved by the party
responsible for compliance could
void the user ’s authority to operate
the device.
i
NOTICE
In order to prevent theft of your
vehicle, do not leave spare keys
anywhere in your vehicle. Your
immobilizer password is a cus-
tomer unique password andshould be kept confidential.
WARNING
Page 123 of 642

3-25
Convenient features of your vehicle
Retain the original transmitter for
future programming procedures (i.e.,
new vehicle purchase). It is also sug-
gested that upon the sale of the vehi-
cle, the programmed HomeLink but-
tons be erased for security purposes
(follow step 1 in the “Programming”
portion of this text).Programming
Your vehicle may require the ignition
switch to be turned to the ACC posi-
tion for programming and/or operation
of HomeLink. It is also recommended
that a new battery be replaced in the
hand-held transmitter of the device
being programmed to HomeLink for
quicker training and accurate trans-
mission of the radio-frequency.
Follow these steps to train your
HomeLink mirror:
3
When programming the HomeLink
®
Wireless Control
System, you may be operating
a garage door or gate operator.Make sure that people and
objects are out of the way of
the moving door or gate to pre-
vent potential harm or damage.
Do not use HomeLink with
any garage door opener that
lacks the safety stop and
reverse feature as required by
federal safety standards. (This
includes any garage door
opener model manufactured
before April 1, 1982.) A garage
door opener which cannot
detect an object, signaling the
door to stop and reverse,
does not meet current federal
safety standards. Using a
garage door opener without
these features increases risk
of serious injury or death. For
more information, call 1-800-355-3515 or on the internet at
www.homelink.com.
WARNING
Page 125 of 642

3-27
Convenient features of your vehicle
Some gate operators and garage
door openers may require you to
replace step #3 with the "cycling"
procedure noted in the "Canadian
Programming" section of this doc-ument.Rolling code programming
To train a garage door opener (or
other rolling code equipped devices)
with the rolling code feature, follow
these instructions after completing
the "Programming" portion of this
text. (A second person may make the
following training procedures quicker
& easier.)
4. Locate the "learn" or "smart" but-
ton on the device’s motor head
unit. Exact location and color of
the button may vary by product
brand. If there is difficulty locating
the "learn" or "smart" button, refer-
ence the device’s owner’s manualor contact HomeLink at 1-800-
355-3515 or on the internet at
www.homelink.com.
5. Press and release the "learn" or "smart" button on the device’s
motor head unit. You have 30 sec-
onds to complete step number 6. 6. Return to the vehicle and firmly
press and release the pro-
grammed HomeLink button up to
three times. The rolling code
equipped device should now rec-
ognize the HomeLink signal and
activate when the HomeLink but-
ton is pressed. The remaining two
buttons may now be programmed
if this has not previously been
done. Refer to the "Programming"
portion of this text.
NOTICE
3
Page 132 of 642

3-34
Convenient features of your vehicle
6. Firmly press and release the"learn" or "smart" button. (The
name and color of the button vary
by manufacturer). There are 30seconds to initiate step 7.
7. Return to the vehicle and firmly press, hold for 2 seconds and
release the programmedHomeLink
®button. Repeat the
"press/hold/release" sequence a
second time, and, depending on the
brand of the garage door opener (or
other rolling code equipped device),repeat this sequence a third time to
complete the programming
process.
HomeLink
®should now activate your
rolling code equipped device.
Gate operator & Canadian program-
ming
During programming, your handheld
transmitter may automatically stop
transmitting. Continue to press the
Integrated HomeLink
®Wireless
Control System button (note steps 2
through 3 in the Programming portion
of this document) while you press
and re-press ("cycle") your handheld
transmitter every two seconds untilthe frequency signal has been
learned. The indicator light will flash
slowly and then rapidly after several
seconds upon successful training.
Operating HomeLink®
To operate, simply press and release
the programmed HomeLink®button.
Activation will now occur for the
trained device (i.e. garage door
opener, gate operator, security sys-
tem, entry door lock, home/office
lighting, etc.). For convenience, the
hand-held transmitter of the device
may also be used at any time.
Reprogramming a single HomeLink®
button
To program a device to HomeLink®
using a HomeLink®button previously
trained, follow these steps:
1.Press and hold the desired HomeLink
®button. DO NOT
release the button.
2.The indicator light will begin to flash after 20 seconds. Without releasing the HomeLink
®button, proceed
with "Programming" step 2.
For questions or comments, contactHomeLink
®at www.homelink.comor
1-800-355-3515.
Page 176 of 642

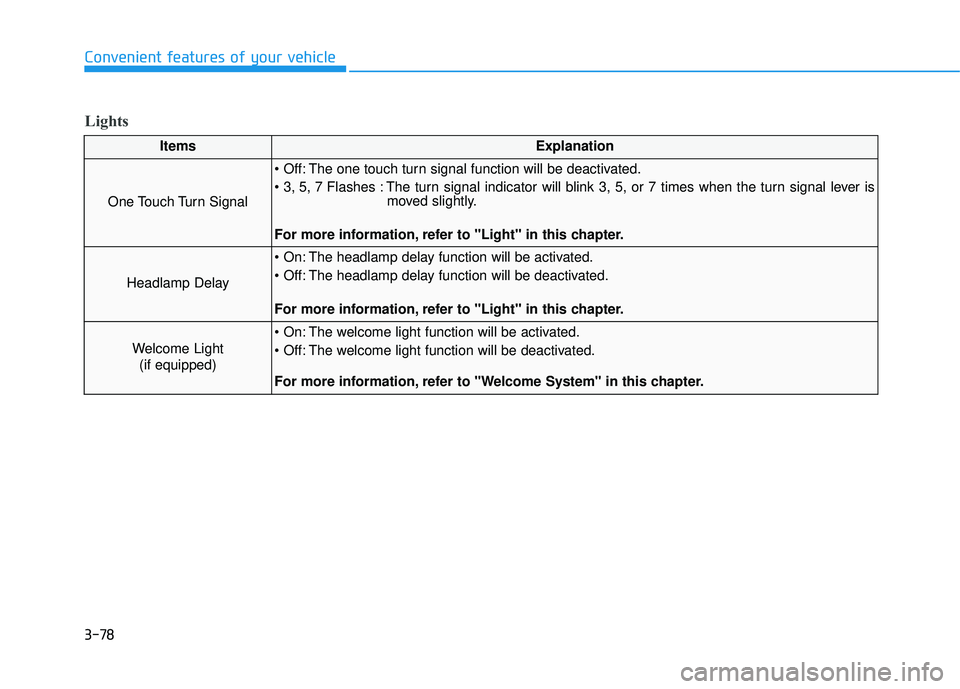
Lights
3-78
Convenient features of your vehicle
ItemsExplanation
One Touch Turn Signal
The one touch turn signal function will be deactivated.
The turn signal indicator will blink 3, 5, or 7 times when the turn signal lever ismoved slightly.
For more information, refer to "Light" in this chapter.
Headlamp Delay
The headlamp delay function will be activated.
The headlamp delay function will be deactivated.
For more information, refer to "Light" in this chapter.
Welcome Light (if equipped)
The welcome light function will be activated.
The welcome light function will be deactivated.
For more information, refer to "Welcome System" in this chapter.