2016 HYUNDAI TUCSON stop start
[x] Cancel search: stop startPage 479 of 642
5-95
Driving your vehicle
5
To prevent engine and/or trans-
mission overheating:
When towing a trailer on steepgrades (in excess of 6%) pay
close attention to the engine
coolant temperature gauge toensure the engine does not
overheat. If the needle of the
coolant temperature gauge
moves towards "H" (HOT), pull
over and stop as soon as it is
safe to do so, and allow theengine to idle until it cools
down. You may proceed once the
engine has cooled sufficiently.
When towing a trailer, your vehi- cle speed may be much slower
than the general flow of traffic,
especially when climbing an
uphill grade. Use the right hand
lane when towing a trailer on an
uphill grade. Choose your vehi-
cle speed according to the max-
imum posted speed limit for
vehicles with trailers, the steep-
ness of the grade, and your trail-er weight.
(Continued)(Continued)
For vehicles equipped with the
Ecoshift dual clutch transmis-
sion, some extra precaution
should be taken when towing a
trailer. Due to the added load on
the transmission when towing a
trailer, the clutches may get hot
if the vehicle experiences exces-
sive upshifting and downshift-ing.
Under certain conditions, such
as repeated stop-and-go launch-
es on steep grades, the trans-
mission clutches may become
overheated. When the clutches
start to become overheated, the
transmission safe protection
mode logic is enabled. If the safe
protection mode logic is
enabled, the gear position indi-
cator on the cluster LCD display
blinks, a chime sounds, and a
warning message will appear.
(Continued)(Continued)
If the Ecoshift dual clutch trans-
mission starts to become over-
heated, the gear shift character-
istics may change. Gear shifts
may become more abrupt. If
continued operation while tow-
ing a trailer includes frequent
and continuous upshifts and
downshifts, the overheat warn-
ing message on the cluster LCD
display may illuminate. If this
occurs, stop the vehicle, apply
the brakes or shift the vehicle to
(P) Park, and allow the transmis-sion to cool.
NOTICE
Page 480 of 642
5-96
Driving your vehicle
Parking on hills
Generally, if you have a trailer attached
to your vehicle, you should not park
your vehicle on a hill.
However, if you ever have to park your
trailer on a hill, here's how to do it:
1. Pull the vehicle into the parkingarea.
Turn the steering wheel in the direction of the curb (right if head-
ed down hill, left if headed up hill).
2. Shift the vehicle to P (Park).
3. Set the parking brake and shut off the vehicle.
4. Place wheel chocks under the trailer wheels on the down hill side
of the wheels. 5. Start the vehicle, apply the brakes,
shift to neutral, release the park-
ing brake and slowly release the
brakes until the trailer chocksabsorb the load.
6. Reapply the brakes and parking brakes.
7. Move the shift lever to P (Park).
8. Shut off the vehicle and release the vehicle brakes but leave the
parking brake set.
Driving the vehicle after it has
been parked on a hill
1. With the gear shift lever in P (Park), apply the brakes and hold
the brake pedal down while per-
forming the following:
and
2. Slowly remove your foot from the brake pedal.
3. Drive slowly until the trailer is clear of the chocks.
4. Stop and have someone pick up and store the chocks.
Do not get out of the vehicle without the parking brake
firmly set. If you have left the
engine running, the vehicle
can move suddenly. You and
others could be seriously or
fatally injured.
Do not apply the accelerator
pedal to hold the vehicle onan uphill.
WARNING
Page 481 of 642
5-97
Driving your vehicle
5
Maintenance when trailer tow- ing
Your vehicle will need service more
often when you regularly pull a trail-
er. Important items to pay particularattention to include engine oil, auto-
matic transmission fluid, axle lubri-
cant and cooling system fluid. Brake
condition is another important item to
frequently check. If you’re trailering,
it’s a good idea to review these items
before you start your trip. Don't forget
to also maintain your trailer and
hitch. Follow the maintenance sched-
ule that accompanied your trailer and
check it periodically. Preferably,
inspect the vehicle and trailer at the
start of each day's driving. Inspect
the hitch mounting to make sure the
hitch is properly secured to the vehi-
cle. Inspect the trailer electrical
wiring to make sure brake lights, turn
signal lights, running lights, and haz-
ard lights are working properly.To prevent vehicle damage:
Due to higher load during
trailer usage, overheating
might occur on hot days or
during uphill driving. If the
coolant gauge indicates over-
heating, switch off the air con-
ditioner and stop the vehicle
in a safe area to cool down the
engine.
When towing check the auto- matic transmission fluid more
frequently.
(Note: This is not applicable
for vehicles equipped with the
Ecoshift dual clutch transmis-sion.)
CAUTION
Page 489 of 642
6-2
The hazard warning flasher serves
as a warning to other drivers to exer-
cise extreme caution when approach-
ing, overtaking, or passing your vehi-
cle.
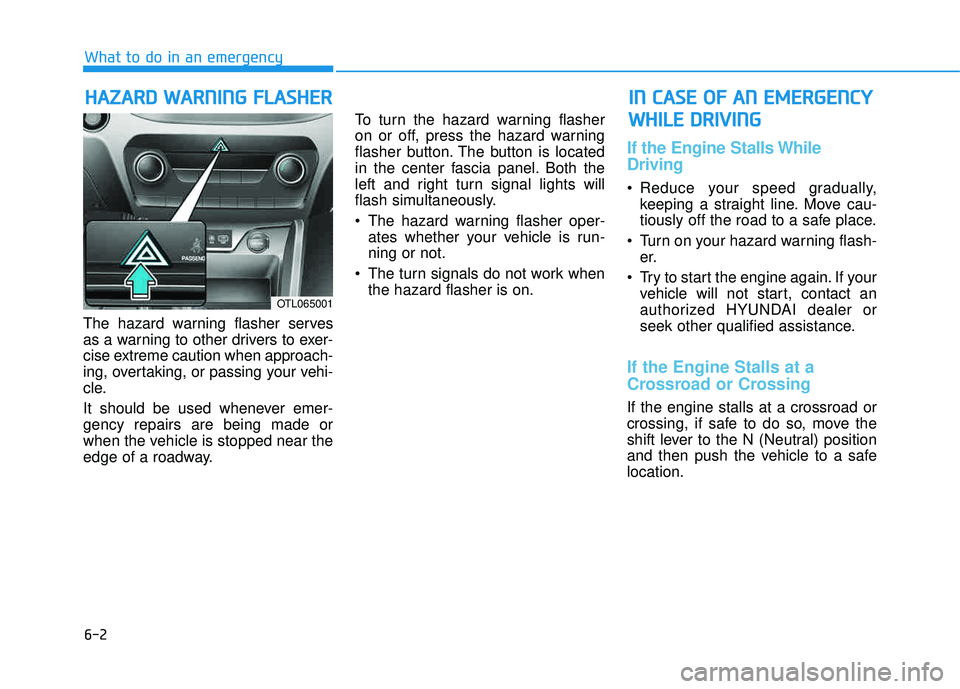
It should be used whenever emer- gency repairs are being made or
when the vehicle is stopped near the
edge of a roadway.To turn the hazard warning flasher
on or off, press the hazard warning
flasher button. The button is located
in the center fascia panel. Both the
left and right turn signal lights will
flash simultaneously.
• The hazard warning flasher oper-
ates whether your vehicle is run- ning or not.
The turn signals do not work when the hazard flasher is on.
If the Engine Stalls While Driving
Reduce your speed gradually,keeping a straight line. Move cau-
tiously off the road to a safe place.
Turn on your hazard warning flash- er.
Try to start the engine again. If your vehicle will not start, contact an
authorized HYUNDAI dealer or
seek other qualified assistance.
If the Engine Stalls at a
Crossroad or Crossing
If the engine stalls at a crossroad or
crossing, if safe to do so, move the
shift lever to the N (Neutral) position
and then push the vehicle to a safelocation.
HHAAZZAA RRDD WW AARRNN IINN GG FF LLAA SSHH EERR
What to do in an emergency
IINN CC AA SSEE OO FF AA NN EE MM EERR GG EENN CCYY
W
W HHIILL EE DD RRIIVV IINN GG
OTL065001
Page 490 of 642
6-3
What to do in an emergency
If you Have a Flat Tire While Driving
If a tire goes flat while you are driving:
Take your foot off the acceleratorpedal and let the vehicle slow down
while driving straight ahead. Do not
apply the brakes immediately orattempt to pull off the road as this
may cause loss of vehicle control
resulting in an accident. When the
vehicle has slowed to such a speed
that it is safe to do so, brake care-
fully and pull off the road. Drive off
the road as far as possible and park
on firm, level ground. If you are on
a divided highway, do not park in
the median area between the two
traffic lanes.
When the vehicle is stopped, press the hazard warning flasher button,
move the shift lever into P(Park),
and apply the parking brake, and
place the ignition switch in the LOCK/OFF position.
Have all passengers get out of the vehicle. Be sure they all get out on
the side of the vehicle that is away
from traffic.
When changing a flat tire, follow the instructions provided later in
this chapter.
If the Engine Doesn't Turn
Over or Turns Over Slowly
Be sure the shift lever is in N
(Neutral) or P (Park). The engine
starts only when the shift lever is in
N (Neutral) or P (Park).
Check the battery connections to be sure they are clean and tight.
Turn on the interior light. If the light dims or goes out when you operate
the starter, the battery is drained.
Do not push or pull the vehicle to
start it. This could cause damage to
your vehicle. See instructions for
"Jump Starting" provided in this
chapter.
If the Engine Turns Over
Normally but Doesn't Start
Check the fuel level and add fuel if
necessary.
If the engine still does not start, have
your vehicle checked by an author-
ized HYUNDAI dealer.
6
II FF TT HH EE EE NN GGIINN EE WW IILL LL NN OO TT SS TT AA RRTT
Push or pull starting the vehicle
may cause the catalytic con-
verter to overload which can
lead to damage to the emission
control system.
CAUTION
Page 496 of 642

6-9
What to do in an emergency
6
TTIIRR EE PP RR EESSSSUU RREE MM OONNIITT OO RRIINN GG SS YY SSTT EEMM (( TT PP MM SS))
(1) Low Tire Pressure / TPMS
Malfunction Indicator Lamp
(2) Low Tire Pressure / Tire Pressure Monitor /
TPMS Malfunction Display
(shown on the cluster LCD dis-
play)
Check Tire Pressure
You can check the tire pressure inthe Information Mode on the clus-
ter.
Refer to the "User Settings
Mode" section in chapter 3.
Tire pressure is displayed after a few minutes of driving after initial
engine start up.
If tire pressure is not displayed when the vehicle is stopped, “Drive
to display” message will appear.
After driving, check the tire pres-
sure. The displayed tire pressure values
may differ from those measured
with a tire pressure gauge.
You can change the tire pressure unit in the User Settings Mode on
the cluster. - psi, kpa, bar (Refer to the "User
Settings Mode" section in
chapter 3) .
OTL065003
■Type A■ Type B
OTL045154L
OTLE065017/OTLE065018
Page 497 of 642

6-10
What to do in an emergency
Tire Pressure Monitoring System
Each tire, including the spare (if pro-
vided), should be checked monthlywhen cold and inflated to the inflation
pressure recommended by the vehi-
cle manufacturer on the vehicle plac-
ard or tire inflation pressure label. (If
your vehicle has tires of a different
size than the size indicated on the
vehicle placard or tire inflation pres-
sure label, you should determine the
proper tire inflation pressure for
those tires.)As an added safety feature, your
vehicle is equipped with a tire pres-
sure monitoring system (TPMS) with
LCD display that monitors continu-ously the individual tire pressures ofeach tire and illuminates when one
or more of your tires is significantly
under-inflated. When the LCD dis-
play indicates that one of your tires is
under-inflated, you should stop and
check your tires as soon as possible,and inflate them to the proper pres-
sure. Driving on a significantly under-
inflated tire causes the tire to over-
heat and can lead to tire failure. Under-inflation also reduces fuel effi-
ciency and tire tread life, and may
affect the vehicle’s handling and
stopping ability.
Please note that the TPMS is not a
substitute for proper tire mainte-
nance, and it is the driver’s responsi-bility to maintain correct tire pres-
sure, even if under-inflation has not
reached the level to trigger illumina-
tion of the TPMS low tire pressure
LCD display.Your vehicle has also been equipped
with a TPMS malfunction indicatorthat will illuminate when the system
is not operating properly. The TPMSmalfunction indicator is combined
with the low tire pressure LCD dis-
play. When the system detects a mal-function, the indicator lamp will flash
for approximately one minute and
then remain continuously illuminat-
ed. This sequence will continue upon
subsequent vehicle start-ups as long
as the malfunction exists. When the malfunction indicator is
illuminated, the system may not be
able to detect or signal low tire pres-
sure as intended. TPMS malfunc-
tions may occur for a variety of rea-
sons, including the installation of
replacement or alternate tires or
wheels on the vehicle that prevent
the TPMS from functioning properly.
Always check the TPMS malfunction
LCD display after replacing one or
more tires or wheels on your vehicleto ensure that the replacement or
alternate tires and wheels allow the
TPMS to continue to function proper-
ly.
Over-inflation or under-inflation
can reduce tire life, adversely
affect vehicle handling, and
lead to sudden tire failure that
may cause loss of vehicle con-
trol resulting in an accident.
WARNING
Page 542 of 642
7-29
7
Maintenance
Parking Brake
Inspect the parking brake system
including the parking brake pedal
and cables.
Brake Discs, Pads, Calipers
and Rotors
Check the pads for excessive wear,
discs for run out and wear, and
calipers for fluid leakage.
Exhaust Pipe and Muffler
Visually inspect the exhaust pipes,
muffler and hangers for cracks, dete-
rioration, or damage. Start the
engine and listen carefully for any
exhaust gas leakage. Tighten con-
nections or replace parts as neces-
sary.
Suspension Mounting Bolts
Check the suspension connections
for looseness or damage. Retighten
to the specified torque.
Steering Gear Box, Linkage &
Boots/Lower Arm Ball Joint
With the vehicle stopped and the
engine off, check for excessive free-
play in the steering wheel. Check the
linkage for bends or damage. Check
the dust boots and ball joints for
deterioration, cracks, or damage.
Replace any damaged parts.
Drive Shafts and Boots
Check the drive shafts, boots and
clamps for cracks, deterioration, or
damage. Replace any damaged
parts and, if necessary, repack the
grease.
Air Conditioning Refrigerant
Check the air conditioning lines and
connections for leakage and dam-
age.